
 My Account
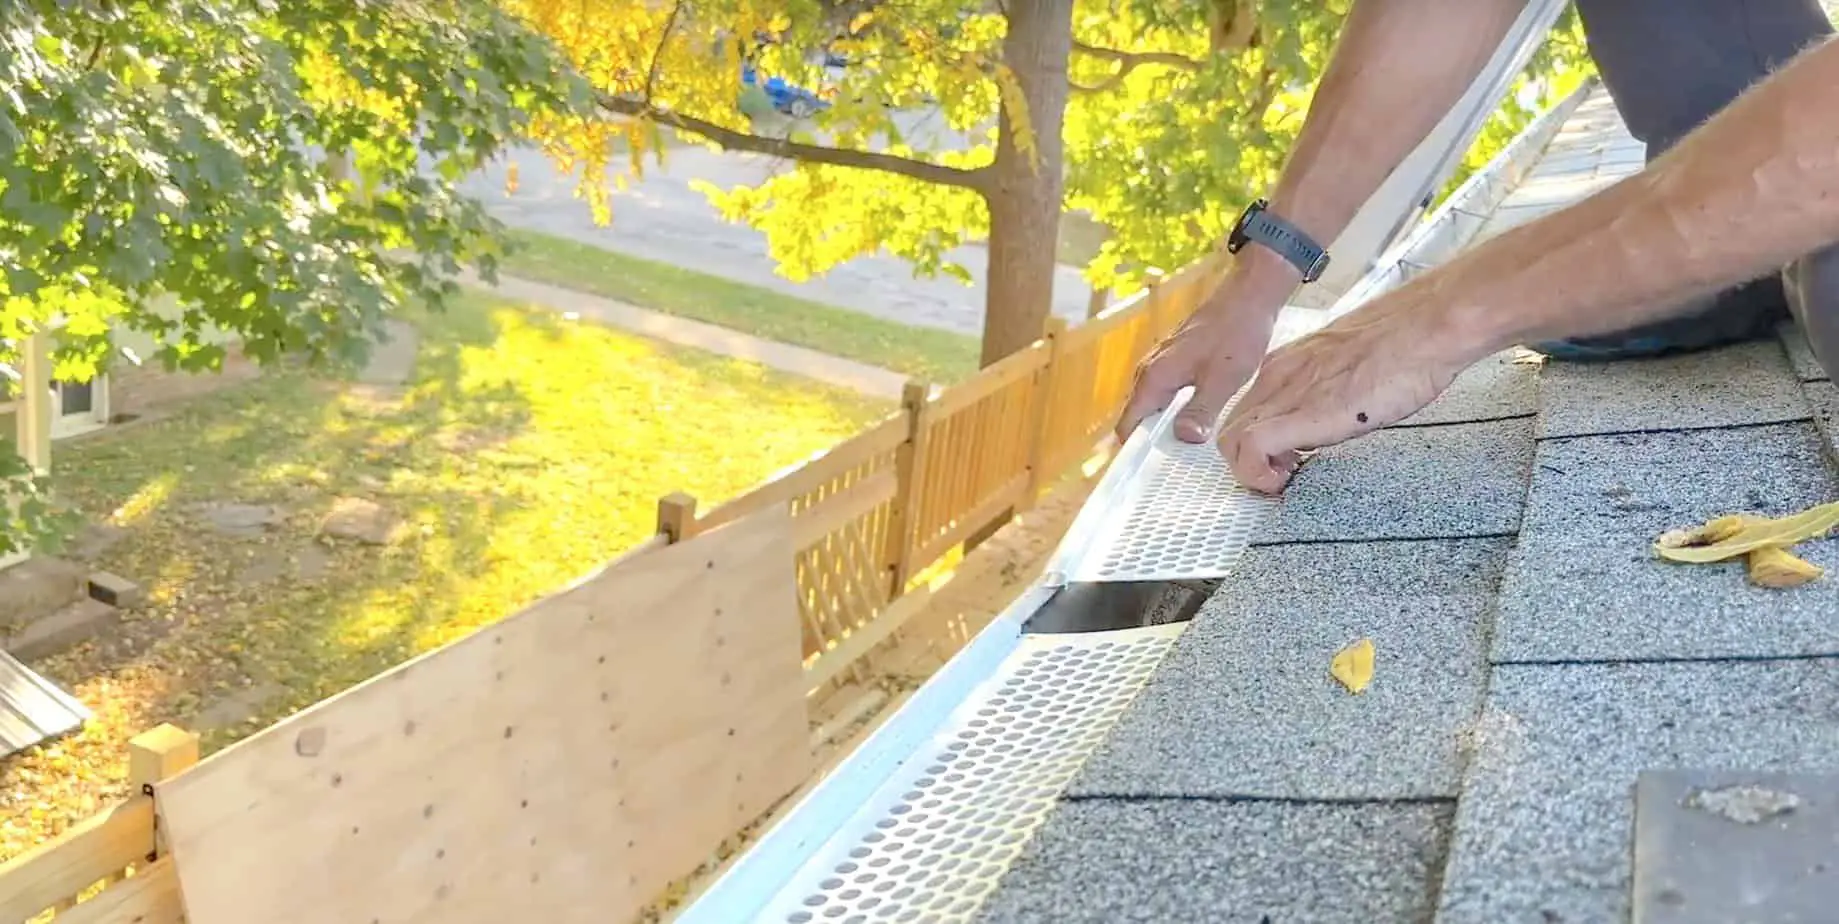
Today I’m going to show you how to select and install gutter guards. Installing gutter guards is a quick and easy DIY project that will reduce the amount of maintenance you’ll need to do to keep your gutters clean.
The Best Gutter Guards and How to Install Them: Step-by-Step Guide
In this step-by-step guide, I’ll give you some tips for cleaning the debris out of your rain gutters, followed by a quick review of the most popular types of gutter guards and how to select what’s right for you. I’ll tell you which gutter guards I prefer and why. Finally, I’ll show you how to install the gutter guards along with a little trick for cleaning them off without getting on a ladder.
This whole project took a couple of hours from start to finish, including cleaning all the gunk out of the gutters — and there was a lot of it!
The time and money that you’ll invest in this DIY home improvement project will be time and money well spent. Your gutters will stay free of debris, saving you hours of work each season. Most importantly, your gutters will usher rainwater efficiently off the roof.
Rather watch than read? Check out this 8.5-minute video.
DISCLAIMER: This video and description contain affiliate links, which means that if you click on one of the product links, I’ll receive a small commission.
How to Select and Install Gutter Guards: Supplies, Tools, and Costs
Supplies
- Gutter guards (LB Plastics white filtered gutter guards)
Tools
- A large-capacity bucket with an S-hook (to hang it off the gutter) will come in handy
Costs
The filtered gutter guards I got from Menards cost $2.22 for a 3-foot length. I spent under $35 for a 42-foot stretch of gutter.
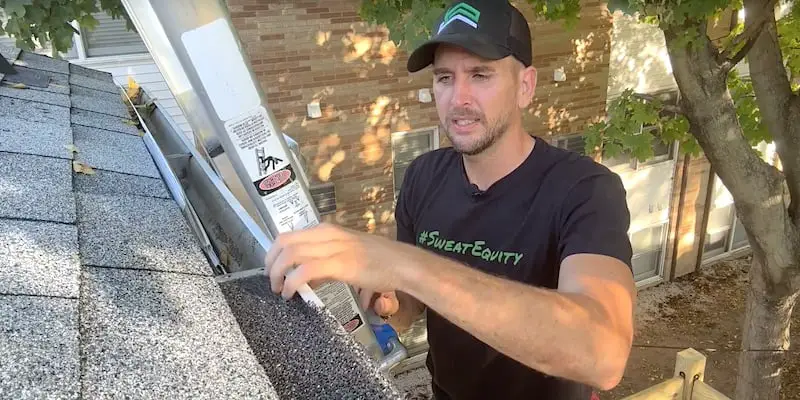
How to Select and Install Gutter Guards: Cleaning Out the Gutters
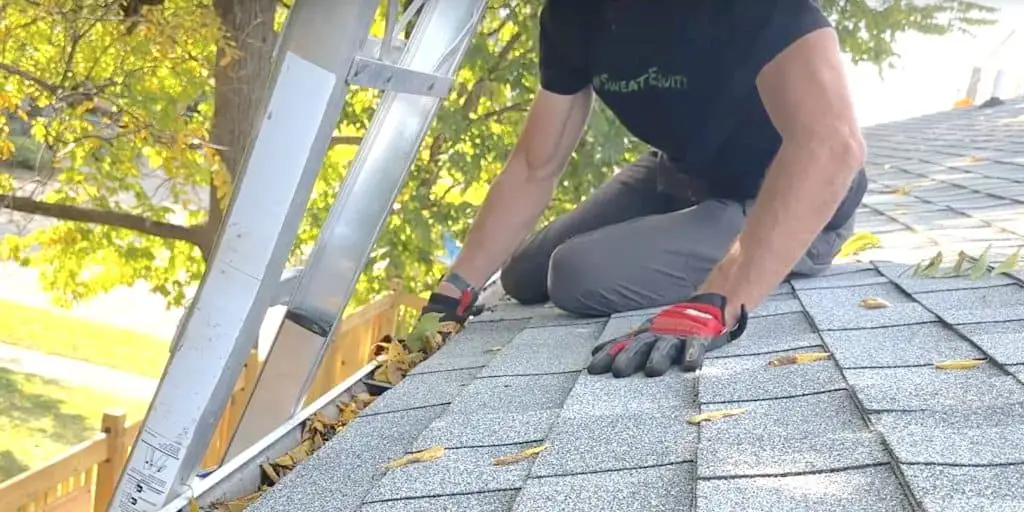
I have a ton of leaves, branches, dirt, and granules from the asphalt shingles accumulated in these gutters. First step in this project is to remove all that debris.
To clean out your gutters, you’ll either be standing on a ladder or on the roof, depending on your roof configuration. The pitch of my roof is pretty low, so I’ll get on it to do this work.
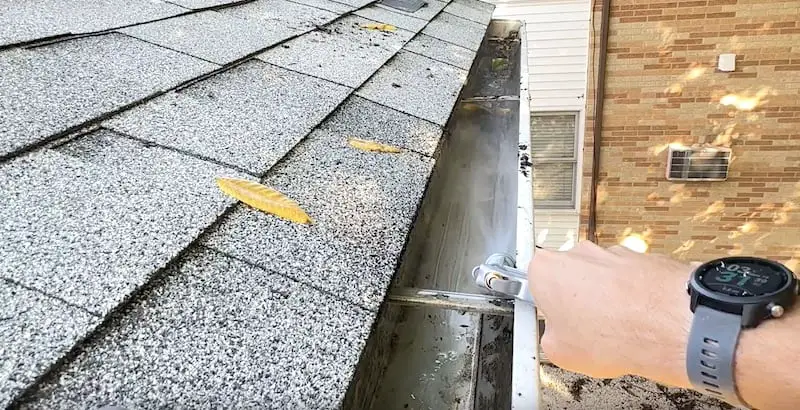
I’m using a 5-gallon bucket and hanging it from the eavestroughs using a little S-hook.
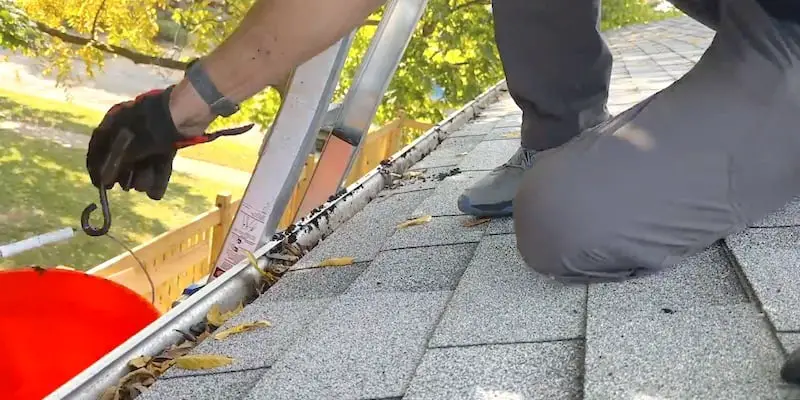
This way, I have both hands free and can easily scoop the gunk right out of the gutter and into the bucket. Not only is this fast but it also reduces the mess because I’m not dumping the debris onto the deck or patio below.
You don’t have to get things perfectly cleaned out at this stage. Just get the majority of the junk out of the gutter. After the bulk of the debris has been removed, you’ll spray the gutters out with a garden hose (a nozzle that gives you some good water pressure will be very beneficial here). Start at the downspout end and progress further away, pushing the remaining dirt towards the downspout with the stream of water.
Once the channel is free of dirt and material, I like to wipe down the exterior of the gutters with a shop towel. It’s amazing how dingy a white gutter can get over the course of a season. Cleaning off the external part of rain gutters really freshens up the whole look of the outside of your house. It’s a nice finishing touch.
How to Select Gutter Guards: Determining the Width
The first thing you need to establish when choosing gutter guards is the width of your eavestroughs. You will likely have 5-inch or 6-inch gutters.
Take your tape measure and measure from the back (where the gutter sits against the house) to the front edge of the trough.
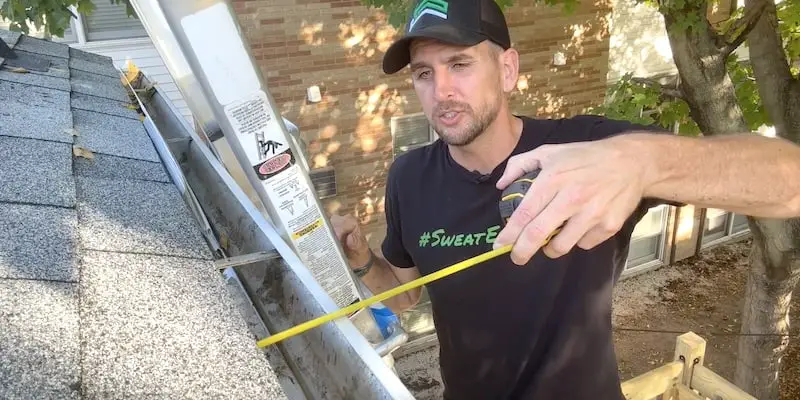
My rain gutters are 5 inches wide. These are the most common. I’d say about 90 percent of us will have 5-inch gutters.
How to Select Gutter Guards: The Different Types
Years ago, I installed some expanded metal gutter guards but the open mesh was problematic; I found a tree growing in it. That’s when I decided it was time to go with a more effective design.
There are a ton of options out there when it comes to gutter guards. Let’s review the most commonly used types.
Foam Mesh
This type of gutter guard is a classic. It’s a kind of foam mesh that simply sits in the trough. The installation is super easy; you just press it into the channel.
With this type of gutter guard, the mesh occupies the interior of the trough, inhibiting any leaves or branches from falling into it, but still allowing water to pass through.
The problem with this type of gutter guard is that granules from asphalt shingles and dirt will start to accumulate on top and eventually clog the mesh, meaning water will pool on the surface. This is not good news if you live in a place where it gets cold in winter.
I’ve found the maintenance on these gutter guards to be almost the same as not having them at all, so I really don’t recommend this style.
Perforated Aluminum Plus Mesh
Now let’s look at a high-end gutter guard.
This product is made from perforated aluminum with a fine mesh over top. It’s very high quality.
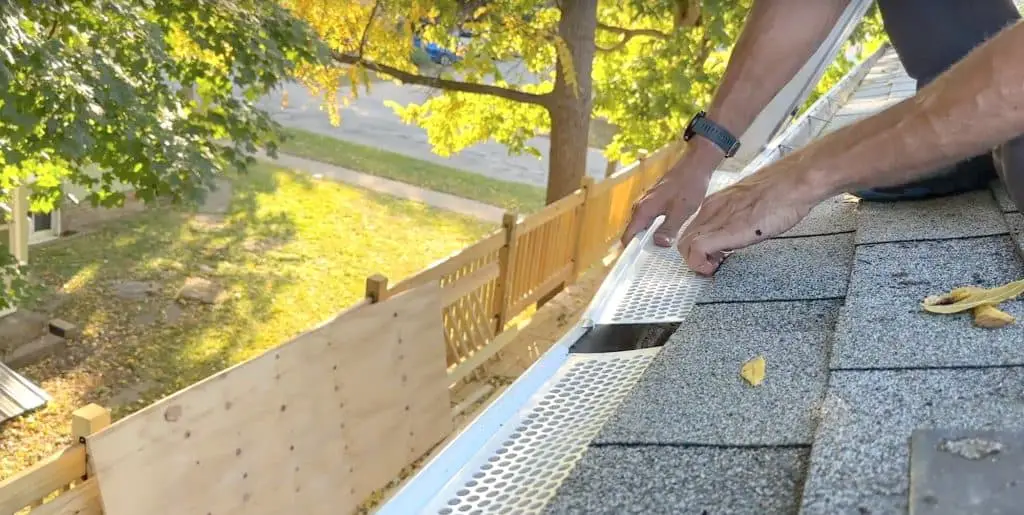
To install this type of gutter guard, you slip it under the bottom edge of the shingles so that it sits between the shingles and the drip edge, and then press down so that the exterior edge snaps into place on the outer edge of the eavestrough.
While this type of gutter guard is made from high-quality materials, I don’t think it gives you that much more benefit for the difference in price, which is considerable. This type of gutter guard costs $10-$12 per 3-foot section, about four times the cost of the product I recommend.
Perforated Plastic
The final type of gutter guard I’ll be reviewing is perforated plastic.
The more basic style is a simple sheet of plastic with either round or triangular holes. This type of gutter guard installs much like the perforated aluminum; it fits under the shingles and then locks into place with a channel that slips onto the front edge of the trough.
Perforated plastic gutter guards are super-easy to install and you can’t beat the cost — about $1.50 for a 3-foot section — but there is a drawback. Little sticks can get stuck in the openings, which then collect more leaves and debris. For this reason, I don’t recommend this design.
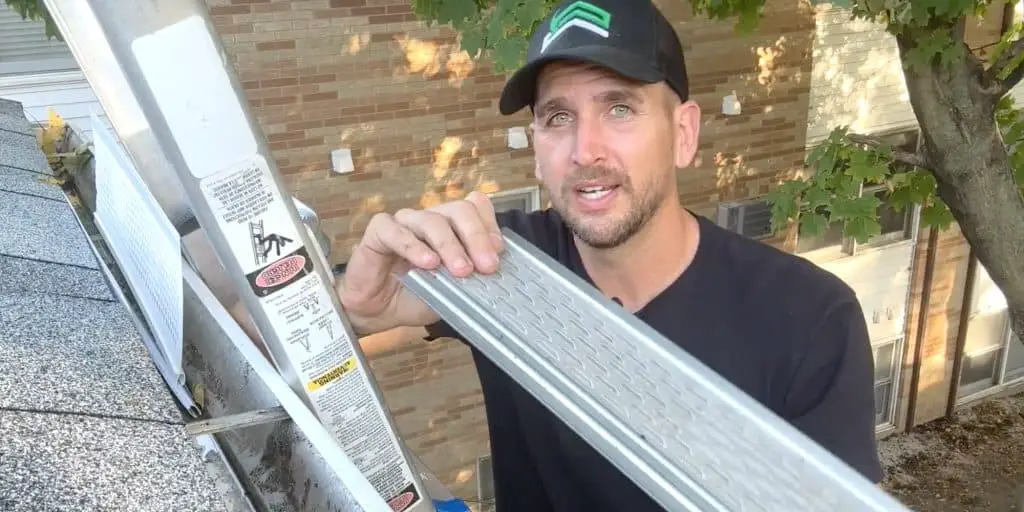
Perforated Plastic Plus Mesh (My Preferred Gutter Guard)
The gutter guard I prefer is the same perforated plastic material we just discussed but with a layer of fine mesh over it. This product costs about $2.50 for a 3-foot section.

For the money, I think this is the best balance of quality, ease of installation, and cost. For the investment you make — less than $1 per foot — you’re going to get serious payback in the form of maintenance-free gutters.
How to Install Gutter Guards
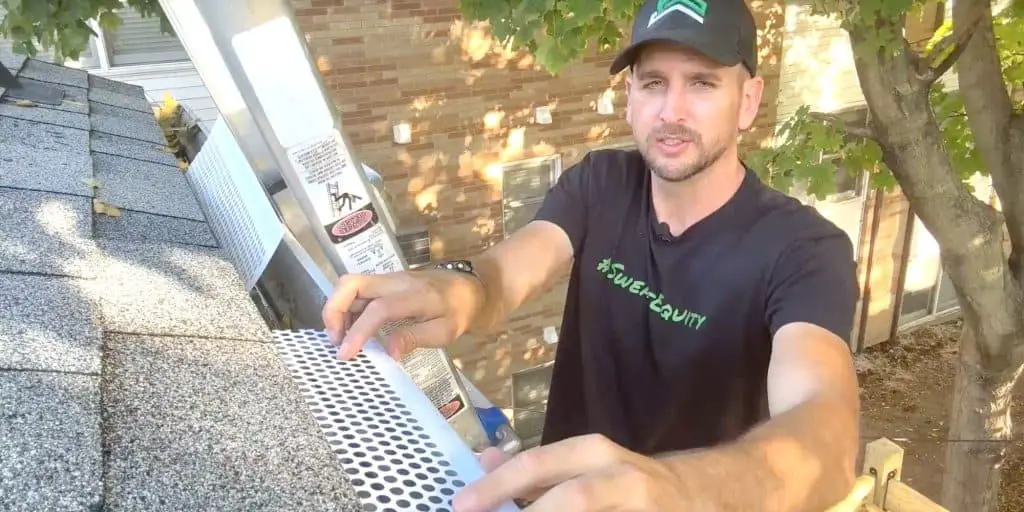
Installing these perforated plastic gutter guards is a snap.
The pieces are in 3-foot lengths so they’re very easy to manage. They can be cut to length with scissors, which I’ll need to do on just the last piece.
To install the gutter guards, slip the non-channel side of the gutter guard under the shingles and then insert the channel over the far edge of the eavestrough. As you add subsequent sections, butt them up against the previous piece.
NOTE: If you recently had a new roof put on, you might want to check with your installer to ensure that installing gutter guards under the shingles like this doesn’t void the warranty.
How to Select and Install Gutter Guards: A Maintenance Trick
To finish off this tutorial on gutter guards, here’s a trick for cleaning off your gutters without having to get on a ladder or get up on the roof of your single-level home. (If your house has two stories, you’ll need a second-story deck or balcony for this to work.)
The key to the trick is a broom with a removable handle, where its hole goes all the way through to the bristle side.
Unscrew the broom handle and reinsert it from the bristle side.
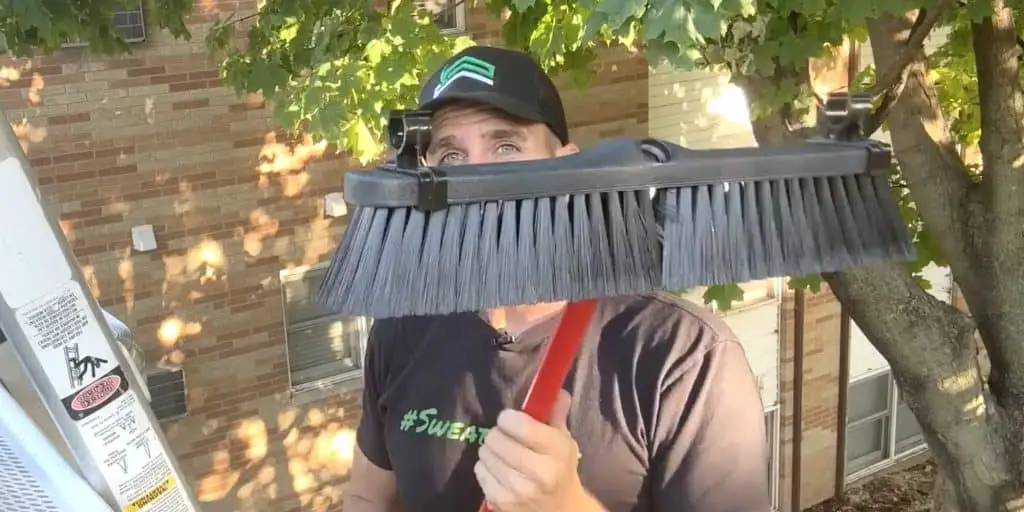
With the broom configured like this, you can reach up as you walk along at ground level (or on your balcony or second-story deck), passing the broom along the gutter guards to brush away any debris.
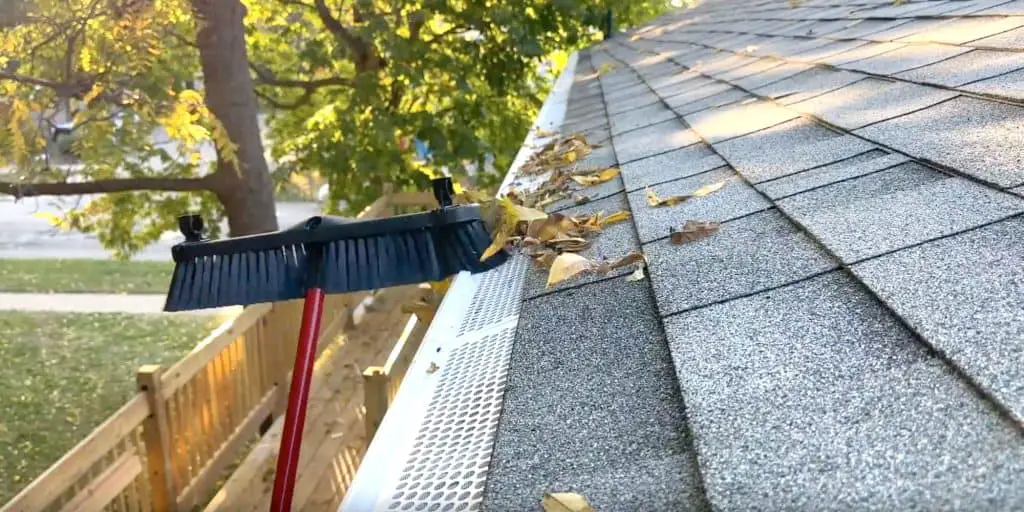
This is a really quick way to do gutter maintenance with minimal effort.
Other Outdoors-Related Tutorials
How to Extend a Downspout: Three Efficient Drainage Ideas
How to Repair and Install Aluminum Fascia Cover Trim
To Leave Comments and Questions
If something doesn’t make sense or if your situation is a little different, please leave a comment under the YouTube video. I check the comments daily and am happy to help out.
Subscribe to our channel! We have weekly videos coming out to help you with your everyday home repairs.
Thanks for stopping by! Take care.


