
 My Account
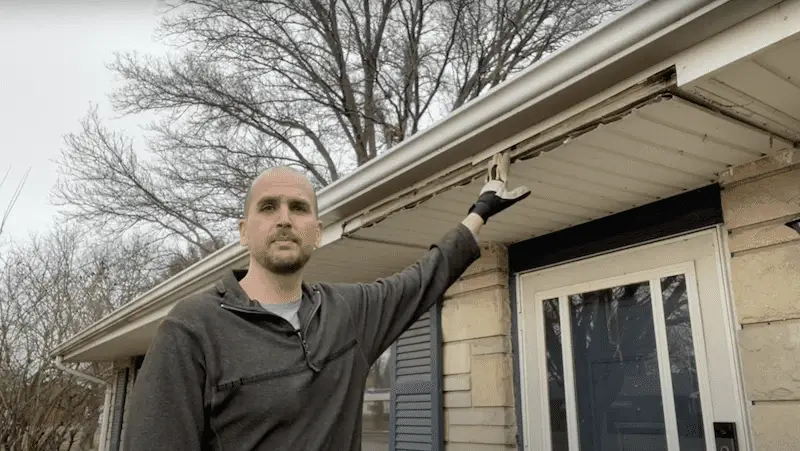
An aluminum fascia trim cover serves an important purpose: it keeps moisture out of your eaves and, ultimately, out of your home. It also protects your gutters while giving your home a nice “finished” look. So if you’re dealing with trim/covering damage, you’ll want to get it fixed sooner rather than later – which is probably why you’re here!
In this blog, you’ll find out how to install an aluminum fascia cover trim that protects your fascia board. In my case, I removed an aluminum awning and needed to patch the aluminum fascia cover trim back in. This involved cutting the aluminum flashing coil from a roll (step #2 below) and bending it before re-installing it on the house (step #3 below). But if you had a storm come through and a piece popped off – make sure you grab that piece and keep it for later. Hopefully, you’ll be able to salvage it and patch it back in, saving yourself some time and money.
We’ll go step by step to make this DIY project as seamless as possible. From how to cut the trim coil to tips for bending the trim, you’ll have your aluminum fascia cover back to normal in just four steps.
Rather watch than read? Check out this 4-minute video below. 👇
Tools:
Cost to repair and install aluminum fascia cover trim:
If you’re patching in an existing cover, the price will be a lot cheaper compared to installing a new one. Depending on how many of the above tools you already own, this project can cost about $50. This includes the cost of the aluminum flashing coil, tin snips, and metal folding tool.
DISCLAIMER: This blog contains affiliate links, which means that if you click on one of the product links, I’ll receive a small commission.
4 Steps – How to Repair and Install Aluminum Fascia Cover Trim
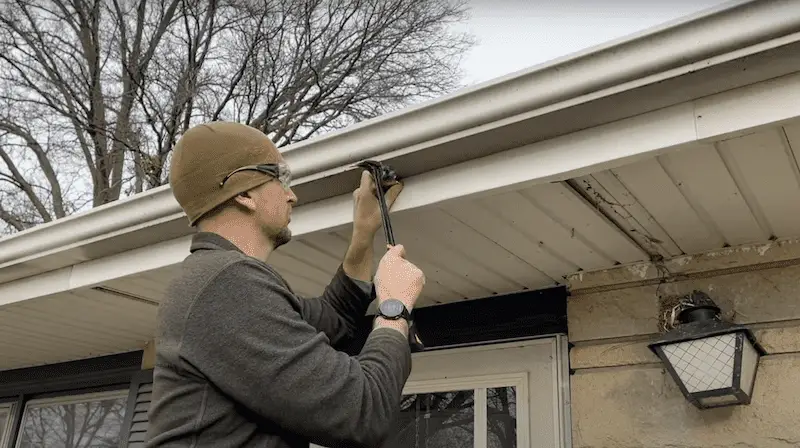
Step 1: Remove nails
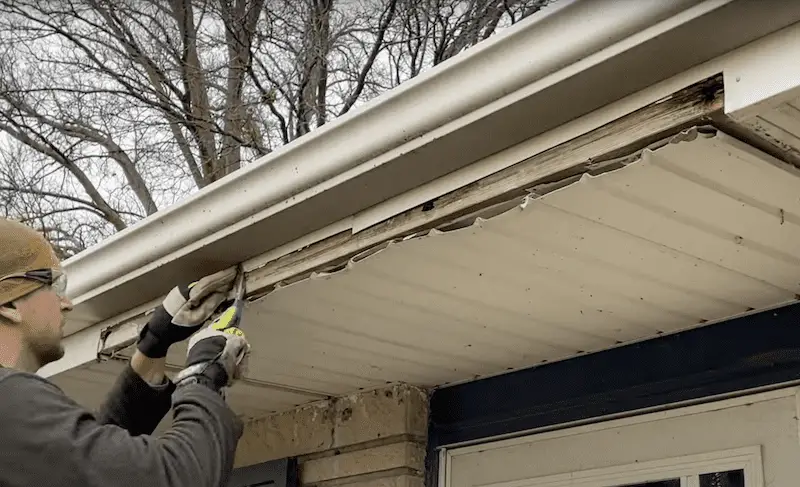
First, I took out two pieces that were cut around the awning by removing a couple of nails, which I used for measurements in the next steps.
Step 2: Measure & cut the aluminum fascia trim
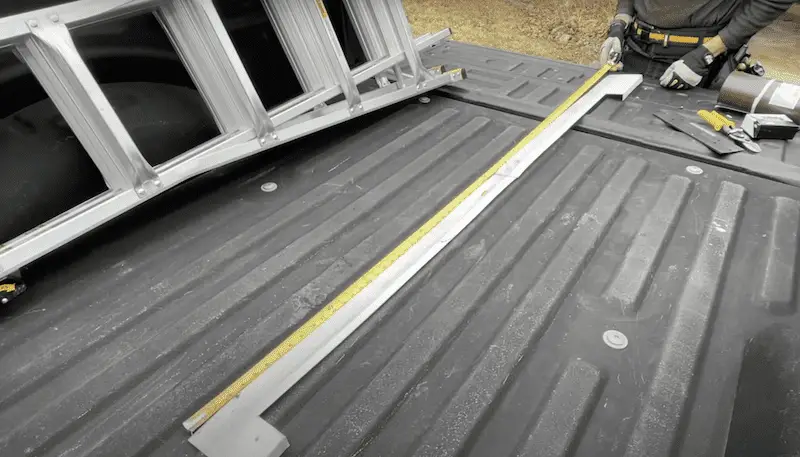
You’ll need to know the length, width, and bend of your trim. For my situation, I needed to cut a piece that was 75”x 6” (with a 1” bend).
Once I had my measurements, I marked the aluminum at 75”. From there, I cut it to length with tin snips – but be careful! The sheet is sharper than it may seem, so I recommend wearing gloves and taking your time.
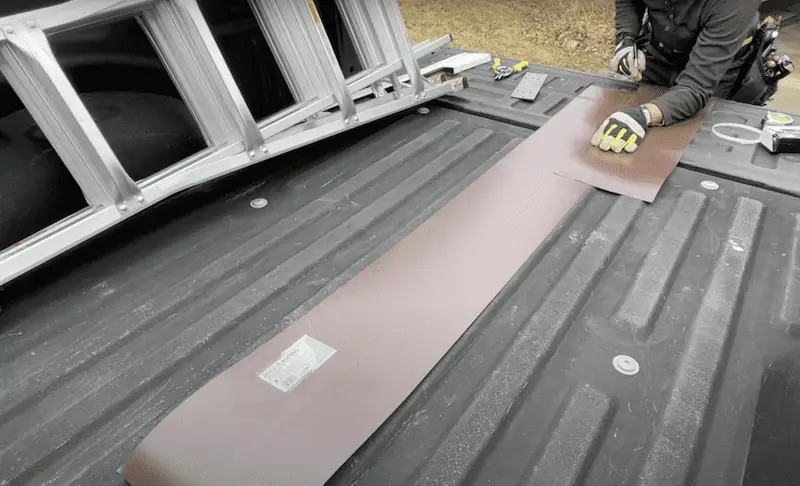
After it was cut to length, I needed to get my 6” of width all the way down the 75” trim- which I marked multiple times to put myself in the best position to get a straight line. Then, using a scrap piece as a straight edge and a sharpie – I marked my cut line.
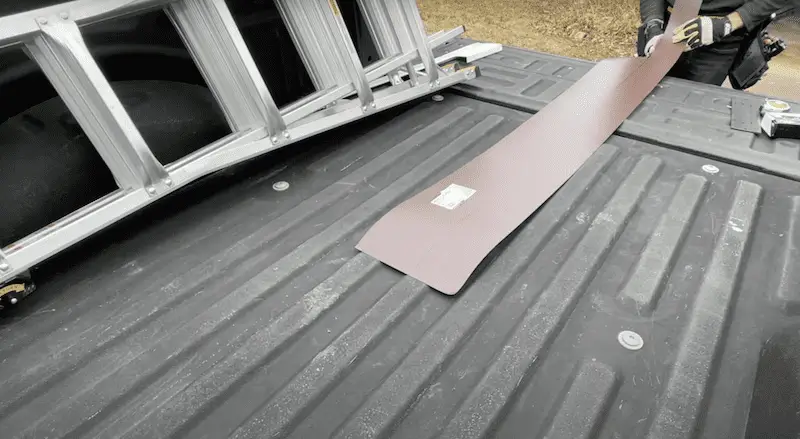
Finally, I trimmed the piece with tin snips. But again, be careful! This is an important step that you don’t want to rush through.
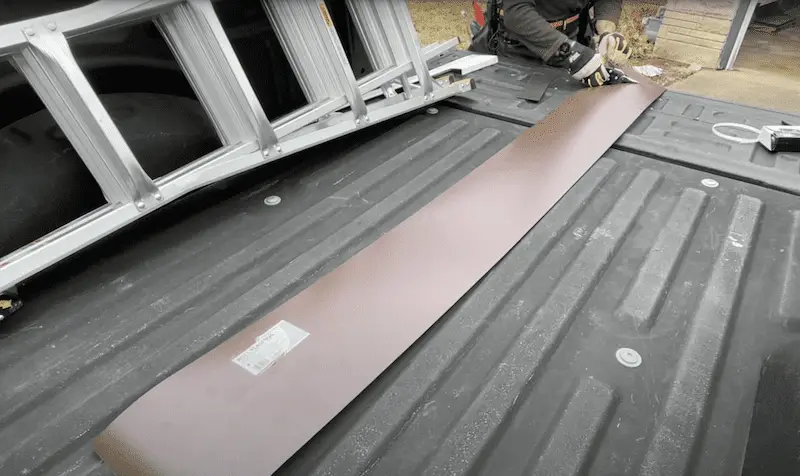
Step 3: Make your bend alongside the trim (slowly!)
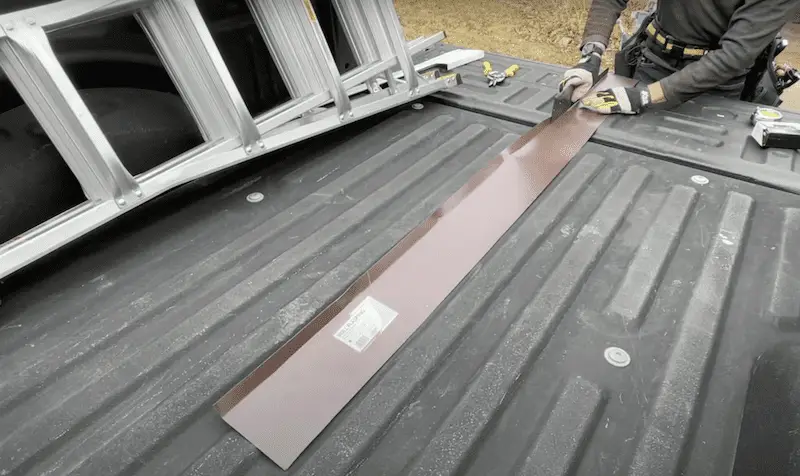
Using a folding tool, I made my 1” bend on the trim. Remember to bend it in the correct direction! For example, I bent it on the brown side so the white surface will show through and be in the correct direction.
Pro tip: Do multiple, smaller bends to get up to your 90-degree angle. Don’t try to do it all at once or it will make for a bad finished product.
Step 4: Install the aluminum fascia trim cover
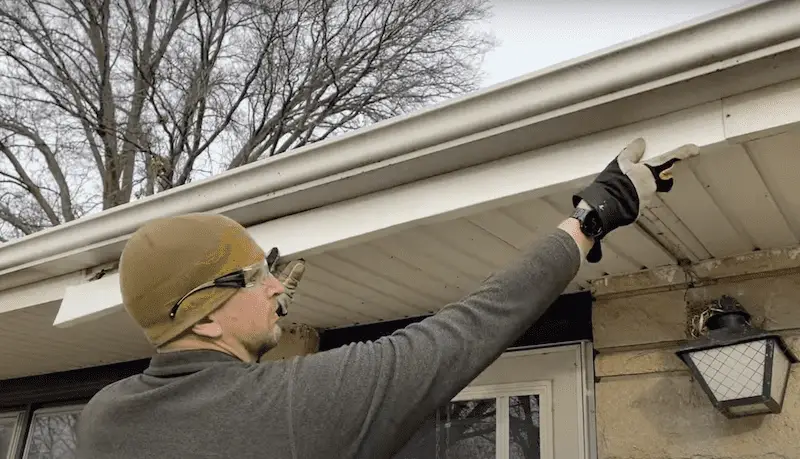
When installing the aluminum fascia trim/ cover, I went under the old piece on the right-hand side and over the old piece on the left-hand side. Then, I made sure the soffit was tucked under the lip of the gutter.
Once you have the trim set in place – get the white stainless steel 1-¼” nails. Start placing nails about every two feet or so – and hammer them in. You don’t need many to get it to hold.
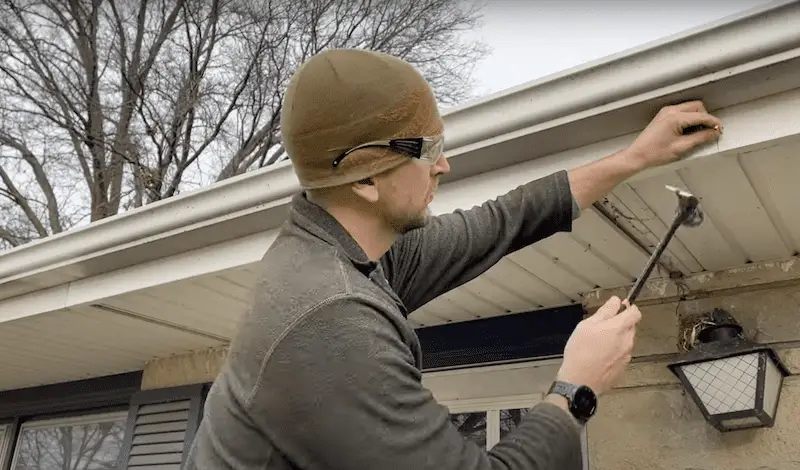
Pro tip: I recommend putting nails close to the end (as seen above) to make sure that the two lips don’t get caught by the wind later on and it’s secure for years to come.
The Wrap Up
Whether you’re patching up an aluminum awning, fixing up damage over the years, or repairing after storm damage – I hope this helped! This is a fairly easy DIY fix and if you have to buy any tools for this project – they’ll very likely come in handy for other fixes down the road.
Looking for more tool recommendations for DIY-ers? Check out my top 10 tools for new homeowners.


