
 My Account
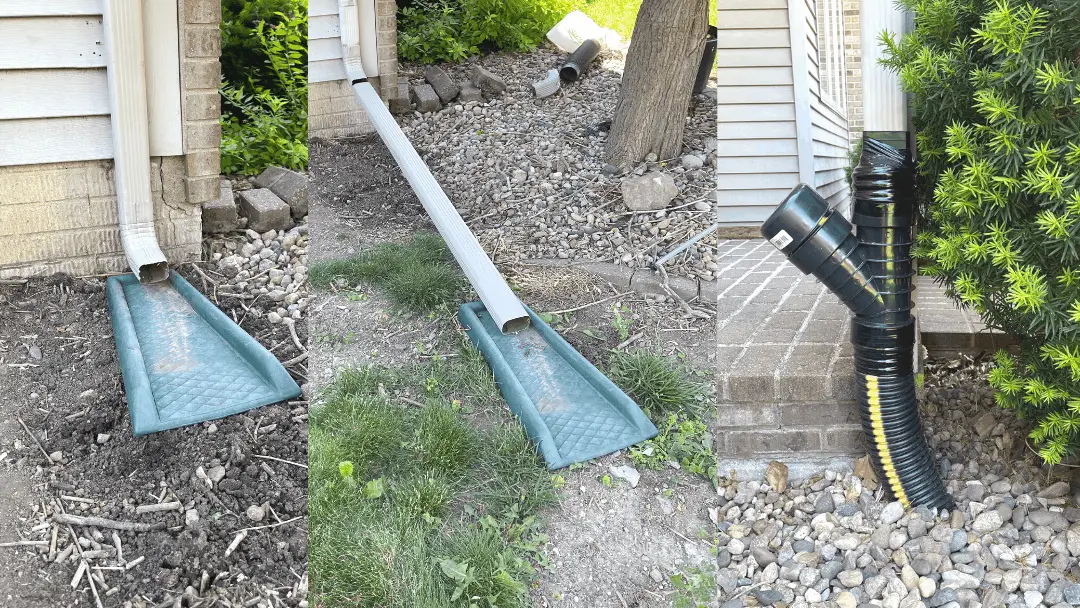
Downspouts provide crucial drainage to get water away from your home. They not only can help keep your basement or crawlspace dry, but also can keep water from eroding away your mulch, rock, or other parts of your landscaping.
Luckily, you have options for installing a downspout system depending on your needs and the amount of time you want to spend on this project. Below I’ll take you through three different downspout drainage and extension ideas, ranging from easiest to most complex. Plus, I’ll share the supplies you need and the steps you’ll take to tackle your water diversion system – no matter which option you choose.
Rather watch the video instead of reading? We’ve got you covered with a 10-minute video below.👇
3 Downspout Extension Ideas: From Easiest to Most Complex
Option #1: Add Downspout Elbow with a Splash Guard (Easiest)
- Supplies required: Downspout Elbow (2″ x 3″ or 3″ x 4″), self-piercing gutter screws (don’t use drywall screws or general construction screws – as these could corrode or eventually clog your downspout), and a splash guard (also known as a splash block)
- Total Project Time: 10 minutes
Your downspouts might already have an elbow installed as this is the simplest of the 3 setups. One thing you want to keep in mind is the outlet of the elbow should only be 3″-4″ above the ground to ensure the water is effectively diverted to the splash guard and away from your foundation.
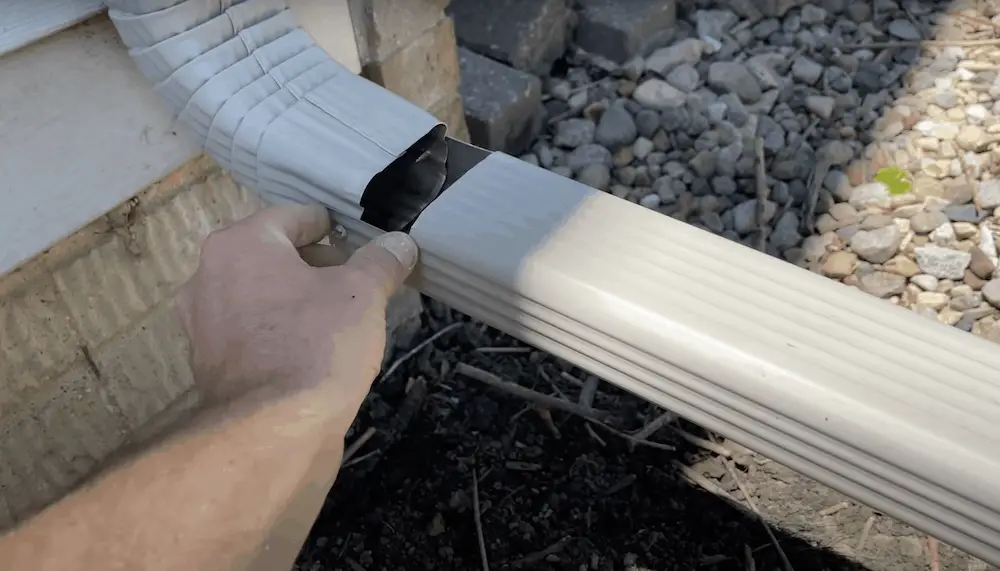
If you need to add a new section of downspout to get the proper height above the ground, simply remove the lowest section of the downspout closest to the guard and cut a new piece of downspout which will add the needed length and result in the proper height of the elbow above the ground. Often you can use the same strapping from the old downspout to secure the new piece to the house but I do use new self-piercing gutter screws as the old ones might have a good amount of corrosion.
Tip: When fitting 2 pieces of pipe together the pipe which will be mounted higher should be inside the pipe which will be lower. This orientation will help reduce water leaks at each joint.
- Pros: Simple to install, flexible, and easy to move the splash guard around while landscaping or mowing.
- Cons: If the grade of your yard slopes down towards the home, the water won’t drain away from the house. Rather, the water would go towards the house’s foundation. Not good.
- Takeaway: If you have a slab foundation or a well-graded yard, this could be an easy solution. Also, it’s a good option if you’re in an area where the soil can percolate the water effectively.
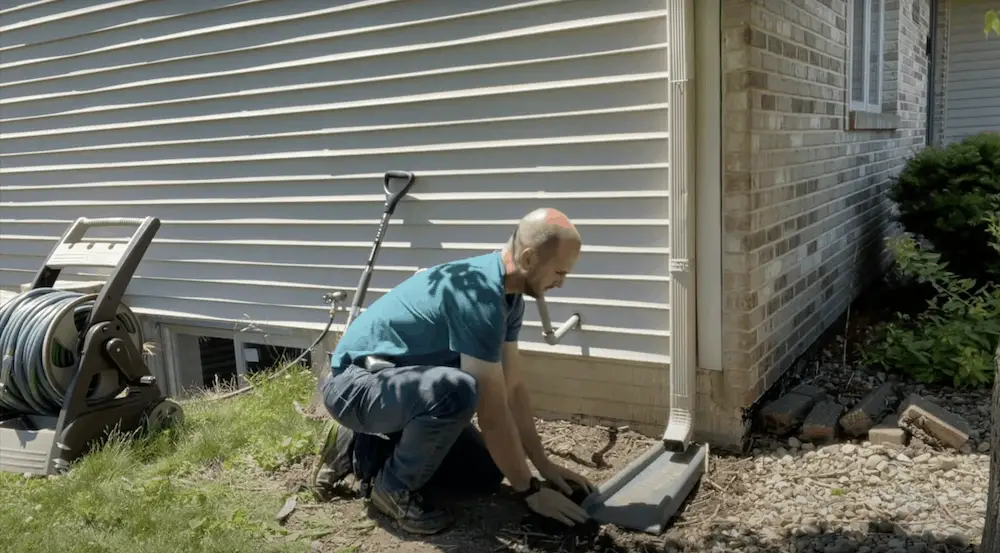
Option #2: Install a Downspout Extension (Medium)
- Tools required: Downspout (2″ by 3″ or 3″ by 4″) at least a 5′ piece of downspout, self-piercing gutter screws, hack saw, tin snips, splash guard
- Total time: 30 minutes
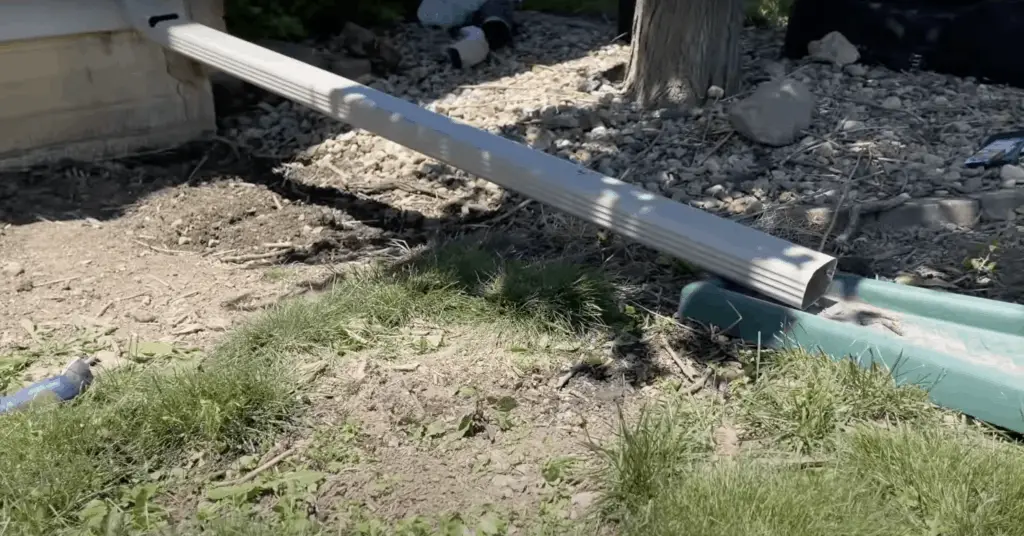
Take an extra section of the downspout and add it to the elbow. You’ll also put two screws with one on each side and cut out about a 2.5 – 3″ section from the top and about half an inch from the sidewall (see image below). This extra step will allow you to pivot the pipe up and down. Why do you need the downspout to pivot up and down? It will give you the clearance to shift it up and have it hold in place while you mow or do other landscaping projects, and then pivot it back down so it works effectively when it rains.
Tip: You’ll want the elbow exiting 10 – 12” off the ground, so when you add the 5’ extension – it will have a nice slope. This will allow the water to have proper velocity down the extension and flow away from your foundation
- Pros: Relatively easy to install and efficient. Places water further from the foundation as compared to option #1.
- Cons: If you have someone else mowing the lawn, they might hit the extension and it can cause you problems over time. Similarly, with dogs or children running around, it’s not always the best permanent solution as it can be a bit clunky and accident-prone.
- Takeaway: This is an ideal temporary solution for many people but not necessarily over a long period of time.
Option #3: Dig a Trench (Most Complex & Most Durable)
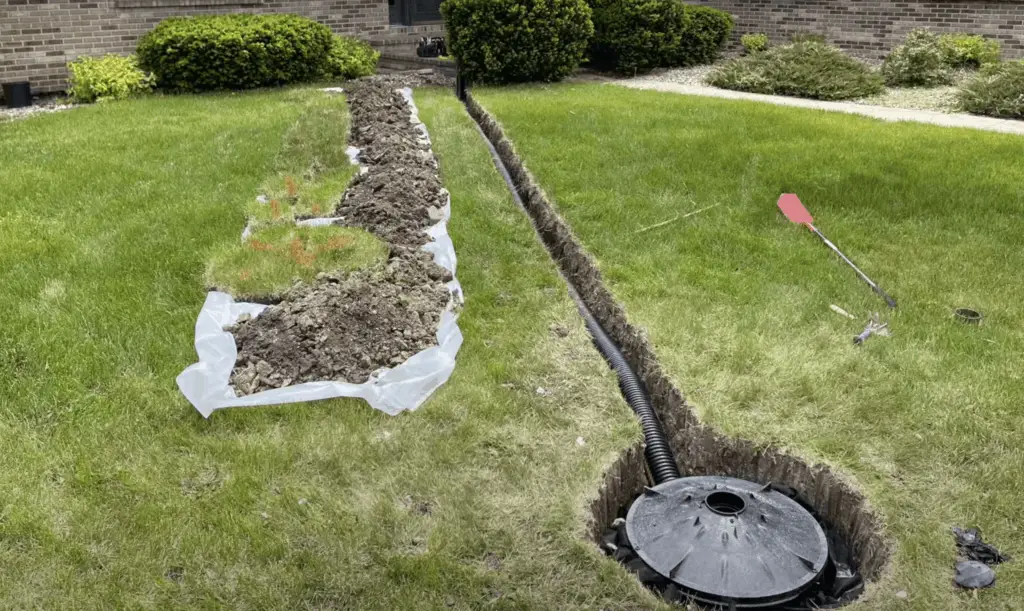
- Tools required: 4″ ADS Solid Corrugated Pipe, 4″ ADS Corrugated Wye, 4″ NDP Popup Emitter, 4″ PVC to 4″ Corrugated Coupling, Trench Shovel, Hand Rake/Cultivator, Heavy Duty Pick Mattock, Jawhorse (Sawhorse and Vise), String, Line Level
- Total time: 4-8 hours per Downspout (Depending on trench length)
There are several parts of this project as outlined in the below list:
- Measuring the grade of your lawn
- Planning trench depth and proper trench slope
- Remove sod and dig trench
- Install piping and associated drainage parts
- backfill
I have a complete playlist on my YouTube channel which will walk you through all the above topics if you need additional guidance YouTube Drainage Playlist
- Pros: Permanent and long-term efficient solution. Better curb appeal.
- Cons: Time-intensive and requires quite a bit of physical labor.
- Takeaway: This is the most time and labor-intensive option, but it’s also the solution with the biggest payoff in the long run.
Which drainage system would you be most likely to try… or which option are you currently using? Let us know in the comments below.


