My Account
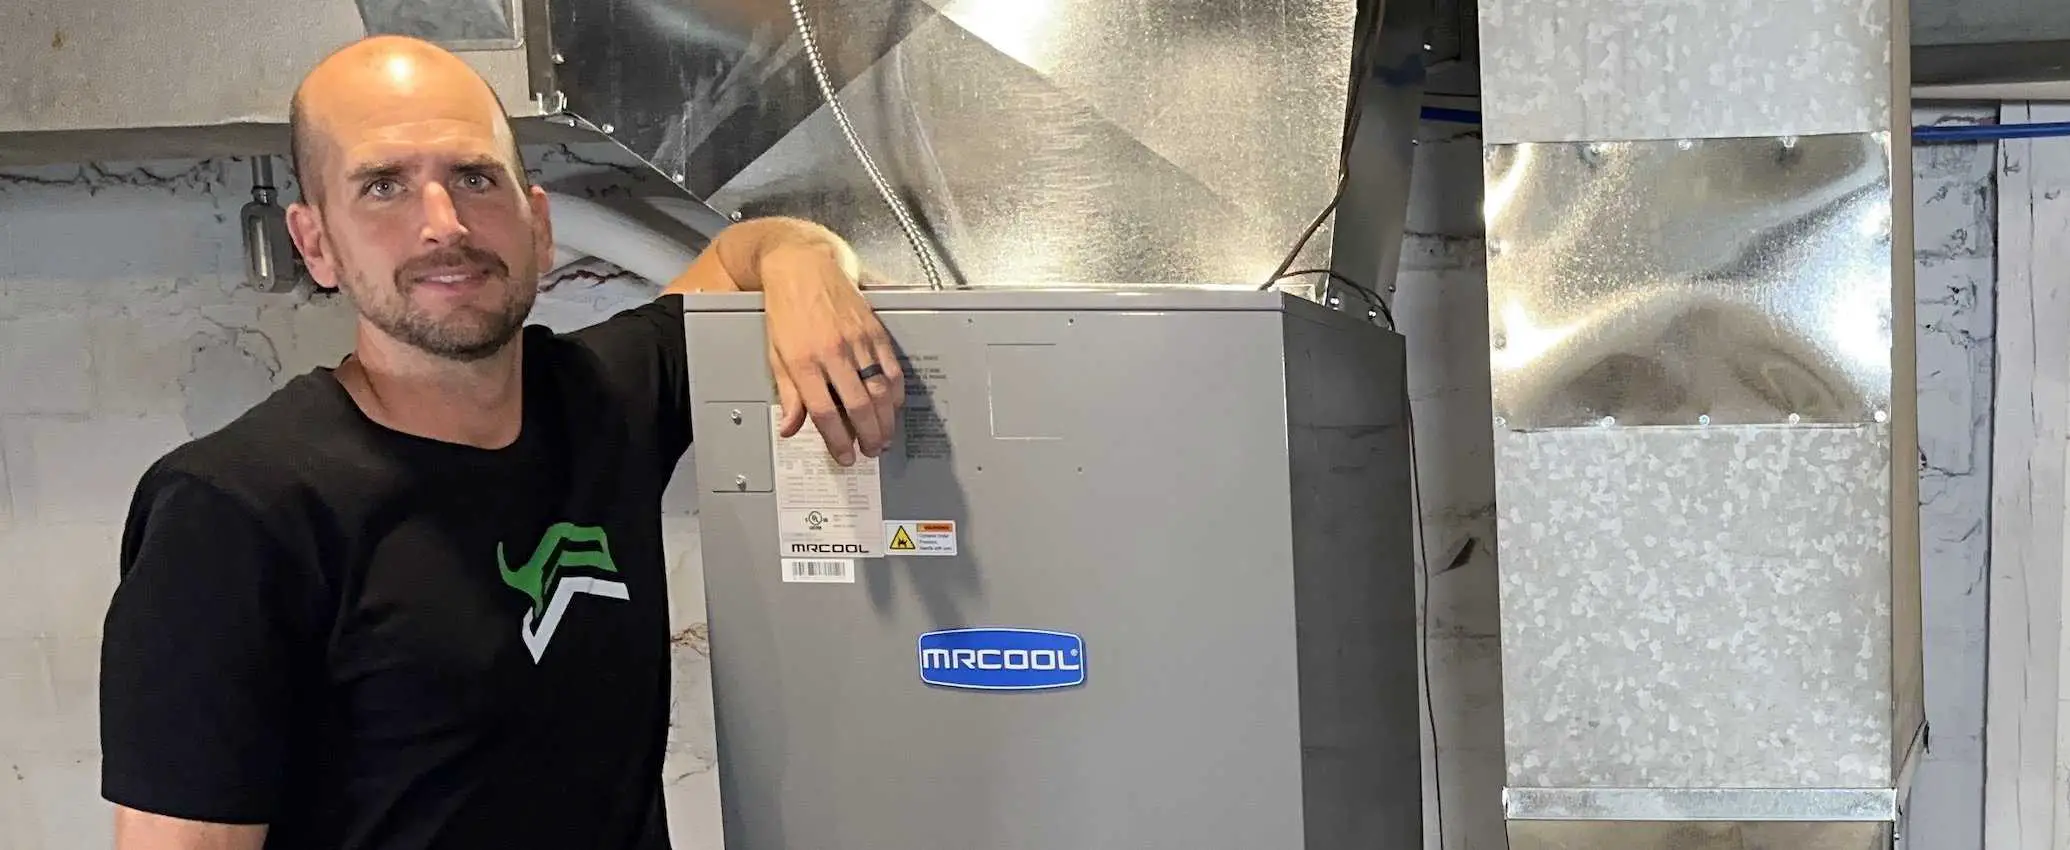
I just finished installing a MRCOOL 36,000 BTU (3-ton) HVAC system Hyper Heat. This is a ducted heat pump system, the newest unit that MRCOOL offers, following the success of their Universal unit.
The Hyper Heat system is DIY-friendly. If you feel up to tackling a do-it-yourself installation of a new central heating and cooling system, this MRCOOL product is a good option that will save you a ton of money compared to the professional installation of a similar system.
Overview of Time and Money Spent on a DIY HVAC Installation
In this article, I’ll share a few things to keep in mind when considering a do-it-yourself HVAC project along with how much time it took me to complete each phase of the project, how much money I spent, and how many trips I had to make to the home improvement center (there was no shortage of trips on this project).
This post is just an overview of what I spent in time and money on a DIY HVAC installation. To view the complete installation of the MRCOOL Hyper Heat system, check out the video.
Rather watch than read? Check out this 7-minute video.
DISCLAIMER: This video and description contain affiliate links, which means that if you click on one of the product links, I’ll receive a small commission.
DIY HVAC Installation: The Scenario
A little bit about the scenario before we get into the overview.
I had an old oil-burning furnace I needed to replace. (The oil-burning furnace was even the subject of a video in which I tried to troubleshoot it because I couldn’t get the oil burner started.) The ductwork was already present but I needed to do some custom ductwork on the cold air return to connect it to the new system.
Note that if you have to install all the ductwork for an HVAC system, it will drastically change the scope of the project and the cost.
DIY HVAC Installation: Breakdown of Costs and Time
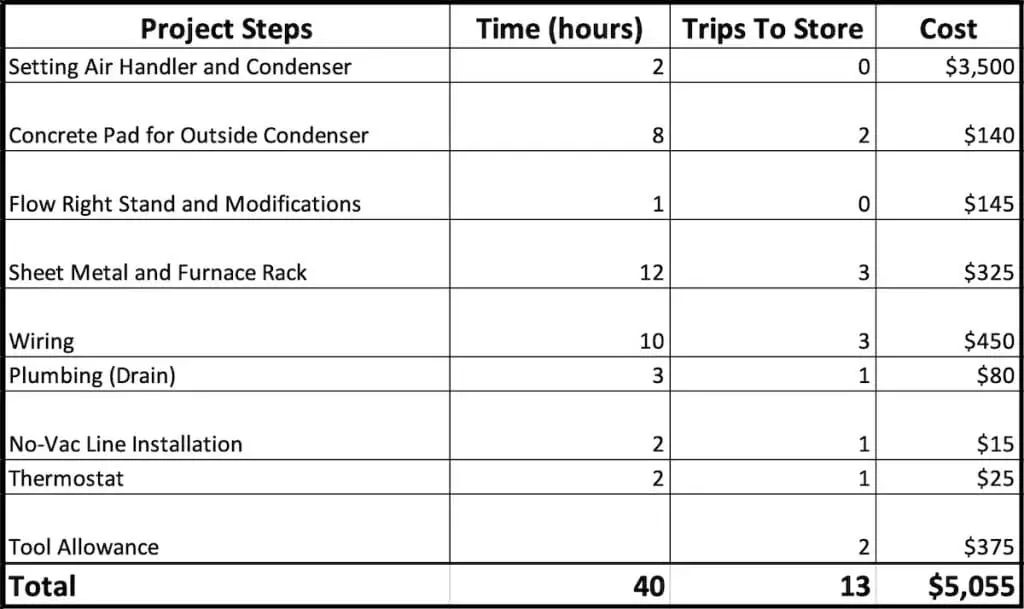
To follow is a detailed breakdown of what I spent in both dollars and time. There’s a table that summarizes everything at the end of the section.
Costs of Equipment and Materials
- Air handler and condenser, $3,500 (delivery included)
- Flow Right return air stand/plenum, $145
- Concrete pad, $140
- Sheet metal and other materials to tie all the ductwork together, $325
- Electrical supplies for two 240-volt circuits, $450
- Plumbing supplies (¾-inch PVC) for drainage of the evaporator coils, $80
- Supplies to install the No-Vac lines, $15
- Supplies to install the thermostat, $25 (the thermostat itself was included with the MRCOOL unit)
- Additional tools*, $375
Total, $5,055
Time Spent on Installation
- Installing the air handler and condenser*, 2 hours
- Setting up the Flow Right return air stand/plenum, 1 hour
- Prepping the exterior site* and pouring the concrete pad (24 x 48 x 5 inches) for the condenser, 8 hours
- Getting all the ductwork tied together (custom fabrication of sheet metal), 12 hours
- Installing two 240-volt circuits (one 50-amp circuit with a disconnect for the condenser, another 15-amp circuit to run the air handler unit), 10 hours
- Installing ¾-inch PVC for drainage* of the evaporator coils, 3 hours
- Running the No-Vac lines*, 2 hours
- Installing the thermostat, 2 hours
Total, 40 hours of labor plus 13 trips to the home improvement center.
*NOTES
- The cost of additional tools or tool rentals will obviously vary according to each situation.
- Installing the air handler (the unit that sits in your basement) and condenser (the unit that sits outside) will probably require two people and a dolly.
- Prepping the site for the concrete pad included digging out the area, leveling the ground, and creating the form.
- Drainage is going to be different for every project; I needed to run mine out to a sump pit not too far away.
- It’s the No-Vac lines that make this a DIY project. The lines already have the refrigerant in them. If you install them correctly, you don’t need to pull a vacuum to bring refrigerant in.
- To install the No-Vac lines, I had to drill through brick, which takes longer than going through vinyl siding and wood sheathing.
Summary of Time, Trips, and Costs
Comparing Costs of Professional vs. DIY HVAC Installation
The quote I got for a professional installation of a 3-ton all-electric HVAC system came in at $12,500. It was not a MRCOOL unit but was comparable in terms of quality, capacity, and warranty.
The total I spent for the MRCOOL Hyper Heat system plus all the supplies needed to complete the installation was $5,055.
I saved almost $7,500 doing this HVAC installation as a DIY project.
Note: MRCOOL sent me the unit for free to give it a try. With that said MRCOOL did not pay additional sponsorship dollars so I could give my unbiased feedback on the unit.
DIY HVAC Installation: Conclusion
This DIY HVAC installation was a labor-intensive project but well worth the time and effort. The total that I spent on the equipment and installation materials was less than half of what a professional installation would have cost.
When I weigh out the time spent against the money saved, the return on my investment of time is pretty impressive. I spent 40 hours doing the work myself and saved $7,445, which I could think of as having “earned” about $185 per hour.
If you feel comfortable taking on this kind of project, you will put in a fair number of hours but it is definitely a good use of your time thanks to the significant savings you’ll reap.
DIY HVAC Installation: The Complete How-To Guide
To watch the whole installation, check out our video, “How To Install Your Own Central Air Ducted System”. It’s a complete how-to guide covering all the details of installing the MRCOOL Hyper Heat system.
Related Articles: How to Pour a Small Concrete Pad
A concrete pad is essential when you’re installing an air-conditioning condenser but it can also be handy at the entrance to a shed or as a landing for deck stairs, among other things. Whatever your application, our step-by-step guide “How to Pour a Small Concrete Pad” covers all the details for an easy do-it-yourself project.
To Leave Comments and Questions
If something doesn’t make sense or if your situation is a little different, please leave a comment under the YouTube video. I check the comments on a daily basis and am happy to help out.
Subscribe to our channel! We have weekly videos coming out to help you with your everyday home repairs.
We’ll catch you on the next one! Thanks for stopping by.