My Account
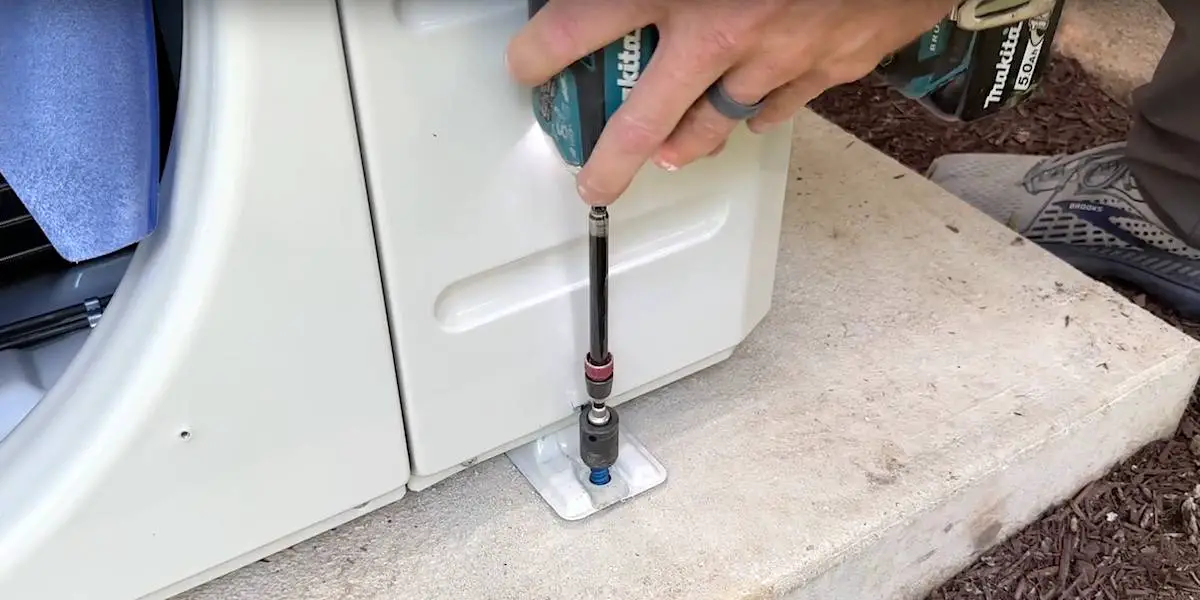
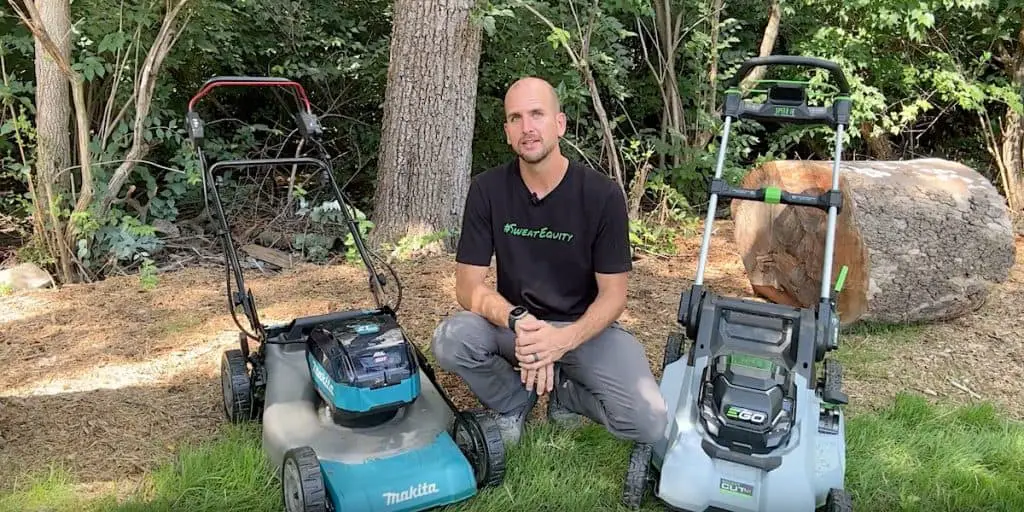
Today I’m going to attach an AC unit to a concrete pad to illustrate the only concrete anchor you need and how to properly install it.
When it comes to concrete anchors, there are tons of different options out there so I decided to poll our Everyday Home Repairs community to see what the popular choices were. About six thousand of our YouTube viewers responded and 71% said they prefer Tapcon concrete anchors, so that’s what I’m going to use in this demo.
How to Install a Tapcon Concrete Anchor: Step-by-Step Guide
The Tapcon concrete anchor I’m going to install is 3/8 of an inch in diameter and three inches long. I think this size anchor is perfect for this project, which is affixing the four flanges of an air conditioning condenser to a concrete pad.
As I walk you step-by-step through the process of installing concrete anchors, I’ll give you some tips and tricks along the way. I’ll also cover what to do if you run into trouble; specifically, what you can do if you over-torque when mounting the anchor and strip out the hole.
Tapcons are a great product but there are some common mistakes associated with them that can derail your project, so I’ll address those as well.
Rather watch than read? Check out this 7-minute video.
DISCLAIMER: This video and description contain affiliate links, which means that if you click on one of the product links, I’ll receive a small commission.
How to Install a Tapcon Concrete Anchor: Things to Note Before Starting
When it comes to installing concrete anchors, you want to measure carefully and measure twice, especially when you have four brackets to line up as I do with this AC unit.
First, I’m going to check my spacing to make sure I have the correct clearances for this condenser. Once I know that the placement is correct, I’ll mark the holes with a Sharpie. Even this should be done with care so that the spot you’re marking is exactly in the center of the bracket hole.
AN IMPORTANT THING TO NOTE ABOUT TAPCON CONCRETE ANCHORS:
If you’ve used Tapcon masonry anchors before, you probably know that the size of the Tapcon on the front of the package in large print is not the size drill bit you need to use. This is NOT the case with Tapcon concrete anchors. The drill bit you need for Tapcon concrete anchors is the same diameter as the anchor. This is specified on the back of the package.
Two Different Methods for Drilling a Hole in Concrete
Drilling a Hole in Concrete with a Standard Cordless Drill
I’ll drill my first hole in the concrete pad using a standard cordless drill on the hammer drill setting. My drill of choice is a Makita.
I’m using a 3/8 by 4-inch drill bit that I’ve marked with some electrical tape. The tape is my depth marker, which I’ve set one-half of an inch longer than my concrete anchor.
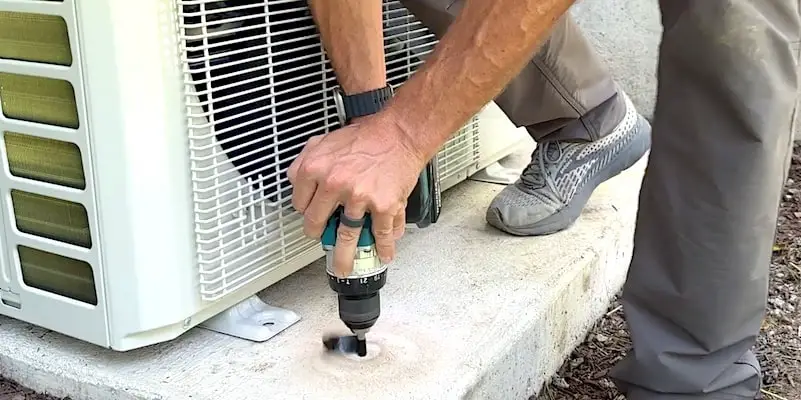
I’m applying pressure intermittently so as not to create too much heat, which can compromise the drill bit.
Drilling a Hole in Concrete with a Rotary Hammer Drill
I’ll use a rotary hammer drill to bore the next hole. This type of drill has a completely different internal mechanism that makes drilling into concrete or masonry a whole lot easier and faster than with a standard cordless drill with a “hammer drill” setting. It also has a built-in depth gauge, which is the black rod you see parallel to the drill bit.
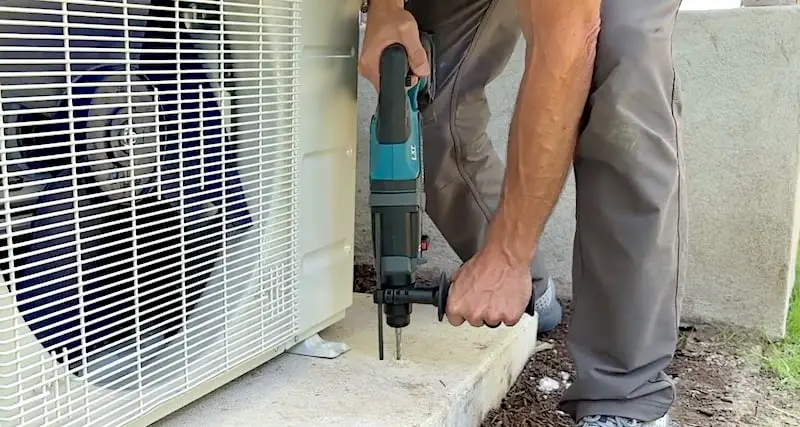
It took fifty seconds to bore the hole with my cordless hammer drill; with the rotary hammer drill, it took about half as long, even though the battery of the rotary hammer drill was half-depleted.
A NOTE ABOUT ROTARY HAMMER DRILL BITS:
An important thing to note about rotary hammer drills is that you’ll need an SDS drill bit instead of a standard drill bit The SDS design has to do with the base of the drill bit and how it locks into the chuck of the drill.
If you’d like to check out our Amazon store, you can find all the tools and supplies I use that I think are DIY-friendly. You’ll see both these drills and the masonry drill bits in the Power Tools section.
Post-Drilling: Cleaning Out the Debris
Once all your holes are drilled, it’s important to clean out all the debris. Bits of concrete and dust in the bottom of the hole can reduce the depth, which can cause issues when you install the anchor. A shop vac works well for this; an air compressor is even better. I have a portable cordless air compressor that’s very handy for blowing out any remaining bits of concrete or dust.
How to Install a Tapcon Concrete Anchor: Sinking the Anchors
To install the Tapcon concrete anchors, I’ll carefully tighten them down using an impact driver, taking care not to over-torque.
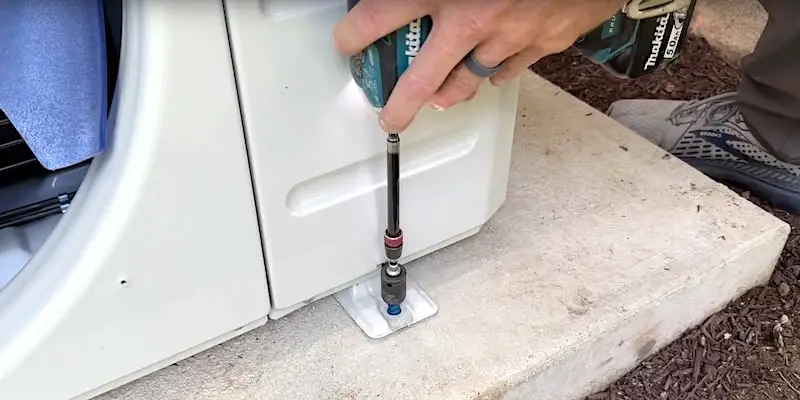
You really shouldn’t need to apply much torque; fifty foot-pounds would be the max. With more force than that, you risk stripping out the hole.
A NOTE ABOUT TOOLS:
You might be tempted to use a half-inch impact gun to install concrete anchors but I frankly advise against this. You just don’t need that much torque for Tapcons. With an impact gun, it’s easy to strip out the holes and create a real problem. One viewer commented that they use a drill instead of an impact driver and have never had an issue with stripping out holes.
Troubleshooting: When a Concrete Anchor Doesn’t Sink All the Way
In this demo, I was able to mount the concrete anchors with no trouble at all. But what if they don’t want to sink all the way?
In my personal experience, a concrete anchor that won’t install properly is due to not paying enough attention when I was cleaning out the hole. Debris caused the anchor to bottom out and not sink all the way. This is the most common issue when it comes to installing concrete anchors. If you don’t have an air compressor, then get your drill back out and do your best to extract any material from the hole.
Troubleshooting: When You Strip Out a Hole
So what can you do if you strip out a hole? My go-to fix is to install the next size Tapcon. This will entail redrilling the hole with the appropriate size bit but it is a pretty straightforward solution.
You could also turn to wedge anchors or strike anchors, but the concept would stay the same. You’d need to install an anchor of a larger diameter, redrilling the hole as appropriate.
Here are a couple of tips from our viewers you might want to try:
- Keep a spool of galvanized wire handy. Just fold a few lengths equal to the thread length, put it in the hole, and re-run the screw. The screw will bite into it and press against the sides of the hole. Works every time! (Tip courtesy of csimet.)
- Stick a few pieces of heavy-duty grass trimmer line in the hole. Works like a charm and holds like iron. (Tip courtesy of edjorgensen.)
- Try putting a length of nylon cable tie in the hole to snug it up. (Tip courtesy of CoconutPalmPictures.)
How to Install a Tapcon Concrete Anchor: Conclusion
For ease of installation, it’s hard to beat Tapcons. By taking care to thoroughly clean debris from the holes after drilling and not using too much torque when you install the concrete anchors, the process should be problem-free. If you do run into a snag because you’ve stripped out a hole, I hope that the simple solutions presented help you out.
Concrete-Related Projects
If you need to create a concrete pad to support an AC unit or as a landing at the bottom of some deck stairs, for example, check out our video, “How to Pour a Small Concrete Pad” or the corresponding article, if you prefer a written format.
To Leave Comments and Questions
If something doesn’t make sense or if your situation is a little different, please leave a comment under the YouTube video. I check the comments on a daily basis and am happy to help out.
Subscribe to our channel! We have weekly videos coming out to help you with your everyday home repairs.
We’ll catch you on the next one! Thanks for stopping by.