My Account
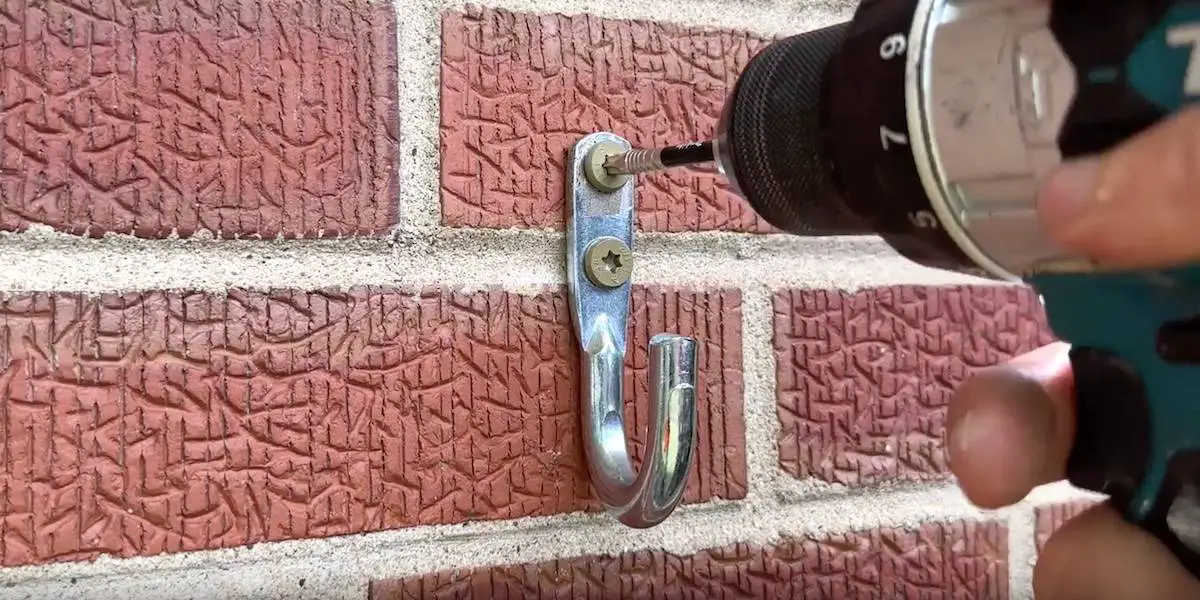
Many DIYers struggle through projects that involve drilling into brick or mortar. There are a number of ways to do this, some of them less than ideal, so today I’ll be walking you through how to fasten something to a brick wall as a means of expanding on this topic.
Before we get to the how-to part of the demo, I’ll go over tools and hardware that will make drilling into masonry much more approachable and also give you the finished result you’re looking for.
I’ll also touch on things to evaluate when you’re trying to decide whether to drill into the brick or into the mortar, as this is a common question that comes up for do-it-yourselfers. Of course, no tutorial on drilling into masonry would be complete without discussing mistakes to avoid, so I’ll cover a couple of important ones.
Finally, I’ll go through the steps to fasten a hook on a brick wall. This demonstration will illustrate how different types of drills perform in a real setting. You’ll also see how easy it is to mount wall anchors in brick or mortar to get a good, secure hold.
Rather watch than read? Check out this 10-minute video.
DISCLAIMER: This video and description contain affiliate links, which means that if you click on one of the product links, I’ll receive a small commission.
Drilling into Brick and Mortar: Supplies and Tools
Supplies
Tools
Drilling into Brick and Mortar: Drill Options
When it comes to drills for drilling into brick or mortar, you have a few options.
Cordless Drill
The drill that most do-it-yourselfers will be familiar with is a cordless drill that has a hammer drill feature. On this type of drill, you usually have a dial that adjusts torque or specifies the mode of the drill. The hammer icon, not surprisingly, indicates the hammer drill function.
The nice thing about a cordless drill is that many DIYers already have one in their arsenal, which saves having to buy a new tool. You will need to get yourself a masonry drill bit, however. I’ll talk more about drill bits a bit further on.
Now let’s look at another type of drill that is much better at boring into brick or cinder blocks or even the mortar itself.
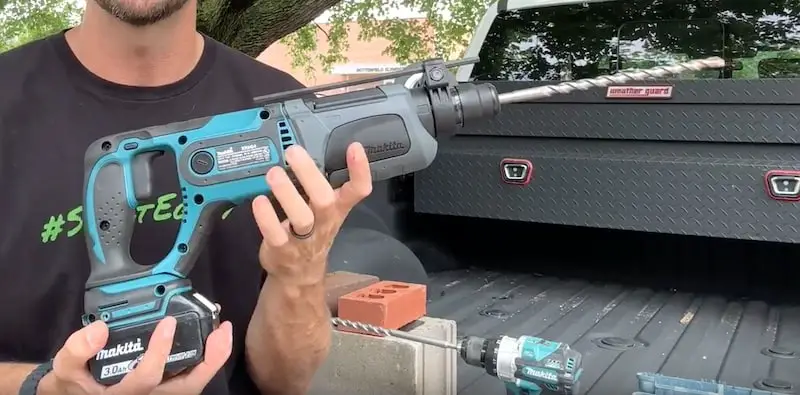
Rotary Hammer Drill
A rotary hammer drill is wildly more effective at drilling into brick than a standard cordless drill. This is due to the internal mechanism, which is completely different than what you have in a regular drill. The workings of a rotary drill consist of a piston that gives you substantially more force or chipping power.
If you don’t want to invest $200-$250 on a rotary hammer drill and you’re drilling more than just one hole, I think it’s worthwhile to rent one. Figure on spending $30-$40 for a day’s rental, plus the cost of your bits.
Another alternative is Harbor Freight, where you’d likely spend a little over $100 to purchase a rotary hammer drill. The quality wouldn’t be suitable for everyday professional use but for occasional DIY projects, it should be fine.
Rotary Hammer Drill with Additional Features
If you have a big demolition project to tackle, such as taking out a sidewalk or removing some stubborn flooring, a rotary hammer drill such as this one could be a good option.
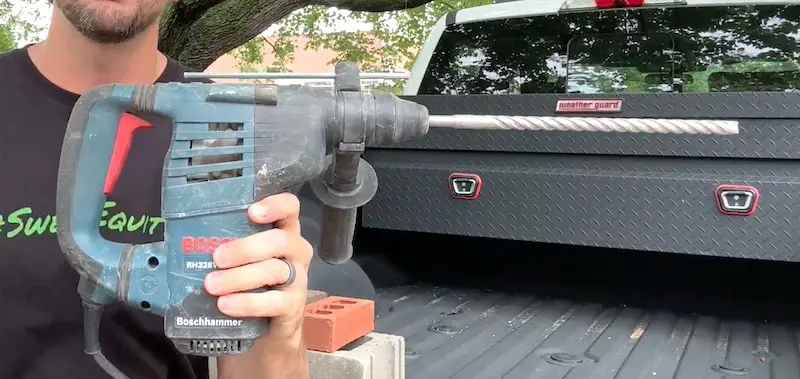
You can see that this drill is substantially larger than the others. You can put spades, chisels, and other specialty bits on it, which makes it very handy for certain projects when used on the chipping hammer setting.
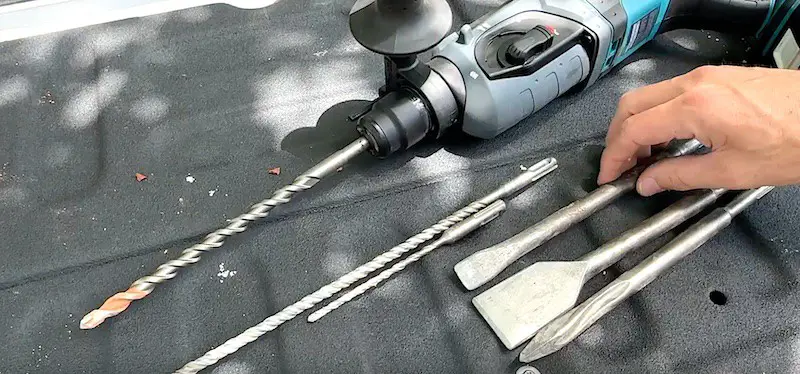
Because this rotary hammer drill is corded, it packs quite a punch, even more than the Makita cordless.
Drilling into Brick or Mortar: Drill Bits
When drilling into brick, you’re going to need precisely sized masonry drill bits in order for wall plugs or anchors to seat and function correctly. (See the section on Tapcons further on if you plan to use those anchors.)
The part of the drill bit that gets inserted into the chuck of the drill differs between types of drills. A drill bit for a standard cordless drill has a simple shape.
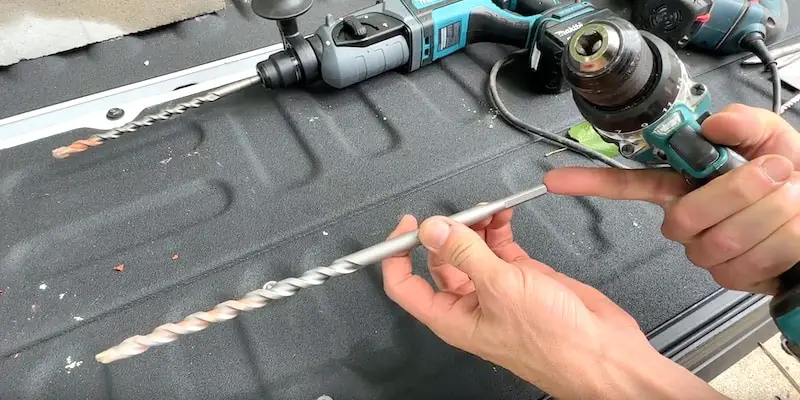
Drill bits for rotary hammer drills, on the other hand, have a fancy design called SDS Plus. This design also allows for the back-and-forth movement created by the piston inside the rotary hammer drill for chipping functions.
The SDS Plus design is universal, so you can use your masonry bits across different drill brands. Note that heavy-duty drills might require SDS Max bits. The SDS Max bits have the same design as the SDS Plus but with a larger diameter shaft.
Where to Drill: Into the Mortar or into the Brick?
When it comes to drilling into masonry — a brick wall in the case of the demo I’m going to be doing — the big question for DIYers is always “Can I drill into the mortar or should I drill into the brick itself?”
The answer depends largely on the condition of your mortar. The mortar in this brick wall is in pretty good shape but if you have an old home there’s a pretty good chance your mortar is starting to break down. (Compromised mortar can be repaired through a process called tuckpointing.)
In addition to the condition of your mortar, you need to evaluate the number of holes you have to drill, where they’ll be positioned, and how much you’re willing to spend to buy or rent a rotary hammer drill if the project is demanding enough.
Drilling into brick can be extremely challenging, especially if you’re up on a ladder and can’t lean your weight into the drill. I’m going to demonstrate how the right tool can make this job a lot easier as I take you through the steps to attach a hook to this brick wall. The project entails drilling two mounting holes, one into the brick and the other into the mortar.
I’ll start with my cordless drill, drilling the first hole into the mortar and timing how long it takes. Then I’ll drill the second hole into the brick with the same drill and clock a time for that. To compare, I’ll drill a hole in the same type of brick with the rotary hammer drill so you can see how much more effective that tool is at drilling into brick. This should be helpful info as you evaluate how to approach your specific project.
How to Fasten Something to a Brick Wall: Which Anchors to Use
Before jumping into our little demonstration, let’s talk about what anchors to use when you want to mount something on brick. An anchor is the thing we’re going to sink into the hole that will expand to fill the space and give us a strong hold.
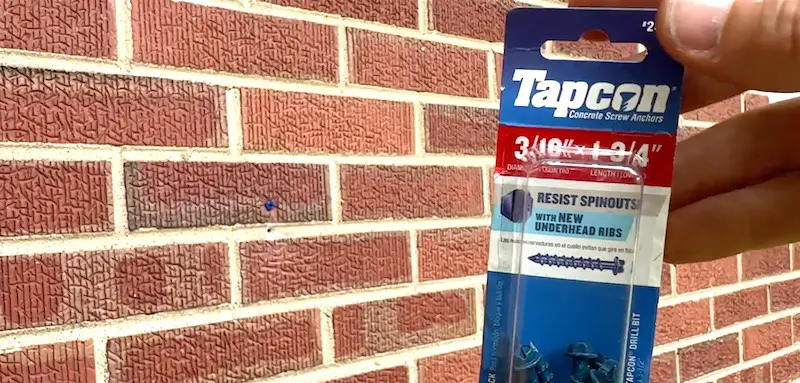
The most popular anchors for masonry are Tapcons.
Tapcon is not my favorite anchor for masonry, however; I prefer a regular wall plug.
Wall plugs come in a wide range of sizes. For purposes of mounting this hook to the brick wall, I’m using a #14 wall plug and a #14 lag screw that’s rated for exterior use. The #14 wall plugs and #14 screws are one inch long. The lag screws have a broad, flat head so they’re perfect for this application.
Drilling into Brick and Mortar: Mistakes to Avoid When Using Tapcons
Let’s talk about the two common mistakes people make when using Tapcons as an anchor in a brick wall.
The first is using the incorrect size drill bit. The size in large print on the package is the size of the anchor, NOT the size drill bit you need to use. The drill bit size that you need would be 1/16 of an inch smaller than the diameter of the anchor. This is also indicated in small print on the front side edge of the package (in the event you’re not good with fractions).

The second mistake do-it-yourselfers commonly make when using Tapcons is over-torquing. If you apply too much rotational force when tightening the screw, you can strip out the threads and the Tapcon won’t hold. Mortar especially will not be very forgiving if you over-torque.
How to Fasten Something to a Brick Wall: Step-by-Step
Our demonstration project of fastening a hook to this brick wall is pretty straightforward.
To start, I’ll mark my drilling locations with a Sharpie. (Note that you don’t want to drill too close to the edge of a brick.)
Drilling into the Brick and Mortar
Next, I’ll take a punch and tap it into both locations with a hammer to give myself a sort of pilot hole, basically a divot for the point of the drill bit to settle into.

Doing this prevents the bit from wandering as you start to drill, ensuring that the hole ends up just where you want it.
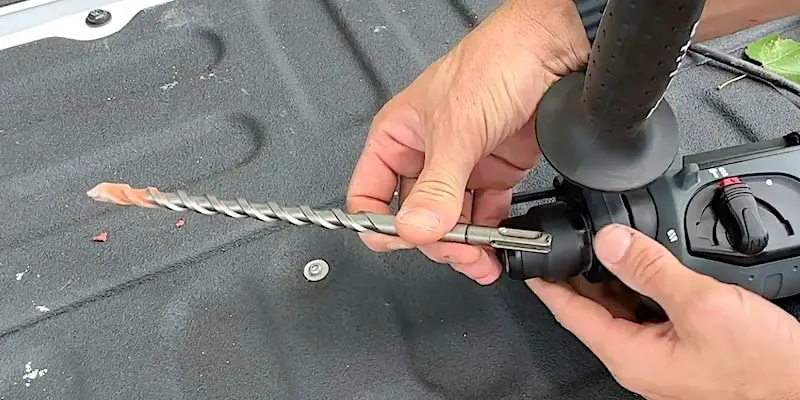
After inserting the masonry drill bit in the chuck of my cordless drill, I’ll tighten it and set the drill on the hammer setting. Then I’ll turn the chuck in the opposite direction to lock it in place.
I’ve marked the bit with a piece of tape so I know how far in to drill.
It took about 18 seconds to drill into the mortar with my cordless drill using a 5/16-inch drill bit.
Now let’s drill into the brick, still using the cordless. It took 42 seconds to drill that hole. I was actually kind of surprised that it went that quickly. To compare, drilling a hole into the same brick with a rotary hammer drill took only 6 seconds! If you have a lot of drilling to do, it’s pretty easy to see that a rotary hammer drill can save you a good chunk of time and effort.
Installing the Wall Plugs and Hardware
When using a wall plug in brick or masonry, I want to sink it below the surface before mounting my hardware. A couple of tips for doing this:
- Gently tap the wall plug into the hole til it’s almost flush with the surface.
- Minimally thread in the screw you’ll be using, just enough to grab the wall plug, then tap on the screw with a hammer until the wall plug sinks just slightly past the surface of the wall.
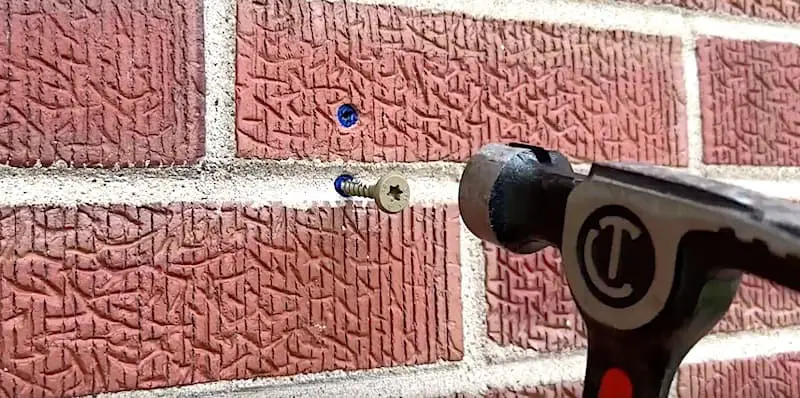
- Remove the screw.
- Set your hardware in place and mount the screws, being careful not to overtighten.

To finish, I’ll do a pull test to make sure the hook is nice and secure.
Drilling Into Brick and Mortar: Conclusion
You can see that with a little knowledge and the right tools, drilling into brick or mortar is not such a daunting task.
If you only have a couple of holes to drill, the cordless drill you already have in your toolbox could work just fine. For bigger projects, you now know that a rotary hammer drill could save you lots of time and make the work much easier.
Related Article: How to Anchor Things to Concrete
If you have to anchor something to concrete, such as an AC unit or some posts that you want to secure with a bracket, check out our YouTube video. The Only Concrete Anchor You Need And How To Properly Install It.
Other General Repairs
Check out all our articles on General Repairs for helpful how-to guides on a wide range of do-it-yourself home repair topics.
To Leave Comments and Questions
If something doesn’t make sense or if your situation is a little different, please leave a comment under the YouTube video. I check the comments on a daily basis and am happy to help out.
Subscribe to our channel! We have weekly videos coming out to help you with your everyday home repairs.
We’ll catch you on the next one! Take care.