
 My Account
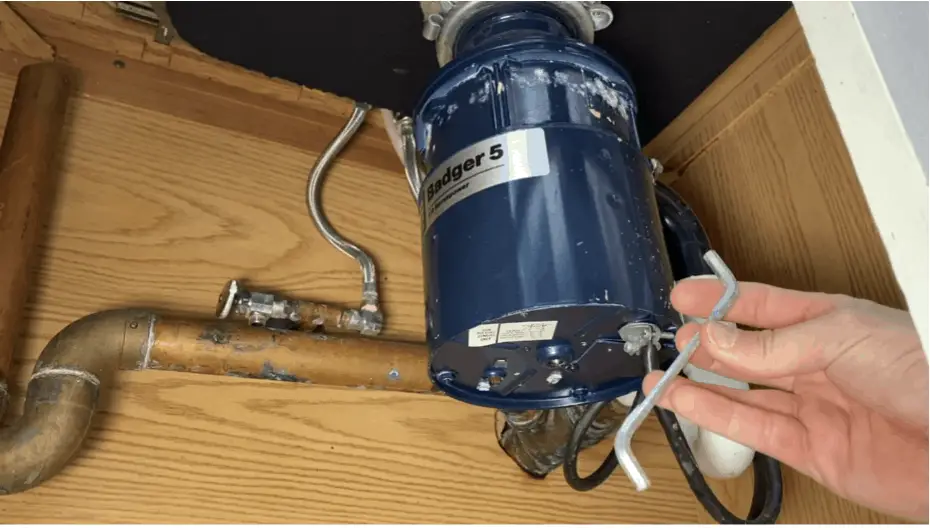
The kitchen garbage disposal is a modern convenience that we rarely ever think about until it stops working. Fortunately, troubleshooting, repairing, or even replacing your garbage disposal isn’t nearly as intimidating as it might seem. Whether you’re looking to replace a garbage disposal or clear a jam – follow these steps and you’ll be back in business in no time!
Rather watch than read? Check out this 17-minute video👇
Tools and Parts:
- Klein Voltage Tester
- “Jam Buster” Allen Wrench
- Pipe Wrench (if needed)
- Flashlight
- Screwdriver
- Wire Strippers
- Badger 1/3 HP Garbage Disposal
- Garbage Disposal Power Cord Kit (includes strain relief)
- Plumber’s Putty (if changing the collar)
Project Cost: If you’re replacing your garbage disposal, expect to pay about $100 for the 1/3 HP Badger model as of September 2021. A new power cord kit, if needed, sells separately for around $10.
DISCLAIMER: This blog contains affiliate links, which means that if you click on one of the product links, I’ll receive a small commission.
How to Repair a Garbage Disposal: Basic Troubleshooting
In most cases, you’ll find that the problem is rather simple and easy to resolve. We’re going to look at these issues first since they’re also the quickest to fix, and often cheap (if not free!).
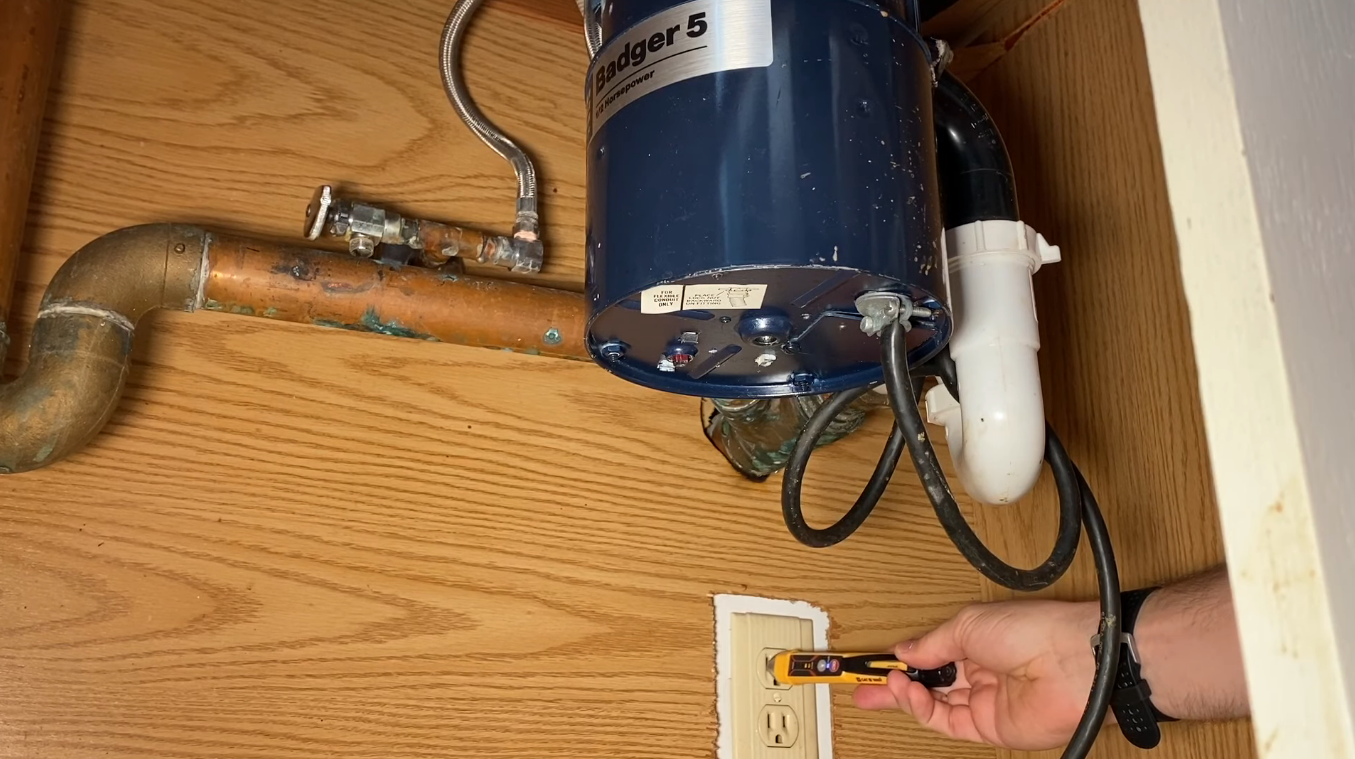
Step 1: Make sure there’s power
Using a non-contact voltage tester, check for power at the outlet where the disposal plugs in (or where the wires enter the unit, if hardwired). If your disposal is operated by a wall switch make sure it’s turned “on” while testing for power. However, if your model is the “batch feed” type then it may have “always-on” power.
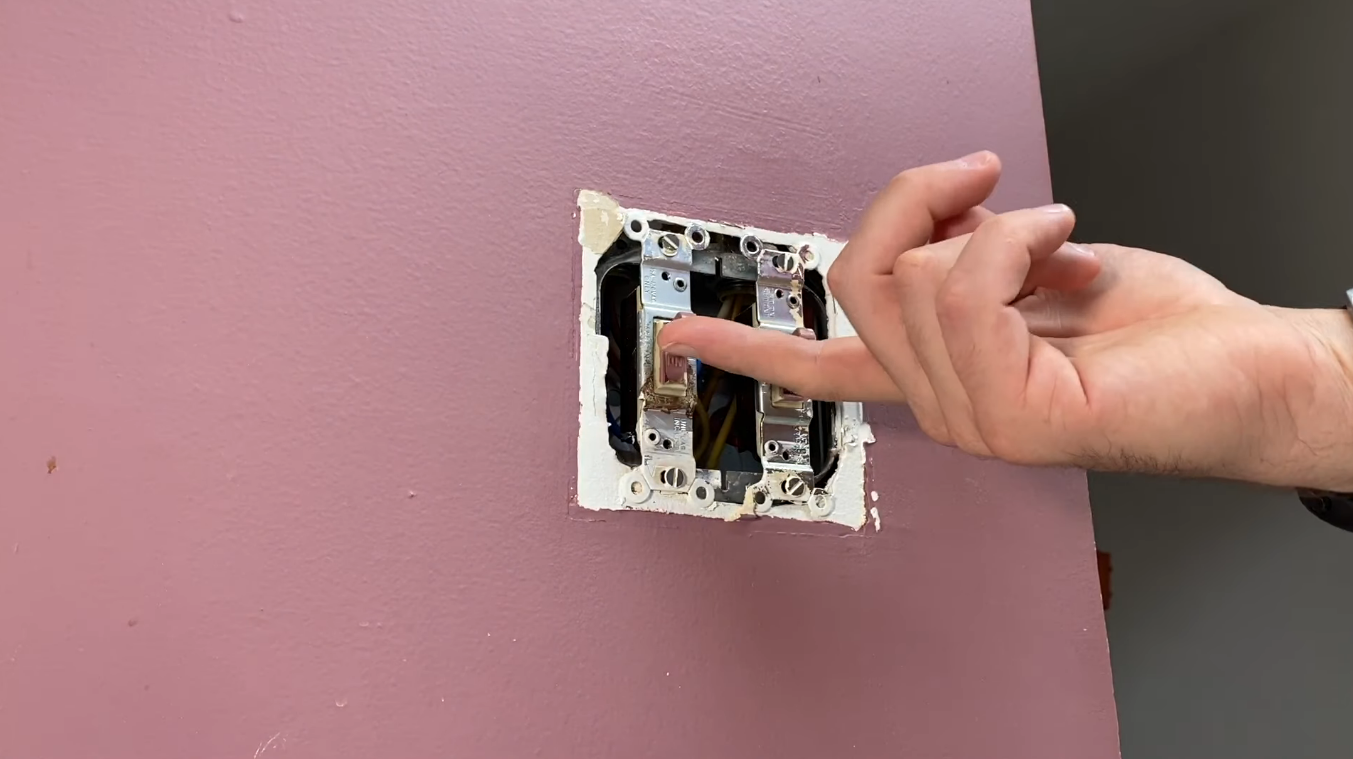
Pro Tip: Some wiring arrangements are designed so that a single duplex receptacle can have one outlet switched for the garbage disposal, and the other powered all the time (say, for a dishwasher). Observe which outlet the garbage disposal is plugged into, and know which outlet you’re testing.
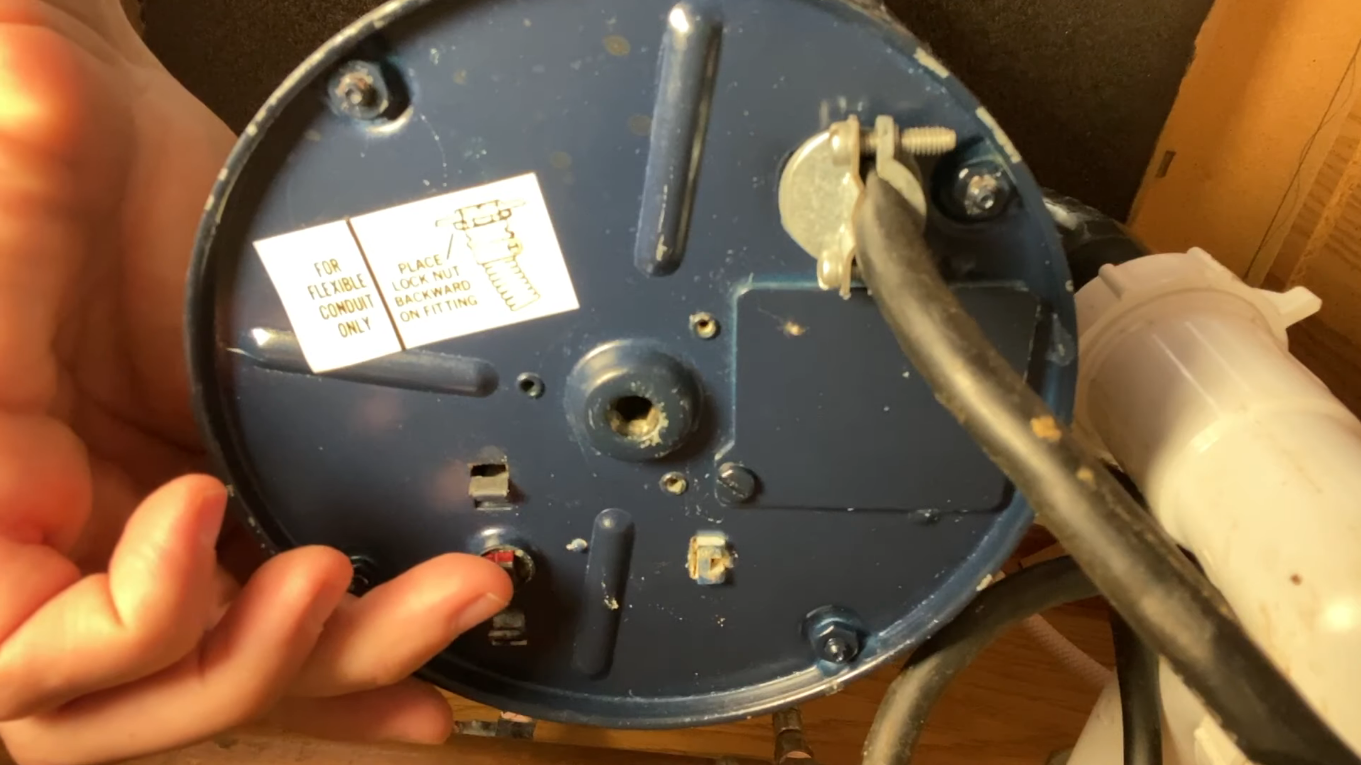
Assuming there’s power, you’ll find a small push-button circuit breaker that may be tripped located on the bottom of the garbage disposal. If tripped, the button will likely be red and protruding. To reset it, simply depress it with your finger until it clicks.
Step 2: Check for a jam
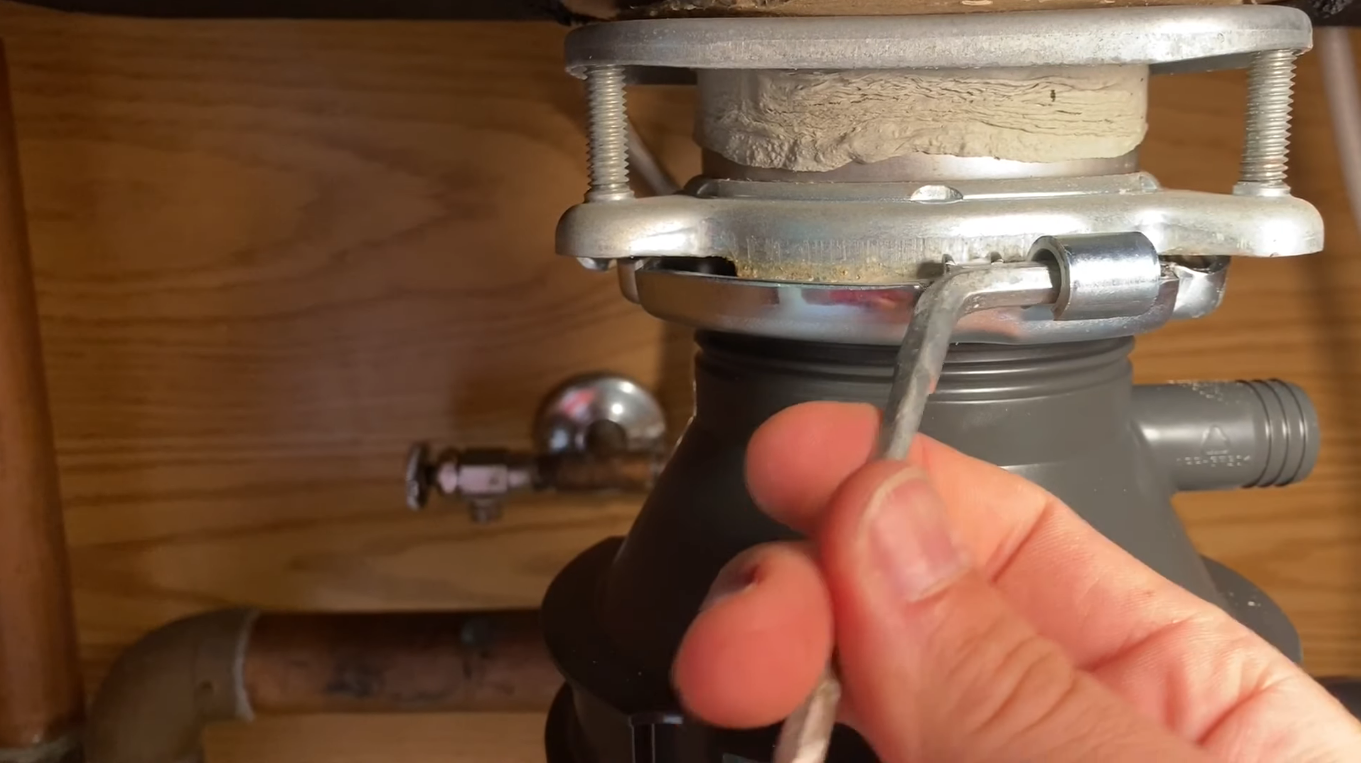
If resetting the breaker didn’t work, or if the motor hums for a few seconds and the breaker trips again, then you may be dealing with a jam. Luckily, most garbage disposals come with a tool called a jam buster that’s designed to do exactly what its name suggests.
The jam buster is essentially an offset Allen wrench that allows you to manually crank the motor’s driveshaft by hand to free up a jam. Don’t see it? Check under your sink! Often they’re left and forgotten after installation. If not, replacements are readily available.
With the power to the disposal off, insert one end of the jam buster into the center of the underside of the unit. It should fit snugly into a hex head in the motor driveshaft. Then, using the offset end of the tool like a crank, turn the shaft in alternating directions to help free the jam if there is one.
Even if the disposal is jammed, you should meet little resistance in getting it to turn as it frees up. Once things are moving freely, restore the power and test again. In the majority of cases, this will resolve the issue and get the disposal working again. However, if your disposal still isn’t working then an internal inspection is next.
How to Replace a Garbage Disposal – Part 1: Removal & Inspection
Didn’t get the disposal to move easily (or at all) with the jam buster? Did you encounter a hard grinding or “crunchy” resistance? If so, it’s time to inspect the inside of the unit for more severe jams or damage. Removing the disposal for inspection is not difficult. Plus, it’ll put you a step ahead in the event you need to replace it anyway.
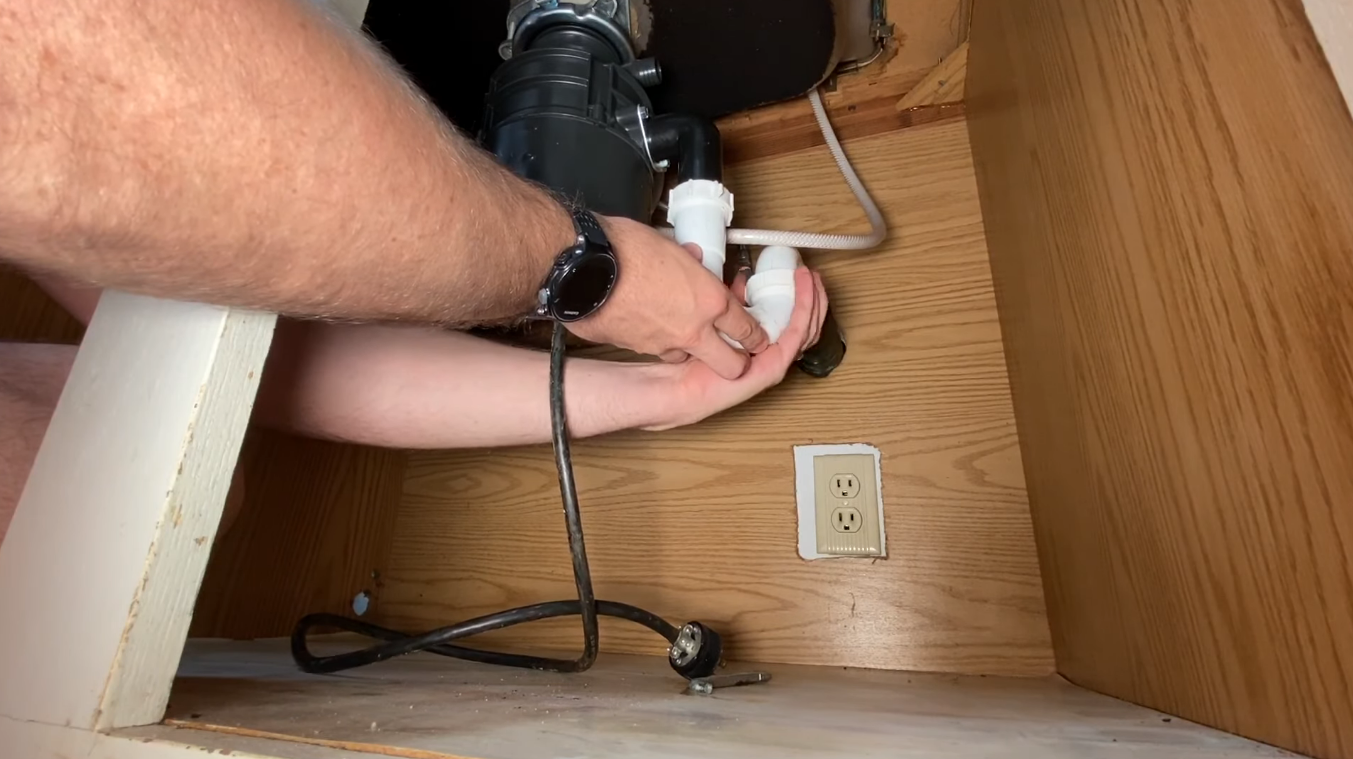
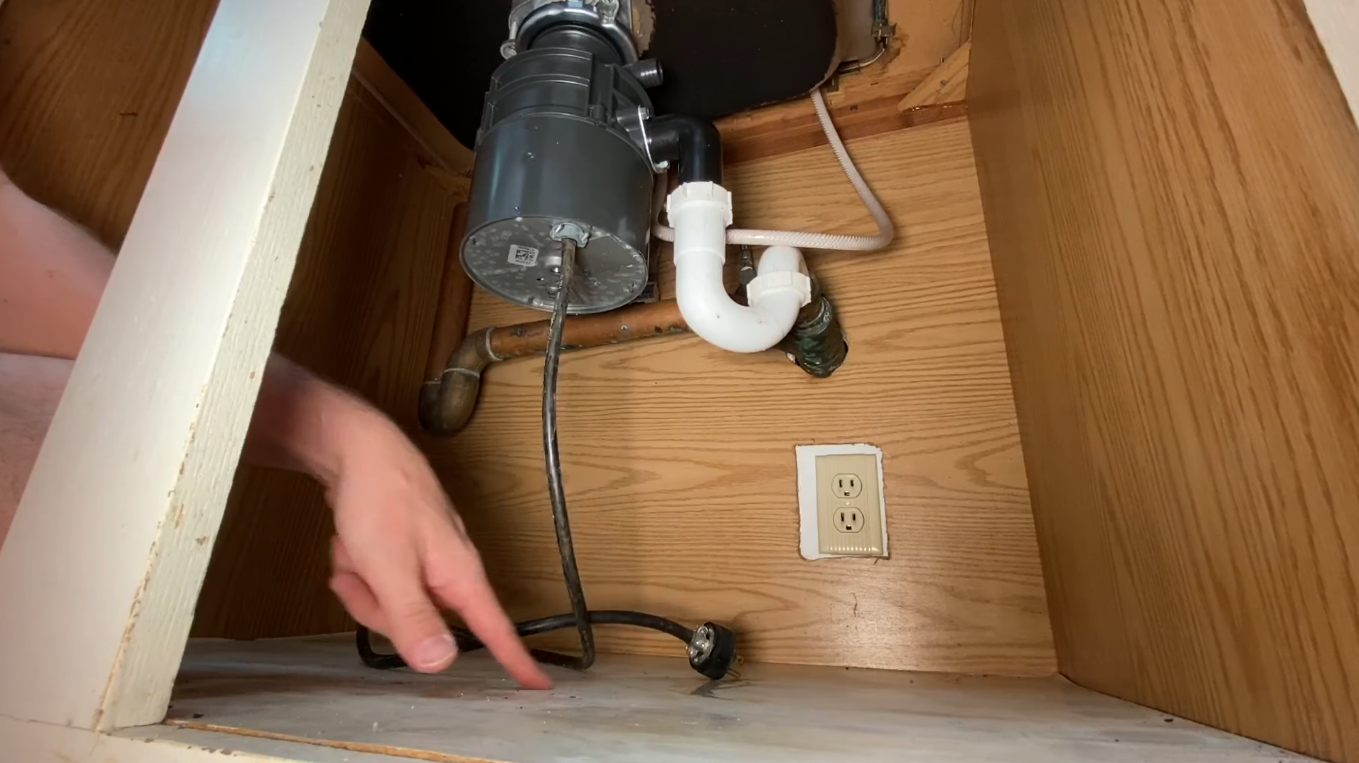
Step 1: Disconnect the plumbing
Loosen the nuts holding the p-trap in place and remove it. The nuts might be only hand or finger-tight. However, if you’re dealing with an older drain (or one made with metal rather than plastic) – you might need a wrench.
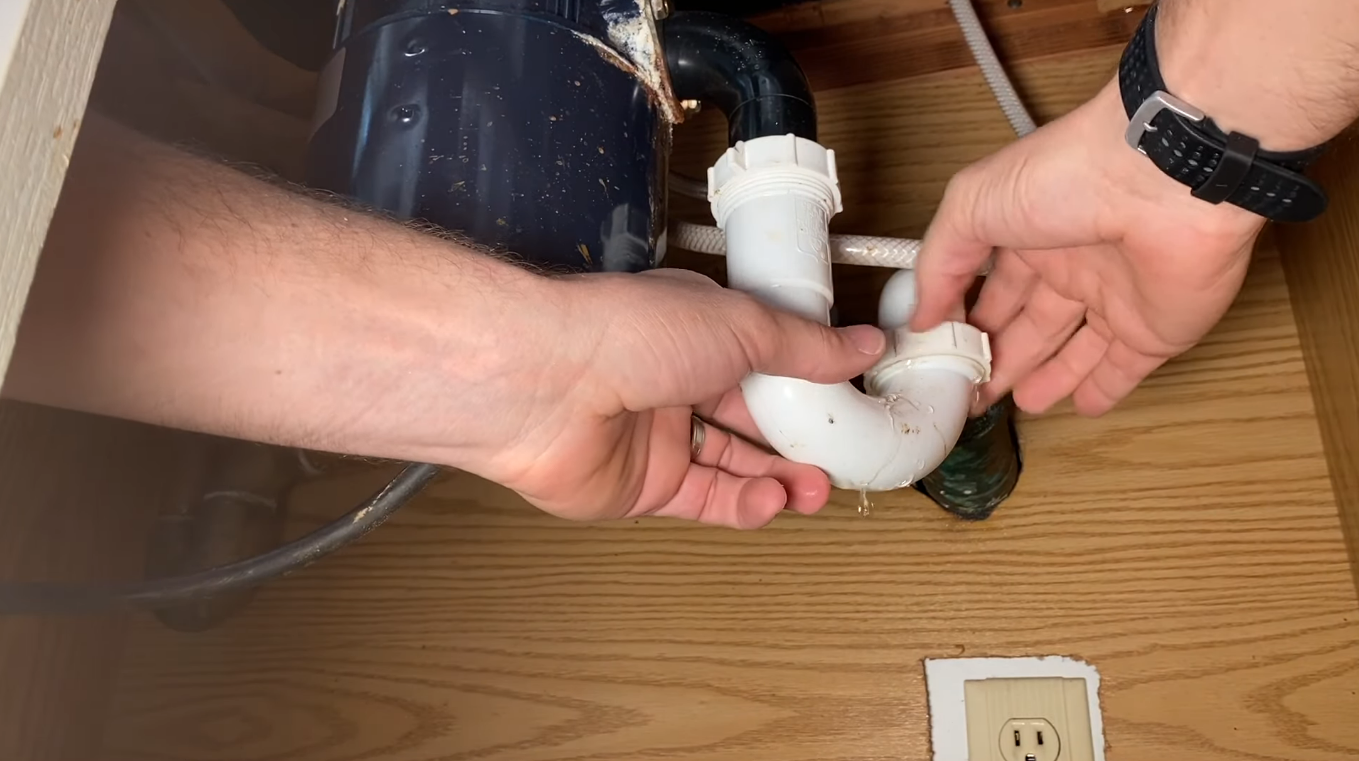
Next, disconnect the dishwasher drain, if there is one. This will be a flexible hose connected to a barbed fitting near the top of the disposal. It’s usually held in place with a hose clamp.

Pro Tip: Be ready with a bucket and towels in case standing water flows out of the drain lines as the connections are broken. And be prepared for some grimy stuff to come out of the trap when it’s disconnected. You may even want to wear gloves.
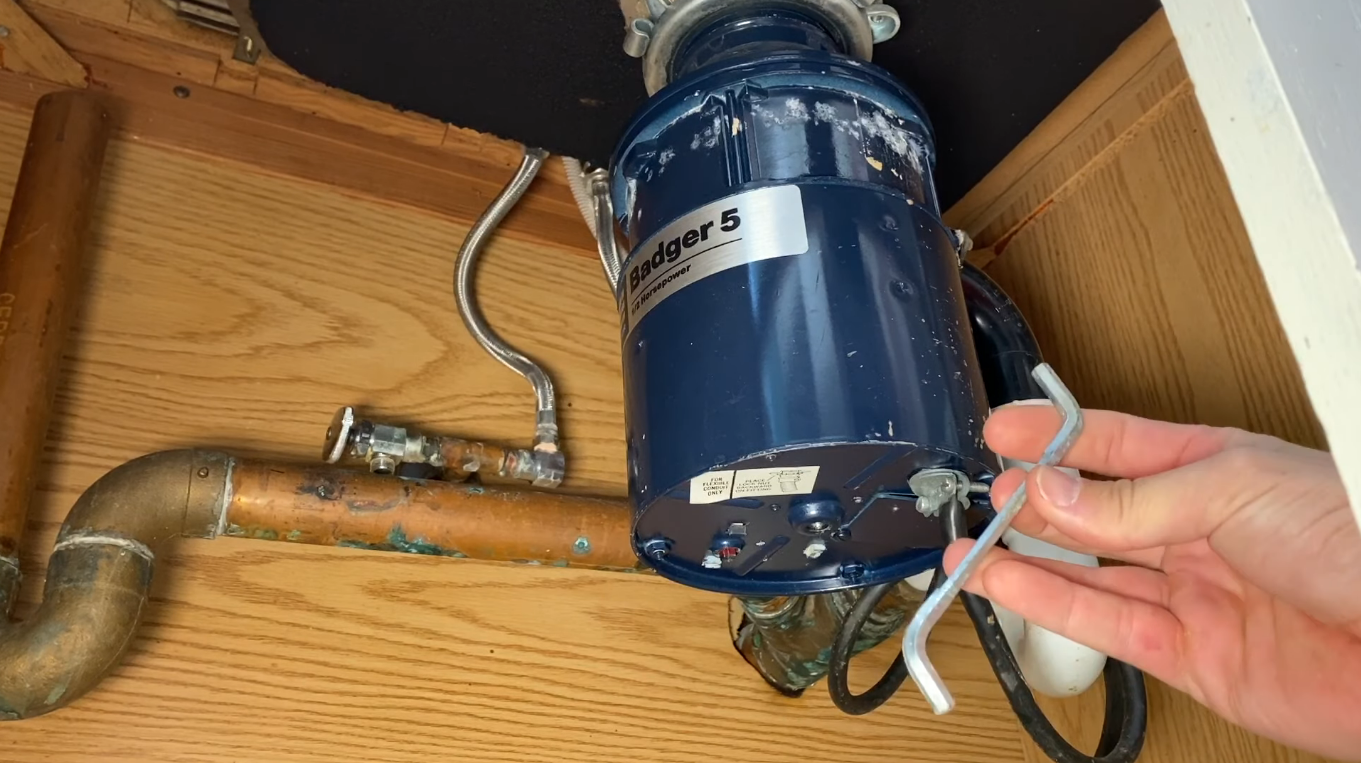
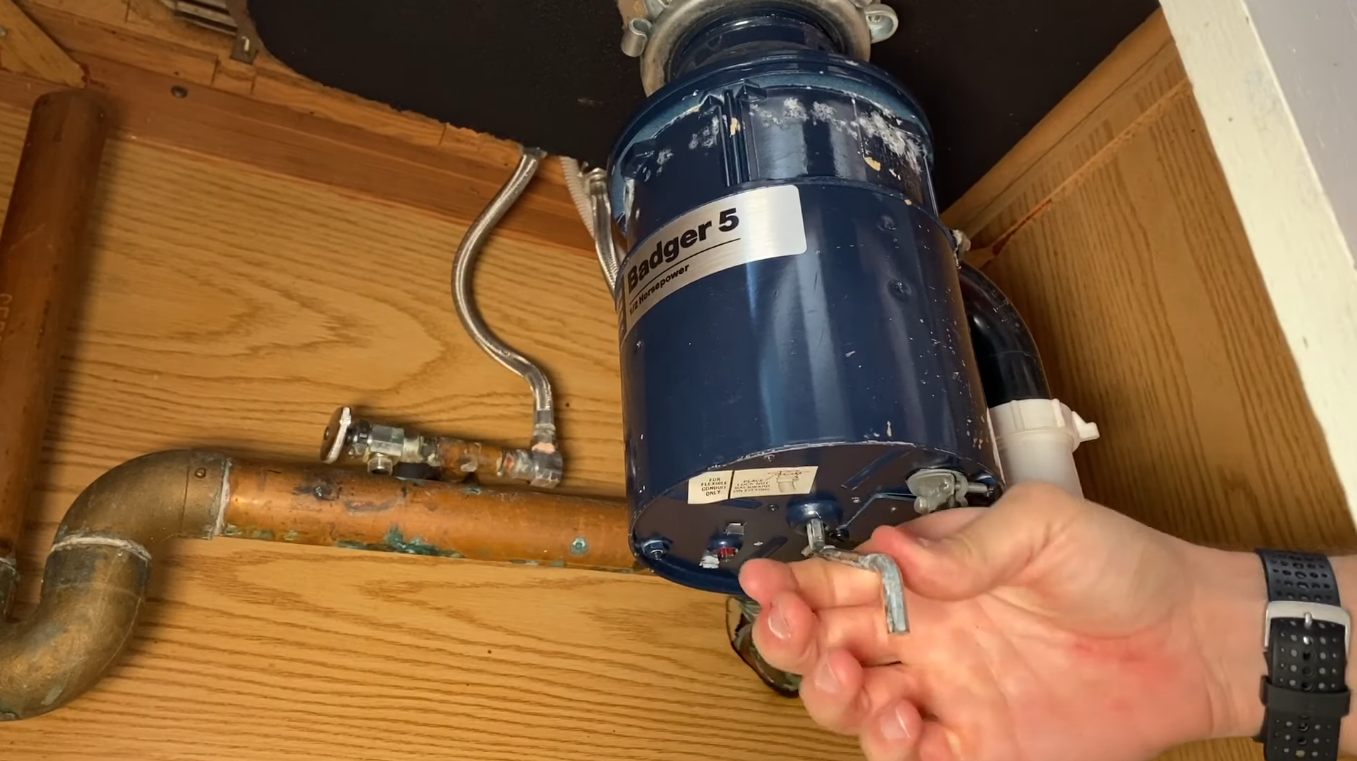
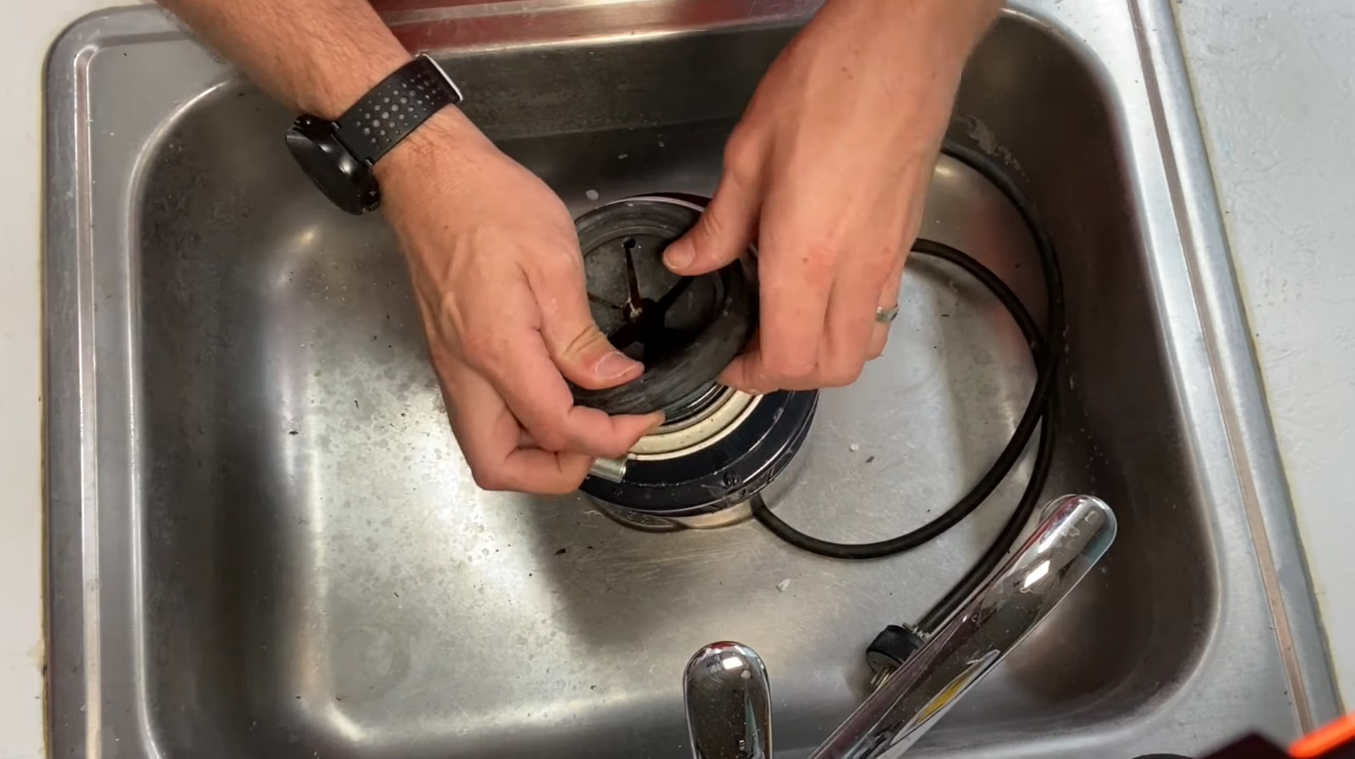
Step 2: Detach the disposal from the sink and remove
Once the unit is unplugged and disconnected from the plumbing, it is ready to be removed. Simply turn the retaining ring at the top of the disposal clockwise and it will disengage from the collar holding it to the sink.
Pro Tip: The jam buster tool can also be inserted into one of the “ears” on the disposer’s retaining ring to gain leverage for tightening or loosening the disposal from the collar.
Step 3: Inspect for jams or damage
Lift the disposal onto a counter or surface where you can examine it. From here, remove the rubber baffle to get a clear view inside. Look down into the opening, with a flashlight if necessary, and try to identify any clogs or damage.
How it Works: A garbage disposal uses a spinning disk to fling food waste towards its sidewalls, which are textured like a grater. At the same time, a pair (or more) of spinning lugs at the edge of the disk rub the waste against these textured sides, reducing it to a wet pulp.
Most jams occur because an object becomes wedged between one of the lugs and the sidewall. This could happen with anything from a piece of food like a chicken bone, to a piece of silverware or bottle cap that inadvertently fell down the drain.
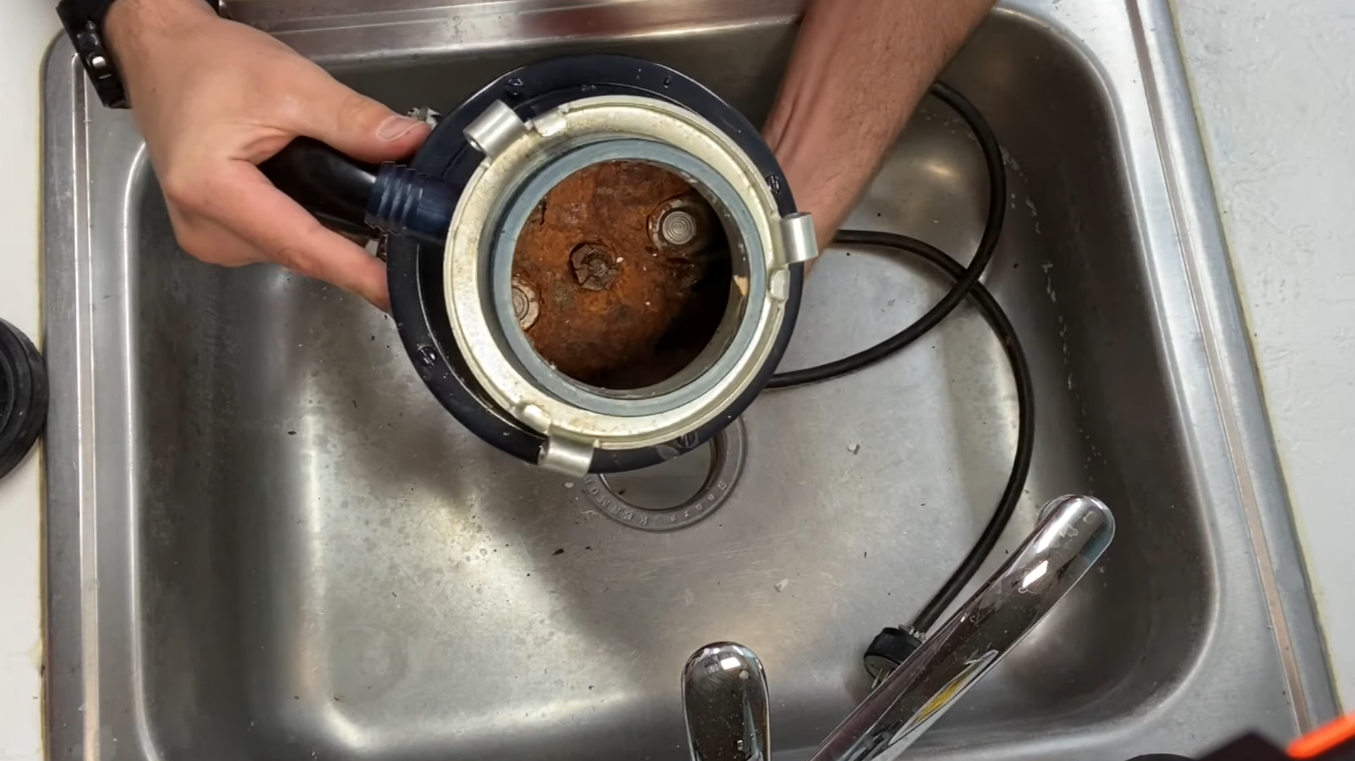
If you don’t see any jams, there may be other damage that’s easy to spot. With the unit removed, you can clearly see that in my case, the issue is actually severe deterioration on the inside, with the disk having rusted clean-through. It’s unsurprising the motor was seized, and this disposal obviously needs to be replaced.
Even if you couldn’t find any jams or damage, it’s still possible there are mechanical problems underneath the disk that you can’t see from the outside. It’s probably safe to say that at this point in the troubleshooting if your issue still hasn’t been resolved, your disposal probably needs to be replaced too.
How to Replace a Garbage Disposal – Part 2: Prepping to Testing
Step 1: Prepare the plumbing connections
First, install the drain elbow on the side of the new garbage disposal. This will typically be held in place with a plate and screws sandwiching a gasket between the flanged end of the elbow and the side opening of the disposal.

If you’ll be using the dishwasher drain inlet, it’s important to break out the plastic knockout which keeps it sealed for installations without a dishwasher. Simply tap a screwdriver into the opening to free the knockout plug. Don’t forget to remove the piece of plastic from the disposal before installation!
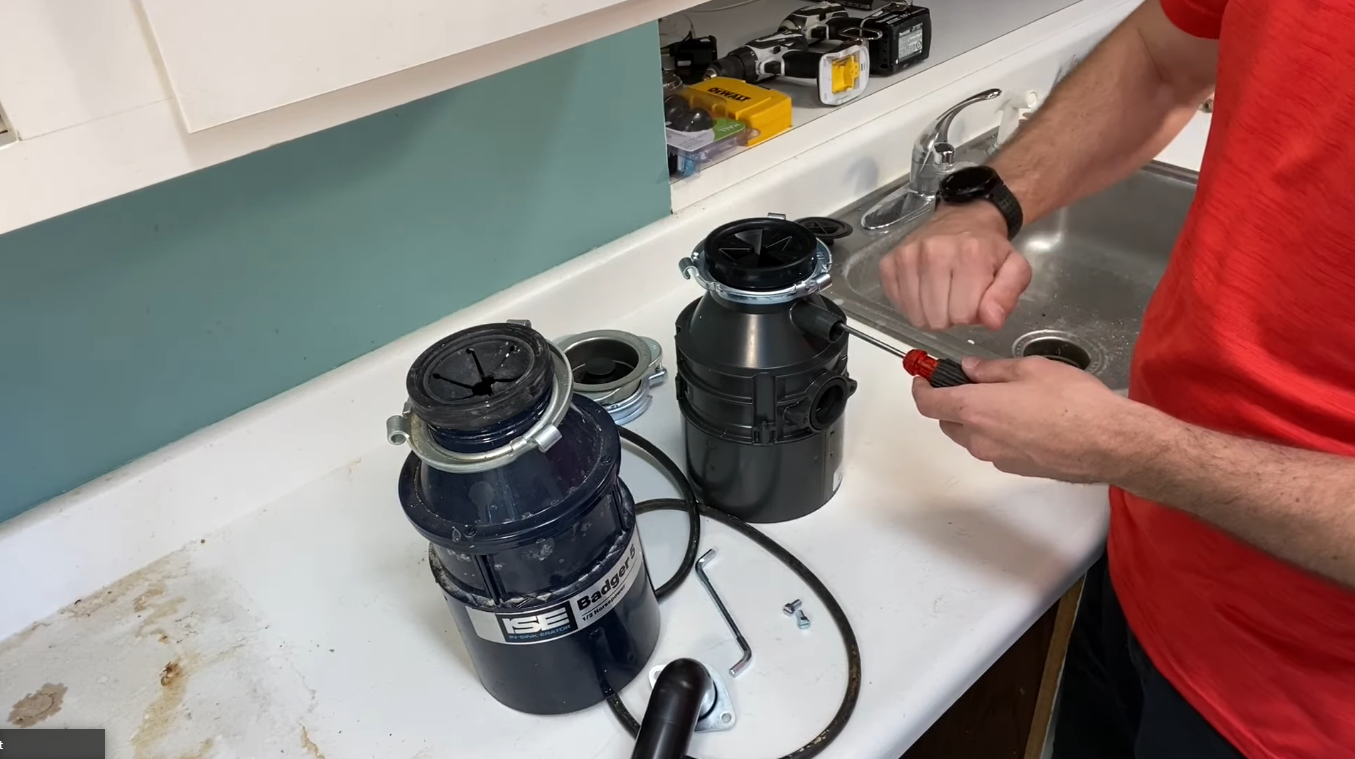
Step 2: Remove the power cord (if reusing)
If the power cord and strain relief from the old garbage disposal are still in good condition, there’s no reason not to reuse them. Remove the cover plate from the bottom of the old unit and loosen the screws on the strain relief fitting.
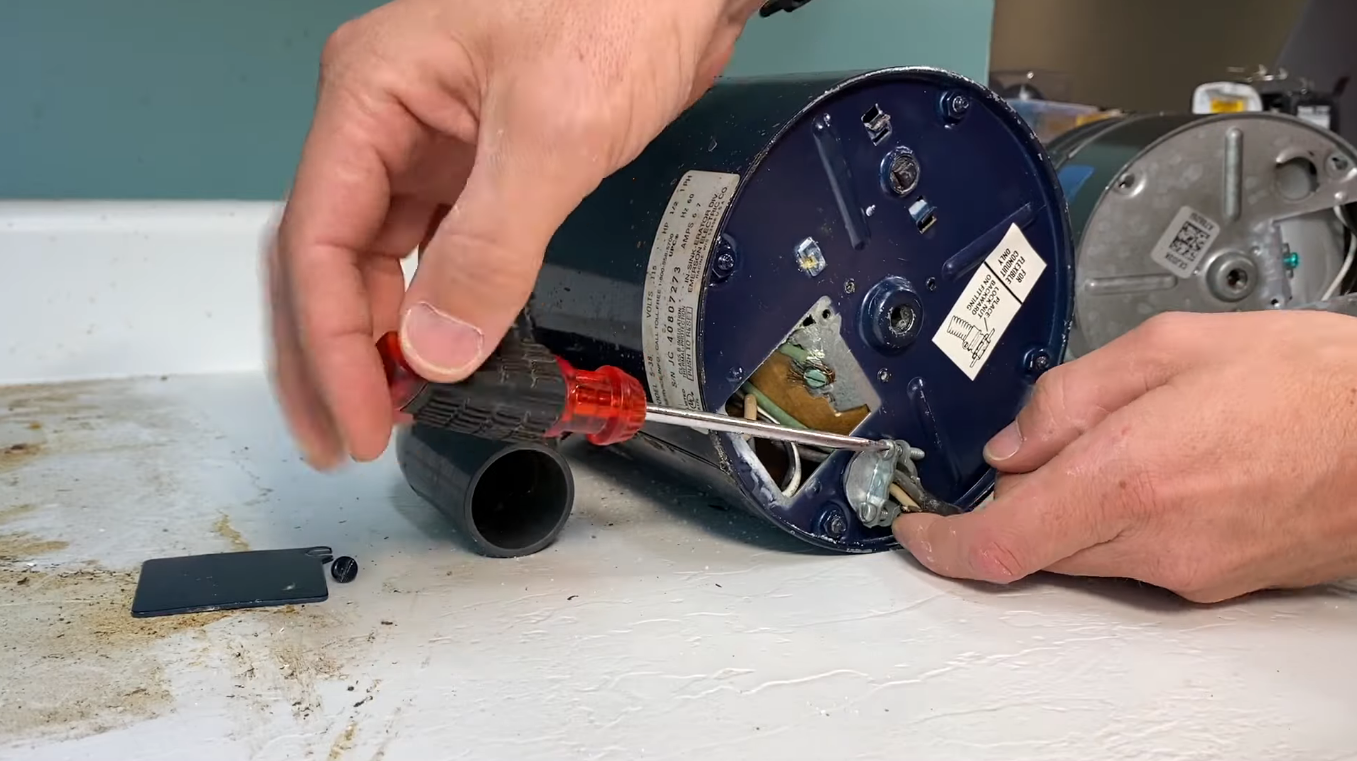
Disconnect the wires, then remove the cord. Unthread the strain relief fitting from the opening and reinstall the cord and fitting (or a new set) on the new unit.
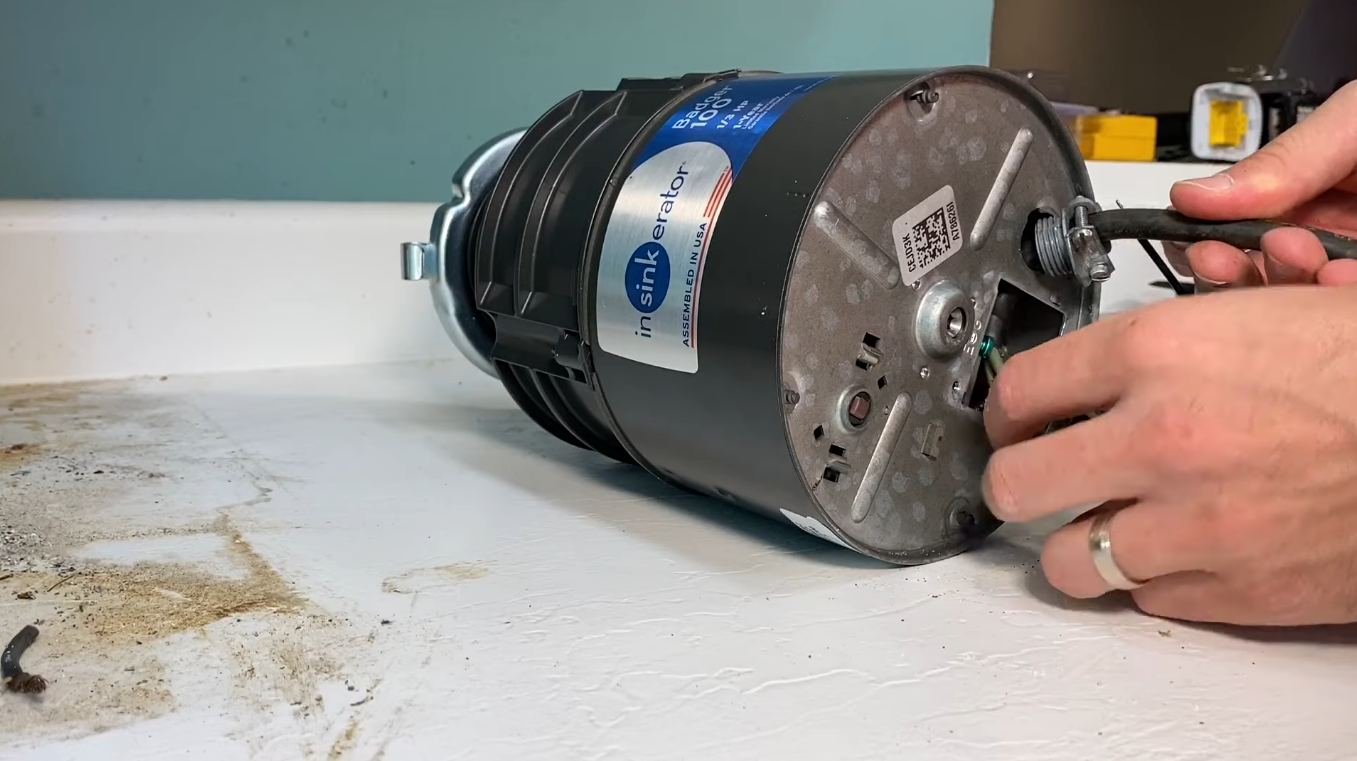
Step 3: Connect the power cord
Thread the cord through the strain relief, then into the cable opening on the new unit. Use your fingers to guide the wires in through the opened cover plate.
Tighten the screws on the strain relief, making sure the fitting clamps around the outer insulation jacket and not only the individual interior conductors. Using wire nuts or Wago lever nuts, securely make the connections: black-to-black (hot), white-to-white (neutral), and green to the green (ground) screw. Finally, replace the cover plate.
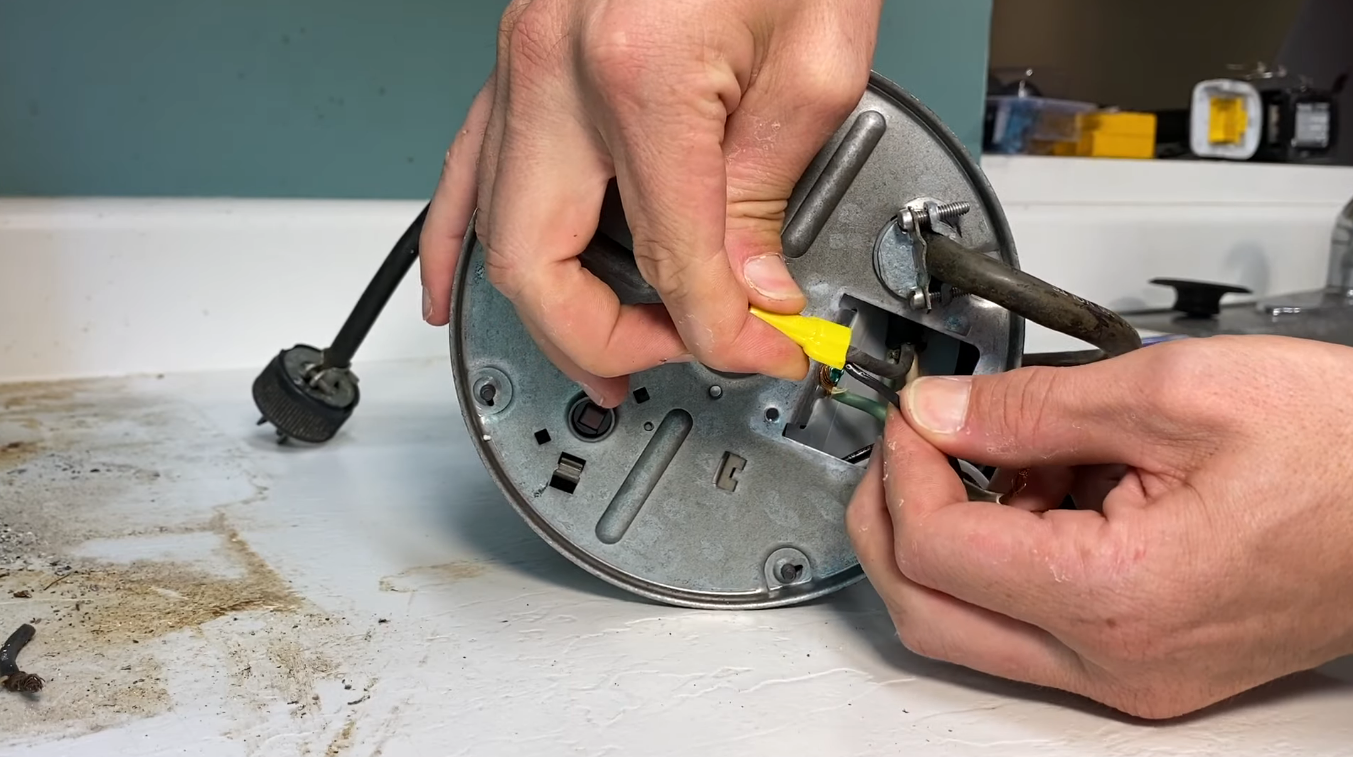
Pro Tip: When reusing the old cord, as long as you have sufficient length to work with, it’s best to trim and re-strip the wires for a more secure connection and neater finish.
A replacement cord kit that includes the threaded strain relief fitting can be purchased separately if needed. Just remember that a new cord is typically not included with a new garbage disposal.
Step 4: Install the collar if needed
Especially if your new garbage disposal is of the same model or manufacturer as the old one, you may find that you can reuse your existing collar. This will simplify the installation a bit. You can test fit the new disposal to make sure it fits. If so, proceed right to step 5 below.
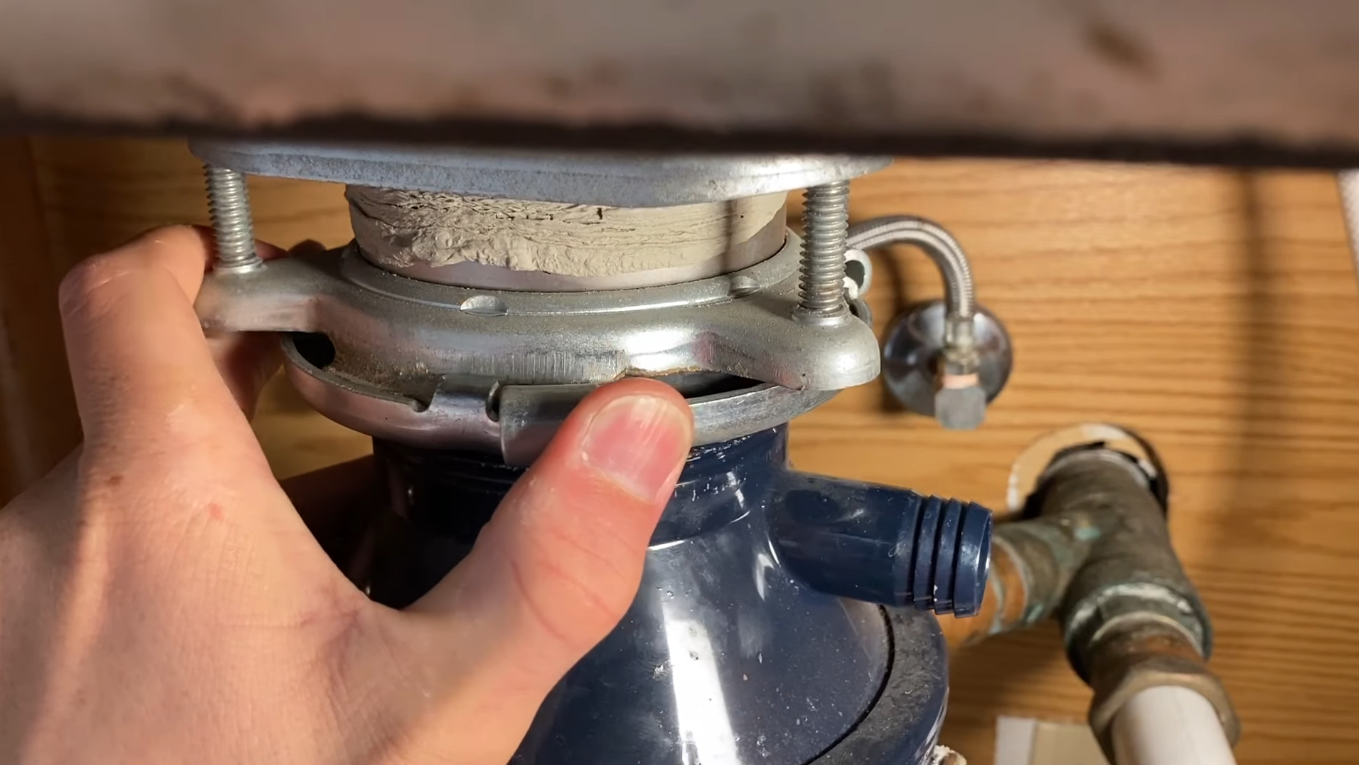
If you must replace the collar, follow the instructions that came with your new disposal as designs vary. The collar will consist of a flange set into the drain opening from above, and a yoke attached to the flange from underneath the sink, that holds the flange in place and provides a mounting point for the disposal.
When installing a new collar, a bead of plumber’s putty must be used to seal between the sink and the flange. Roll a “snake” of putty and press into the underside of the flange before seating it into the drain opening.
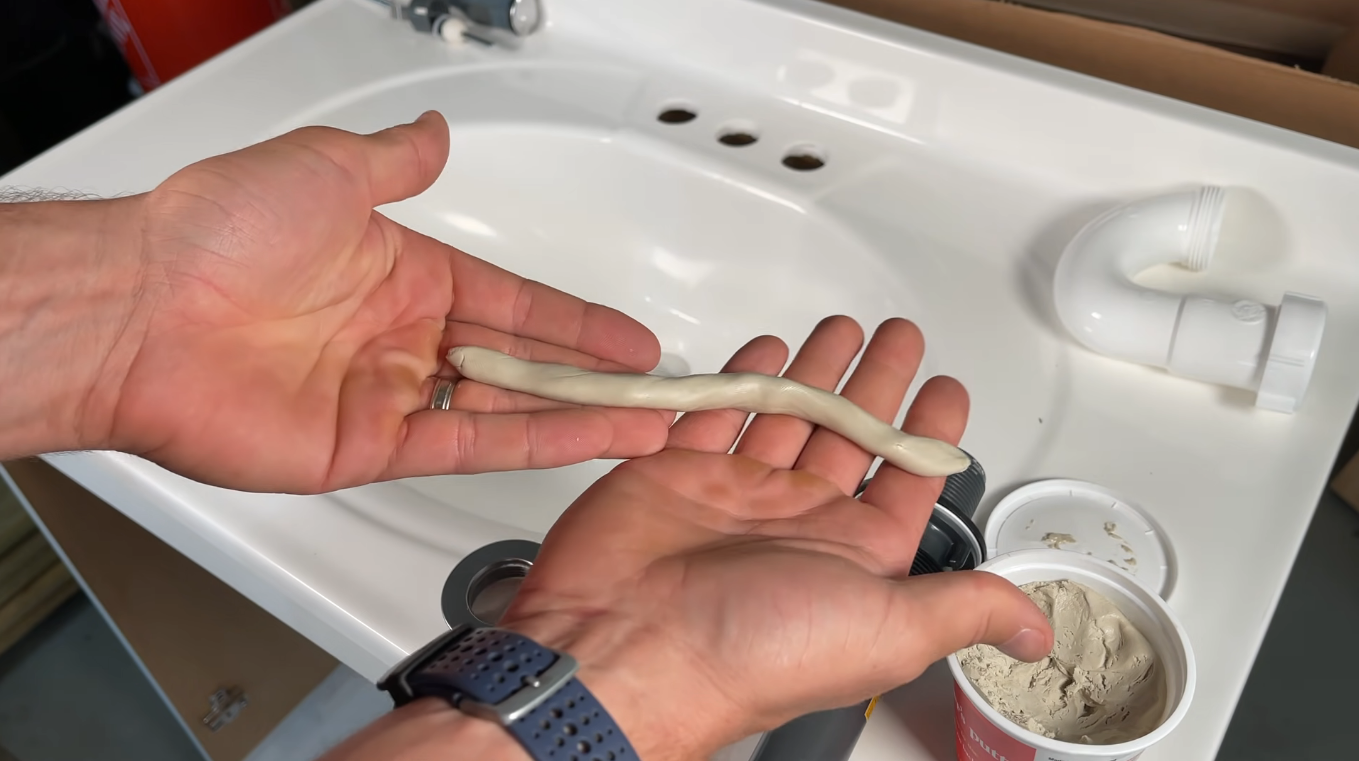
Pro Tip: Be certain to fully clean any old putty from the opening prior to installing the new flange. This will make an adequate seal.
As the flange is tightened down from beneath the sink, the putty is squished between the flange and the sink forming a watertight seal. The excess putty will be squeezed out and can be peeled off with your fingers like modeling clay.

Step 5: Connect and test
At this point, lift the new unit up into place and turn the retaining ring onto the collar. Be sure to position the disposal to align with the drain, and ensure all three tabs on the ring are engaged with the collar. Slide the connecting nut and compression ring up onto the elbow, then reinstall the trap and tighten the connections, including the retaining ring.

Finally, reconnect the dishwasher hose if applicable, and proceed to test.
Wrap Up and Extra Tips
With everything buttoned-up, it’s time to test. Before restoring power and operating the disposal for the first time, run the water for several seconds to fill the dry grind chamber. This will give you an opportunity to check under the sink for any leaks.
Provided everything is leak-free and working properly, below are a few things you can do to help prolong the life of your garbage disposal:
- Always run cold water while the garbage disposal is running. Never run the disposal dry.
- Avoid putting fats or oils down the disposal. They’re caustic and can congeal, leading to clogs, slow drains, and disposal failure.
- Don’t assume your garbage disposal is powerful enough to grind up very hard items like peach pits or chicken bones. Some are, but many are not. It’s best to know for sure before you try.
- Keep the jam buster tool somewhere safe where you’ll remember it, in case you need it to clear a jam.
With good care and maintenance, replacing a garbage disposal is hopefully one job you won’t be repeating for a while. And you’ll save a lot of money by not having a professional plumber do the job.


