
 My Account
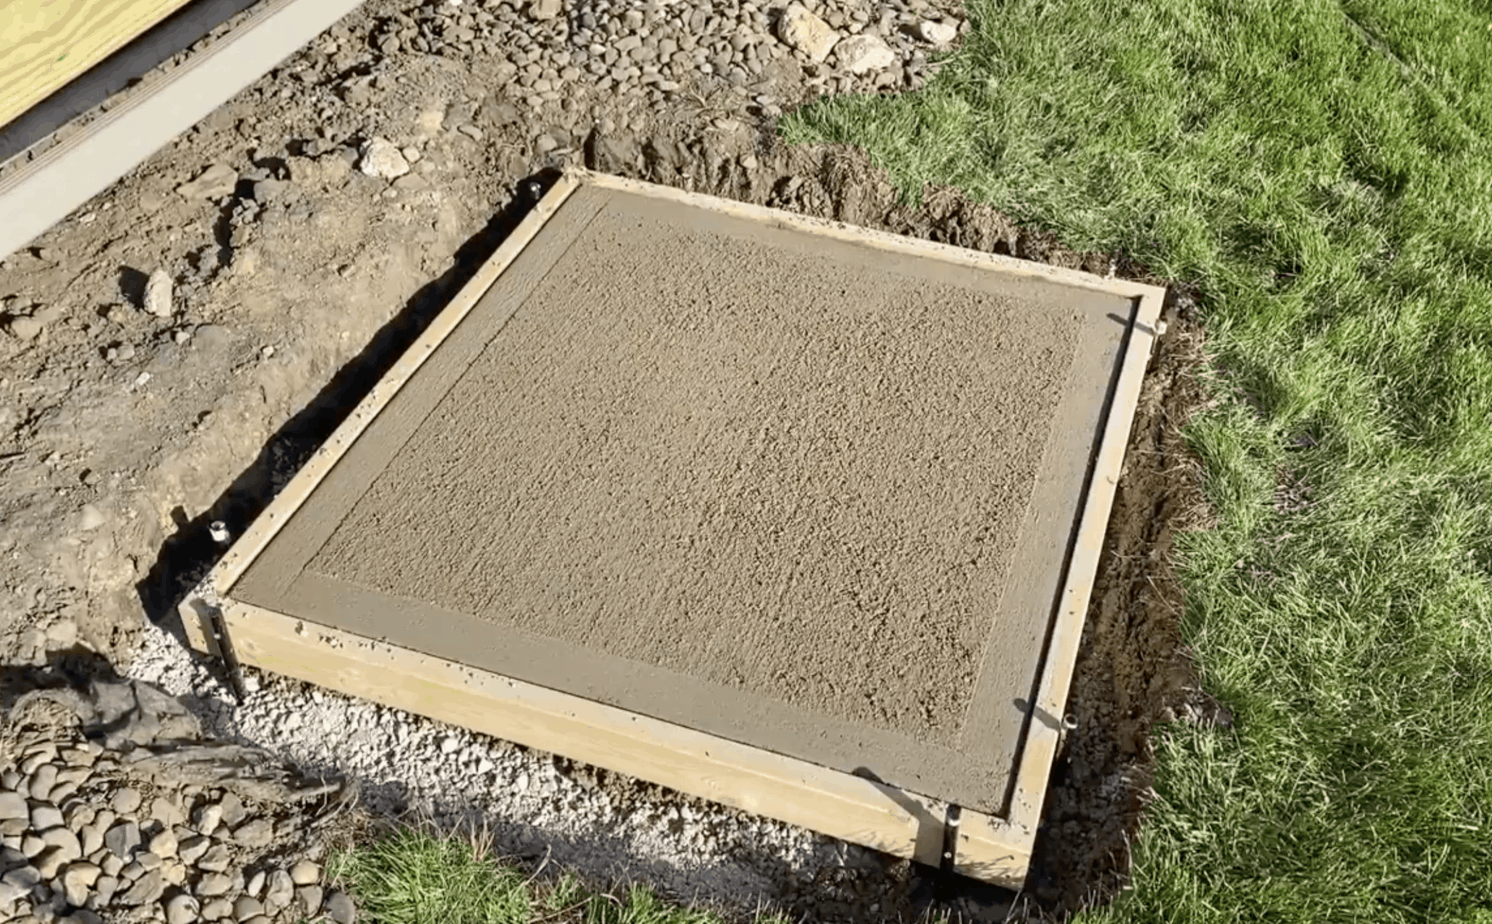
Concrete pads are very versatile. They’re a great landing pad for deck stairs, an entryway, a shed, or even an air conditioner condenser. And while concrete can be a little intimidating to work with for some of us DIY weekend warriors, it is an approachable project. But I will warn you – this project is a workout! From digging holes to hauling 60 pound bags of concrete- you’ll definitely break a sweat.
In this blog, I’ll walk you through how to create a concrete pad in 7 steps. For my project, I was making a landing pad for a set of steps coming off the deck. But this tutorial will likely apply to whatever concrete pad project you’re working on.
Please keep in mind, I am by no means a professional when it comes to concrete. I have a little experience – but like most of you, I do make mistakes! So there are a few lessons learned that I’ll share with you at the end.
If you’d also like to watch this project, check out this 14-minute video below.👇
Tools:
General excavation:
- Spike & pick
- Shovel & small hand tools
- Wheelbarrow
Making the frame:
- (2) 8-foot 2x4s (this is because my pad will be 45” x 48” )
- IRWINQUICK-GRIPCorner Clamp
- 6 Inch Irwin Quick Clamps
- Speed square
- Makita Corless Drill Combo Kit
- Johnson Torpedo Level
- Stakes (wood or metal)
- Wire Mesh (this is to strengthen the concrete. I got a 4 x 8 foot sheet)
- Stanley Tape Measure
- General purpose deck screws
Concrete tools:
- 2×4 piece of wood (used as a screed to strike it off)
- General purpose concrete
- Pile of rocks (serves as the base)
- Gloves (don’t forget gloves – concrete can really dry out your skin!)
- Concrete Float
- Concrete Edger
Concrete Pad Cost:
$160. Depending on your toolkit and the size of your pad, this project may cost you a bit more or less.
DISCLAIMER: This blog contains affiliate links, which means that if you click on one of the product links, I’ll receive a small commission.
How To Pour A Small Concrete Pad – Deck Stair Landing (7 Steps)
Step 1: Make the Frame
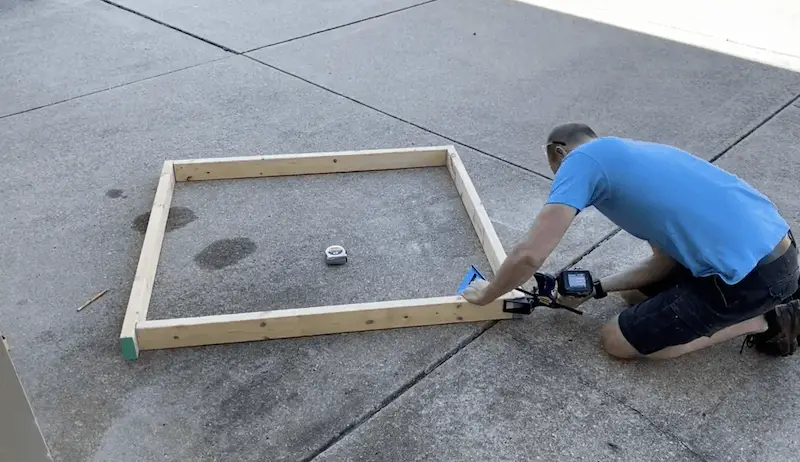
Cut your wood to the desired size. I also used a corner clamp to help keep everything square at 90 degrees while I attached the 2x4s together. (Go to minute @3:05 to see how I made my frame.)
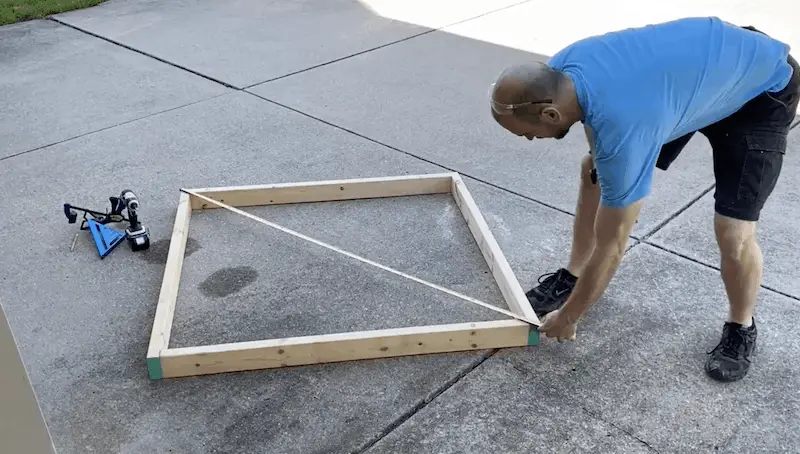
Pro tip: Measure both diagonals of the square frame to ensure they’re the same length. This is a sure sign your frame is square.
Step 2: Position the Frame
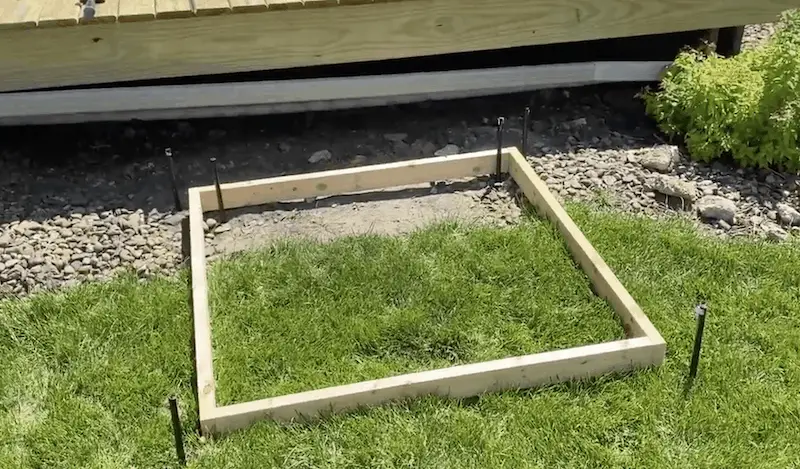
Roughly position the frame where you want it to go. For my project, I decided on a spot based on where my deck stairs were going to be (which I marked with stakes, see photo above). I also knew I wanted to put stairs on the other side of the deck- so I wanted to make sure both sides were aligned.
At this stage, I didn’t have my stringers made yet. This is because I wanted to get the platform landing pad in place prior to deciding exactly how high each of the risers needed to be. But I did know I wanted three steps with each step being roughly 10 inches wide from the treads. So I measured back from the surface and I put the stake in roughly where the “back side” or “outside” stringer will land. And I also used a stake positioned inside the concrete pad to roughly indicate where the outside stringer will land on the concrete pad.
Again, it’s a fairly rough layout at this stage since it’s before any digging and leveling.
Step 3: Dig
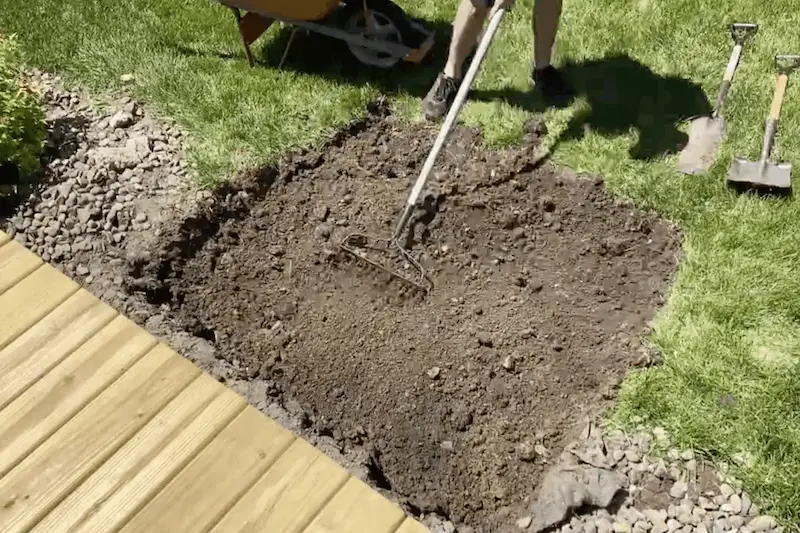
Here’s where the workout really comes in! Now that you’ve got your frame made and positioned, you’ll start to dig. For my situation, I started digging from the lower side. I went about 9 or 10 inches deep because I had 5” of concrete and also 4-5” of base underneath the concrete.
Keep in mind, depending on the slope of your space – you’ll have to dig a little more on one side than the other to get everything level. But I recommend having a slight slope out for rain so it can drain off properly.
Step 4: Make your hole flush in the back
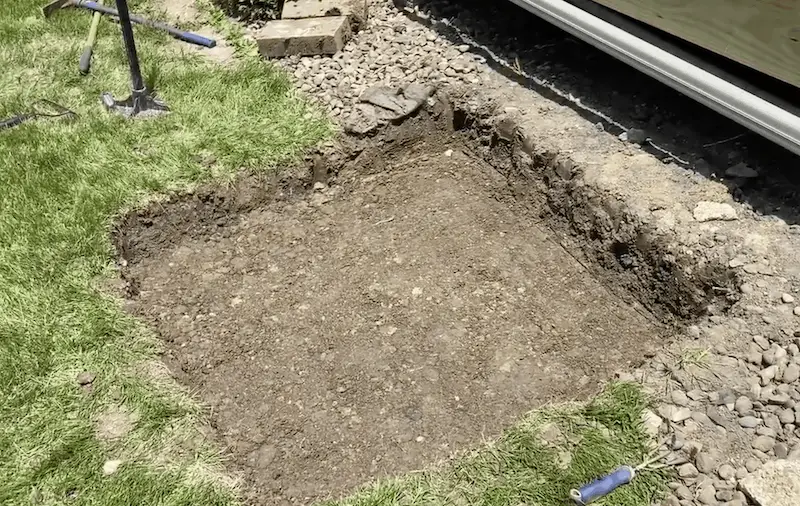
Once you have the oversized hole dug – try to make it flush in the back with the concrete. I also suggest giving it a little bit of a “lip” that’s above the grass that’ll slope down with the new dirt. And then put some grass seed down.
Step 5: Lay Base and Wire Mesh Before Concrete
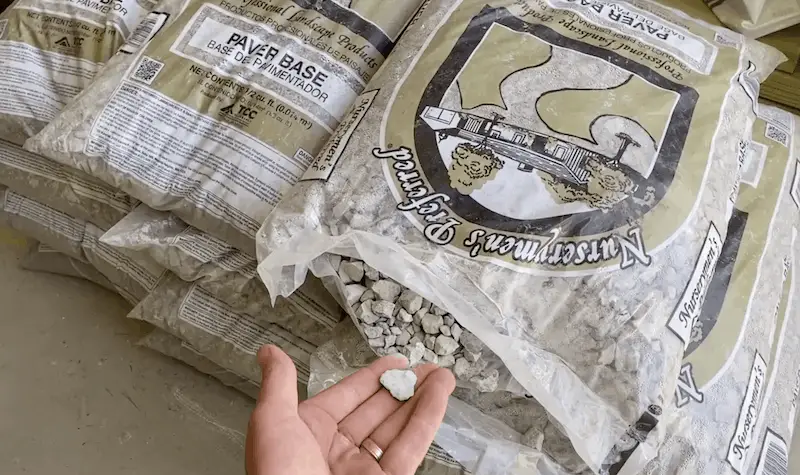
You need to have a good base under your concrete. I put about 4″ to 5” of base before I poured any concrete. Since I couldn’t find exactly what I was looking for at the store, I used a paver base, which has a mix of aggregate sizes and dust refines. This will compact down underneath the concrete and also provide necessary drainage.
To help strengthen the concrete pad I used a sheet of wire mesh cut to fit inside the wood frame. You will also want to make sure the wire mesh is not sitting directly on top of the base as you want it in the middle of the concrete when poured. I did this by cutting small “X” patterns of the extra wire mesh and bending into small chairs that the sheet of wire mesh would sit on top of about 2 inches off the paver base.
Step 6: Mix the Concrete
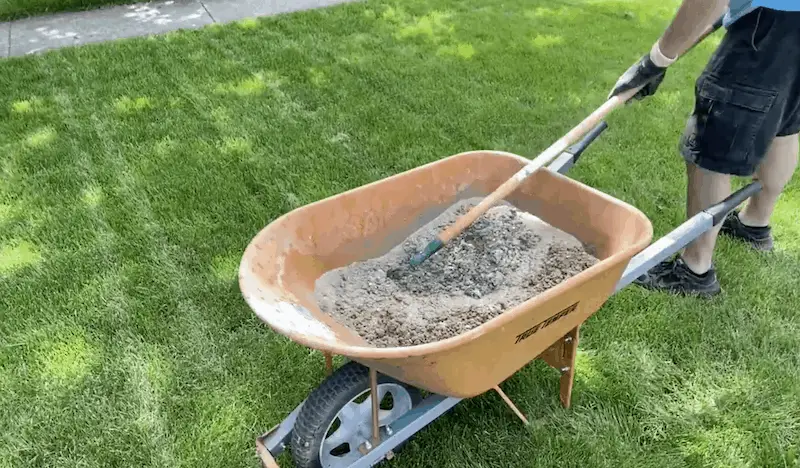
Overall, I used 11 bags of general-purpose concrete to get a 45″ x 48” concrete pad that was 5” deep. Here’s a quick breakdown of the process – which was essentially following the instructions on the concrete bags:
- Dump the concrete mix into a wheelbarrow.
- Add water per the instructions. Mix it together
- Add more water & mix (repeat over and over again – you can also rent concrete mixers which will definitely save you time and labor. Since my project was relatively small – I found hand mixing to be doable.)
Step 7: Pour the Concrete
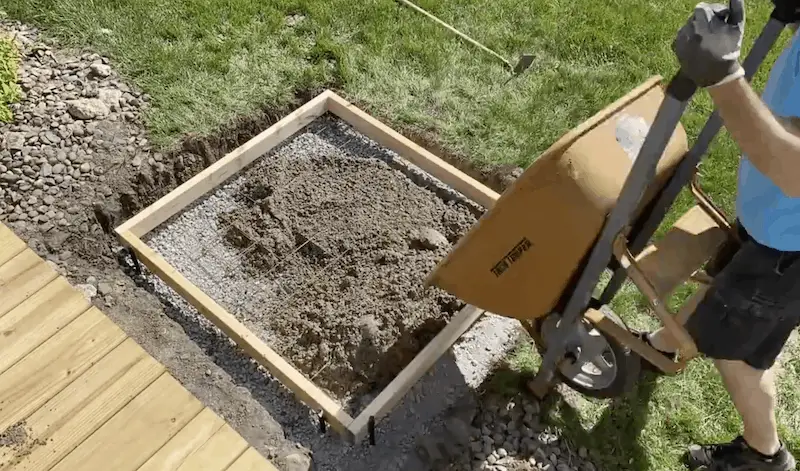

In the final phases, you’ll start off by piling the concrete into the hole over the base. Get the concrete to where it looks like you have enough and start to strike it off with a 2 x 4. You will use the sides of the frame as a guide and with a sawing (back and forth) motion pull the extra concrete to the front of the frame.
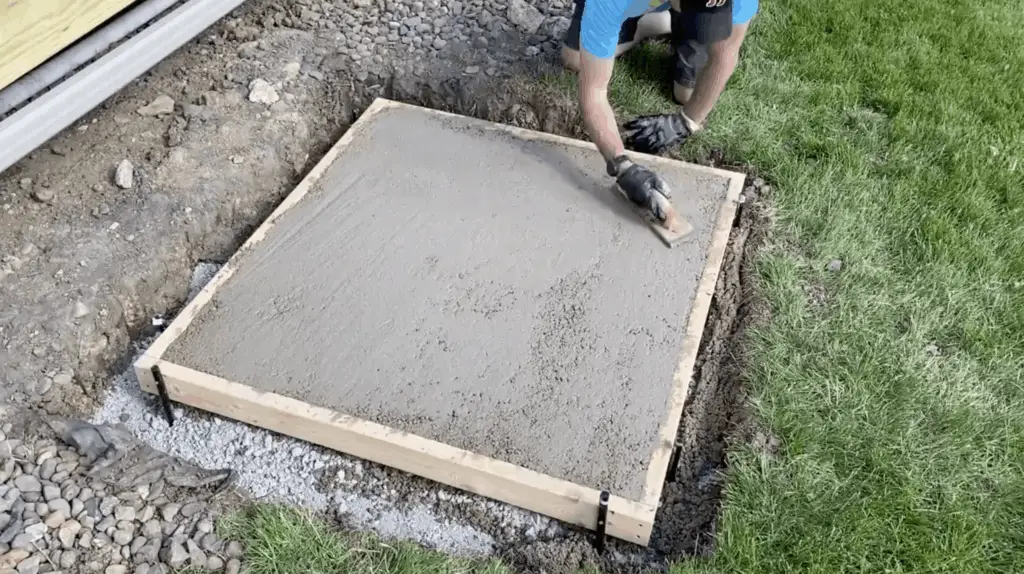
Once you have the surface roughly smoothed off you will move on to floating the pad with a hand float. During this step, you are looking to smooth out the surface and bring the water to the top where the surface will have a sheen.

Once I have everything floated I will do an initial round of edging just getting a rounded off edge along the perimeter of the concrete pad along the inside of the wood frame
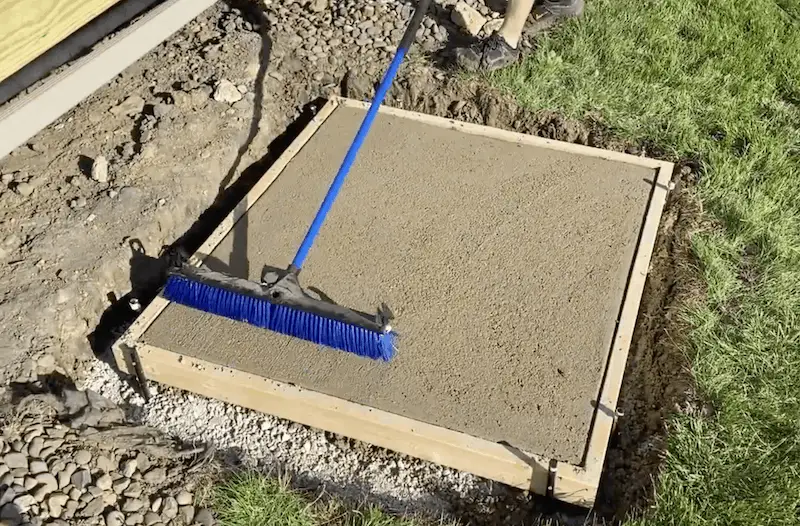
Then, after about 45-60 minutes of dry time (this will depend on the moisture content of your concrete) I will brush the surface will a standard broom.
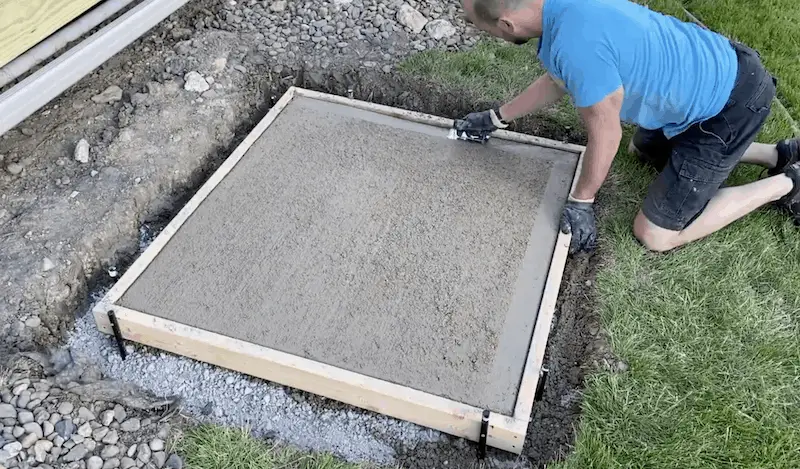
Finally, clean up the edges for a smooth perimeter. In hindsight – I wished I had added a bit more water to the concrete mix which would have made the floating process faster.
Pro tip: To help the pad “cure” I also recommend wetting the surface 3-4 times a day for about a week.
Concrete Pad Cost Breakdown

In terms of cost, for my 48” x 45” landing pad that’s about 5” thick – it cost about $160. This includes $30 worth of tools I didn’t have already – so it could be more or less depending on the tools you currently own. Even if you’re hiring a contractor for this project, hopefully this gives you a reference point.
The Wrap Up
While some of the DIY projects on this blog take only a few minutes (like this one and this one) – pouring a concrete pad took me pretty much all day. From excavating everything to finishing off the pad – it was about an eight-hour project. Again, it also required a lot of manual labor so make sure you stay hydrated. So if you’re doing this, block out your calendar for the day and prepare to break a sweat.
As I mentioned earlier in the blog, here are a few mistakes I made that I will keep in mind for any future related projects:
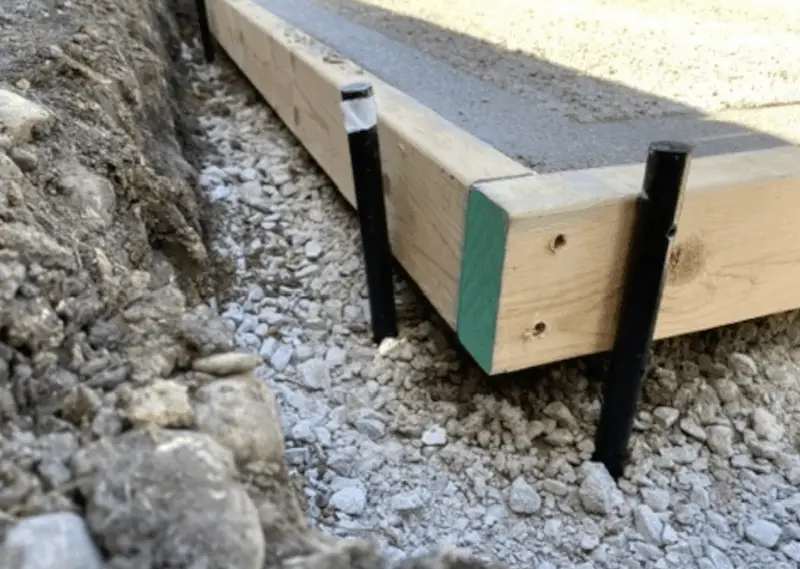
1. When I had the frame in place – it had a gap at the bottom before I started the pour (see above). In retrospect, I should have backfilled in the bottom so the concrete would go right up to the material and have a nice finish at the base.
2. The concrete mix was a little drier than I wanted. When I was trying to float it off, I couldn’t get much water to pull up to the surface that allows you to get a nice and smooth finish. My recommendation: use a little more water than the prescribed recommendation on the bag. For example, instead of using 1.9 liters per bag, I’d probably use 2.1 or 2.2.
But overall, I’m happy with it – and I hope this tutorial helps you with any future concrete projects!


