
 My Account
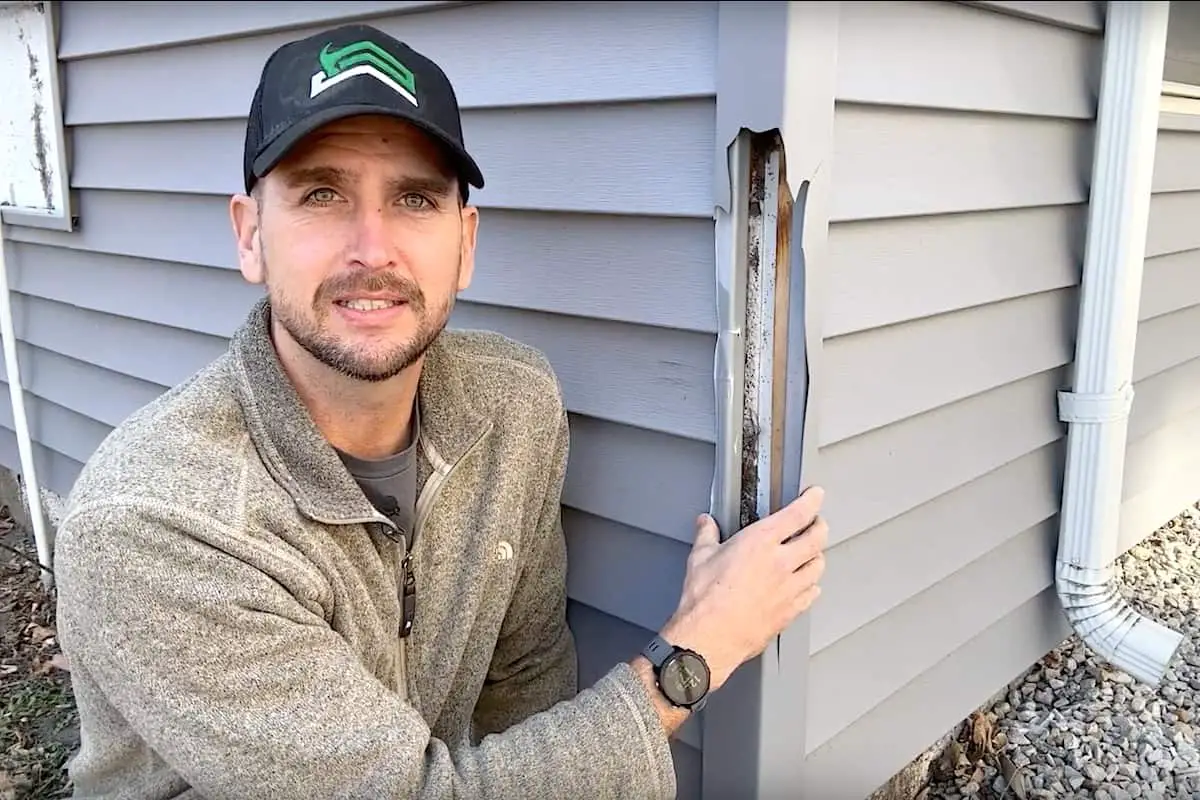
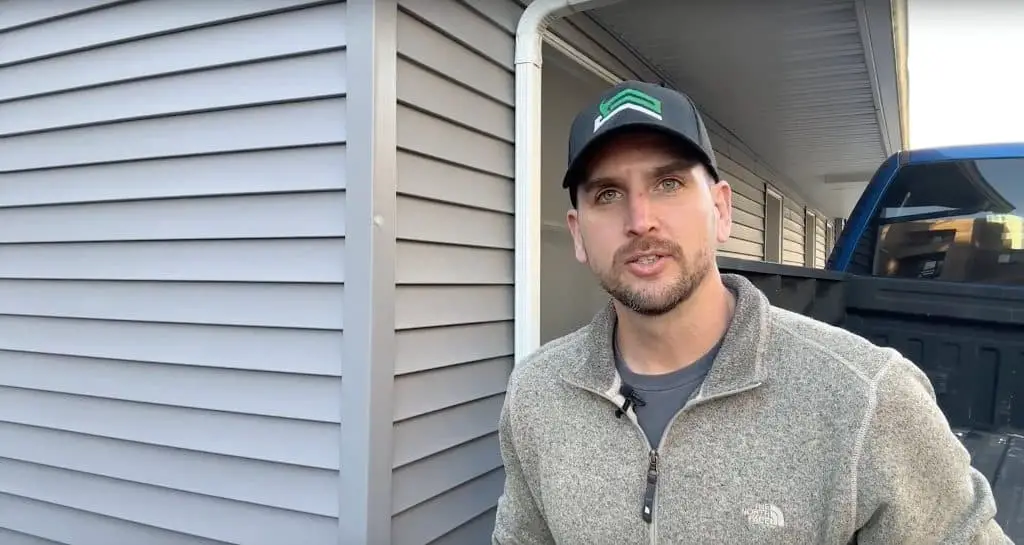
In this article, I’m going to run you through how to do some vinyl siding repair; specifically, how to replace an outside corner piece.
The vertical corner piece of your vinyl siding is rather susceptible to damage. The piece I’m going to replace in this demo has a gaping hole in it. Judging by the location and size of the hole, a car backed into it. Regardless of how badly your siding is damaged, any hole is going to let in moisture and critters, so repairing the siding is something you should not delay doing.
How to Replace a Corner Piece of Vinyl Siding: Step-by-Step Guide
In this step-by-step guide, we’ll first be prepping the existing and replacement corner pieces of vinyl siding by cutting them down with a utility knife. This easy modification will greatly simplify the job of replacing the corner strip.
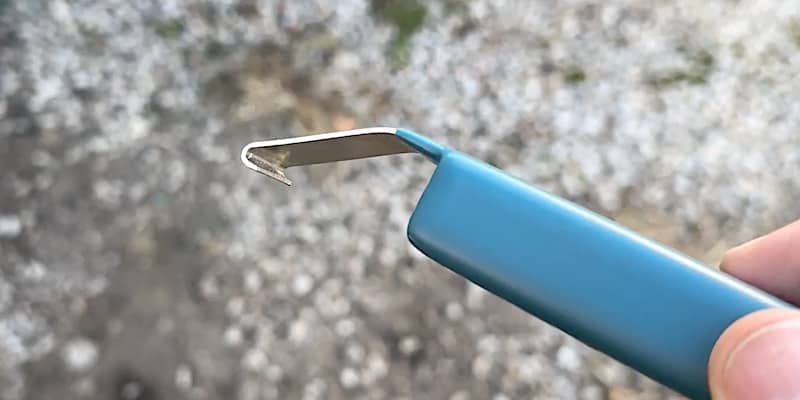
Besides a utility knife, you’ll need an inexpensive siding tool to accomplish this repair. No special skills are required. This is a DIY project anyone can undertake.
After showing you the process of replacing the corner siding piece, I’ll address color-matching, in the event your replacement piece of siding doesn’t match what’s on your house.
Rather watch than read? Check out this 9-minute video.
DISCLAIMER: This video and description contain affiliate links, which means that if you click on one of the product links, I’ll receive a small commission.
How to Replace a Corner Piece of Vinyl Siding: Supplies, Tools, and Costs
Supplies
- Corner replacement piece of vinyl siding (exact color match not necessary)
Tools
Costs
The vinyl siding tool costs about $13 and the utility knife about the same.
How to Replace a Corner Piece of Vinyl Siding: A Simple Trick
Rather than disassemble everything to replace the corner piece of siding, I’ll employ a simple trick. I’m going to cut down both the existing piece of trim and the new piece in a specific way that will allow me to simply install the new modified piece over the old nailer flanges.
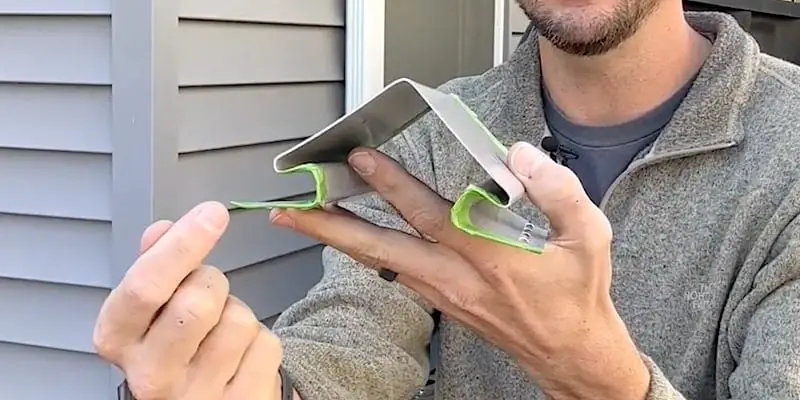
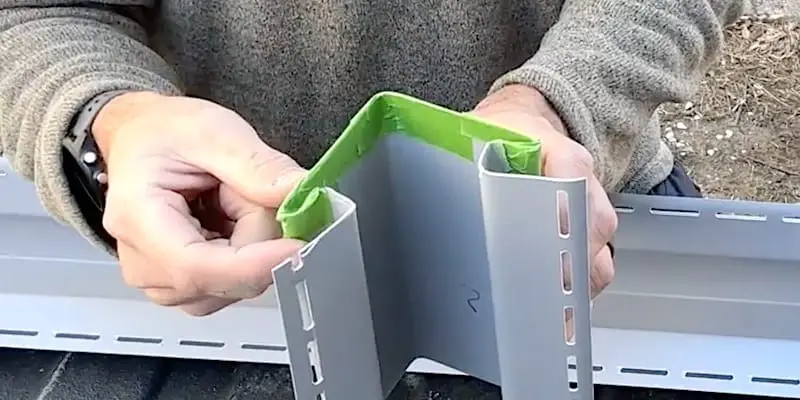
To understand better how this will work, let’s look at the structure of the corner piece of siding.
This is the profile of the corner piece. I’ve marked the nailer flanges with green tape.
(The nailer flanges of the corner piece sit underneath the horizontal vinyl siding pieces and get nailed to the sheathing on the house. To fully remove the corner piece, I’d have to take off all the siding, which would be a huge amount of unnecessary work. That’s why I’m replacing the corner piece using this simple trick.)
When you look at the profile of the flange, there are two J-channels, one on each side (the parts marked with green tape in the image above). We’re going to cut away the corner piece on the house so that all that’s left is this channel (half of it under the siding and half of it protruding). The part that’s protruding will essentially be a lip that the new piece will attach to.
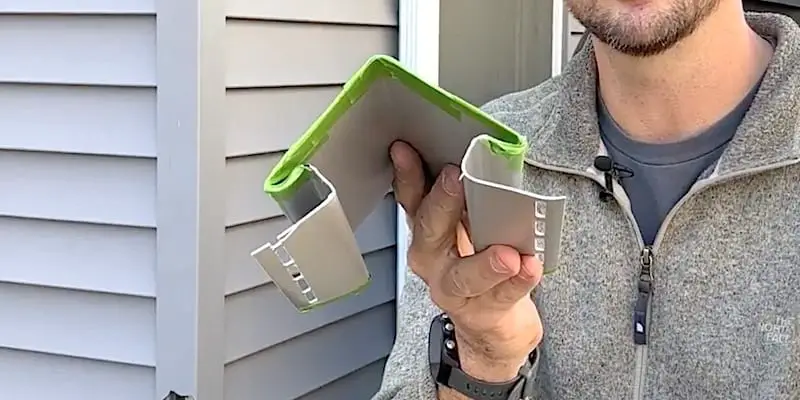
Correspondingly, I’m going to cut the nailing flanges off the replacement corner strip. I won’t cut the entire J-channel off; I’ll leave the third side of the channel intact (the part that curves behind the corner, marked in green tape in the image below). This piece needs to overlap and secure onto the lip that I’ll be creating when I cut down the corner strip affixed to the house.
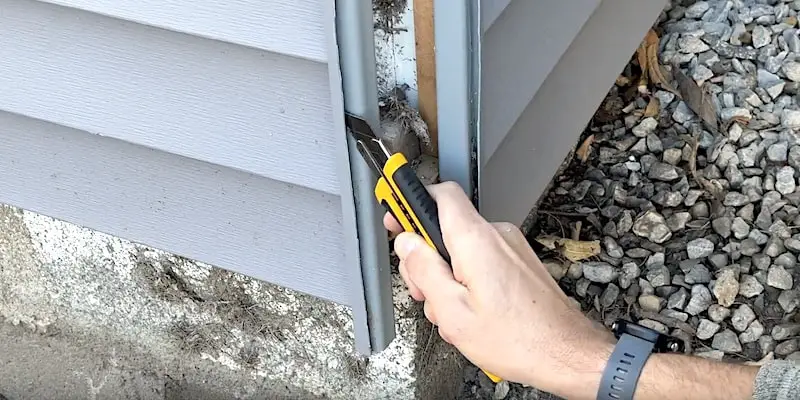
How to Replace a Corner Piece of Vinyl Siding: Removing the Damaged Piece
As I mentioned in the previous section, we’re going to remove material from the damaged corner piece of vinyl siding by cutting it at a specific place with a utility knife. Essentially, I’ll be removing the corner of the corner piece for its entire length. What I’ll be leaving in place is the final part of the nailing flange that protrudes from the lateral pieces of siding, creating a lip that I’ll hook the new corner piece onto.
I’m going to start in the area of the damage to spotlight what needs to be done for the entire length of the corner strip.
First, I’ll score the corner piece lengthwise about a half-inch from the edges and remove the center section.
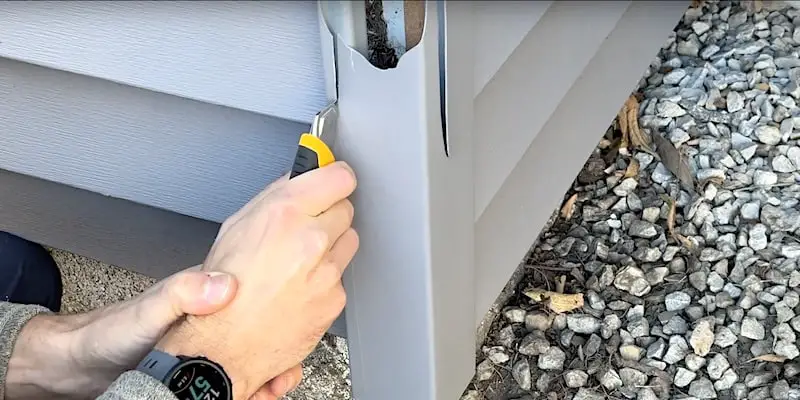
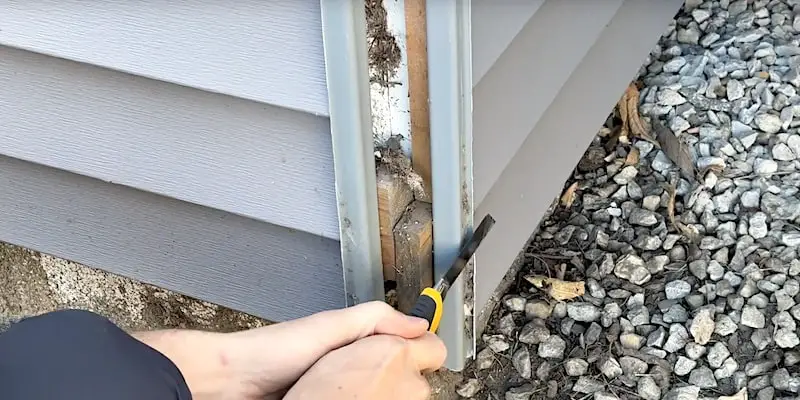
Now that I have access to the inside of the corner piece, I can extend the blade of my utility knife and remove with some good precision the remainder of the material that I don’t need. Essentially, I’m cutting away the fold that remains after I did my initial cutting away.
SAFETY NOTE: Take your time and use care when doing this. Keep your other hand and your legs out of the way. The blade of the utility knife is sharp and if it comes loose from the vinyl, it can cut you pretty badly. It’s a good idea to wear some cut-resistant work gloves when doing this; cut vinyl siding can gash you quite badly also.
Having a good quality, heavy-duty utility knife will make this job not only easier but also safer. I use an OLFA 25mm Extra Heavy-Duty Utility Cutter for this type of work. This is a “snap-off” cutter, which means you can literally snap off sections of the blade as they become dull. A sharp knife makes the work safer and faster.
I like to work in sections to do this cutting away but you could make one long cut on either side and remove the entire length in one go.
Here’s how the corner piece looks after the cutting away. It doesn’t have to be perfect; what’s important is that the correct amount of material gets cut away so that the new piece can clasp onto it without being impeded.
How to Replace a Corner Piece of Vinyl Siding: Modifying the New Corner Piece
Now that we’ve modified the outside corner of the siding on the house to act as a lip to hold the new corner, we need to modify the new corner piece by cutting away most of the nailing flanges.
These corner pieces typically come in 10-foot lengths so you’ll need a decently-wide work surface. I’m using the tailgate of my truck.
I’ve marked in green tape the section we’re going to keep:
Removing the section of the flanges I don’t need is a straightforward matter of running my utility knife down the length of the piece and then breaking it off. Again, do take your time and use care when working with a utility knife.
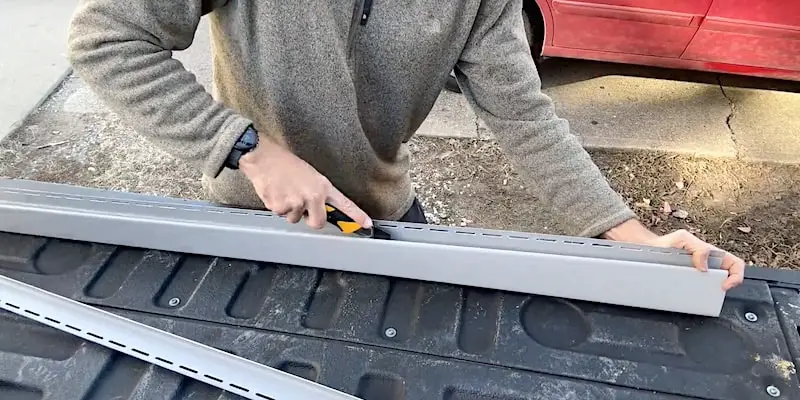
Usually, you can get a clean break in one pass but you might have to go over and recut any bits that weren’t severed all the way.
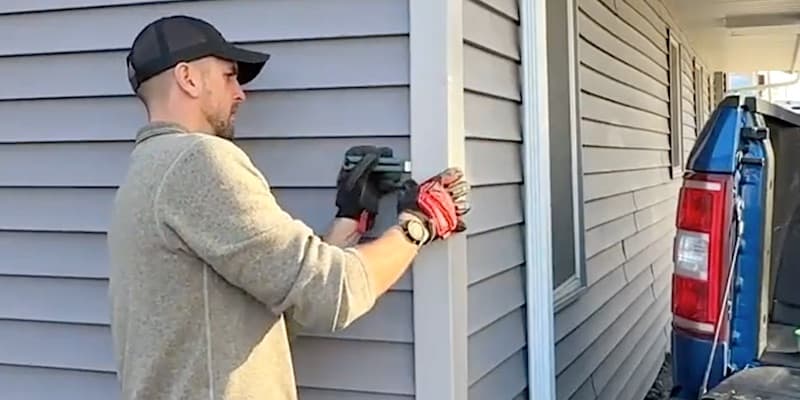
How to Replace a Corner Piece of Vinyl Siding: Installing the New Piece
Here’s an up-close look at how these two modified pieces are going to fit together:
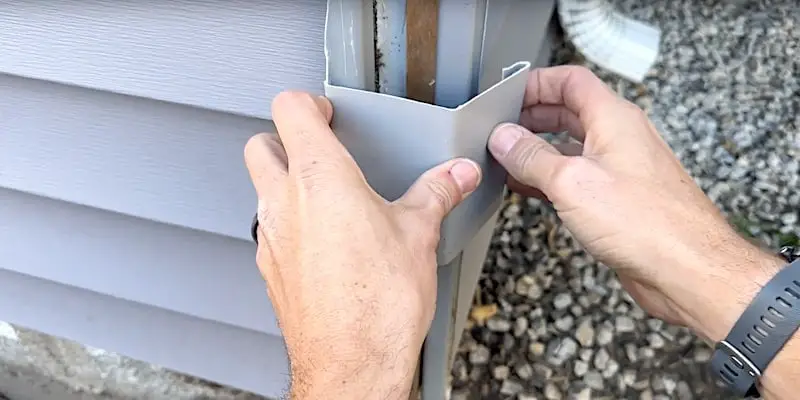
I’ll hook one side of the new corner piece around the lip of the flange that’s still attached to the house. Then I’ll do the same to the other side.
When you have a whole length of corner piece to install, it does take a little doing. I usually start at the top and work my way down, hooking on one side at a time. Once the first side is fully seated, I’ll use a siding tool to make easy work of getting the other side of the new corner piece hooked into place.
How to Replace a Corner Piece of Vinyl Siding: Color Matching
Chances are that you won’t have a spare corner piece lying around and you’ll have to get one at your home improvement center. Frequently, the colors they have in stock don’t match what’s on your house.
You have a couple of options in this case.
The first option is to replace all the corner pieces on your house using a new color. For example, corner pieces in white would create a nice accent color against the grey siding on this house. If you have more than one corner to piece to replace, this might be a viable option.
The second option is to paint the new corner piece. You can take a piece of the existing siding into your local paint store and have them color match it. A quart of exterior paint is more than enough to paint one corner piece like I have here.
I went with a satin finish. You don’t want to go too glossy. I also chose a Latitude Series paint from Sherwin Williams because the weather is getting colder. This paint is a little more resilient when painting in cold conditions.
To apply the paint, I’ll use a small, low-nap roller.
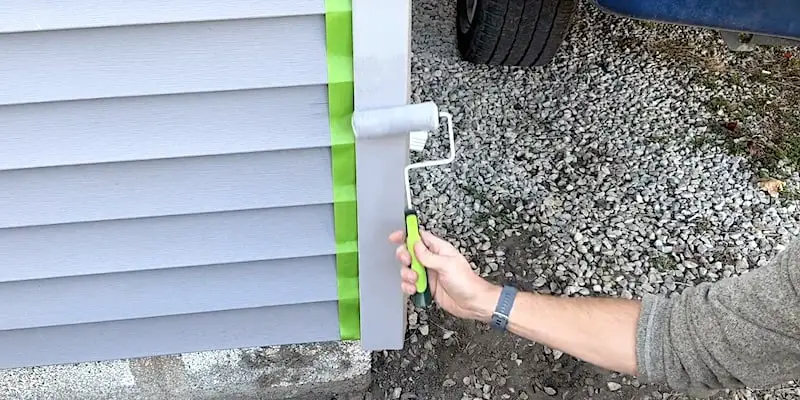
The color match is pretty good! You can hardly tell that the new corner piece isn’t original material.
That’s all there is to it! With just a utility knife and an inexpensive siding tool, replacing a damaged corner piece of vinyl siding is a DIY project anyone can tackle with confidence.
Exterior Projects: More DIY Tips
For more tips regarding vinyl siding, check out our article What Are the Best Nails to Use with Vinyl Siding?
Clean your driveway and sidewalks better and faster! Discover what attachment you should be using that you probably don’t have, along with our tips to save time and get a better result in How to Pressure Wash a Concrete Driveway.
Learn how to make a perfect tree mulch ring with our Tree Edging and Mulching Mastery article.
To Leave Comments and Questions
If something doesn’t make sense or if your situation is a little different, please leave a comment under the YouTube video. I check the comments on a daily basis and am happy to help out.
Don’t forget to subscribe to our channel! We have weekly videos coming out to help you with your everyday home repairs.
Thanks for stopping by! Take care.


