
 My Account
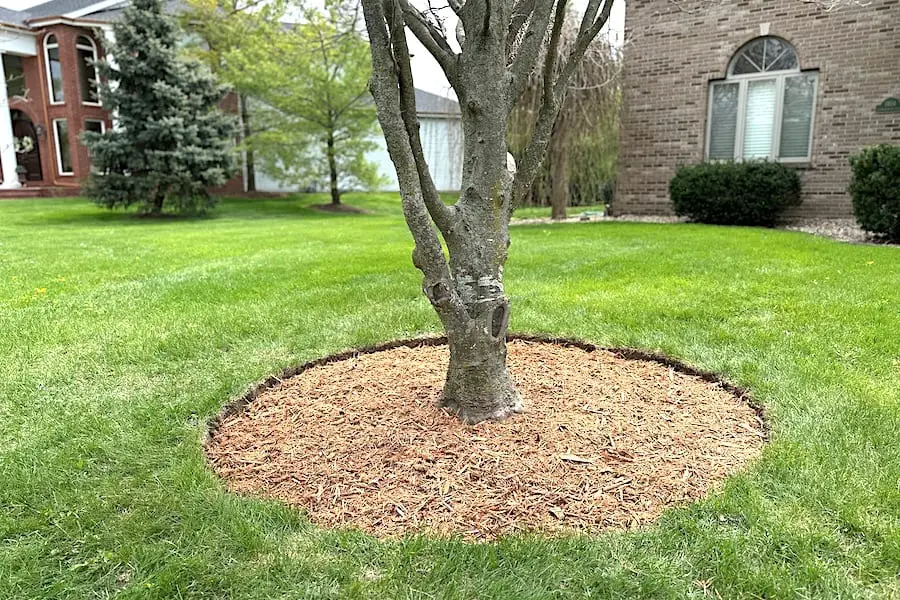
Today I’m going to walk you through the steps to make a perfect mulch ring around the trees in your yard.
A tree mulch ring is an easy way to give your landscaping a facelift but there are also practical reasons for doing it. First, it makes mowing a lot easier. Second, it will get more moisture and nutrients to the roots of the tree and promote healthy growth.
How to Make a Perfect Tree Mulch Ring: Step-by-Step Guide
In this step-by-step guide, we’ll first be going over a simple technique to mark a perfect circle around the base of a tree. Then, I’ll show you how to clear the grass from the surface of the ring and give you the simplest solution imaginable for keeping weeds out. Finally, I’ll talk about a mistake even pros make sometimes when placing mulch that could negatively impact the health of your tree or even kill it.
Making perfect mulch rings around your trees is a super-approachable project for any do-it-yourself, regardless of your level of knowledge or experience.
Rather watch than read? Check out this 8-minute video.
DISCLAIMER: This video and description contain affiliate links, which means that if you click on one of the product links, I’ll receive a small commission.
How to Make a Perfect Tree Mulch Ring: Supplies and Tools
Supplies
Tools
How to Mark Out a Perfect Circle Around the Base of a Tree
Marking out a perfect circle around your tree doesn’t have to be hard.
There are different tricks you can implement to accomplish this but I like using a tie-down strap. I just put the strap around the base of the trunk to create a loop that will give me a radius of about three feet. Then, I’ll place my edger inside the loop and just push the edger down into the grass to mark the perimeter.
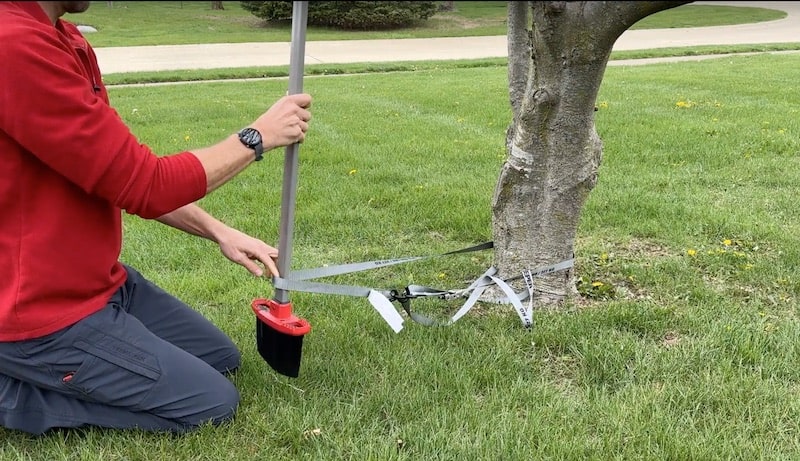
By keeping tension on the loop with my edger (or spade) as I work around, I’ll end up with a perfect circle.

I think this method is way better than messing with string or marking paint.
Removing the Grass from the Tree Ring
Now comes the labor-intensive piece of the process: removing the grass from the tree ring.
I’m going to use this grass in another part of my yard to fill in some bare patches so I’m going to toss it on a tarp as I dig it up. You could toss the sod into a wheelbarrow but I find a tarp is very handy for moving stuff like this around in the yard.
At this stage, you just want to get the majority of the sod out of the way. We’ll clean things up more precisely in the next step. If you have kids in the house, this could be a great time to call them in to help and burn off a little energy.
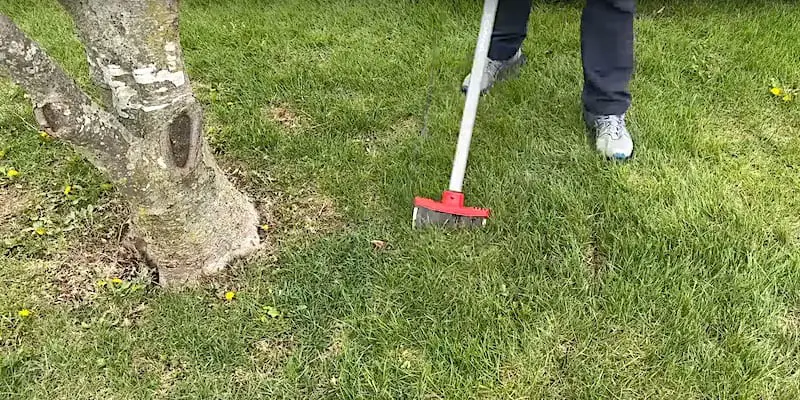
When you remove the grass, it’s not necessary to go down too deep; 2.5 to 3 inches is sufficient. An edger is handy for this as it’s designed to penetrate just that far.
I like to work in narrow, somewhat pie-shaped sections. First, I’ll perforate the outline of the section from the perimeter of the circle back to the trunk, prying up the sod as I go.
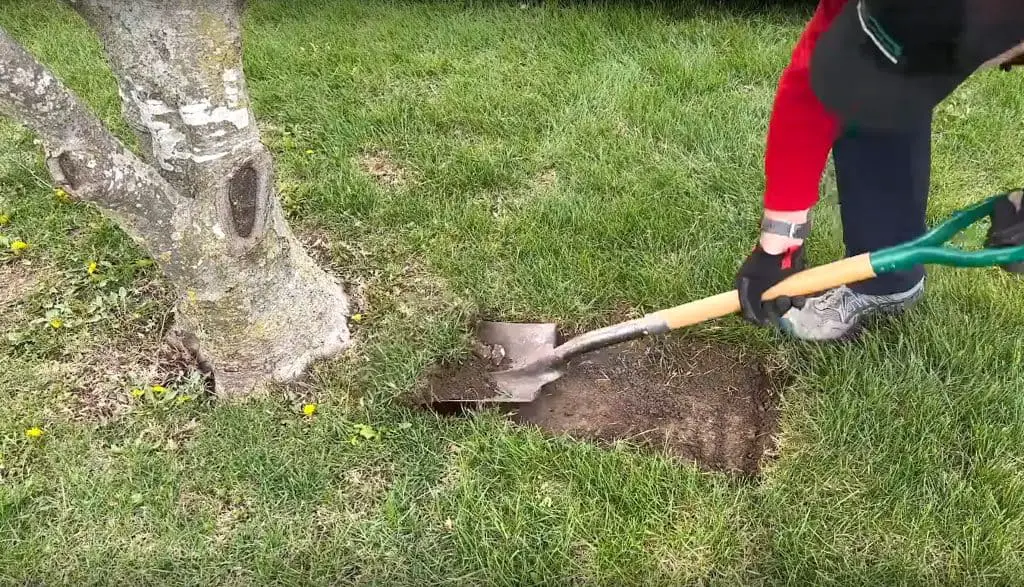
With the outline cut and the sod loosened, the next step is to lift out the grass with a shovel.
Final Steps to Prepare the Tree Ring Before Adding Mulch
Now that the majority of the grass has been removed, I’m going to use some gardening tools to remove the last bits of sod and any weeds down to the roots. I’ll also clean up the edge of my circle. Take care as you do this so as to not damage any exposed roots of the tree.
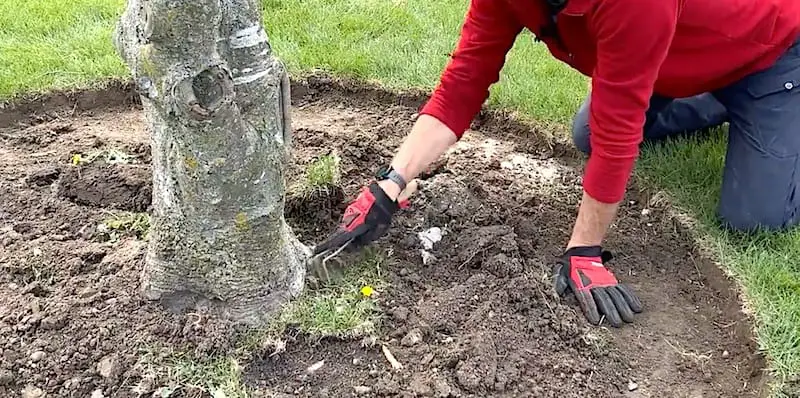
I’m going to loosen up some of the earth in the circle with a 3-prong cultivator and clear it away. As I do this, I’ll want to brush away soil from the root flare — the tapered point of the trunk that meets the earth — so that it is exposed. It’s important to the health of the tree that this area where the trunk broadens into the roots be just above the soil line.
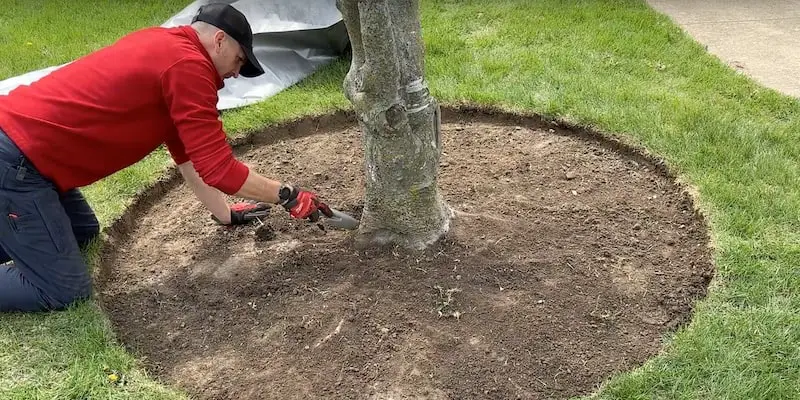
I also want to create a little grade so that the soil slopes from the base of the tree down to the perimeter of the ring.
How to Make a Perfect Tree Mulch Ring: Weed Control
To control the weeds, I’m not going to lay down any fabric; I’m just going to sprinkle on some Preen. Preen is a weed preventer, not a weed killer. This is why I emphasize removing any weeds down to the roots.
In addition to sprinkling Preen on the soil within my tree circle, I’ll also sprinkle some in the mulch after I spread it around.
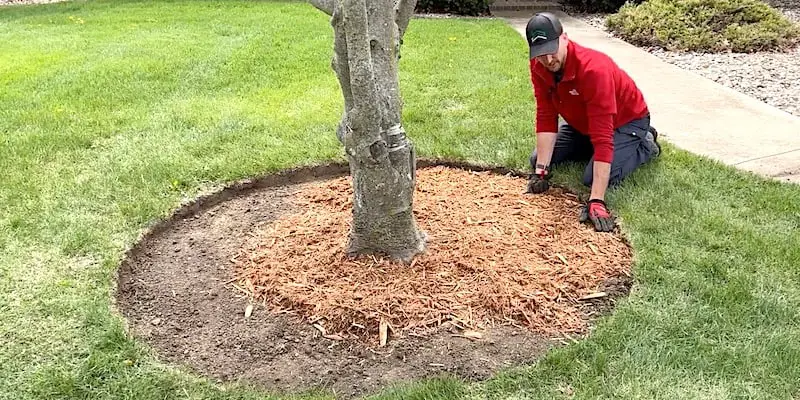
Adding Mulch to the Tree Circle
What you want to avoid when adding mulch to the tree circle is covering up the root flare. This is a common mistake people make that can result in suffocating the root system of the tree.
As I spread the mulch around the circle, I want to take care to leave the root flare exposed and the mulch very shallow at the base of the tree. Because I sloped the soil away from the trunk, the mulch will be deeper around the perimeter of the ring but the appearance will be a level bed of mulch. The important thing is not to create a mulch “volcano” that slopes upward onto the trunk.
I also want to keep the level of the mulch about an inch lower than the surrounding grass. This will help keep it in the circle when rain or wind comes along.
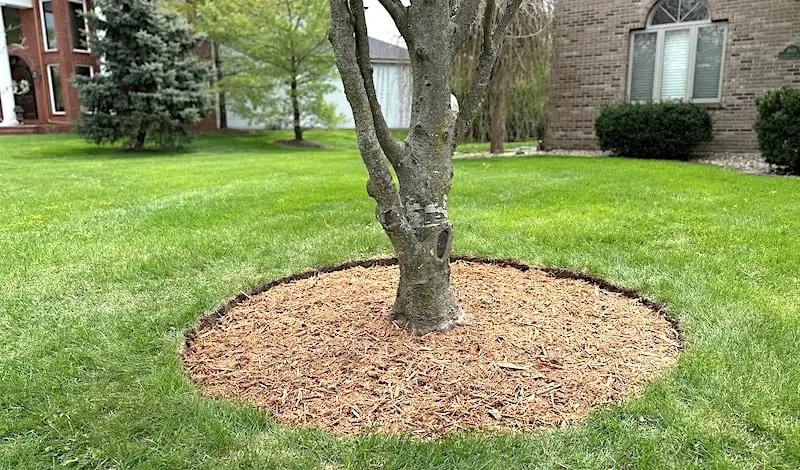
I used about a bag and a half of mulch (about three cubic feet) to cover this three-foot-radius circle with about two inches of mulch. My choice for this project was cypress mulch but you could use any type you like to get the aesthetic you want.
To finish off the project, I’ll sprinkle some more Preen on the mulch and then wet it down so that the Preen soaks into the mulch.
And that’s it! A perfect tree mulch ring, created without hassle and without making a mess.
Related Project: Weed-Free Driveways and Sidewalks
Got weeds and grass growing out of the cracks in your sidewalks or driveway? Check out our YouTube video or read the step-by-step guide for the ultimate solution!
For Other Outdoor Projects
For other outdoor projects, browse the Outdoor section of the website.
To Leave Comments and Questions
If something doesn’t make sense or if your situation is a little different, please leave a comment under the YouTube video. I check the comments daily and am happy to help out.
Don’t forget to subscribe to our channel as we have weekly videos coming out to help you with your everyday home repairs.
Thanks for stopping by!


