
 My Account
One of the most common repair items in your home is a slow-draining bathroom sink. Don’t call a plumber just yet! Let me walk you through three simple steps to unclog your bathroom sink drain.
The sink I’m using in this tutorial is draining very slowly. The water starts to back up after just a couple of seconds of running the water.
Clearing a Clogged Bathroom Sink Drain: Step-by-Step Guide
Before we get into the how-to of our step-by-step guide to unclog a bathroom sink drain, we want to understand just how slowly the sink is draining. This will give us a baseline to see if we’re making progress as we go through the steps.
I’ll show you a simple method for performing this baseline test and then walk you through the three easy steps to unclog a bathroom sink drain. These steps range from pouring hot water down the drain to disassembling different parts of the drain assembly.
We’ll be looking at the two most common kinds of drain stoppers in this tutorial. These are the “push” or “click-clack” kind (that you push down with your finger to both close and open) and the pop-up kind (that has a lever near the faucet handles that you pull up and push down to raise and lower the stopper).
If you’re new to home repairs, don’t worry! This DIY project is quite straightforward and will resolve the vast majority of problems you could face when it comes to a slow-running drain.
Rather watch than read? Check out this 12-minute video.
DISCLAIMER: This video and description contain affiliate links, which means that if you click on one of the product links, I’ll receive a small commission.
How To Unclog A Bathroom Sink Drain: Supplies and Tools
Supplies
- Drain clog remover
- Drain Auger
- Paper towels
- A bucket
- Rubber gloves
Tools
- A candy thermometer is helpful but not necessary
- Allen key, possibly
- Channel locks, possibly
- Crescent wrench, possibly
Getting a Drain-Time Baseline
Before starting, we want to get a baseline of the drain time. This will enable us to know whether the steps we’re taking to unclog the bathroom sink drain are working or not.
To get a baseline, we’re going to measure how long it takes for one gallon of lukewarm water to drain past the level of the drain-stopper.
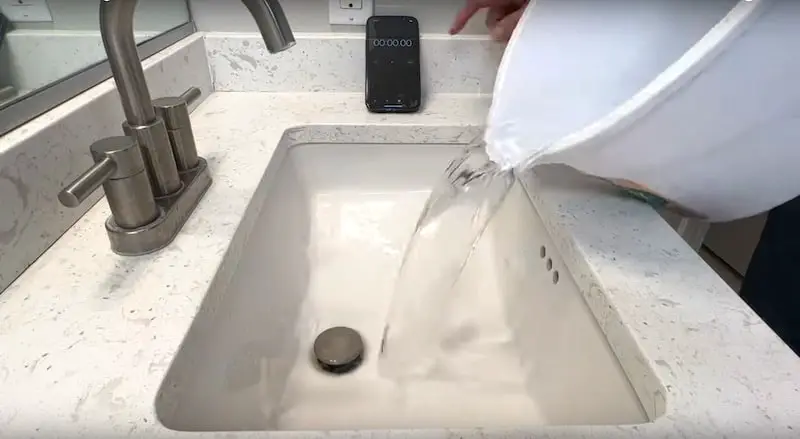
In my test, it took 1 minute and 58 seconds for the gallon of water to drain.
Step One: Using Hot Water to Loosen the Clog
Step One of clearing our clogged bathroom drain is simply hot water.
Heating the Water
Put about 2 gallons of water in a big saucepan or stockpot and heat it on the stove.
We want the water to be good and hot but not boiling. I’m heating the water to 160 degrees F.
A candy thermometer could be helpful here. If you don’t have a thermometer, look for very small bubbles starting to form on the bottom of the pan. Water at this temperature will be very hot to the touch, hot enough to scald you very quickly.
Pouring the Water Down the Sink
Take the pot of hot water into the bathroom, using care when carrying it through the house. Putting the lid on the pot and using some oven mitts or hot pads might not be a bad idea.
Now we’re going to slowly pour the hot water into the sink. What we’re trying to do is loosen up all the grime and hair and who-knows-what caught in the drain and flush it out.
The hot water approach is a much more eco-friendly solution than something like Drano. It’s also something you don’t have to go out and buy.
Now that we’ve poured all the hot water down the drain, it’s time to do another drain-time test and compare it to our baseline.
Post-Step-One Baseline Test
Let’s see how long it takes for another gallon of lukewarm water to drain, to see if we’ve made any progress.
This time it took 1 minute and 25 seconds, which is some pretty good improvement compared to the 1’58” of my baseline test.
If you have limited time, this step alone might be sufficient as a temporary fix to get you through a dinner party or the holidays until you have some time to dig a little bit deeper, as we’ll do now.
Step Two: Removing and Cleaning the Drain Stopper
In Step Two, we’ll be dealing with the Number One source of a clogged bathroom drain: the drain stopper.
Goop Alert! This is where the project can start to get a little messy and disgusting.
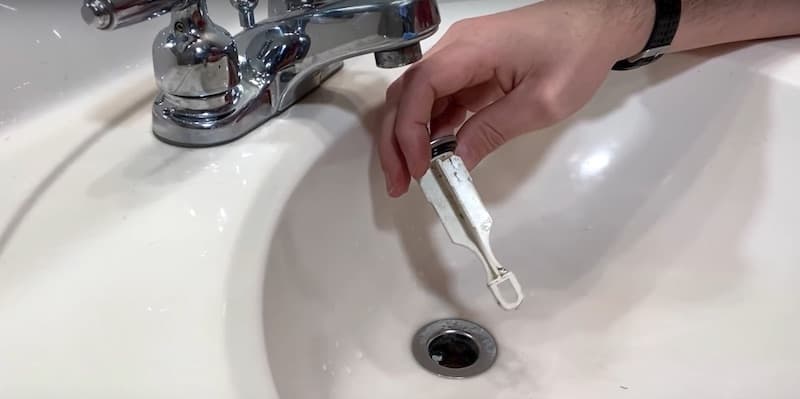
Removing a Push (Click-Clack) Drain Stopper
To remove a push drain stopper, rotate the top of the stopper counterclockwise. (For instructions on how to remove a pop-up drain stopper, see further on.)
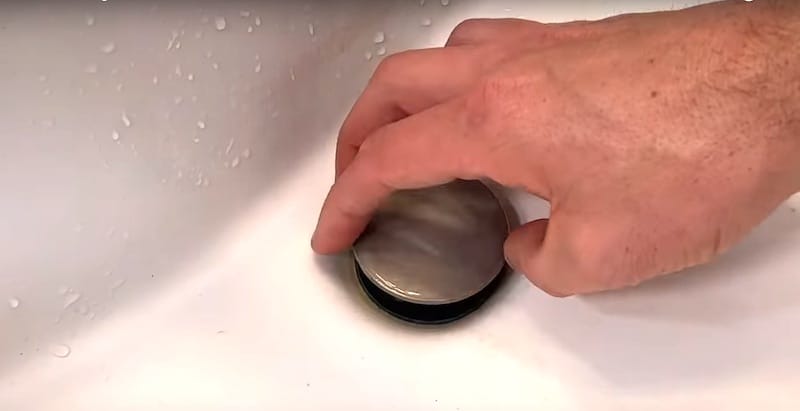
Sometimes the top of the stopper will detach from the center support when you unscrew it.
Fortunately, most of these push stopper designs will take an Allen key. Just insert the Allen key into the top and rotate by hand counterclockwise until it comes loose.
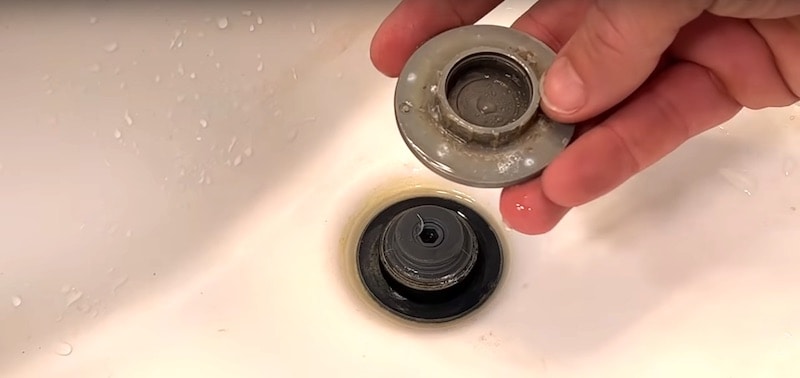
Let’s lift out the stopper and see what follows.
Attached to my drain stopper is a nice tail of gunk and hair, which I’m going to pull off with some paper towels. You might want to wear rubber gloves for this.
If you do pull out a clump of goo here, you’ve probably gotten at the source of your clog.
After pulling off the clump of goo, rinse the stopper under running water to fully clean it up.
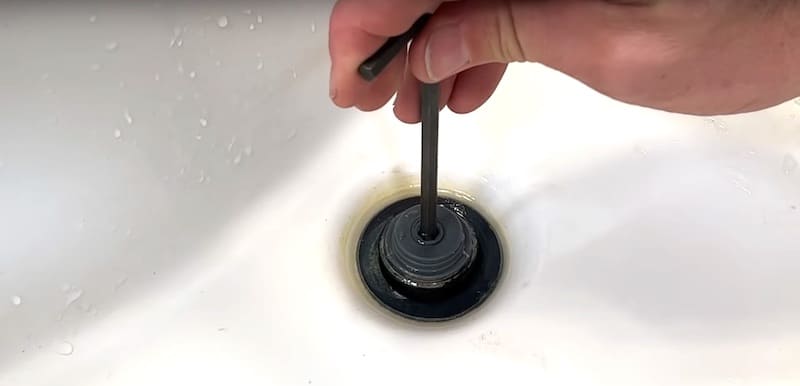
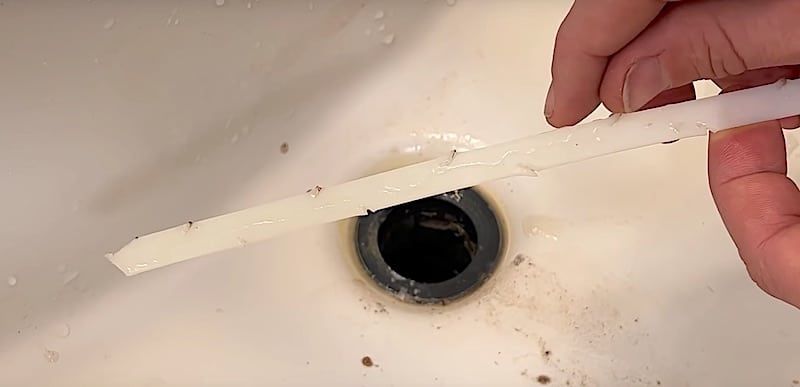
Clearing the Drain with a Drain Clog Remover Tool
While we’ve got the drain stopper out, we’ll use a drain clog remover — a simple tool that you can buy or make — to remove grime and hair further down the drain. The drain clog remover tool is basically a barbed strip of plastic that snags on hair when you feed it into the drain.
In the Supplies and Tools section, I’ve included a link if you want to buy the drain snake online. You can also pick them up at any home improvement center. They’re usually orange and only cost a few dollars.
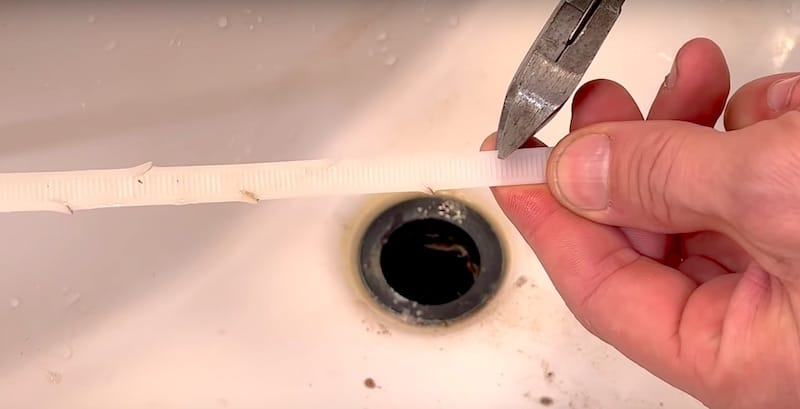
I made this drain snake out of a long zip tie that I had. I just took side cutters and made small snips in the zip tie, bending out the cut pieces a bit after snipping them. The bending creates a barb that will catch on hair or goop in the drain.
You can craft a homemade drain clog remover like this with any flexible strip of plastic.
To use the drain clog remover, just fish around in the drain with it. Once it catches on a clump of hair or goop, the mass should pull right out.
Remounting and Checking the Drain Stopper
To remount the drain stopper, we’ll reinsert it and rotate it clockwise. In my case I’m doing this in two parts; the central support first using an Allen key, then the cover by hand.
Note: Be careful not to tighten too aggressively. These parts are just plastic and can break easily if you over-tighten them.
Let’s push our push drain stopper down and back up again to make sure it’s functioning before we measure the drainage time again.
Something tells me the water’s going to drain quite a bit faster this time!
Removing a Pop-Up Drain Stopper
A pop-up drain stopper operates by a lever near the faucet handles.
To remove the pop-up drain stopper, you’ll need to get down under the sink and loosen the nut on the back of the drain tailpiece that’s holding the pivot rod of the stopper in place. You might need a crescent wrench for this if you can’t loosen it by hand.
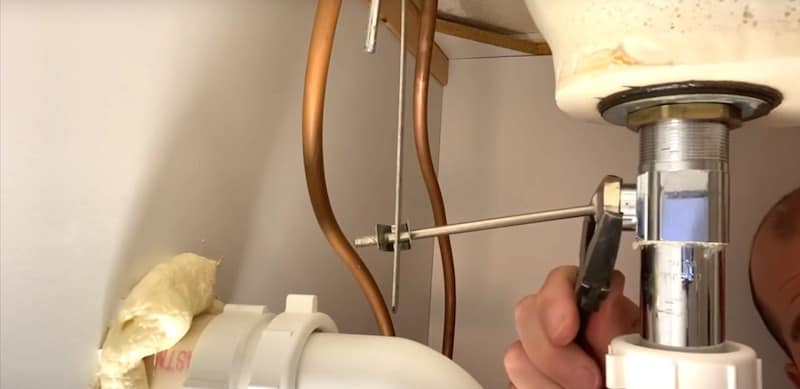
Pull the pivot rod out of the tailpiece.
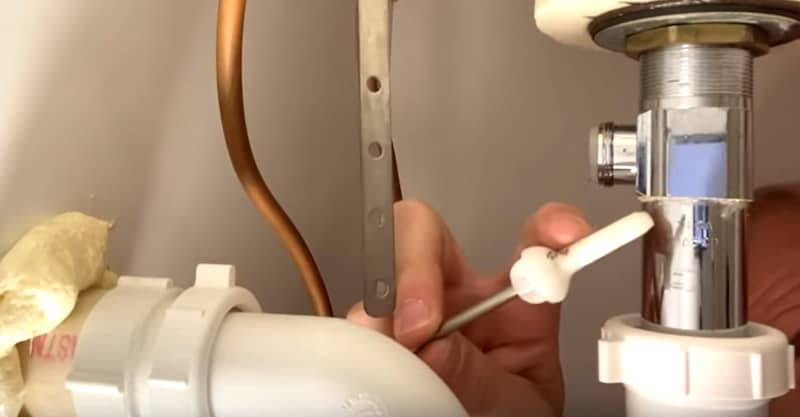
Note: I’ve fully detached and removed the pivot rod to show you what it looks like, but it’s not necessary to do this. It’s enough to pull the pivot rod out of the tailpiece, leaving it attached to the perforated strap that supports it. If you need to, you can remove the spring clip holding the pivot rod to the strap to get the mechanism out of your way.
Now you can lift the stopper out of the top side of the sink and hopefully the source of your clog along with it.
Clear away any gunk stuck to the drain stopper with some paper towels. Rinse the stopper under water to wash away any residual goo.
Use a drain snake to free the lower part of the drain of any grime and hair. See the previous section entitled “Clearing the Drain with a Drain Clog Remover Tool” for more details on this.
Post-Step-Two Baseline Test
Let’s do our baseline test again. We’ll pour a gallon of lukewarm water into the sink and see how long it takes to drain.
This time it took only 13 seconds!
Obviously, the clog on the drain stopper was my issue. Nine out of ten times, this will be the case.
I’ve cleared a clogged bathroom drain many times, so the crud doesn’t surprise me. If this is your first time unclogging a drain, it’s always a special experience to see the stuff living inside your drain.
If your sink still isn’t draining, don’t worry. Step Three is coming up.
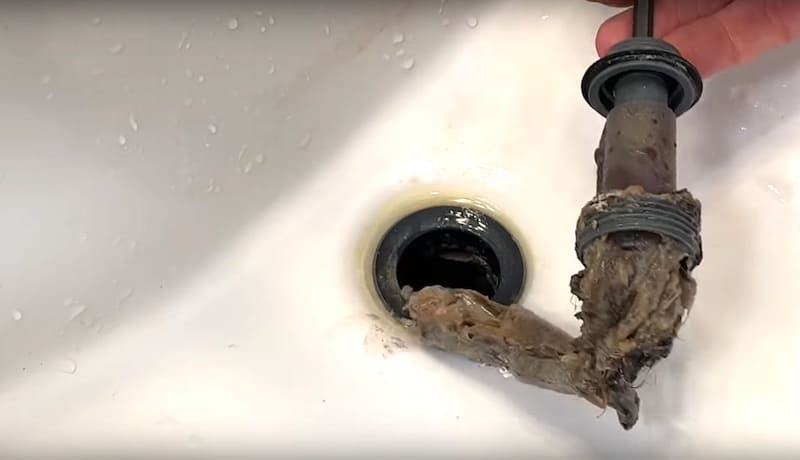
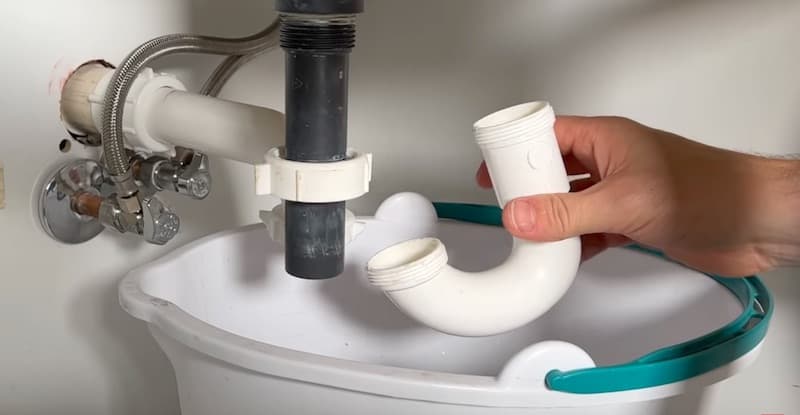
Step Three: Clearing/Cleaning the P-Trap and Gooseneck
In Step Three, we’re going to go underneath the sink and address the P-trap.
The P-trap is the curved piece of pipe that goes from the tailpiece (the straight piece of pipe directly below the sink) to the drain going into the wall.
There is always water in the P-trap. This is what keeps sewer gas from coming back up into the house.
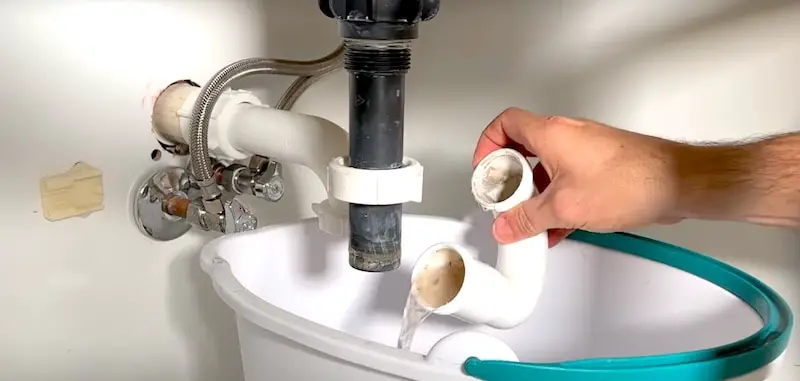
We’re going to place a bucket under the P-trap to catch the water as we disassemble these drain sections. This is important for avoiding water damage at the base of your vanity.
Removing and Cleaning the P-Trap
First, we’ll loosen the nut at the back of the P-trap.
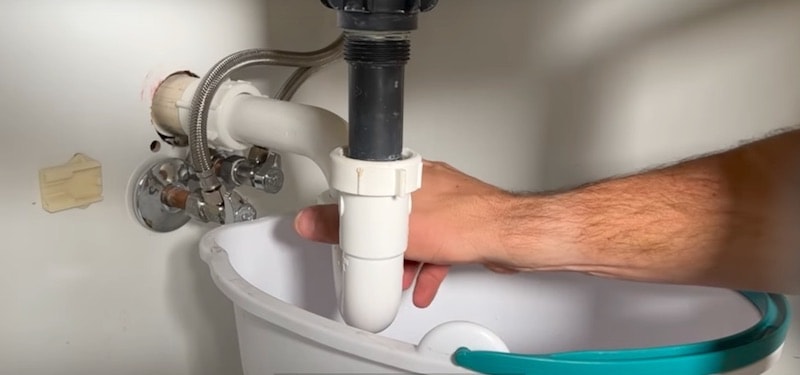
You should be able to do this by hand; if not, use some channel locks. Water will start to seep out of the loosened connection.
Next, loosen the nut on the front side of the P-trap.
Let the water drain out.
Once the water stops, unscrew the nuts all the way, remove the P-trap, and dump the water out.
In my case, there is no clog in this part of the drain, but we’re going to clean up the P-trap anyway, seeing as we’re here. Obviously, if there were gunk, we’d pull that out first.
To clean up the P-trap, I’m going to roll up some paper towels and feed them through the pipe, twisting as I go. Once the paper towels poke through the other end, I’ll pull them all the way through.
You can see how just one pass cleaned up the P-trap nicely.
Next, we’ll clean off the end of the tailpiece with some paper towels.
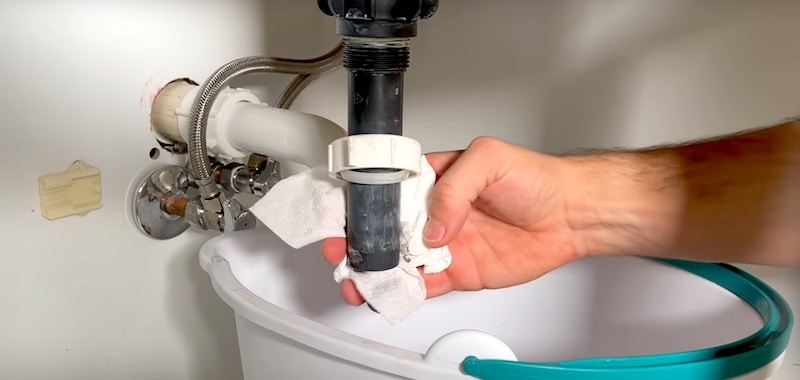
If you see hair hanging out of the tailpiece, be sure to pull all that out. It’s not uncommon for hair to get stuck in this area.
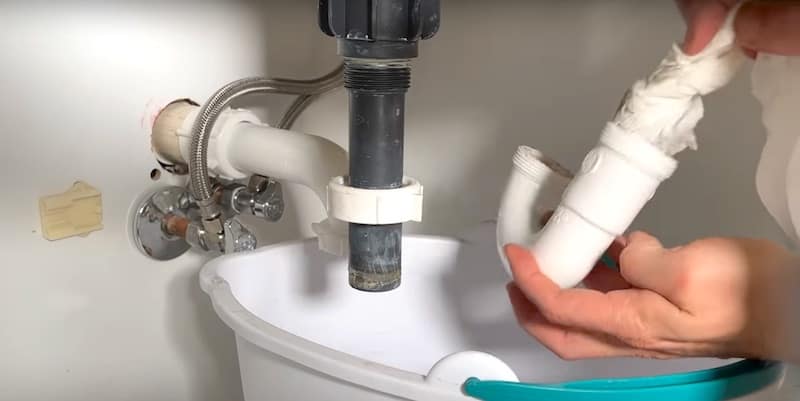
Removing and Cleaning the Gooseneck
Last, we’ll dismantle and clean up the gooseneck. This is the piece of pipe that goes from the P-trap into the wall under the sink.
Push your bucket all the way to the wall, then loosen the nut on the gooseneck by hand.
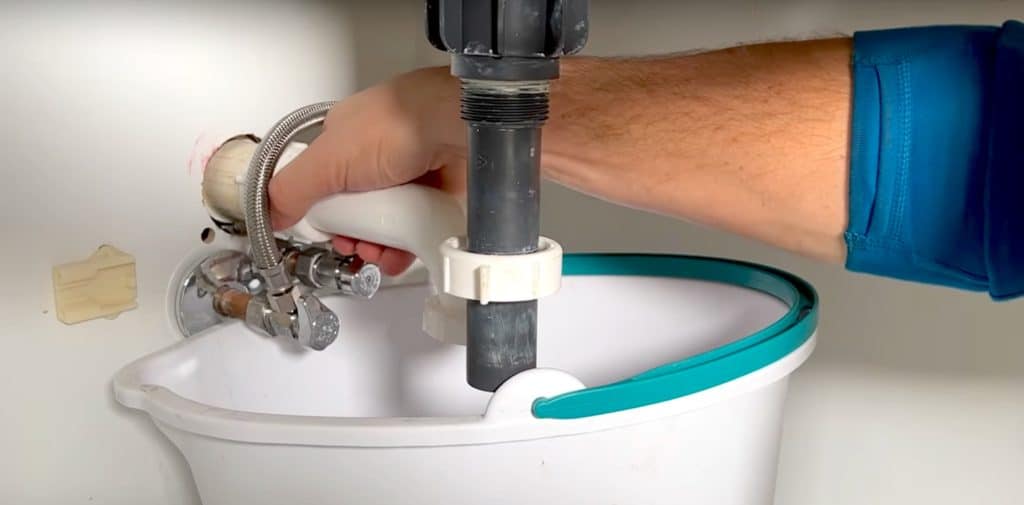
There shouldn’t be much sitting water here but the pipe can be a bit gunked up, like mine is.
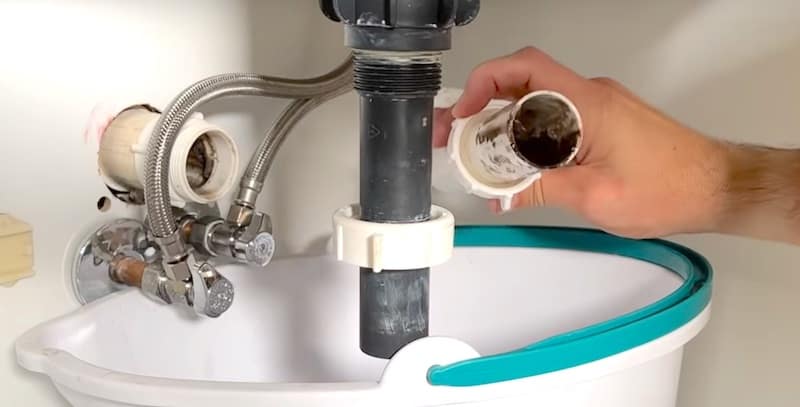
Again, we’re going to feed some rolled-up paper towels through the gooseneck to clean it, twisting as we go.
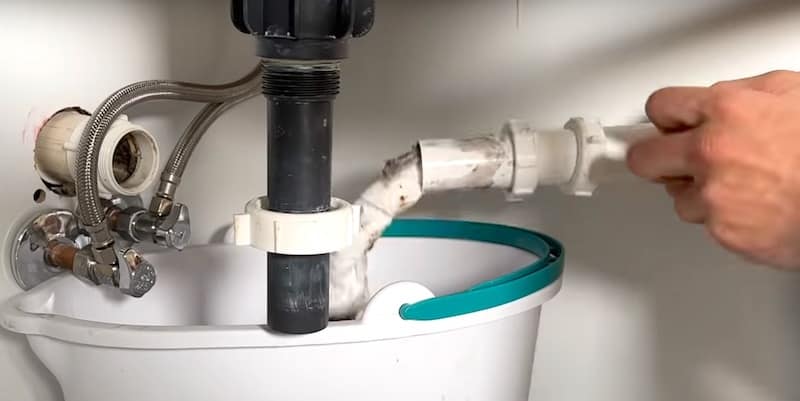
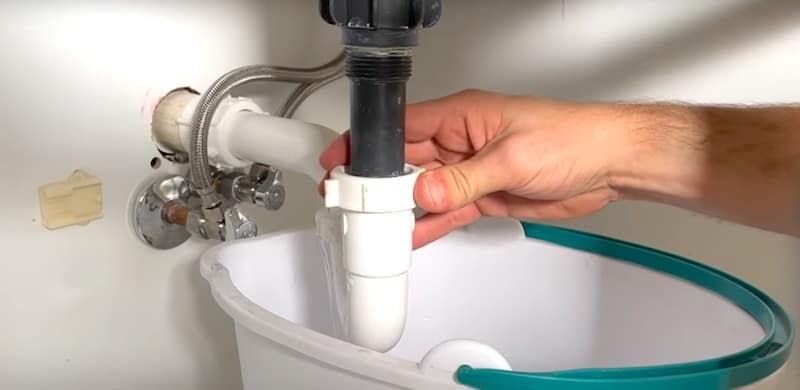
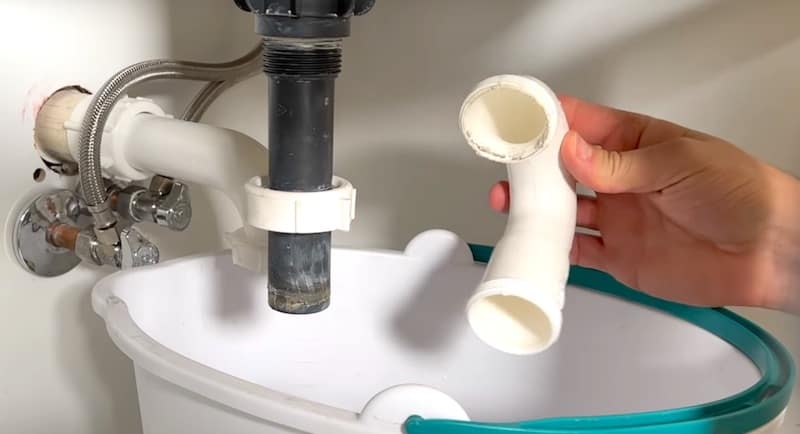
Reinstalling the Gooseneck and P-Trap
Now to reinstall the gooseneck and P-trap.
First, I’ll reinsert the gooseneck into the wall connection, tightening the nut just enough to hold it in place.
Don’t tighten the nut of the gooseneck all the way. You want to leave some play here because the gooseneck will need to be adjusted to line up with P-trap when we reinstall it.
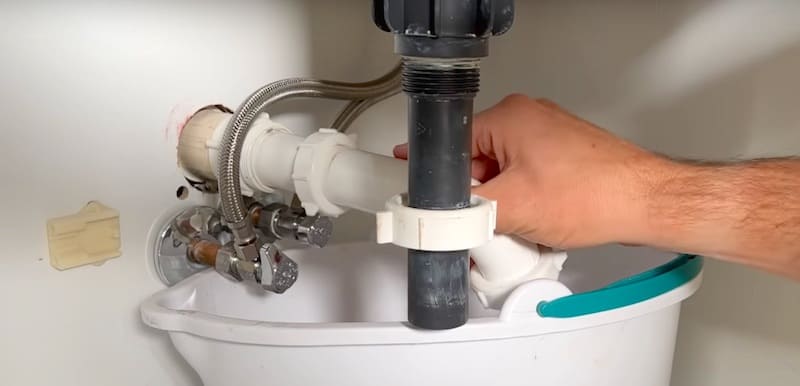
Next, the P-trap goes back on. Remember that the longer end of the P-trap attaches to the tailpiece (the straight piece extending from the sink).
Once the long end of the P-trap is back on the end of the tailpiece, tighten the nut a bit.
The last thing to connect is the back end of the P-trap with the gooseneck. This is where you’ll adjust the horizontal position of the gooseneck.
With the P-trap and gooseneck reassembled and lining up properly, tighten up all the nuts by hand.
Post-Step-Three Baseline Test and Final Check
Now that the lower drain sections have been cleared of gunk and cleaned up, you can do one last baseline test to see how long it takes for one gallon of lukewarm water to drain past the drain stopper (especially if your clog was in the P-trap).
As a final check, look under the sink to see if there are any leaks in the P-trap and gooseneck connections.
If the sink is still draining slowly, you can be pretty much assured that the clog is inside the pipe past the gooseneck (going into the wall). In this case, you’ll want to disconnect everything again and ream out this section of pipe with a drain snake or auger. There is a link to a cheap auger in the Supplies and Tools section.
How To Unclog A Bathroom Sink Drain: Conclusion and Last Word of Caution
That’s it! Those are the three simple steps to unclog a bathroom sink drain.
A last word of caution — any time you disturb plumbing connections you’ll want to carefully check them after remounting everything. Once your drain is running freely, don’t forget to look under the sink to check for leaks in the P-trap and gooseneck connections.
Bathroom Sink Drains: Other Related Repairs
Got a broken pop-up drain stopper? Check out our YouTube video or read the step-by-step guide on How to Fix A Bathroom Sink Drain Stopper: 4 Easy Solutions.


