
 My Account
Is your bathroom sink drain stopper not working effectively? You’re in the right place! In this blog, you’ll learn how to maintain or fix your lift rod and the associated drain stopper. It’s very common for these pieces to break. But luckily, the fixes are pretty simple. Sometimes all you need is a tool or two – and you’ll get your sink back to normal (or maybe even better than before).
If you’d also like to watch this project, check out this 14-minute video below.👇
Tools:
DISCLAIMER: This blog contains affiliate links, which means that if you click on one of the product links, I’ll receive a small commission.
How to Fix A Bathroom Sink Drain Stopper: 4 Easy Solutions
One of the most common issues – is that the lift rod moves up and down but the stopper doesn’t move. Or something along those lines! Here are four potential solutions that will hopefully fix things up.
1. Does the lift rod move up and down – but the stopper doesn’t move?
Potential solution: Tighten the bolt at the top of the lift rod strap.
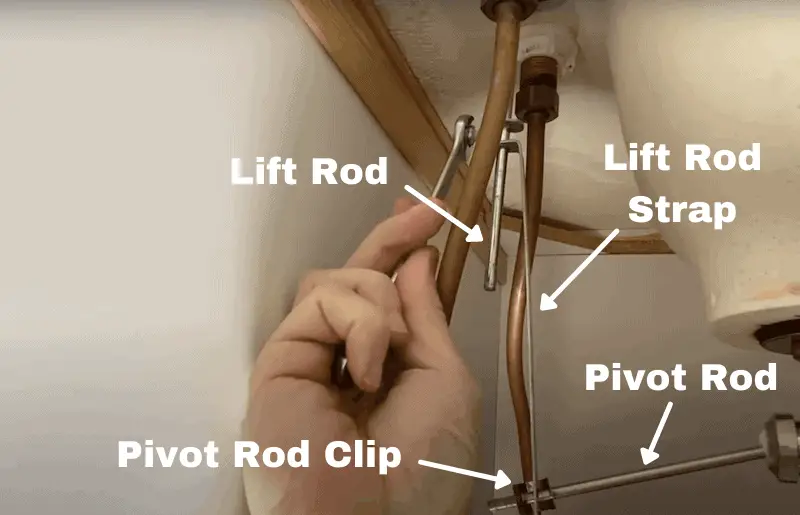
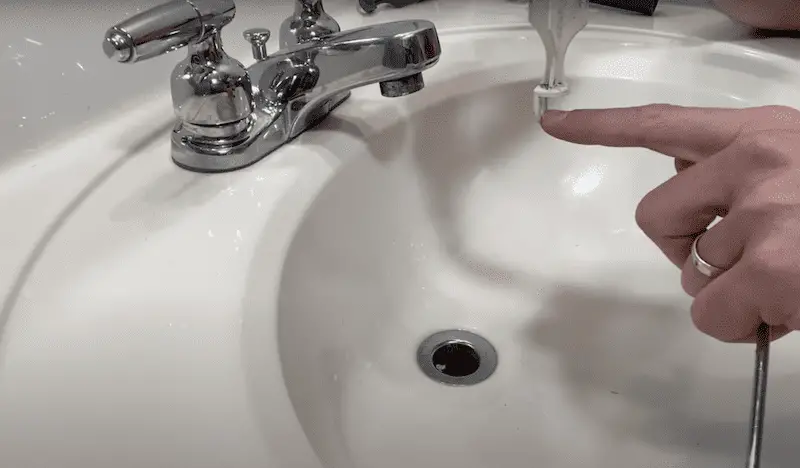
A common problem is that the lift rod moves up and down – but the stopper doesn’t move and it stays in either the up or down position. Either way, this is a pretty simple problem to fix.
If your lift rod literally pulls out of the hole in the back of the faucet, you probably need to tighten the bolt at the top of the lift rod strap. Alternatively, you might be dealing with an issue with your pivot rod which will be covered in point #2.
Here’s how to fix this:
(Go to minute @3:00 in the video to see a demonstration!)
- Go down in the vanity cabinet and check if the lift rod is not tight. If it is tight – proceed to the next step.
- Put your stopper in the “up” position. This is the position where the sink should drain.
- Then, you’ll want to position the lift rod in the lowest position where the top of the lift rod is sitting on the faucet
- From there, you’ll be at the correct adjustment. So when you tighten it, your lift rod will be down. You’ll be able to pull it up and then that will seal the stopper in the closed position.
But what if the lift rod is completely out of the strap (seen below)? You’ll have to re-connect it first.
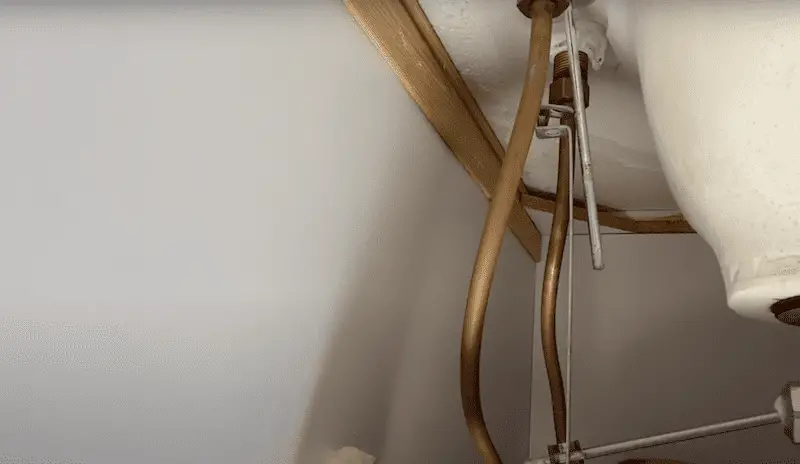
- If you see the lift rod completely out of the strap – you’ll lift it up and pass it through the hole. Make sure the stopper is in the up position.
- Then tighten the nut at the top of the lift rod strap with a wrench or a crescent wrench.
How do you know if things are working correctly? If everything is correct you should be able to pull up and push down on the lift rod and the drain stopper should move up and down.
2. Is the lift rod strap secure – but the sink drain stopper still isn’t working?
Potential Solution: Adjust the seal of the pivot rod.
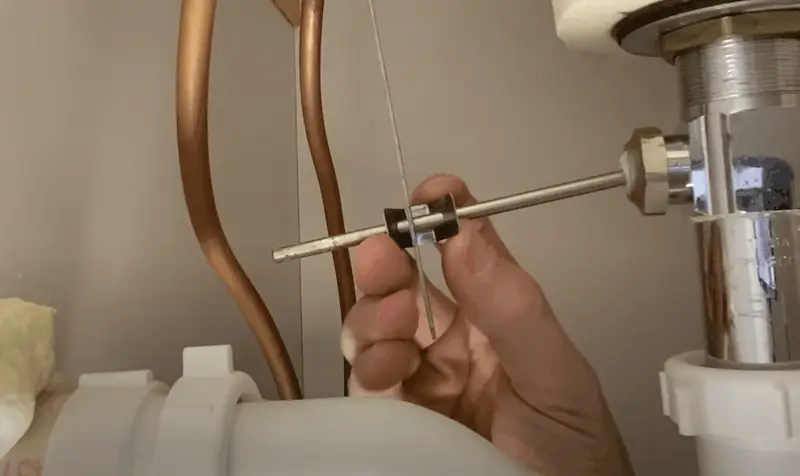
Does the lift rod strap go up and down when you pull on the lift rod and the pivot rod is working – but the stopper still doesn’t move? You likely have an internal failure on the other end of the pivot rod. This sounds worse than it is! You’ll just need to break into the drain tailpiece and inspect the pivot rod.
Note, if you’re working with plastic you may not need any tools. With metal, you’ll probably need to use channellock pliers.

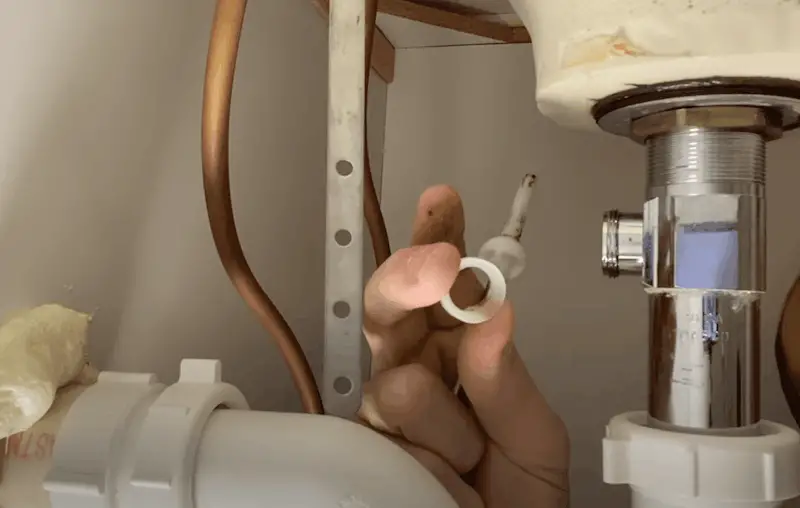
First, you’ll remove the pivot rod clip by squeezing it and pulling it off. Set it to the side. Loosen the pivot rod nut after and remove the pivot rod from the drain tailpiece. You’ll either see a pivot ball to plastic and the plastic going into the bottom of the stopper (seen above). Or you’ll see metal for the rod and a plastic ball. Take it out and I also recommend giving it a good clean – removing any gunk or hair.
It is not uncommon for a metal pivot rod to corrode and fail over time. This is not a big problem and often you can get a new pivot rod by taking the broken part down to your local home improvement store and trying to match it up with a new one. If you can’t find a good match you might need to install a new drain tailpiece which can be a little larger project but still doable.
[Go to minute @4:00 in the video above to see a visual of this process.]
3. Does the pivot rod look good but the stopper still doesn’t go back down?
Potential Solution: Purchase a new drain stopper
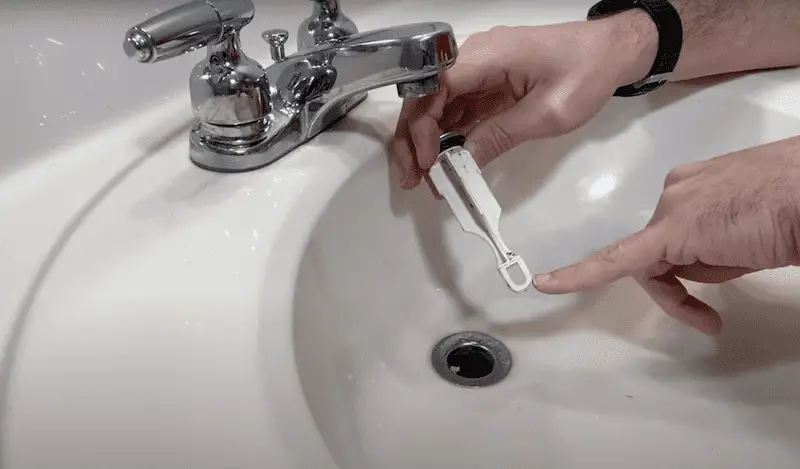
If the pivot rod looks good and correctly attached, but you cannot pull the stopper back down – the problem could be that a plastic piece is broken off your drain stopper (see above). In this case, you’ll need to purchase a new drain stopper.
4. Does the stopper go up but not down and the stopper is not damaged?
Potential Solution: Make sure the loop of the stopper is facing the faucet.
Is your issue that you can push the stopper up – but it never pulls down? A common reason for that is the bottom of the stopper is positioned 90 degrees offset.
Here’s why that matters: The pivot rod is supposed to go through the plastic loop at the bottom of the drainer stopper and then move it up and down. Sometimes when people get in a hurry they install the pivot rod and then they have the plastic loop on the wrong side, so it will push it up – but it will not pull it down because there’s nothing to hook on to.
You need to make sure that the loop of the stopper is facing the wall/faucet and when you install it, check that the loop is directly open to the pivot rod coming through. This can be a little tricky but take your time and you’ll be in good shape.
[Watch @ 9:50 in the video to see a demonstration of how to install this and make sure the loop is aligned correctly so that the pivot rod can match up with it for a proper install.]
Once you have your pivot rod reinstalled make sure the drain is operating accordingly.
Steps to re-install a pivot rod:
To properly re-install your pivot rod – follow these steps!
- Insert the pivot rod back in place with the seal’s concave side facing out – and hand-tighten the nut.
- Quickly, confirm the drain is working correctly.
- From there, reinstall your clip that connects the strap to the pivot rod. Go through one side of the clip, then the strap and finally the backside of the clip – apply pressure and scoot the clip up the pivot rod.
Note that the further your clip is out at the end – the longer travel your drain stopper will have moving up and down. On the other hand, the further you go in, the less travel. So this can be customizable depending on what you want.
Pro tip: You can also bend the clip slightly. If it’s flared out when you reinstall it – it puts more friction on your rod. This will make things more secure and you won’t have it slide off later.
The Wrap Up
I hope this helped you out! I know these plumbing projects can be intimidating, but they’re often more accessible than they seem once you get to know the parts a little better.


