
 My Account
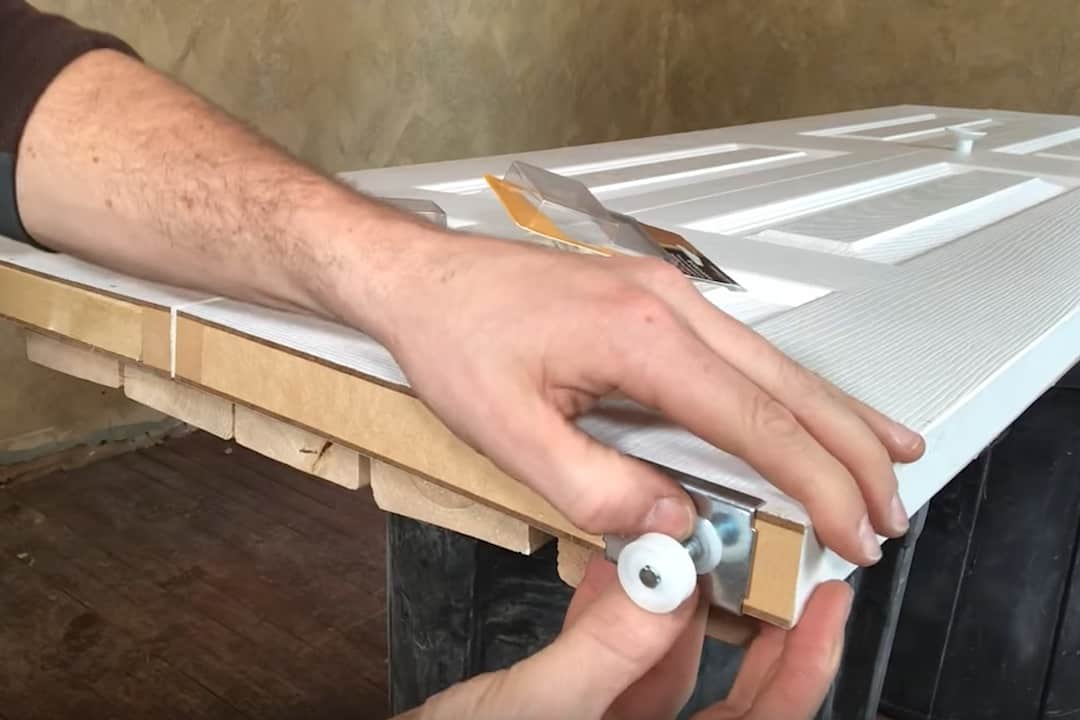
Today our do-it-yourself project has to do with a common problem in many homes — bifold doors with a broken pivot that needs repairing.
Bifold doors are frequently used to enclose such spaces as laundries, closets, and pantries. They’re easy to install and cheap, so they’re a popular choice for many homeowners.
Newer bifold doors are not made of solid wood, especially the more cost-effective ones. They are hollow-core and typically made from MDF (basically sawdust and glue fused together).
The door’s hardware is affixed to this MDF material, which can become damaged over time. This sort of disintegration is a common problem with MDF. Fortunately, it can be repaired without having to replace the whole door, as you’ll see in this tutorial.
How to Repair Bifold Doors: Step-by-Step Guide
If you call someone in to fix your bifold doors, it could cost hundreds of dollars, but some broken hardware and a little compromised MDF isn’t reason enough to call in a pro. You can do this repair yourself without spending much time or money.
In this how-to guide, I’ll show you step by step how to replace the top roller pivot of a bifold door when the MDF is damaged. This DIY project can be accomplished in 30-60 minutes and will cost only a couple of dollars.
Rather watch than read? Check out this 11-minute video.
DISCLAIMER: This video and description contain affiliate links, which means that if you click on one of the product links, I’ll receive a small commission
Repairing Bifold Doors: Supplies and Tools
Supplies
- Bifold Door Repair Bracket
- BiFold Door Pivots (3/8″ hole diameter)
- Toggle Bolts 1/8″ x 2″ long (2-pack)
Tools
- Drill with 3/8″ and 5/32″ drill bit
Repairing Bifold Doors: Examining the Problem
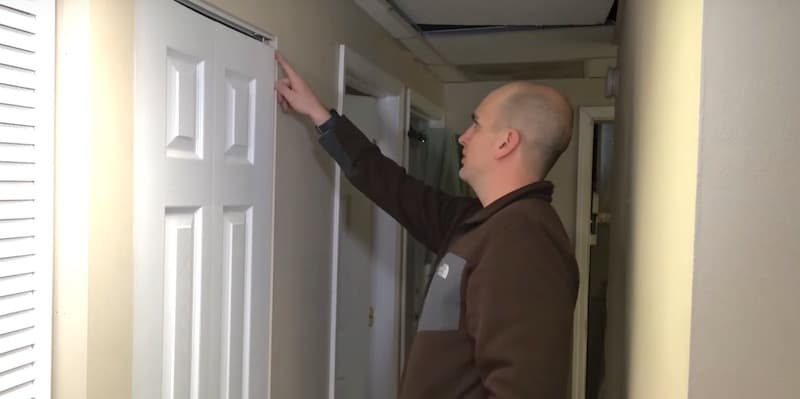
In one of our hallways, we have a bifold door that’s come off the track.
This component at the top of the door should have a roller on it that holds the door inside the upper track.

Let’s take a closer look.
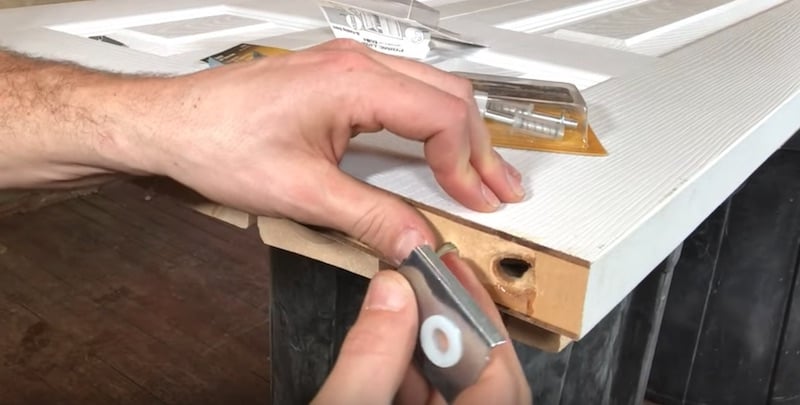
On the right (fixed) panel of the bifold door, a section of the MDF has been replaced with solid wood. You can see the wood inset here, which is held in place with three staples.
The hardware mounted into the wood — the pivot there on the right — looks good.
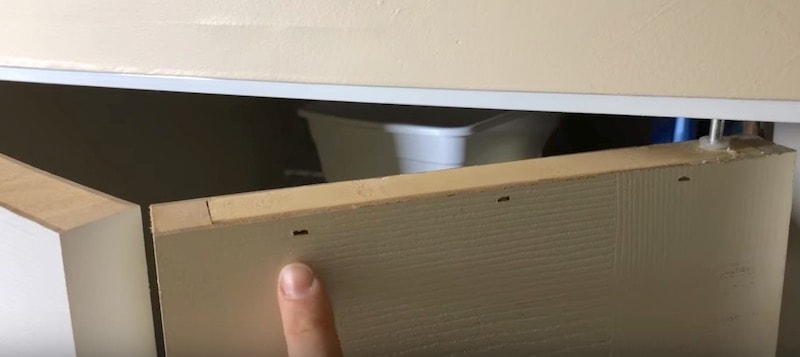
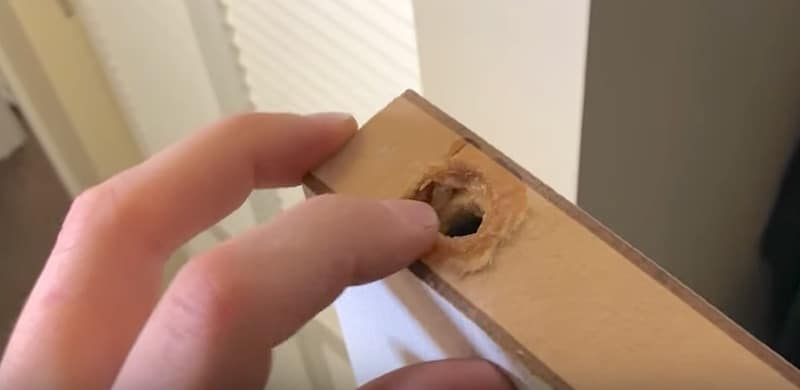
On the left (sliding) panel, however, the MDF is damaged and there’s some glue on it. Tugging on the roller a bit, it pulls right out.
This door is in a rental unit of mine, so I don’t know the history of the door but it appears someone’s tried to repair it previously.
This roller(roller missing from the picture) is the component we’re going to replace.
We’ll also need to install a bracket on top of the door to hold the pivot because the hole is enlarged and damaged, and there’s really no way to restore the MDF to a point where it will be sound.
Repairing Bifold Doors: Removing the Doors
Before getting started on the repair, I’m going to take the door off and move it to a level surface.
To remove the door:
- If the free (sliding) panel of the bifold is still in the track (unlike mine), push down on the roller to release the panel from the track.
- Fold the bifold door.
- Grasping both folded panels, lift the door up to release it from the bottom bracket.
- Swing the door out from the bottom. The top pivot should unseat so that you can pull the door away completely.
Repairing Bifold Doors: Hardware
The Bracket
To repair this bifold door, I’ll be using a metal bracket made for just such a purpose.
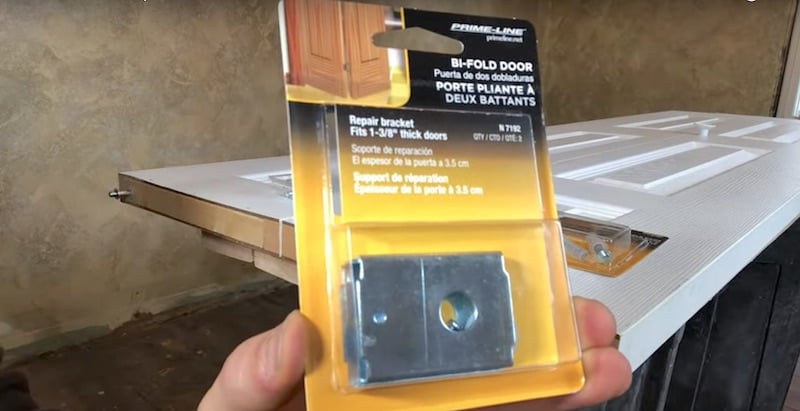
The bracket is essentially a “replacement hole” for the damaged hole in the MDF at the top of the door.
I’ve measured my door and I know that it’s 1⅜-inch thick. This is a pretty standard thickness but it’s best to measure before going out to buy your bracket.
The bracket has two holes: a bigger hole for the roller and a smaller hole for the mounting screw. The bracket kit also contains a bushing, which is a plastic ring that will fit into the larger hole to hold the roller.
Examining the screw that came with the kit, I have to admit I’m not convinced about its ability to hold very well.
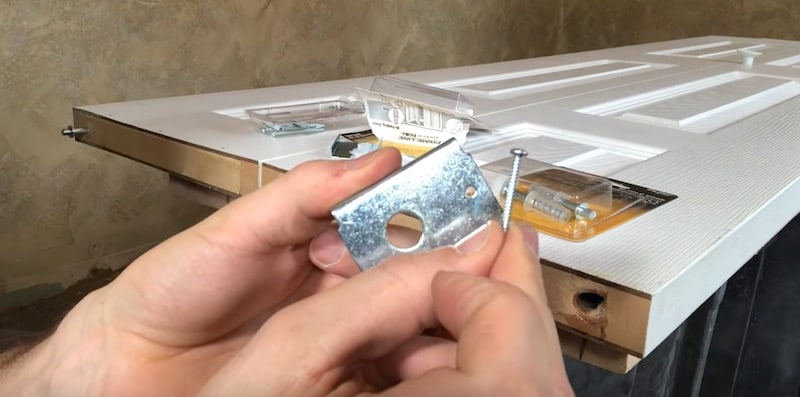
I’m going to use a toggle bolt instead.
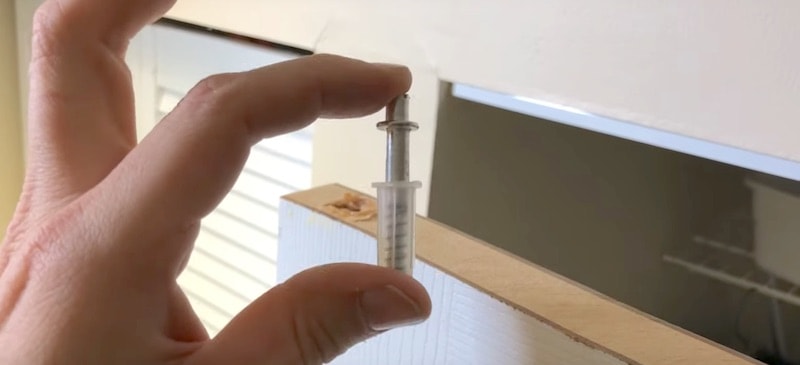
The Toggle Bolt and Wing Nut
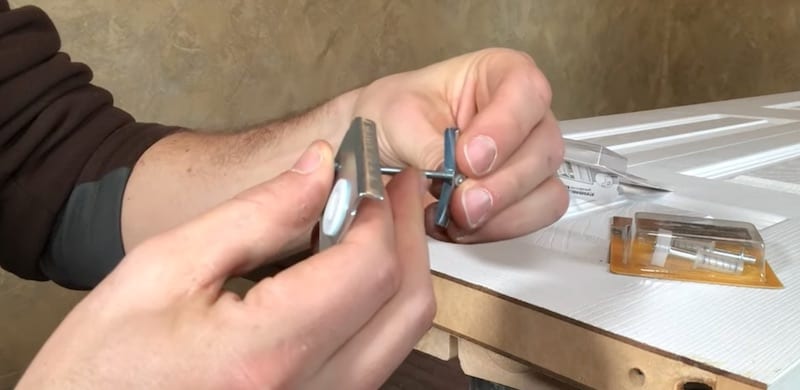
I’ll be using a ⅛-inch x 2-inch toggle bolt.
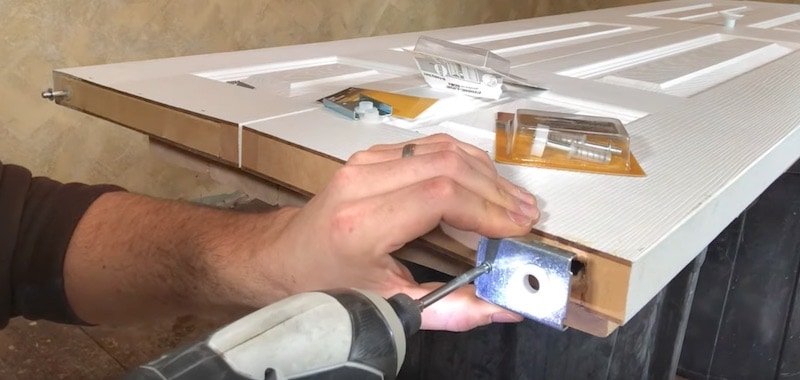
Note: I will need to enlarge the mounting-screw hole of the bracket a bit for this toggle bolt. I’ll do this using my drill and a 5/32-inch drill bit.
When the bolt and wing nut pass through the MDF, the wing nut will open and hold the bolt in place from the underside of the piece of MDF. This is a much more secure and long-lasting fastener than a screw when you’re working with MDF.
The Pivot and Roller
Here’s my new pivot and roller; in this case a ⅞-inch top roller.
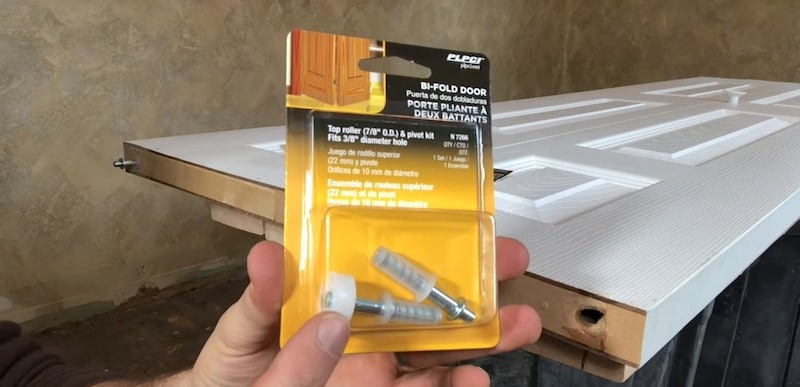
The kit comes with a roller, as well as a spare pivot.
Repairing Bifold Doors: Mounting the Bracket
Drilling the Holes
First, I’ll line up the big hole in the bracket with the hole in the door. (The small hole of the bracket will be towards the center of the panel.)
Next, I’ll mark the hole for my toggle bolt with the screw that came with the kit by just pressing it into the MDF a bit.
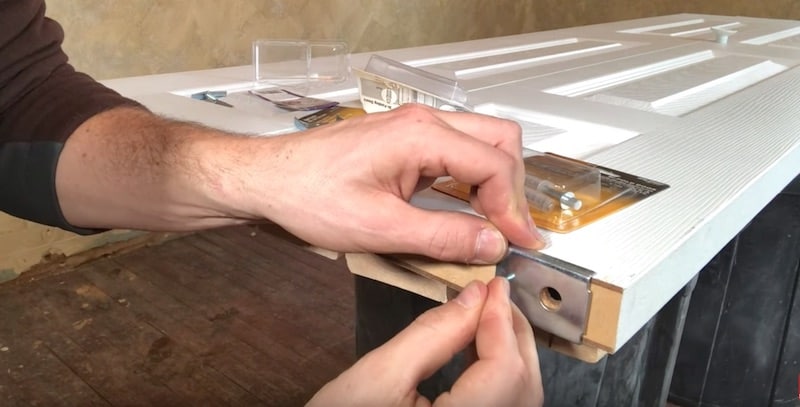
Then, I’ll drill a hole for the toggle bolt using a ⅜-inch drill bit where I’ve marked the spot.
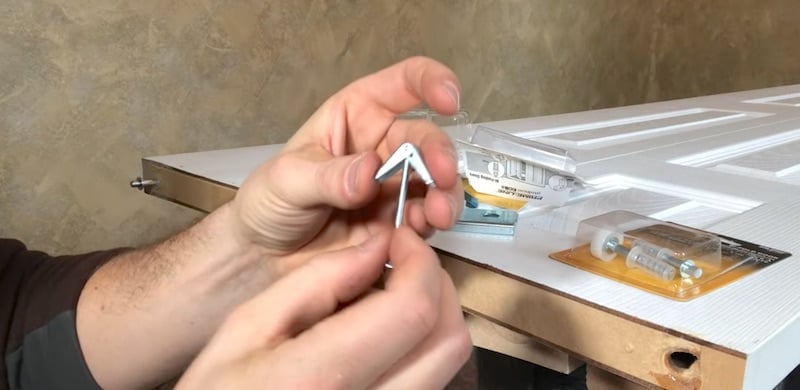
Preparing the Bracket
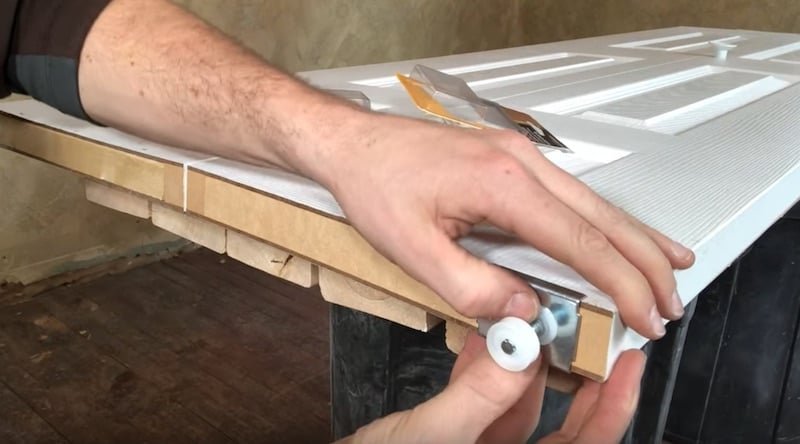
To prepare the bracket, I’ll:
- Mount the bushing into the large hole.
- Pass the toggle through the small hole.
- Screw on the wing nut so that the wings collapse towards the bolt.
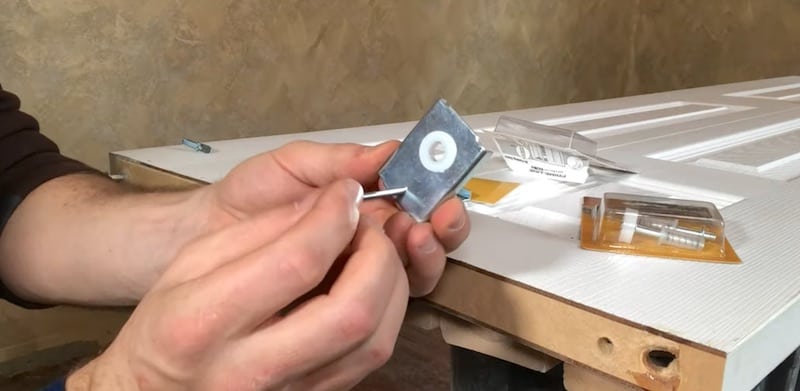
The wing nut only needs to be threaded onto the bolt a bit; we’ll tighten it up later.
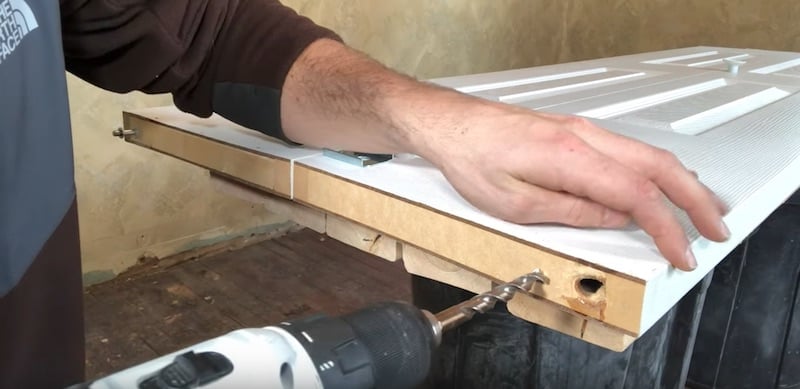
Fastening the Bracket
To mount the toggle bolt and wing nut, just press it through the drilled hole. Once the wing nut emerges on the other side it will expand and you will hear a “snap.”
When tightening the bolt, pull the bracket towards you so that the wing nut presses up against the other side of the frame.
Fastening the bracket to the bifold door with a toggle bolt makes for a far better hold than you’d get with the tiny wood screw that came with the kit.
Repairing Bifold Doors: Mounting the Roller
To mount the roller, just push it into the hole. Usually, you can do this by hand but you might need a little hammer.
Once installed, the roller should collapse and spring back out when you push on it.
Repairing Bifold Doors: Reinstalling the Doors
To remount the bifold doors, we’ll connect the top part first.
Even though we’re mounting the top part first, we want to line up the bottom of the doors to be more or less on the same vertical plane as the top track.
First, with the door folded up, we’ll lift it so that the roller of the sliding panel slips into the top track.
Then we’ll line up the pivot on top of the fixed panel of the door until it seats in the bracket attached to the door frame.
With the top of the door attached, we’ll line up the pivot on the bottom of the fixed panel of the door with the bottom bracket.
You might need to do a little back and forth to get both the bottom and top pivots fully seated. Do check carefully to make sure both pivots are properly in place.
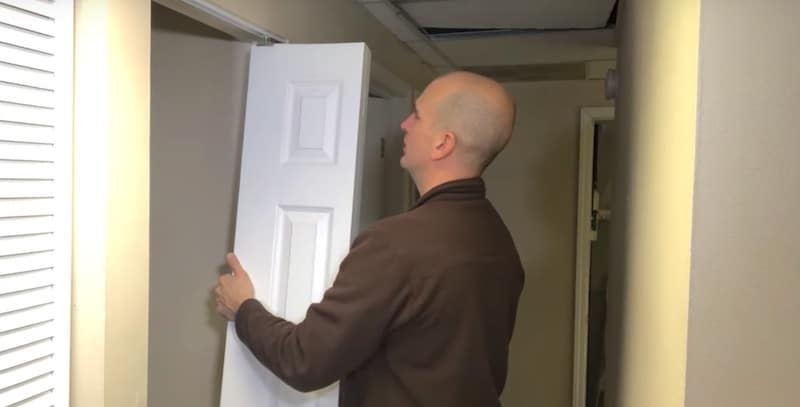
To check our work, we’ll close the bifold door and look at the spacing on both sides to make sure it’s even.
The spacing is even and the door is working well.
We’re good to go!
Got other home repair projects to tackle?
For a related project, have a look at our article on How To Fix An Interior Door That Won’t Latch.
For other home repair projects, please check out our YouTube channel.


