
 My Account
A door that won’t latch is one of the most common repairs around the house.
This often occurs over time because the latch becomes misaligned with the latch plate, also known as the strike plate. This can be caused either by your house settling or by the hinges becoming loose.
There are 3 steps I take when trying to correct a misaligned latch:
- Tighten or replace the screws on the door hinges
- File the strike plate hole, or
- Adjusting the hinges.
Keep on reading as we expand on the above 3 steps you can use to repair your interior door. Alternatively, if you would like a video walking you through each of the 3 steps check out our YouTube channel!
What Does A Door Latch Go Into?
A door latch goes into a latch plate (also known as a strike plate).
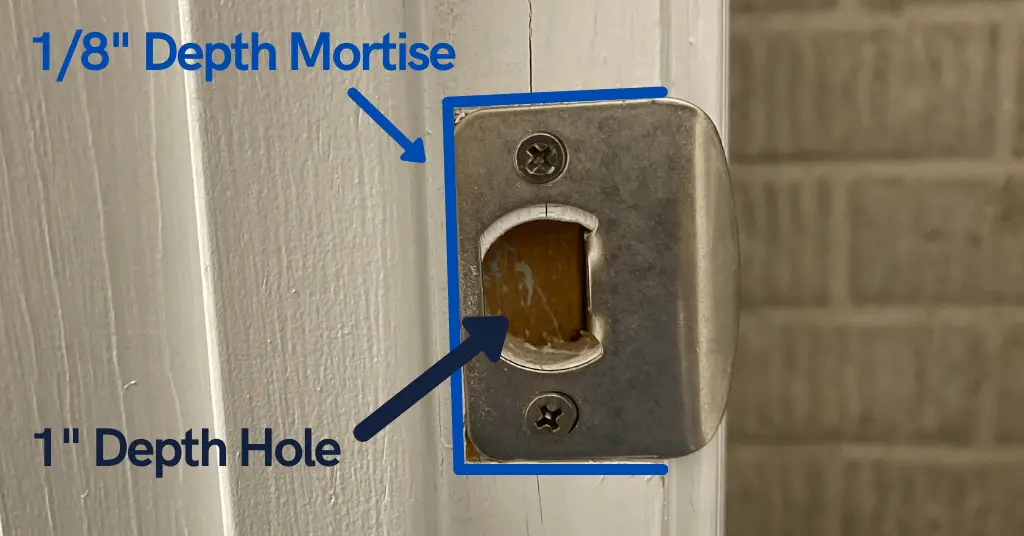
The strike plate is mounted into the door jamb, and usually, a small mortise is cut into the jamb, which allows the strike plate to be flush with the door jamb.
Additionally, the door jamb should be chiseled out 1 inch (25mm) in depth, matching the hole’s size in the strike plate. This will allow the latch to fully extend in the strike plate.
What Causes A Door Not To Latch?
A misalignment between the latch and the strike plates is the most likely cause that will lead to a door not latching. This can happen as your home foundation settles, even by a fraction of an inch, or seasonal changes.
How Do You Fix A Door That Won’t Latch?
There are three simple steps I follow when troubleshooting ways an interior door that is not latching:
Step 1:Tightening The Hinges
This is the most straightforward fix and thus should be the first thing to check.
Step 1a
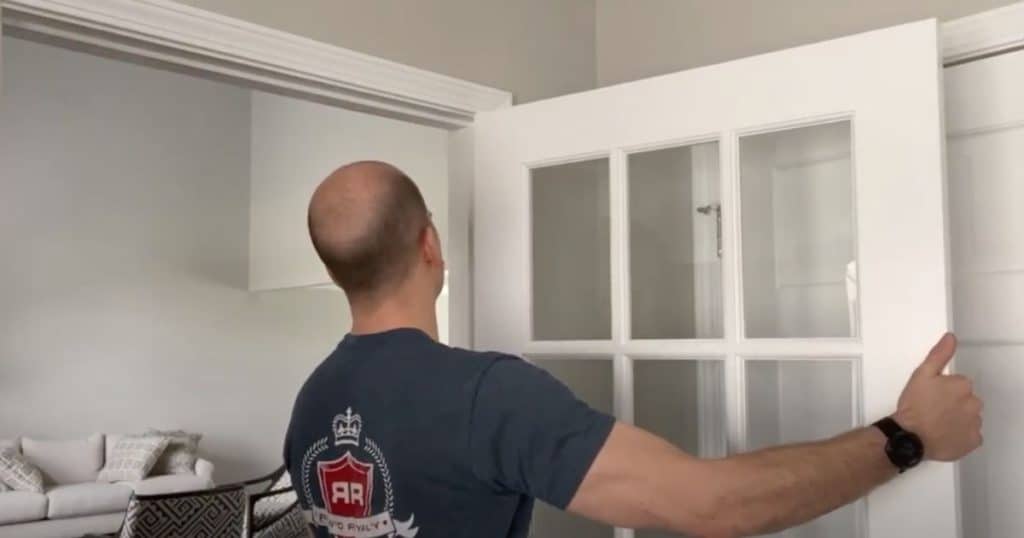
Grab the door’s sides and gently move it side to side while looking at the hinges.
If you see the hinges moving or “wiggling” a bit, then the hinges likely need to be tightened, or screws need to be changed.
Step 1b
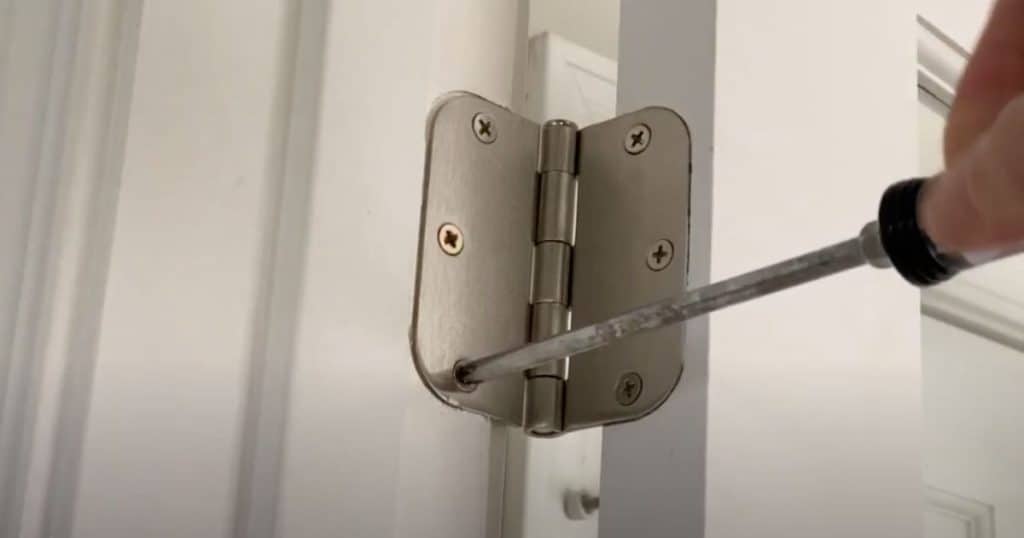
With the help of a simple Phillips head screwdriver, tighten each of the screws in each hinge.
If they are all tight, try and close the door and see if it latches.
If, however, you have any of the screws that simply turn without getting tighter, that screw will probably need to be changed as the current hole may be stripped out.
Step 1c
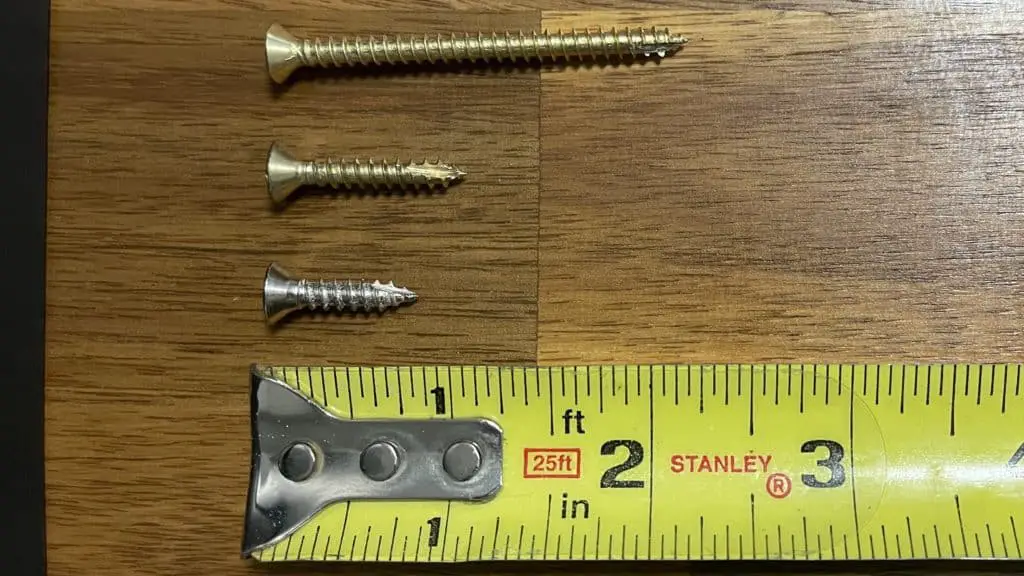
Remove the screw that is not tightening.
If your screw is ¾ of an inch (19.05 mm) or even 1 inch (25.4 mm) long, they are too short.
Instead, try the 2 ¼ inches (57 mm) long screw. I recommend using the Satin Nickel Door Hinge Screw from Amazon. I always carry 3 or 4 of these packs in my hardware kit and have used them for numerous loose hinges over the years.
A longer screw will go all the way through the jam and into the frame behind, providing a better hold.
If your door still is not latching after checking that all the hinges are tight, try the next 2 steps to solve your problem.
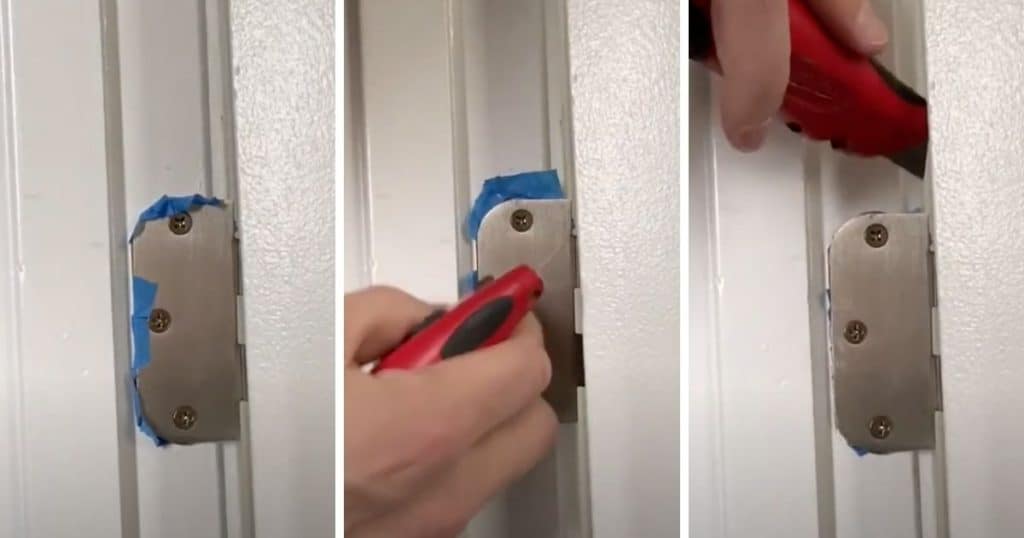
Step 2: File The Strike Plate Hole
If tightening the hinges does not repair the latching problem, try filing the strike plate hole.
Step 2a

With the use of pipe sealant, lipstick, caulk, or anything else that marks, apply to the bottom of the latch.
Step 2b
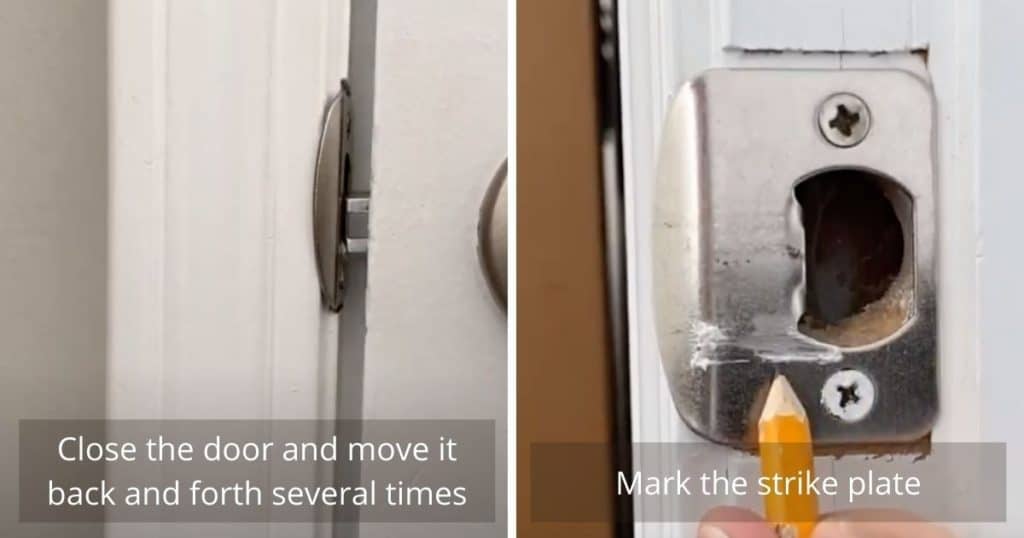
Retract the latch slightly and close the door completely.
Once the latch is touching the plate, move back and forth a few times.
This will mark the plate allowing you to see where the latch’s bottom is concerning the strike plate.
Step 2c
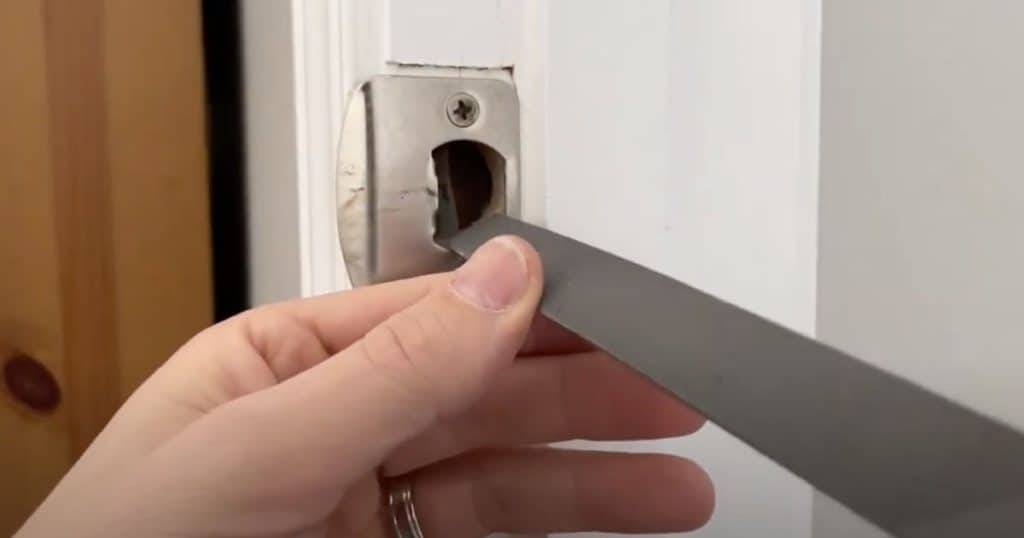
With a simple convex hand file, start to file the plate and whole.
Side Note: Move the file in one direction only, inwards. Filing in both directions will be ineffective. This is because, as you go out, you will file the teeth of the hand file with the metal shavings.
Eventually, you will start working the wood and metal plate down. Carry on filing away until you have enough clearance that your latch will line up with the strike plate hole.
If tightening the screws does not work (step1), or the file required for your latching plate is too great (step2), the next option is adjusting the hinges.
Step 3: Adjusting The Hinges
This step is the most complicated due to the various sub-steps to take. If you are a visual learner, the video will help you follow the steps much better.
Bending the hinges or adjusting the hinges will allow you to reposition the door within the door jam itself.
9 times out of 10, the issue will be your latch being lower than the strike plate hole, so that is the scenario we will review below.
The first thing to do is to assess all the gaps around your door. Ideally, you want 1/16 of an inch (1.6 mm) on the hinge side, ⅛ of an inch (3 mm) on the latch side, and less than 1/16 of an inch (1.6 mm) at the top of the door.
If your latch is lower than the latch plate, adjust the latch side of the door.
Side note: before you start adjusting anything, ensure you have enough space for the door to move, remember the ideal gap size’s described above. For example, in my video, I show a door that needs to be adjusted on the latch side. As the door will be moved in the vertical direction, the door will rotate right. As I move that latch-up, it will move the bottom of the door towards the jamb, and the top of the door up. Having no space at the top or bottom of the door will cause the door to interfere or bind with the door jamb and introduce a new problem causing your door not to close correctly.
Ok, once you have a game plan, follow the steps below:
Step 3a
Close the door.
Step 3b
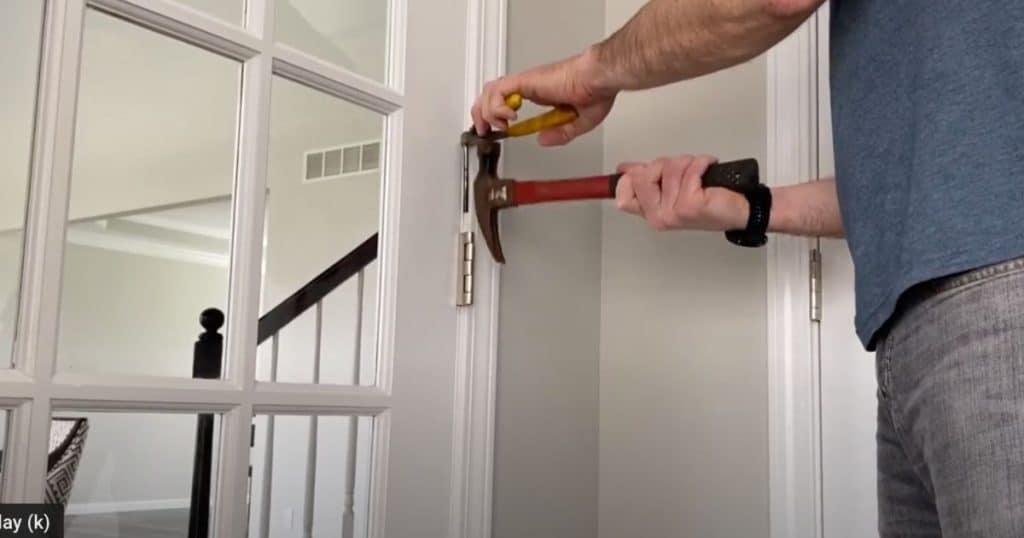
Start at the bottom hinge and remove the door pin. I use a hammer and side cutters to easily remove the pin.
Step 3c
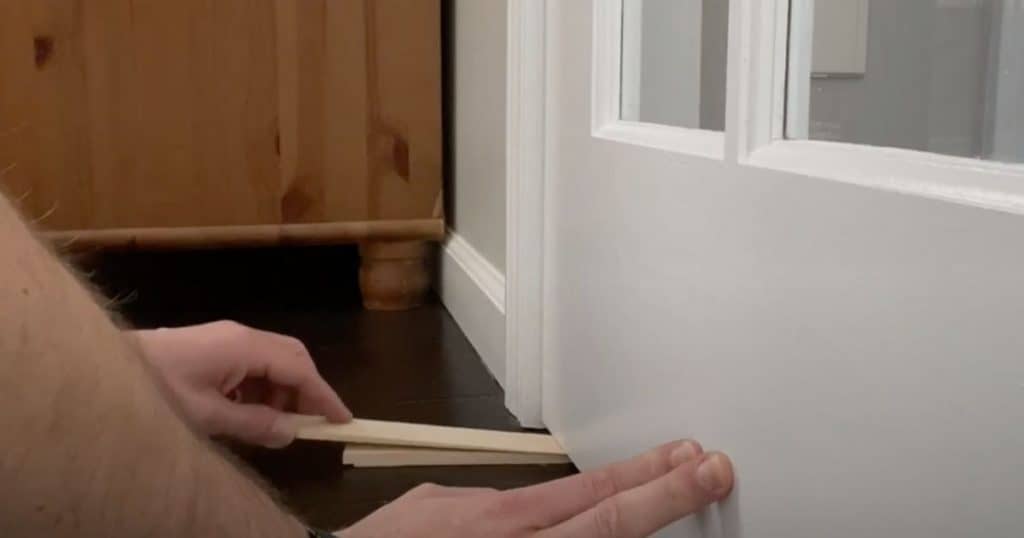
Once the bottom hinge pin is out, shim the door’s base on the door’s latch side, so the door is supported and doesn’t sag.
Step 3d
With the wood shims in place under the door on the latch side, we will remove the middle door hinge pin.
Step 3e
With the bottom and middle pins removed, you will need to continue adding more wood shims at the bottom of the door until the latch is high enough to fully extend into the strike plate hole.
Make sure you have a little clearance between the bottom of the latch and the strike plate.
Step 3f
Now that we have the door where we need it, and the latch fully extended in the strike plate, ensure that you have clearance all the way around the door before moving to any of the other steps.
Step 3g
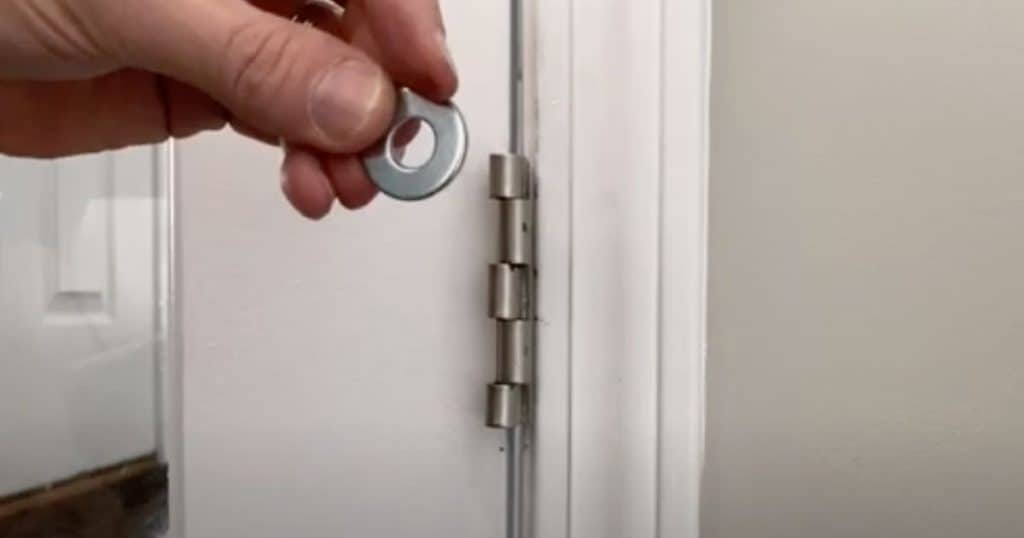
Considering both the bottom and middle hinges, assess the amount of movement needed in the jamb-side hinge to position the door-side hinge allowing the latch to extend in the strike plate.
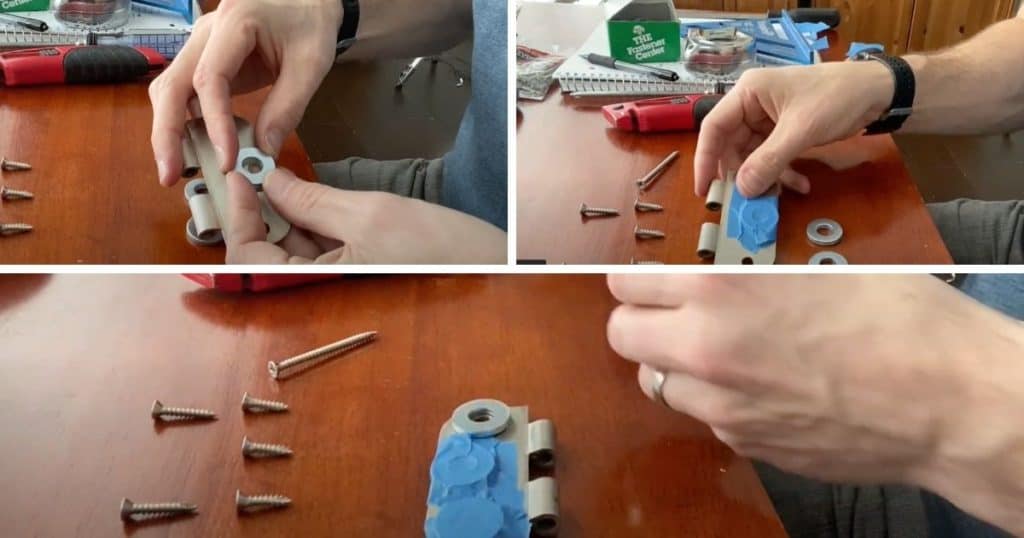
Example: If you need to space out the jamb-side hinge by ⅛”, then place two washers (approximately 1/16″ thick) on each of the hinge screw holes.
Tip: Secure each of the washers with painter’s tape. This will help you align the screws in the whole without any interference from the washers.
Step 3h
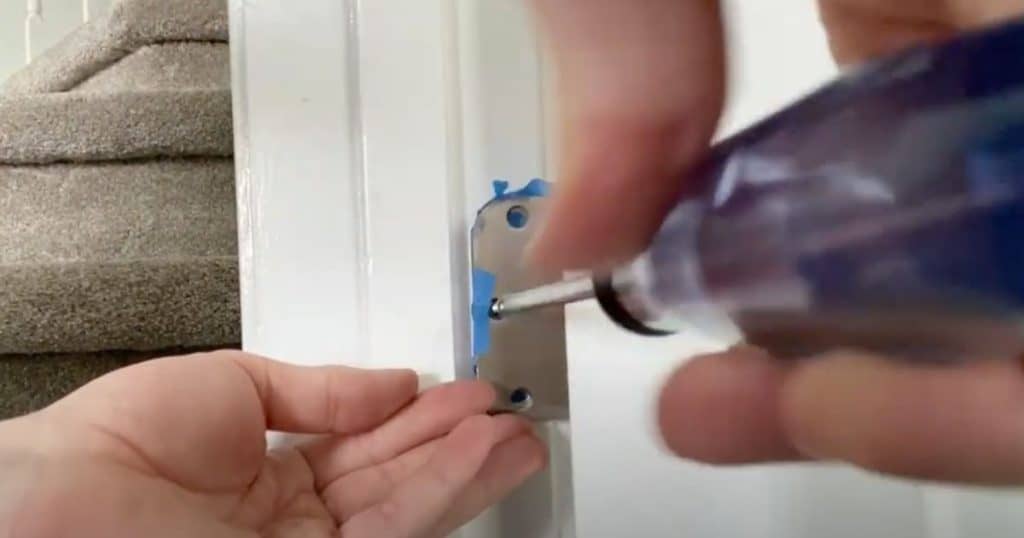
With the washers secured at the back of the hinge, put the hinge in the jamb.
Place a 2 ¼” (57.15 mm) screw in the middle hole and a 1″(26 mm) screw in the top and bottom holes.
I prefer to hand-tighten the screws because the cordless drill sometimes can strip out the screws.
Step 3i
Once the hinge and screws are in place, trim as much as you can of the painter’s tape.
Step 3j
With the help of the screwdriver, go around and do one last tightening of the screws.
Voila, you should now have a door that latches.
Conclusion
Doors that won’t latch are one of the most common problems around the house.
There are many ways to get a door latch misalignment corrected. In this article, and in my video, I described 3 steps you can take:
- Step 1: The simplest and most common action to take will be to tighten all the screws around the hinges. If you have one that will not tighten, change it for a longer hinge screw.
- Step 2: With a pipe sealant’s aid, mark the latch, close the door and move it back and forth until the striking plate is marked. If the distance is not too great, you could file the latching plate and the strike plate hole with a convex hand file.
- My final option is adjusting the hinges.
If you are a weekend warrior like myself, Subscribe to my youtube channel. I have many videos to help you around the house with your repairs and improvements.


