
 My Account
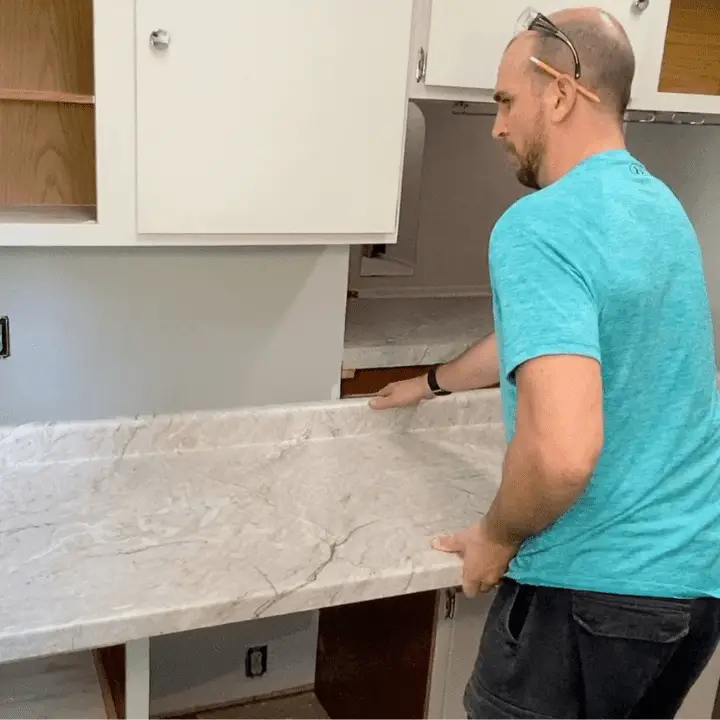
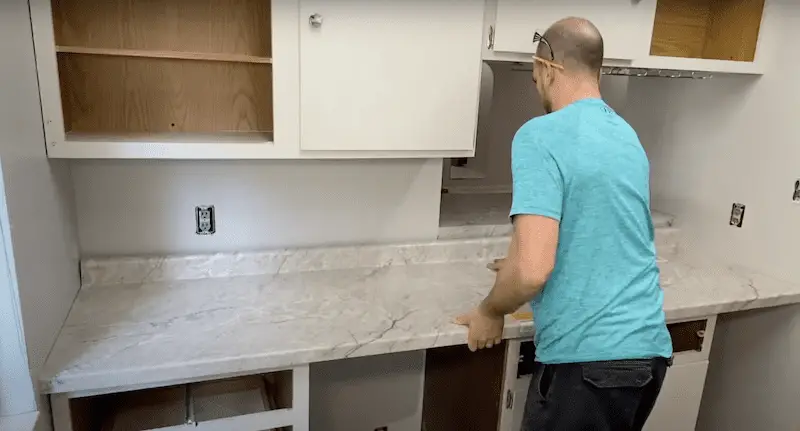
Installing laminate countertops in a galley-style kitchen is one of the most approachable DIY projects. You don’t have any corners and seams that you have to deal with – they’re simply straight-runs that you need to cut and secure into place.
That said, there are different tips and tricks that will make this project easier and more polished. In this blog, we’ll cover the supplies you need and step-by-step instructions. From making a plan to cutting a hole for the sink, these steps cover exactly how to install laminate countertops in 10 steps.
Rather watch than read? Check out this 20-minute video.
Tools Used
- Laminate Jig Saw Blades
- Jig Saw
- Makita Cordless Router
- Flush Trim Router Bit
- Makita Cordless Circular Saw
- Diable 60 Tooth Blade (6.5 “)
- Hand File Set
- Micro Side Cutters
- Vinyl Floor Roller
- Utility Knife
DISCLAIMER: This blog contains affiliate links, which means that if you click on one of the product links, I’ll receive a small commission.
Laminate Countertops Installation in 10 Steps
1. Remove old laminate countertops
Take your time to remove the old laminate countertops if you have them. Getting in a hurry and ripping things out, will likely cause a ton of damage. You’ll end up with more drywall or painting work that you’ll have to do before you get to install the new laminate countertops.
Usually, at least in my area, countertops are secured through the corner brackets inside the cabinets. And then, you’ll have some screws (usually four in each cabinet) popping up and securing into the countertop. So you need to unscrew those and depending on if there’s anything between the countertop and the cabinet itself, they might just pull right off. That’s how mine worked.
Additionally, you’re probably going to have some silicone on your backsplash and possibly on the side. Take a sharp utility knife and cut that off, so when you lift it off you’re not damaging the drywall.
Remember, if you’re going to set the countertops in exactly the same, it’s nice to keep them whole so you have them for measurements.
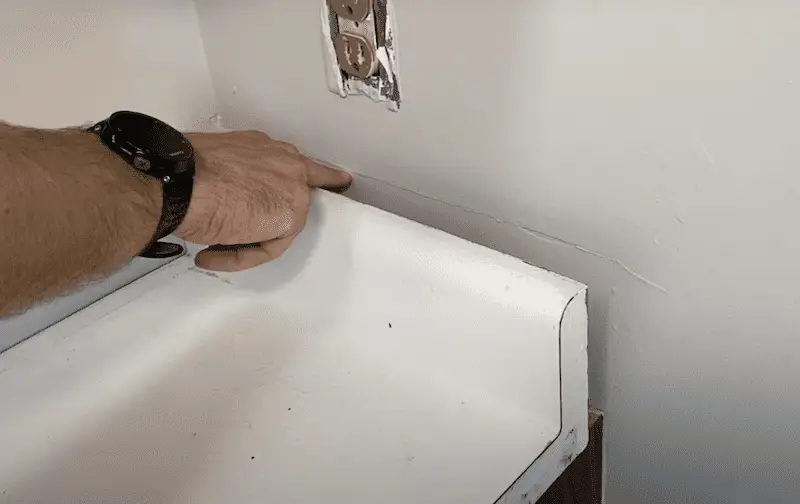
Pro tip: don’t overlook the measurements on the backsplash. This will help you with the planning. For example, if you see that the backsplash on a new laminate countertop is not the same as yours, then you’re going to have a gap. You might want to make that up that distance by building up some shim pieces that’ll help cover any drywall damage, some unpainted surfaces, or just the ridge that you’ll get at the top of the old backsplash. It’s different for each project, but this measurement can save you some time.
2. Plan cuts for the new laminate countertops
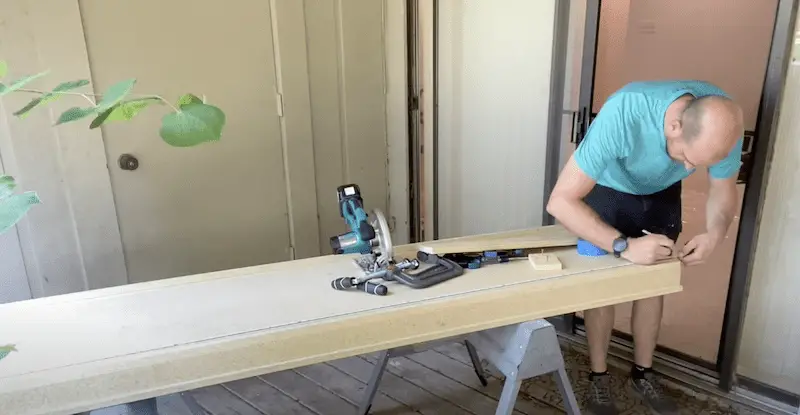
With the eight-foot section on sawhorses, I marked the front and back near the backsplash measurements and then connected that cut line with my cut guide, which serves as a straight edge.
With that cut line, I put my circular saw adjusted all the way up so the blade touches the cut line. Then, I set the guide with some c-clamps and also a small guide for the backsplash.
From there, I put down some blue painter’s tape on the laminate side to help protect and minimize the chances of chips.
3. Make your cuts
After you put on safety glasses, you’ll adjust your blade down to about 2″, so you can complete the cut. This is because you’re going to have to get around the front edge and then also rotate around the backsplash. (For more instructions on this, check out this video below.)
At this point, remove everything, flip it over, and inspect the line. Make sure you’re satisfied with the result (no chips with a nice smooth finish).
4. Install build-up strips
Now, it’s time to install some four build-up strips (two on each of the cabinets). Once the countertop is in place and the sinkhole is cut, I will come back through and put a few more build-up strips or small pieces on the front surface of the sink base. This is because the countertop is going to lose some of its structure once that sinkhole is removed.
Pre-drill and then screw them in. I used drywall screws for this and got everything all set. Then, take the countertop and make sure it sets in place and everything fits up all right.
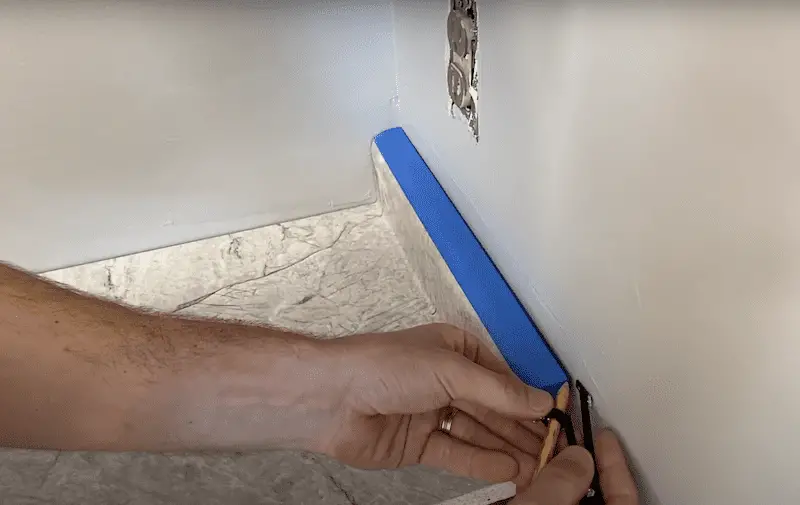
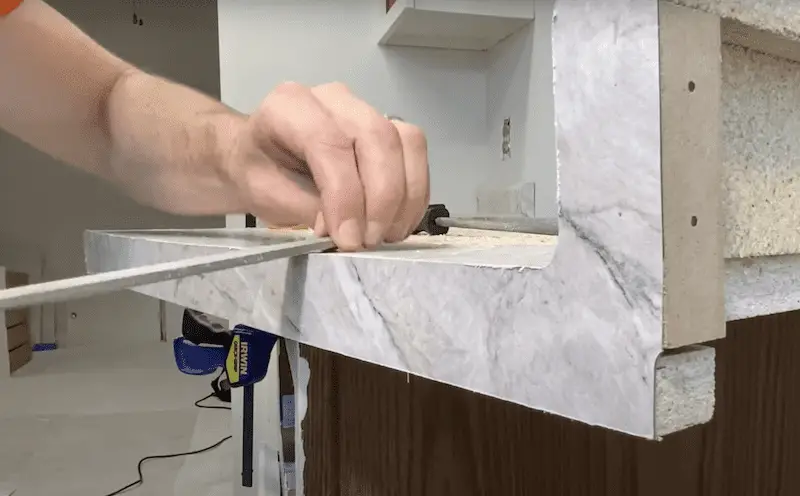
5. Cover gaps (end splash, silicone, or scribing).
At this stage, you’re probably not looking at a perfect gap all the way around the sides and on your backsplash. This could be from your cuts on the laminate countertop – but more reasonably it’s probably from your wall surfaces not being perfectly parallel or perpendicular, causing a varying amount of gaps.
So what can you do? You have a few options!
- End caps: If the gap is on the wall surface, for these countertops they make what’s called an “end splash” like a backsplash but just made for the end of the counter. Depending on where you got your countertops look and see if they have those available. However, in my case they’re a two-week lead time. Just something to keep in mnd.
- Silicone bead: Additionally, you’ll be putting silicone between the wall surface and the countertop. So, in my opinion, if the gap is a 1/8″ or less, you’re probably good. You can make that up with that silicone bead and no one’s going to know the difference.
- Scribing: If you’re on your backsplash – like this one actually and you have a 3/16 on one side or even 1/4 on one side – you can consider scribing (go to minute 6:40 to see this process).
The goal, whether you’re scribing or using a silicone bead, is to have your countertop fit as desired to your cabinets and wall surfaces.
6. Finish out the ends with end caps
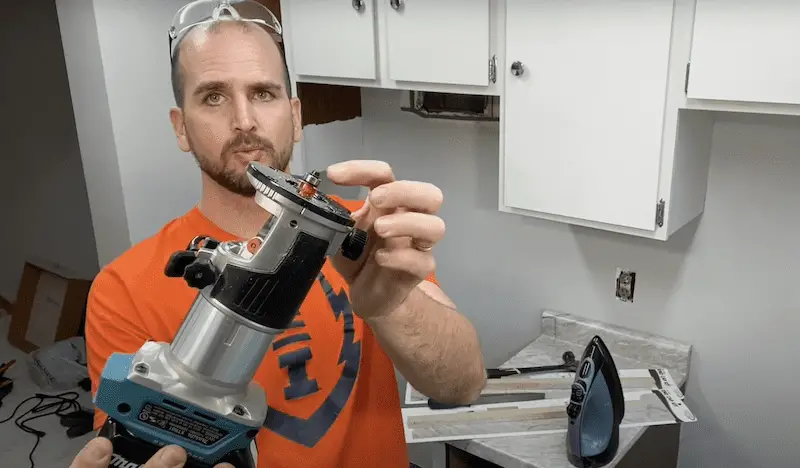
It is much faster if you have a router with a Flush Trim Router Bit. I really recommend getting one if you’re going to do more than one countertop. However, if this is a one-and-done project for you and you don’t have a router, don’t invest the money. Just keep in mind, it’s just going to take you a little bit longer.
Steps for using a router:
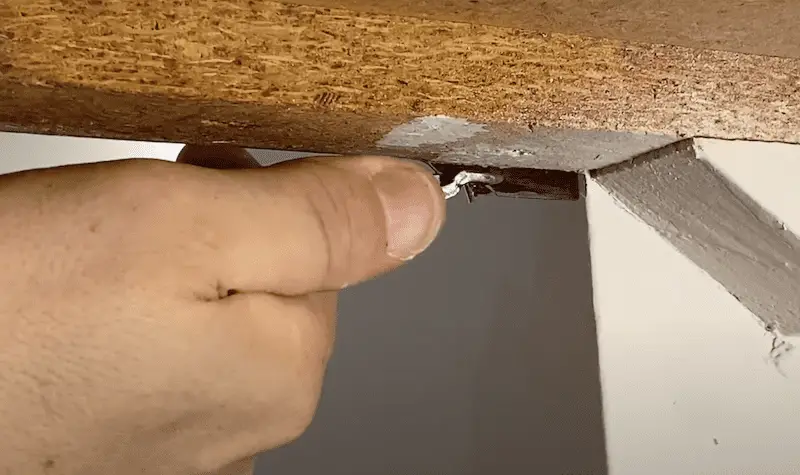
- Take the build up strips and install those on the back side of the laminate countertop. You’ll use the finished nails and hammer them home making sure that the outside surface is as flush as possible.
- For me, I installed three finished nails on each side and went back through and installed two more just to make sure everything was secure.
- Once the long pieces are there, which are 3/4″ thick, we’ll put the smaller backsplash build-out strips which are a 1/2″ into place with two nails.
When those are installed, and everything looks good – you’re ready to apply the end cap.
If you’re not using a router, one additional thing you could use is some snips or Micro Side Cutters (seen above). These are handy because you can snip off additional material quickly instead of having to file everything down. (Click this link to see how to finish the ends with just a file.)
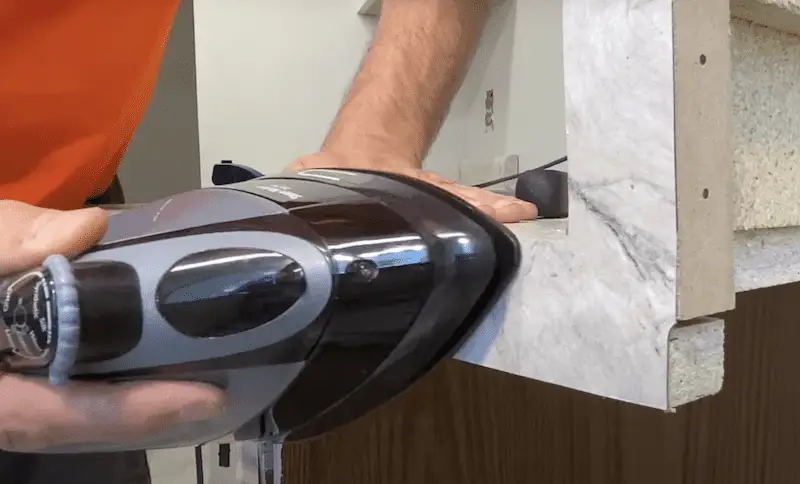
7. Apply the end cap
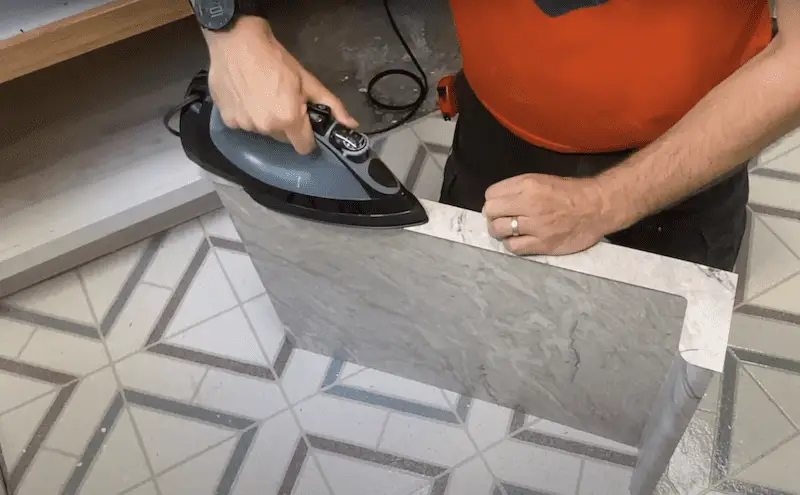
Place the end cap on your countertop and make sure there’s no excess material peeking out from under the end cap. Once you have it in place, you’ll start to heat it up with the iron set to the cotton setting, applying pressure and heat as you work your way around.
Once everything is heated up, if you have a Vinyl Floor Roller, it will be helpful for you to roll it out as it’s cooling down, and the glue will start to bond. Then, you can test to make sure everything’s secure.
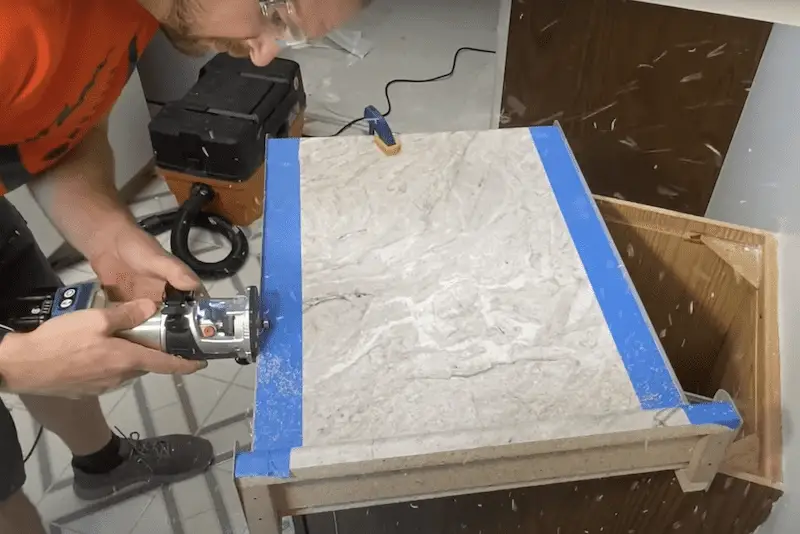
Before cutting with the router, put down blue painter’s tape on the top laminate surface – this helps the guide wheel to ride on the surface and also gives an early indication if the router gets too close to the laminate, which would damage it.
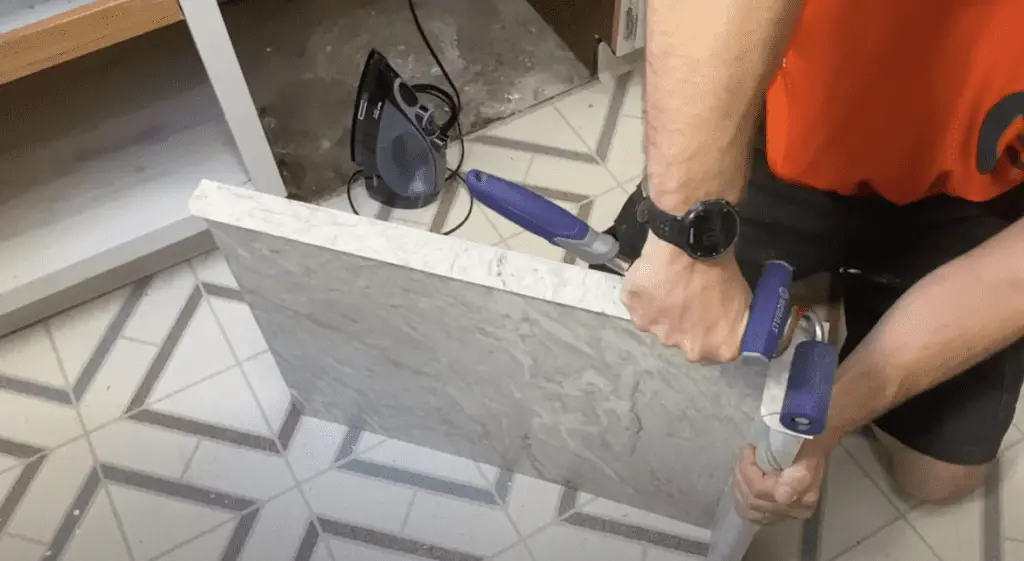
8. File for a finished product
For a nice finished project, you’ll need to use a hand file. Use the flat file horizontally with a small angle so you don’t gouge the laminate surface.
Clean off the excess, frayed plastic that you see above. Pro tip: you’ll know that the end cap is filed down to where you need it to be when the glue starts to fold over onto the top surface and then starts to come off.
A round file will come in handy for the inside corner on the backsplash. The front corner can also be tough so take your time. When you’re filing around a curve, remember the contact surface is a lot smaller with the flat file, so the material will come off much faster. Be careful!
If you see any weak points you can take your iron on the same setting and apply additional heat to reactivate the glue. Then, press down to get a final bond on the surface.
Note: filing can take the most time, but be patient. You don’t want to get this far and then damage your surface and have to start over.
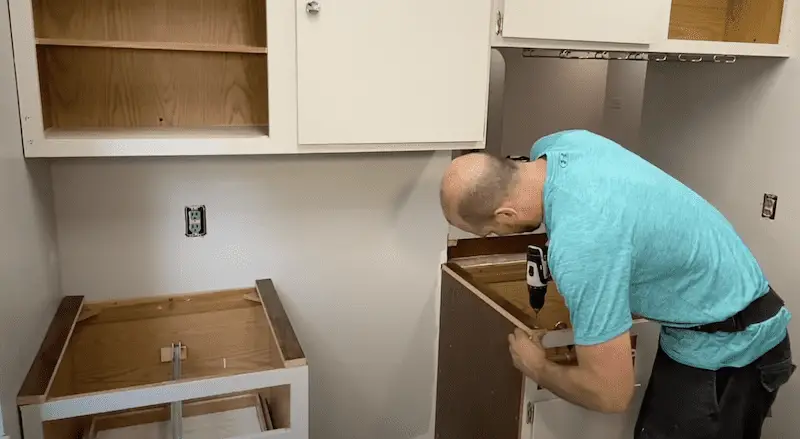
9. Secure the countertops to the cabinets
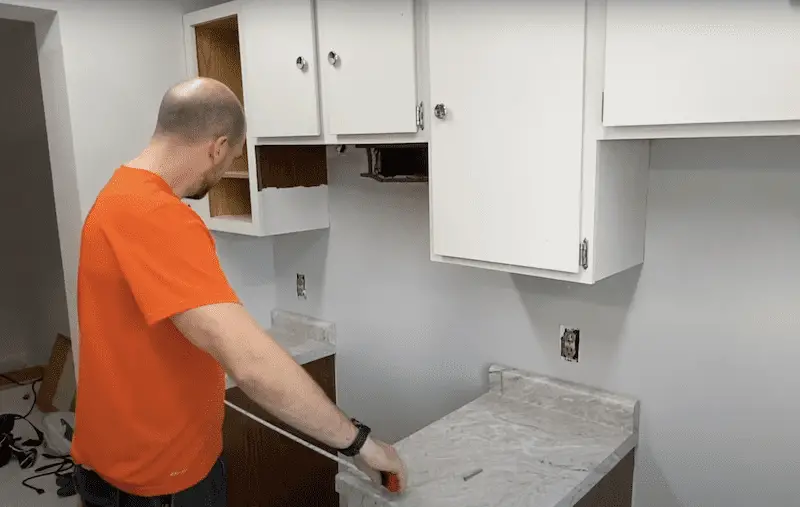
This is a very easy step, but make sure you have enough clearance with other appliances like a refrigerator or stove. You want to ensure you have enough space but also not too much that will leave you with an undesirable gap between your countertop and appliance.
Secure it down with screws, such as 2.5” deck screws. Check your clearance and secure through the corner brackets of your cabinets into the countertop itself. Don’t overtighten the screws as this can lead to damaging the corner brackets.
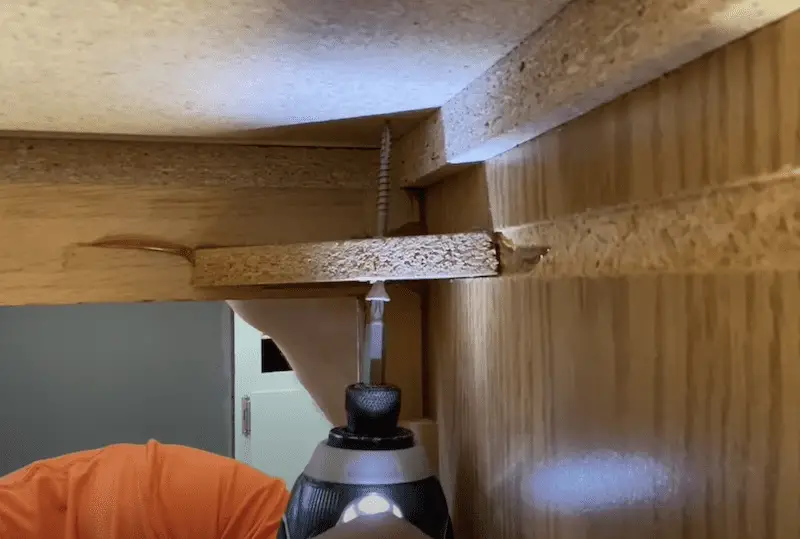
You might be drilling into the top– ¾” surface itself – or you might be going into the build-up strip, which means you have 1.5” total to drill into. Jump down in your cabinets and look and see how much length you’re going to need on the screw. From there, get ½” of that screw into the bottom of the counter surface you’re securing.
This might be a build-up strip on the bottom of the countertop or at the countertop surface itself. You do not want more than 3/4 of an edge if you’re going into the countertop. Why? Your screw is going to come through the top which is obviously undesirable!
10. Cut the hole for the sink
The last step is cutting the sink hole. If you want in-depth commentary and tips there, check out the video above. I specifically focus on how to cut it out.
One of the big things you’re going to need is a jigsaw, which costs about $30 to $40. And more importantly, you’ll need the Laminate Jig Saw Blades blades. They have straight teeth that will reduce the chances of chipping the laminate off.
You do not want to use a normal jigsaw blade because it will pull up on the surface and then flake off the actual laminate. Not good!
The wrap up – overall laminate countertops installation
I know this seems like a long process, but if you go step by step, the laminate countertop installation process can be satisfying. It’s also a money-saving DIY home repair project that . If you’ve done this project, let us know in the comments how it went. What worked? What didn’t?


