
 My Account
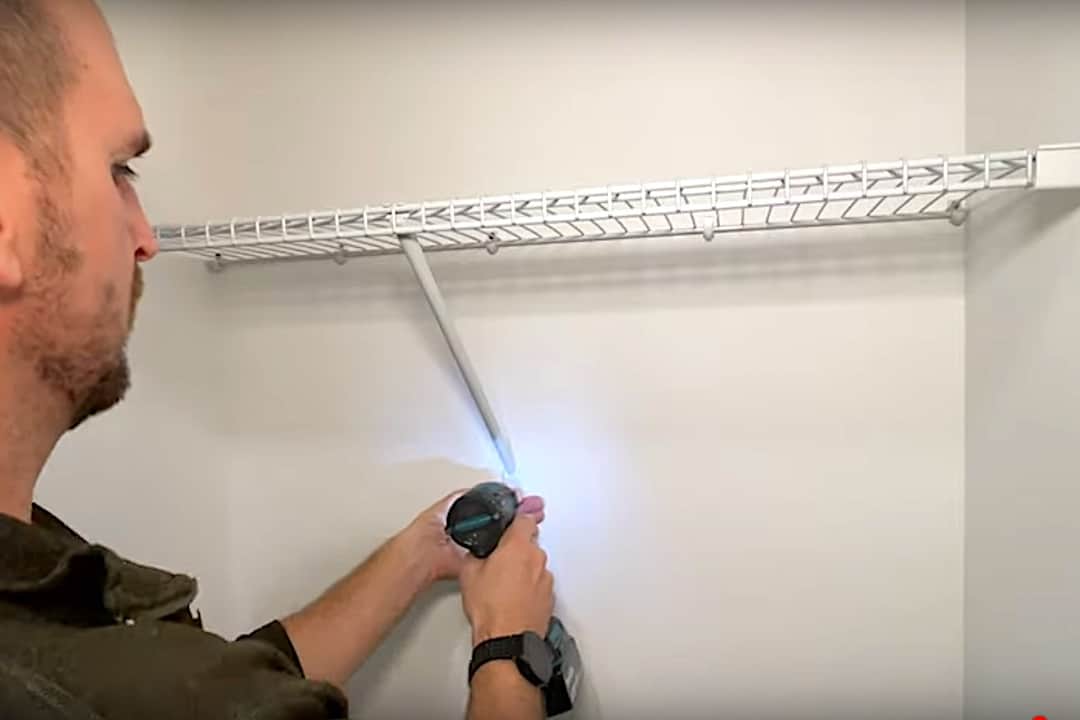
Today I’m going to show you how to properly install Closetmaid wire shelves into a closet.
Specifically, I’m going to be working with this Closetmaid Shelf Kit with Closet Rod. The shelf is 4 feet wide and comes with a rod for hanging your clothing as well.
These shelves are notorious for being installed poorly and for working their way out of the wall over time, especially when they’re loaded with weight. The plastic anchors come loose and the brackets and shelf eventually fall off.
Fortunately, you can install a Closetmaid shelving system in a way that’s secure and durable by implementing a few simple tricks of the trade.
Foolproof Closet Shelf Installation: Step-by-Step Guide
In this tutorial, I’ll show you step by step how to get your Closetmaid shelves installed right the first time by using some simple supplemental hardware and my preferred approach to mounting the clips and brackets.
If your project is an already-installed closet shelf that’s falling off the wall, this technique can help you easily fix those problems as well. Without any major work and without any drywall patching, I’ll show you how to repair your shelving system in a way that will make it even more secure than when it was first installed. And we’ll do this all with some inexpensive parts you can pick up in any home center.
Installing a wire closet shelf is a very approachable project, even for a new do-it-yourselfer. By following the steps in this how-to guide, you can achieve foolproof results on your DIY wire shelf installation or repair project without a lot of time and effort.
So let’s jump into it!
Rather watch than read? Check out this 18-minute video.
DISCLAIMER: This video and description contain affiliate links, which means that if you click on one of the product links, I’ll receive a small commission.
How To Install Closetmaid Shelves: Supplies and Tools
Supplies
Tools
- Makita Cordless Drill Combo Kit
- Dewalt Drill Bit Set
- Dewalt Screwdriver Bit Set
- Craftsman Screwdriver Set
- Stanley Tape Measure
- Studbuddy Stud Finder
- Johnson Torpedo Level
- a Sharpie
- a hacksaw
Measuring the Space for the Shelf
I’m going to be installing this shelving unit so that the clothing rod is 66 inches above the floor. This means the shelf itself will be a few inches higher than that.
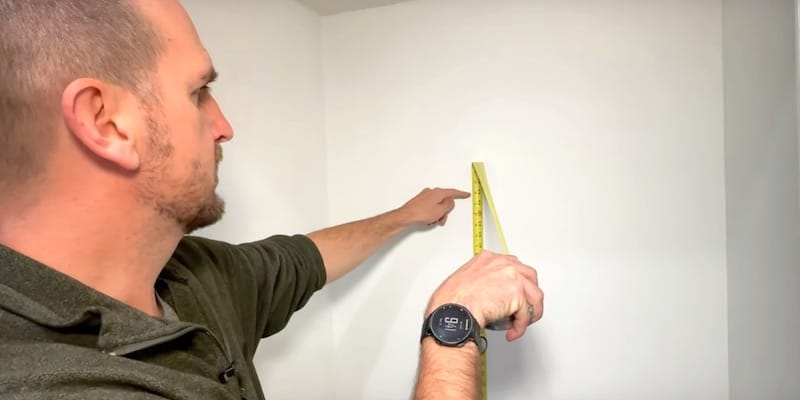
At that height, I’ll take a measurement across the back wall of the closet.
The width is 36 inches.
You want to cut the shelving unit components a little narrower than the space. I’m going to cut my shelf and rod 35-½ inches wide to give me about a quarter-inch clearance on each side.
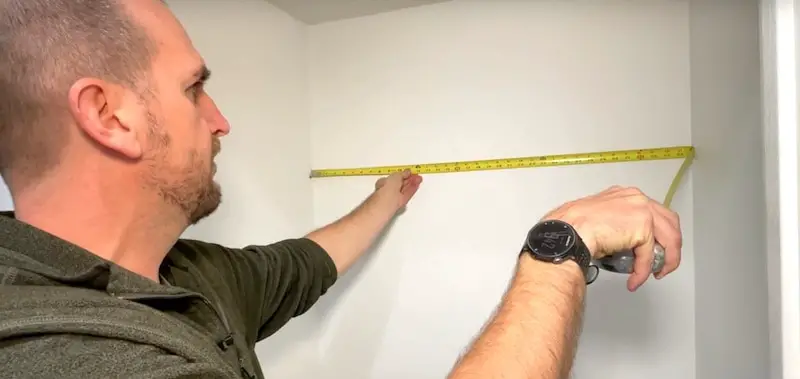
Knowing that closets frequently are not square, it’s a good idea to take another horizontal measurement about a foot into the space (at the depth of the shelf).

NOTE: If the space for the front side of the shelf is narrower than the back wall, use this measurement as the basis for cutting down the shelf. (In other words, deduct ½-inch from the front measurement as the width you’ll cut the shelf down to).
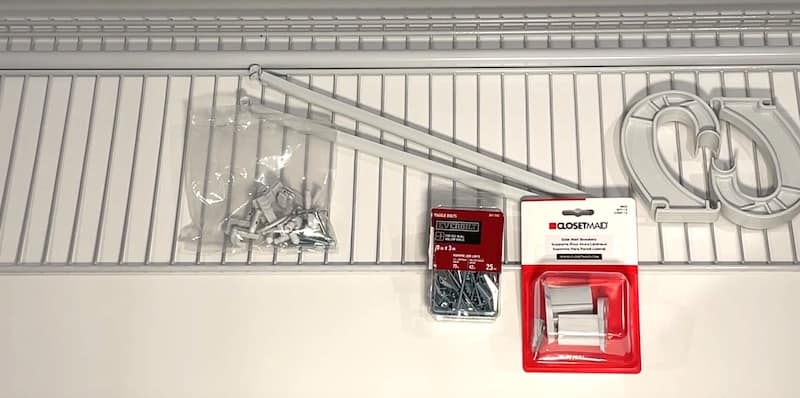
What Comes in the Closetmaid Shelf Kit with Closet Rod
Here’s what comes in the Closetmaid Shelf Kit:
- the wire shelf (in this case, 4-ft wide)
- the clothing rod
- mounting clips
- 2 support brackets (outer edge of the shelf to the wall)
- mounting hardware
I recommend you also get this additional mounting hardware:
- ClosetMaid Side Wall Brackets (these will make a dramatic difference in the stability of your shelf)
- 1/8″ x 3″ toggle bolts
I think toggle bolts are a great thing to have around; they come in handy for a lot of repair projects around the house and they’re particularly useful with regard to these closet shelving kits, whether you’re installing the shelf for the first time or resolving problems with existing ones.
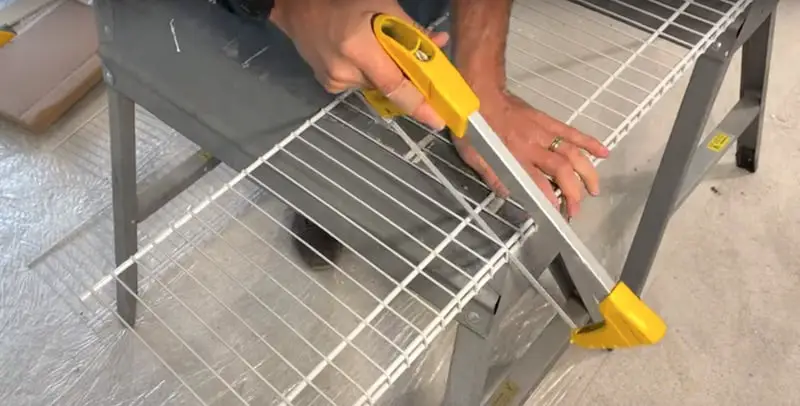
Cutting the Wire Shelf and Closet Rod
To cut the wire shelf and closet rod down to size, I first marked them one-half inch narrower than the width of my closet with a Sharpie. Then I laid them across a stable surface and cut them with a hacksaw.
Now that we have our shelf cut down to size, let’s go back to the closet.
Prepping and Marking the Shelf Clip Holes
Prepping the Wall
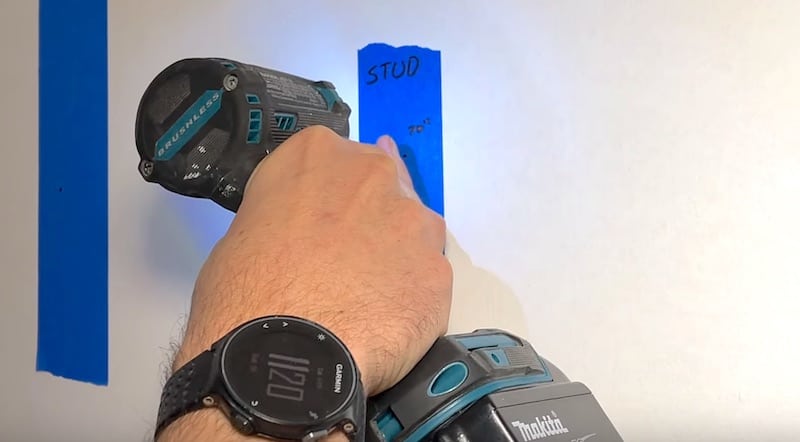
I prefer mounting shelves to the studs.
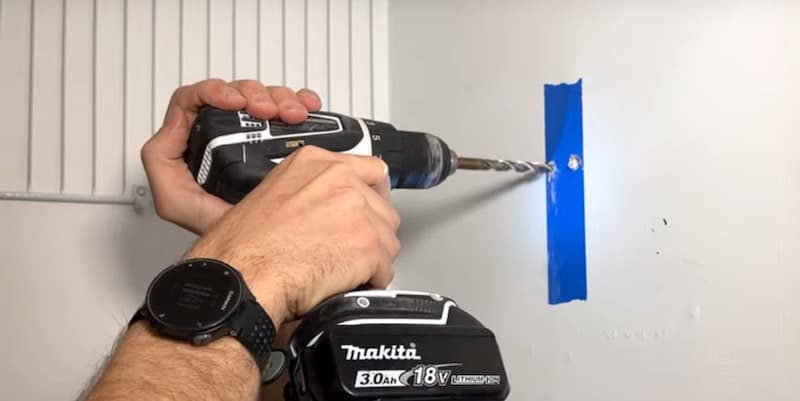
So that I can easily see where the studs are and to give me a surface for marking the mounting hardware holes, I’ve put up some pieces of painter’s tape before starting to work. I am doing this more for your reference and if I was just doing this project without the tutorial I would not be placing the painter’s tape on the wall
According to the Closetmaid wire shelf kit instructions, there should be no more than 11 inches between mounting clips, so I’ve split the distance between the studs and marked those with pieces of tape as well.
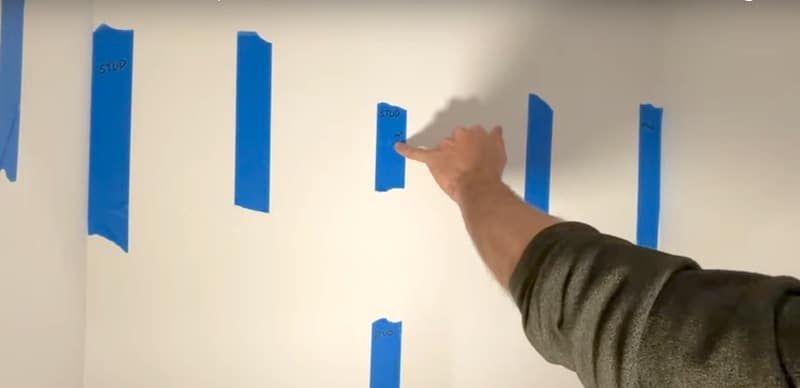
I’m going to install the shelf 70 inches off the floor, so my pieces of tape are vertically straddling that installation level.
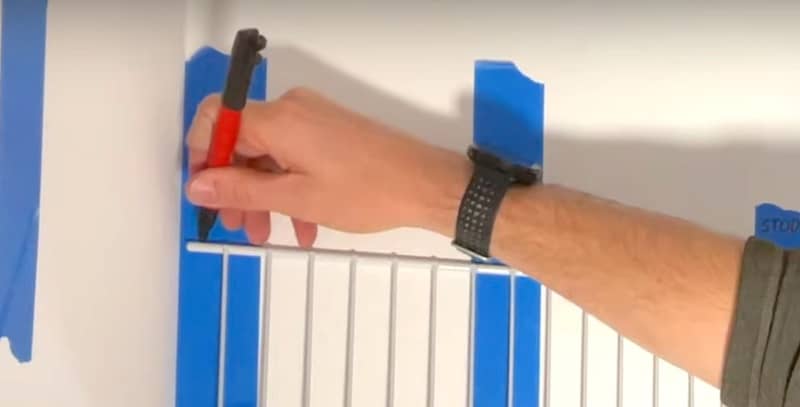
Marking the Holes for the Shelf Clips
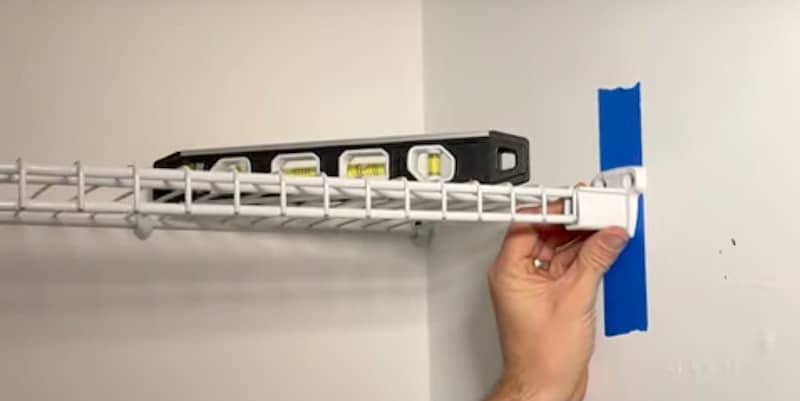
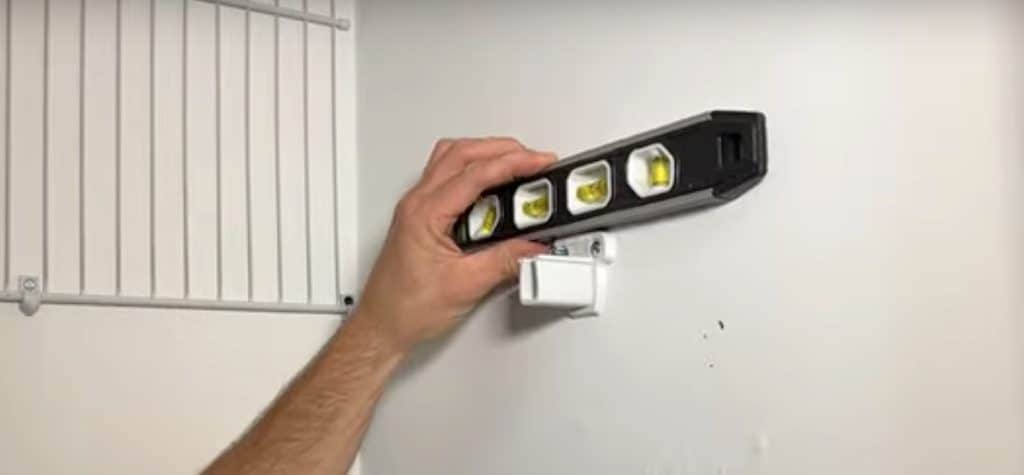
To mark the holes for the mounting hardware on the back wall of the closet, I’ll use the shelf with my Torpedo level placed on it as a guide, holding the back side of the shelf up to my installation height.
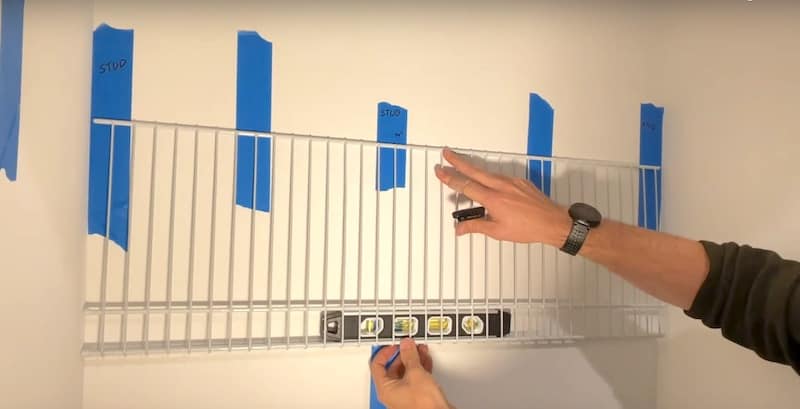
After making sure that the bubble is in the middle of my level, I’m going to mark the spots for the clips that will hold the shelf.
I want to place the holes so that they fall in between the wires to ensure clearance for the clips (this is the main reason for using the shelf as a guide.)
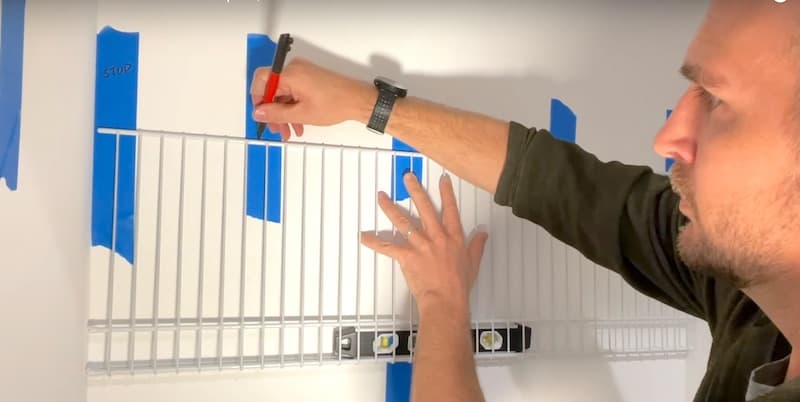
For the clips on the ends, I want to get as close to the sidewall as possible.
Thoughts About Mounting Hardware
I want to touch on the mounting hardware before we mount the shelf.
Wall Anchors vs. Toggle Bolts
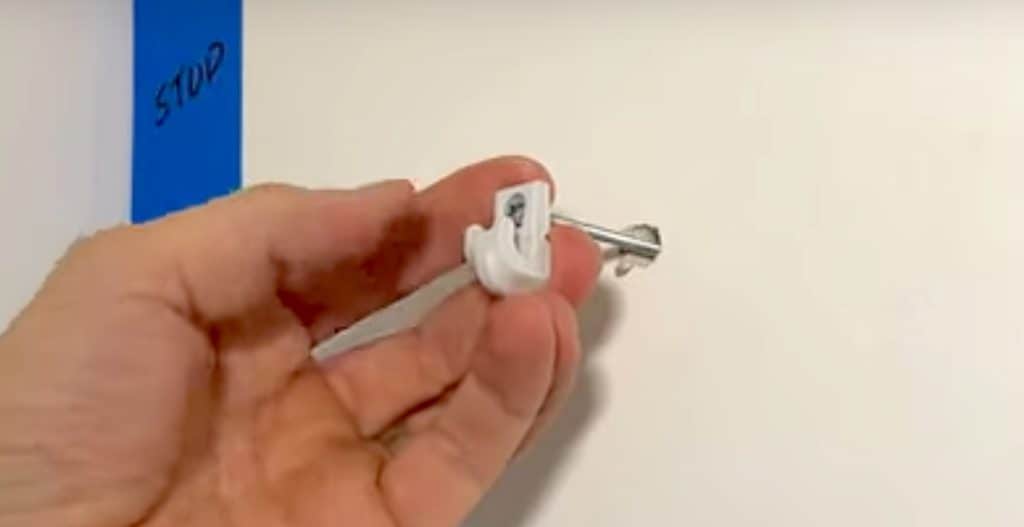
This is the standard shelf clip that comes in the Closetmaid kit.
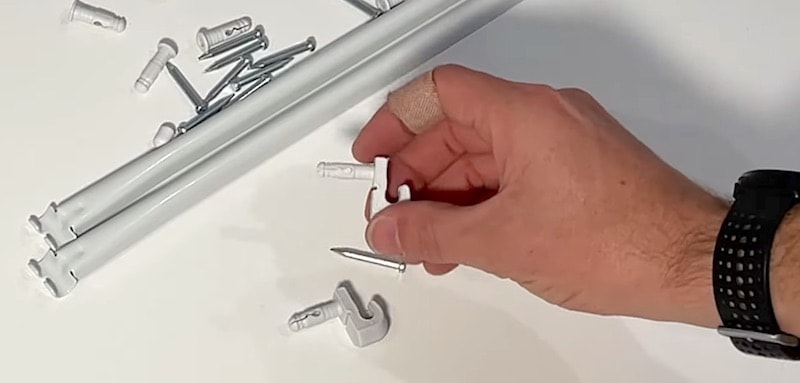
You can see that it has a built-in plastic wall anchor.
The anchor will fit into a quarter-inch hole that you’ll drill into your drywall. By driving a nail into the clip after it’s in the wall, the anchor will expand to hold it in place. In theory.
The problem with drywall is that it can weaken over time. That’s why these wall anchors lose their grip.
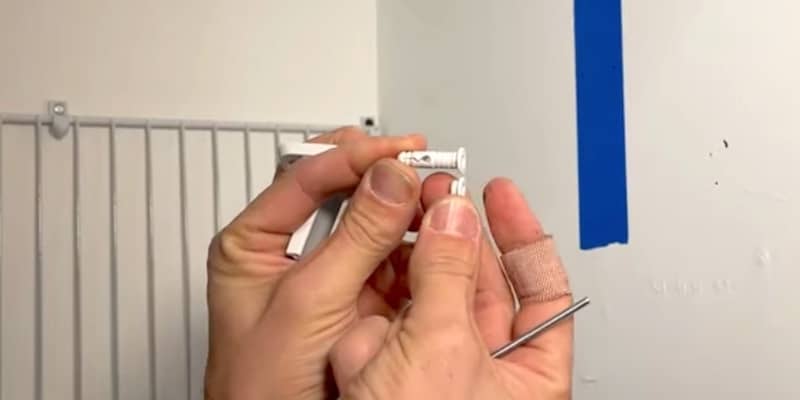
Here’s a little comparison of these clips, one mounted with the standard wall anchor that comes with the kit and the other with a toggle bolt, which is the mounting method I prefer.
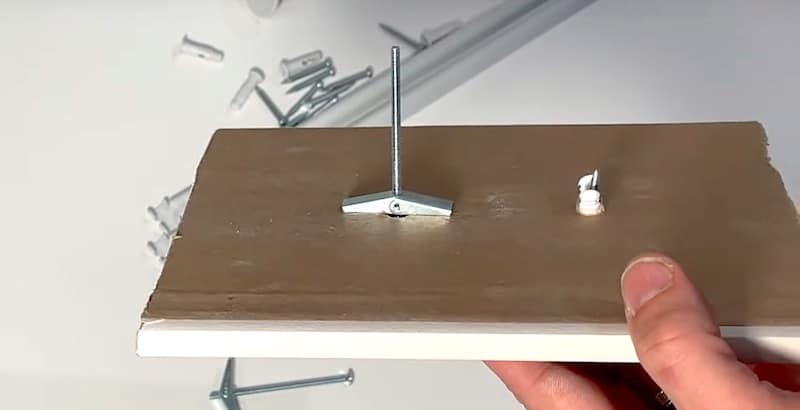
It’s easy to see that the toggle bolt distributes the load across a much wider area, which reduces the strain on the drywall and gives you a far better hold. Each one of these toggle bolts is rated to hold up to 70 pounds, so there’s really no comparison between a toggle bolt hold and a wall anchor hold.
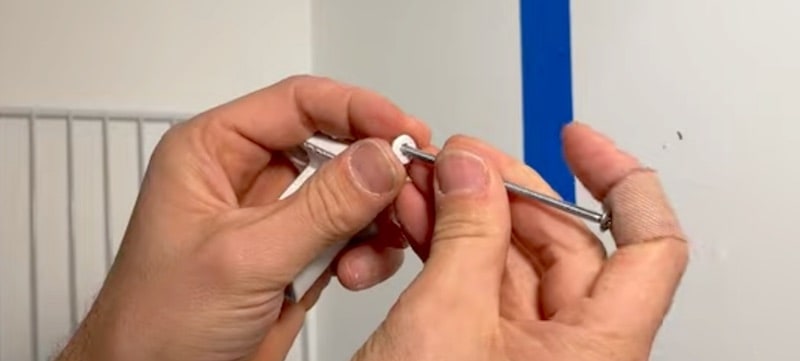
Let’s take a closer look at the drywall anchor with the nail driven through it.
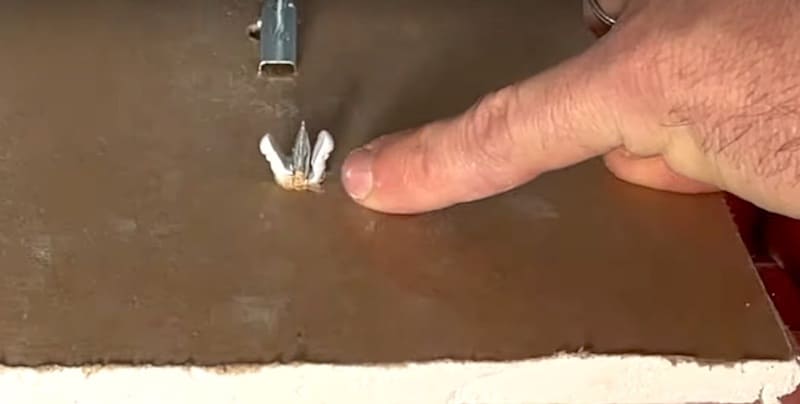
With this mounting method, you’re depending on the drywall around the anchor to hold up. If the drywall breaks down, which can happen pretty easily with weight-bearing on it, this anchor is basically useless. That’s why it pops out of the wall.
I’ll show you how to install both toggle bolts and the standard clips with built-in wall anchor, but for an installation, you won’t have to worry about for a very long time to come, I recommend you use toggle bolts.
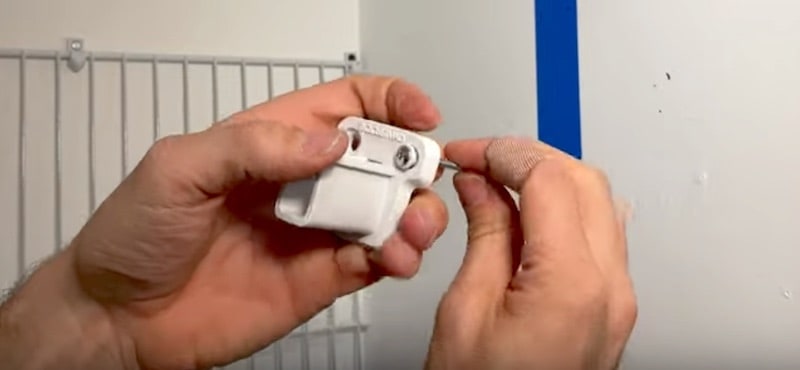
Modifying the Clips for Toggle Bolts or Screws
If you decide to use toggle bolts or if you’ll be mounting the clips on a stud, you’ll need to modify the clips that come in the kit. This is a simple matter of taking some side cutters and snipping off the anchor portion of the clip, which is easy enough.
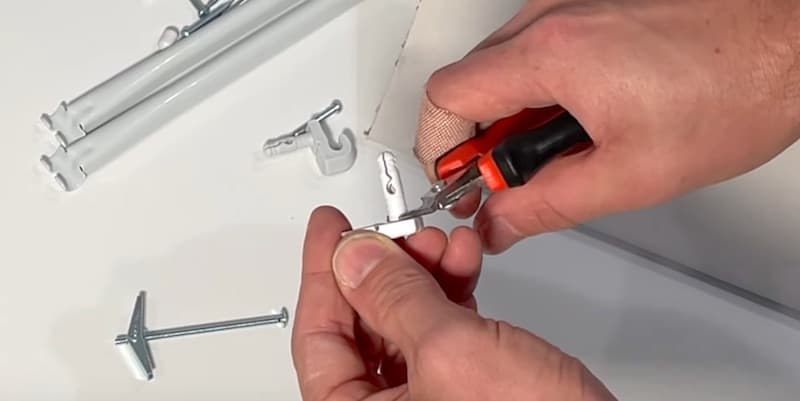
Be sure to snip cleanly and leave the backside of the clip flush.
Easy Fix for an Existing Wire Shelf that’s Falling Off
If you have an existing shelf that’s falling off because the wall anchors have come loose, the good news is that you can use that same hole to install a toggle bolt.
You’d simply need to widen the hole to a ⅜-inch diameter for a ⅛-inch by 3-inch toggle bolt. The hole needs to be this wide to pass the spring nut through. Keep reading for more details.
Mounting the Shelf Clips
Mounting the Modified Clips to the Studs
For the clips that I’m mounting to the studs, I’m going to use my modified clip (anchor part snipped off) and a drywall screw, starting with the center stud.
Then I’ll do the same for the studs on each end.
Mounting the Modified Clips to the Drywall with a Toggle Bolt
To mount the modified clip (anchor part snipped off) with a toggle bolt:
- Drill a ⅜-inch hole (in the wall where you previously marked)
- Insert the bolt through the hole of the modified mounting clip
- Start threading the spring nut onto the bolt (just a little ways)
- Collapse the spring nut
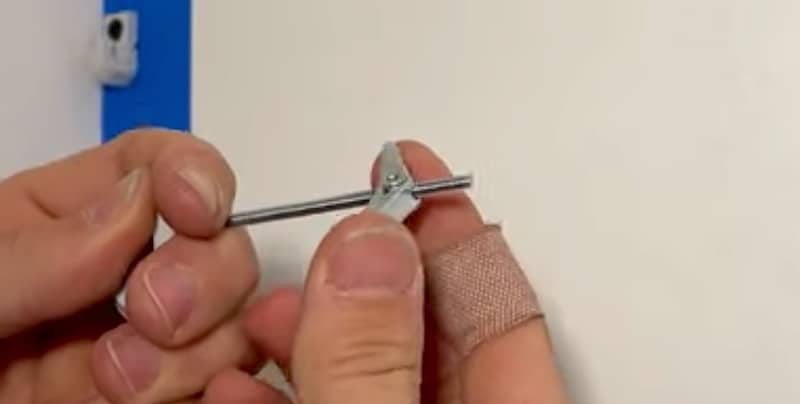
Now pass the toggle bolt through the hole. You’ll hear the spring nut open up when it clears the other side of the drywall.
To tighten the toggle bolt, pull the clip towards you so that the spring nut is pressed up against the back side of the drywall. Don’t tighten all the way; you’ll want to tighten up the last bit with care due to the hole being rather large.
For the last bit of tightening, I’ll carefully line up the clip first.
Manually tightening with a screwdriver is a good final step to get the screw good and snug.
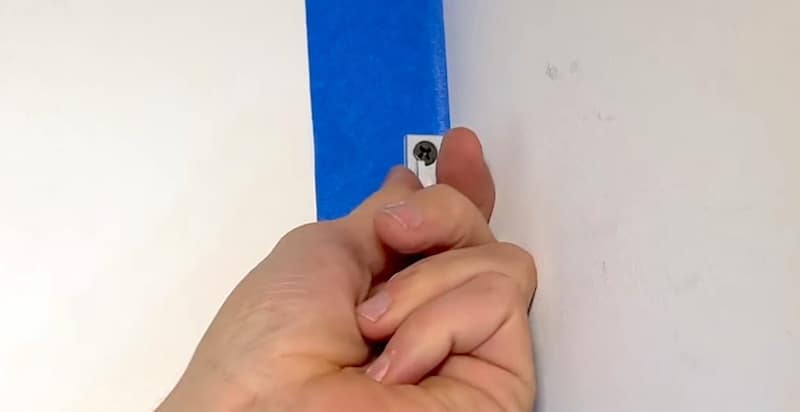
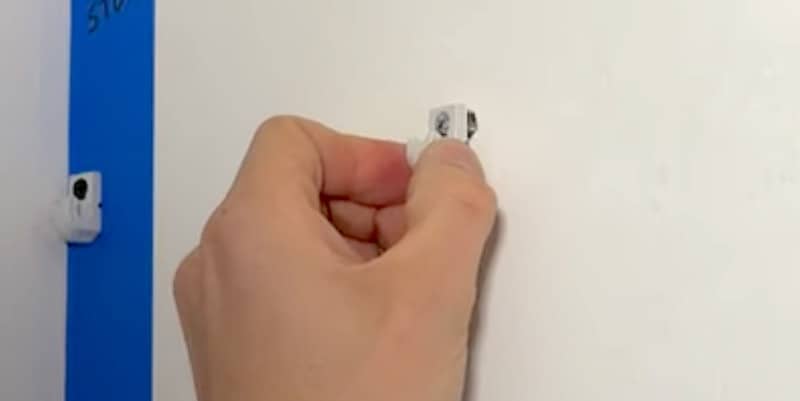
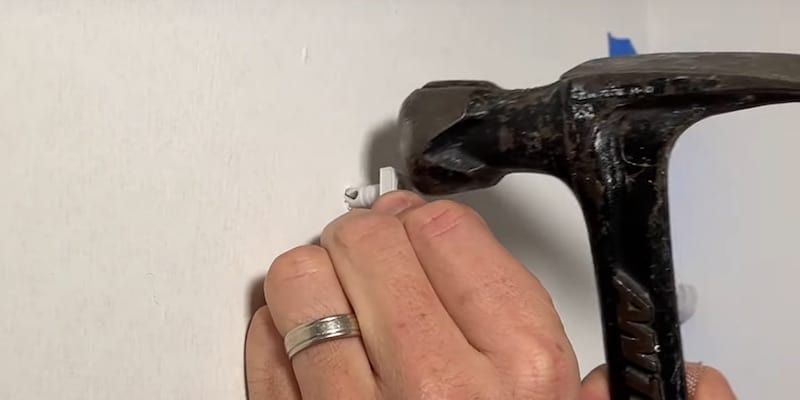
Mounting the Standard Clips to the Drywall
To mount the standard clip, drill a hole in the wall where you previously marked using a ¼-inch drill bit.
Remove the tape, tap in the clip, and drive in the nail.
Installing the Closetmaid Wire Shelf
Double-Checking that the Clips are Level
Now that the clips are mounted on the back wall of the closet, I’ll snap the back side of the shelf into them and put my Torpedo level in place to double-check my work.
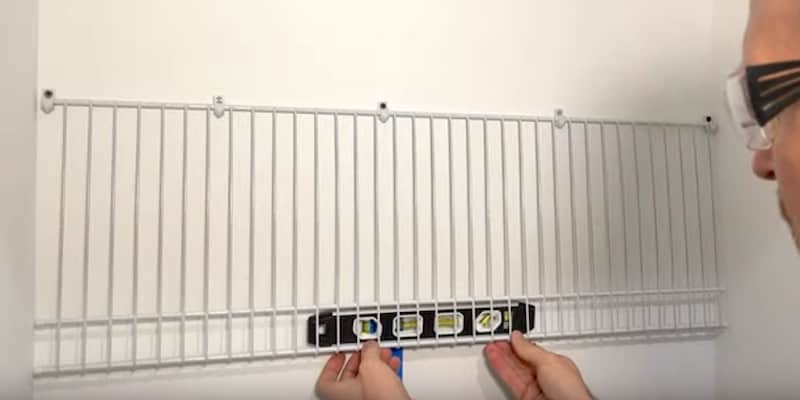
The bubble is right in the middle and all is level so we’re ready to move on.
Marking the Holes for the Side Brackets
Remember that these side brackets are additional hardware I suggest you purchase in order to make the installation of your shelving unit more secure.
Tip: To facilitate marking and drilling the holes, I put a vertical piece of painter’s tape on the wall at the depth of the shelf. This is an optional thing. It can be handy for less-experienced do-it-yourselfers when you’re marking, in case you have to remark something, so that you don’t end up with marks on your wall to clean up.
To mark the holes for the side brackets, we’ll need to put the brackets on the ends of the shelf. I’ll remove the shelf from the clips to do that.
Once the mounting brackets are on both ends of the shelf, I’ll snap it back into the clips and put my level on top of the shelf.
After centering the bubble to make sure the shelf is level, I’ll mark the centers of the two mounting bracket holes. Then I’ll do the same on the other end of the shelf.
Creating a Washer for the Toggle Bolt
I’m going to use toggle bolts to mount the side brackets of the shelf instead of the wall anchors that come with the kit.
Why am I doing this? Well, the toggle bolt, as we know, will give me a superior hold but it is a smaller diameter than the hole in the mounting bracket, so I’m going to clip the wall anchors down with some side cutters to create a washer for my bolt.
This improvised washer will fit perfectly inside the mounting bracket to hold the bolt.
Drilling the Holes and Mounting the Side Brackets
The next step is to drill a ⅜-inch hole and mount the toggle bolts. Before I do this, I’ll want to flip the shelf up to get it out of the way.
I did have a little surprise while I was drilling, and it was a good surprise — one of the holes caught a stud. So I’ll use a wood screw in that hole and a toggle bolt in the other.
I’ll screw in the toggle bolt first, then the wood screw, but not totally tight. I’ll want to check that the bracket is level before doing the final tightening.
It’s a good idea to verify that the shelf inserts properly into the bracket and is level before moving on and mounting the other bracket.
Mounting the Central Support Bracket
Now that I have both of the side brackets mounted, I’m going to install a center support to make the whole assembly a little more stable.
Recall that in the center of my closet I have a stud, so I’m going to mount the central support to the stud with a wood screw.
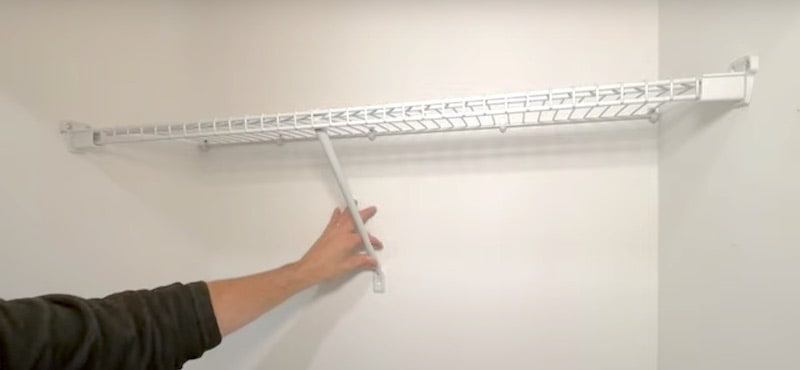
The shelf support sits under one of the wires of the shelf, so you can position it where you want it.
As I’ve said previously, mounting to a stud is preferred. For mounting into drywall, a toggle bolt is better than the wall anchors that come with the kit.
With the central support installed, my shelf is fully secure.
Installing the Clothing Rod
Now let’s install the brackets for the clothing rod.
It’s best to install these brackets away from the side walls a bit. This gives better support to the rod. I’m going to “indent” my brackets 4 spaces.
I’ll start by inserting the top part of the bracket up between the wires.
Next, I’ll lower the back part of the bracket into place, then click the front tab of the bracket over the front edge of the shelf.
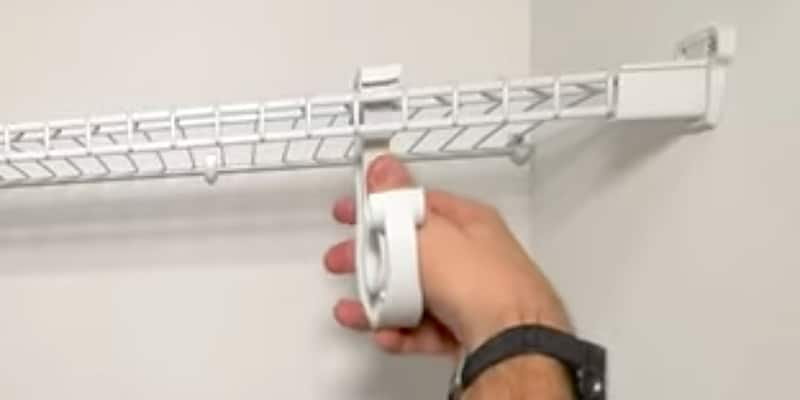
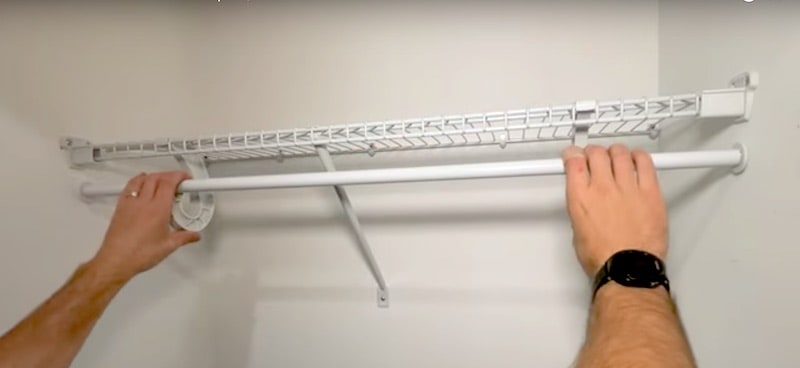
Finally, I’ll snap the clothing rod (with the end caps already on) into place.
How To Install Closetmaid Shelves: Conclusion
That’s it! Our Closetmaid Shelf Kit with Closet Rod is fully installed and ready to go. We can pile as many coats as we want on this thing and it’s gonna hold.
To recap the preferred ways of mounting the clips and brackets:
- Mounting into studs where you can is best
- Toggle bolts are the best alternative when a stud isn’t available
- The wall anchors that come with the kit — it’s really best to not use those
By following the tips and steps in this guide, you can avoid the frustration of a shelving unit barely hanging on right after you’ve put in all the time and effort to install it.
Closet Shelving: Related Tutorials
To see a related tutorial, namely how to install a Rubbermaid Fasttrack Closet Kit, please watch our YouTube video or read the step-by-step guide.
Don’t forget to subscribe to our YouTube channel as we have weekly videos coming out to help you with your everyday home repairs.
We’ll catch you on the next one! Take care


