
 My Account
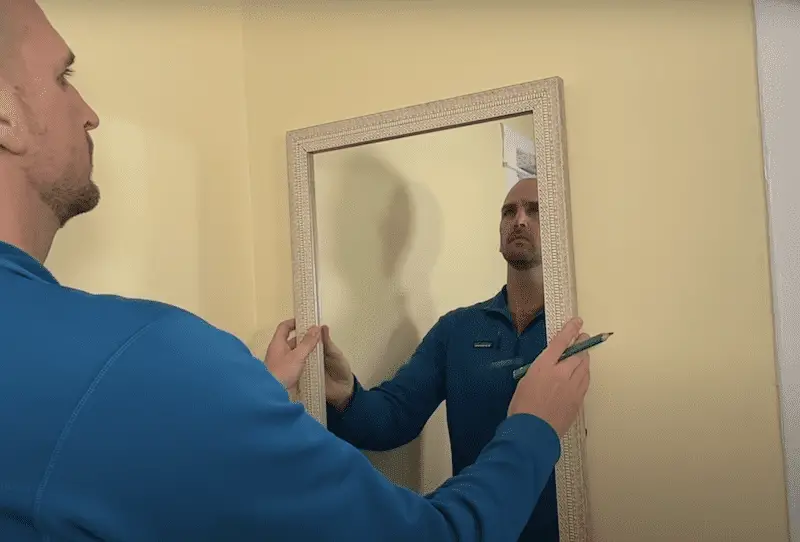
Good news: hanging a heavy picture or mirror on the wall does not have to be a major undertaking! You don’t need many tools or much experience. Keep reading to see a demo with a full-length 25-pound mirror and my must-have tools for hanging pictures/mirror securely.
Toward the end, I’ll also share tips for when you want to remove it from the wall. Whether you’re renting, redecorating, or moving — there’s a good chance you’ll be removing it at some point, so you’ll want to get your walls back to normal and avoid as much damage as possible.
Rather watch than read? Check out this 10-minute video.
Tools
- Drywall Anchors from Easy Anchor: This is my number one must-have when hanging anything on drywall. It is very important that you get the metal anchors. There are many plastic anchors that look very similar to this, but I don’t think they work nearly as well as these metal anchors. While there are several metal anchors out there, I like Easy Anchor because it works really well with grabbing onto drywall and plaster and pulling the anchor in. This will help you avoid damaging the drywall and never really getting a good hold.
- Screwdriver
- Level (or the measurement app on your phone)
- Screws with a pan head
- Tape measure
- Dry erase marker
DISCLAIMER: This blog contains affiliate links, which means that if you click on one of the product links, I’ll receive a small commission
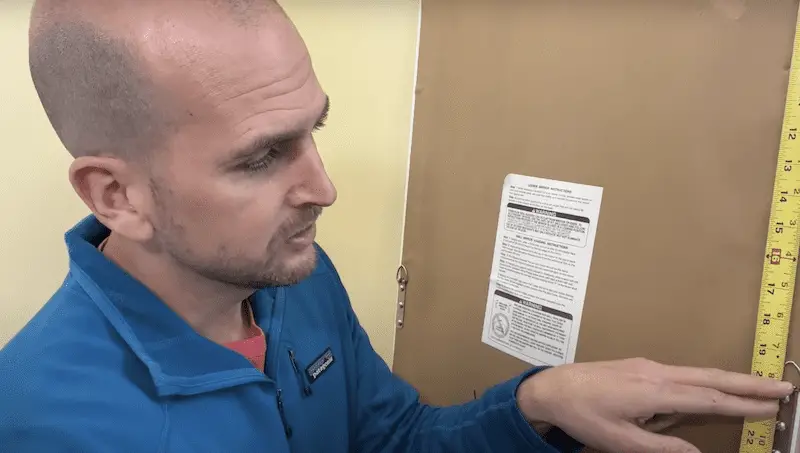
1. Position the mirror and get the first measurements
First, I positioned the mirror where I wanted it on the wall. I need to measure the top surface which will be referenced later on.
Additionally, this mirror is going to be spaced 5” away from the wall, so I’ll just go ahead and give a reference mark which will be the left edge of the mirror.
The mounting hardware on this mirror is by far my favorite setup — and that is D-rings securely fastened into the frame. Hanging wire is another common set up but it’s a little bit harder to get measurements of where to put holes in the wall since that wire will “give” quite a bit once the weight of the mirror or picture is placed on the wire.
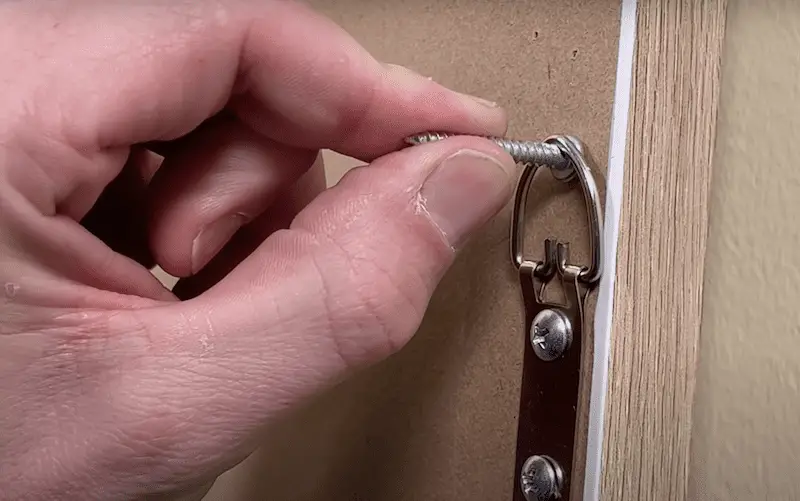
I’ll have a screw that’s going to hook onto that D-ring — and that screw has a nice little pan head, which has a lip that’s going to hold that D-ring. And the weight of the picture is going to hang and not jump off that screw. If you use something like a countersunk head with an angle, it’s a bit more prone to the possibility to jump off your attachment points.
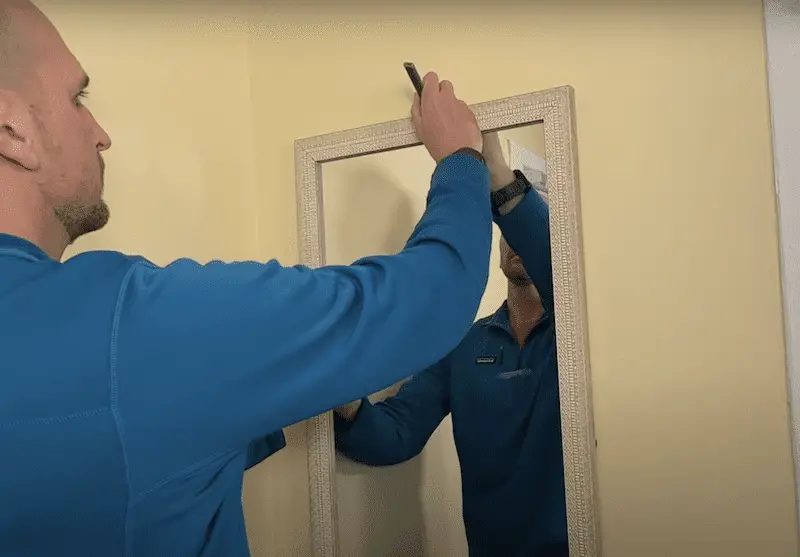
At this point, the only measurement I need is from the top edge of my mirror (which I know where I want that on the wall) and measure down to where that screw is going to hold this D-ring. For me, that is 19 ⅜”.
I’ll take the end of my tape measure and that will be at the top surface measuring down 19 ⅜” to get the vertical mark for that D-ring location.
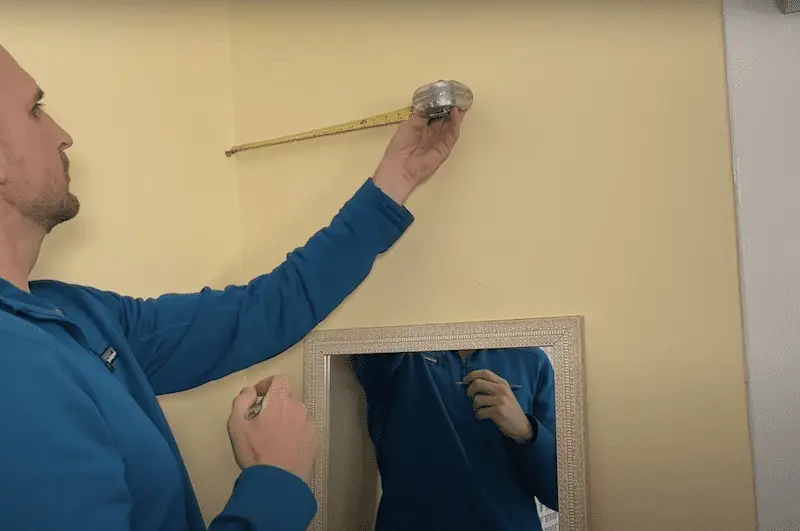
Then, I’ll go horizontally and measure 5” again away from the wall and make another mark.
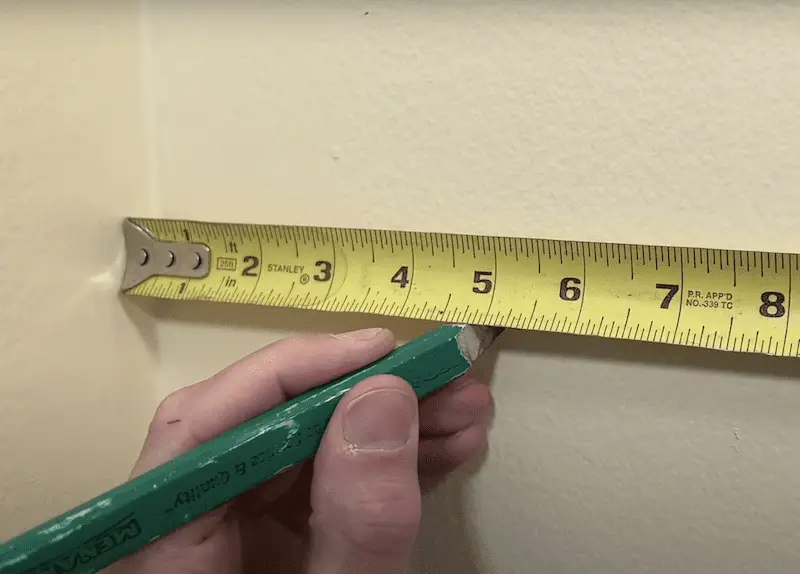
X marks the spot where I want my first anchor, so now we have our whole location at least for the first one and we’re ready to put hardware into the wall.
2. Install your first drywall anchor
I’m working with drywall and plaster. The latter can be especially tricky since it’s so brittle and it often chips off more than what you would see in drywall. However, all I need is a number two Phillips head screwdriver and that’s going to fit right into the easy anchor.
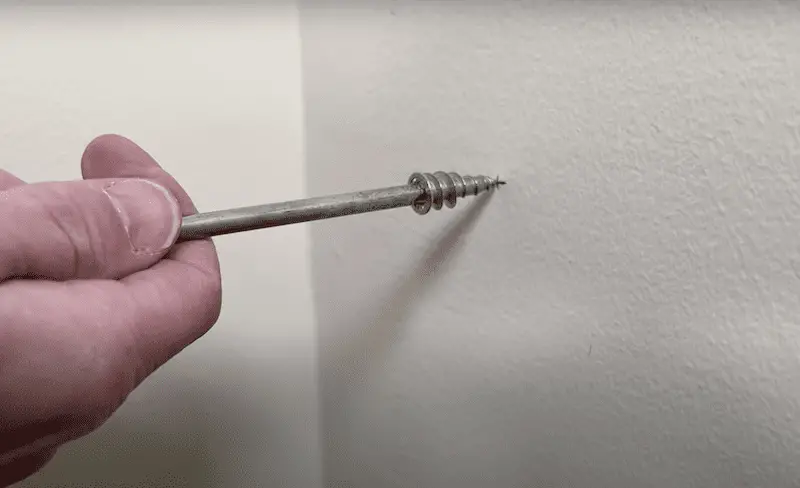
Here are the steps to install Easy Anchor:
- Place it on your location and then give it a nice little tap.
- The “tap” will set that tip before turning (clockwise) the easy anchor.
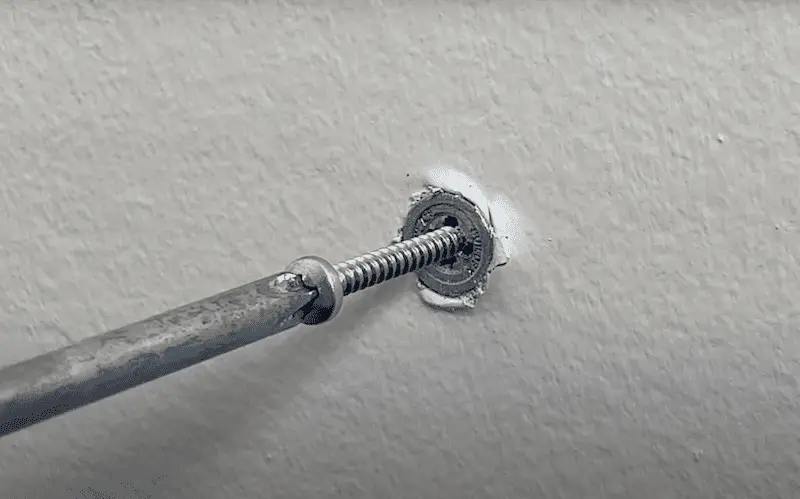
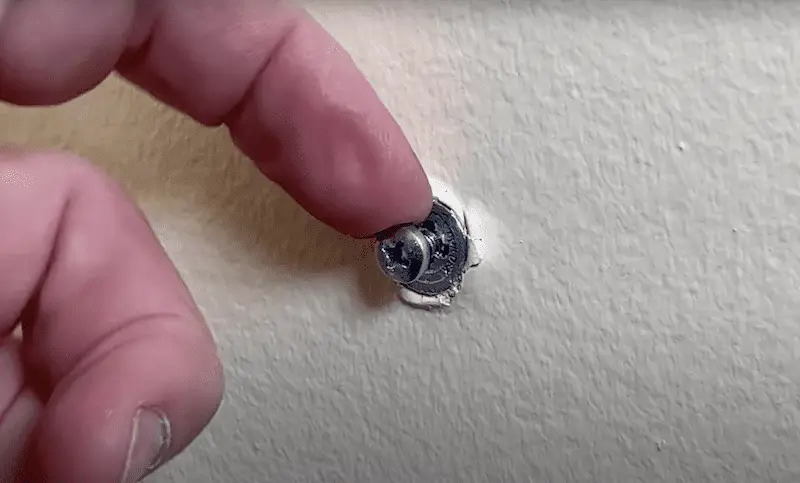
- Then place force on the wall as the easy anchor turns because that’s going to help those threads grab onto the wall and then pull the anchor in, making sure you’re not damaging the drywall or the plaster. Note: It gets a little tight at the end, but make sure that the anchor is flush with the wall surface.
- Take the screw and set it in place until it reaches about a quarter of an inch off the wall. Then I’ll stop because I do want a bit of a lip for the D-ring to set on top of (see image below).
You could use an impact driver or a drill to make this job quicker, but that also does increase the risk of damage. Even though it takes more time, I prefer to use a screwdriver and lower the risk of causing any damage.
3. Position the second anchor
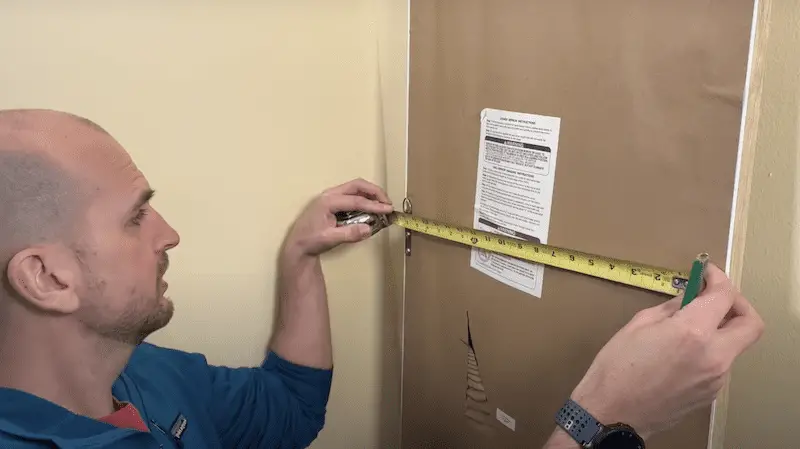
At this point, it’s time to position the second anchor and I need a reference dimension between the two mounting D-rings.
You go peak to peak — and I have 19 ⅛” between the two d-rings so that’s the reference dimension I need for the second anchor location.

I also used my 48” Johnson level, which I set on top of the screw, so I have to make up that distance. Once I’ve transferred the dimension on the level, I marked it with a dry erase marker — not a permanent marker because I want to wipe it off later. Then, I make sure my bubble is in the middle an then mark by second location
Don’t have a large level that you can use for this project? Use the measurement app on iPhones (or check out this article if you have an Android). There’s a level feature you can use to get a reference mark. I tried it and I got a very similar position as I did with the bubble level.
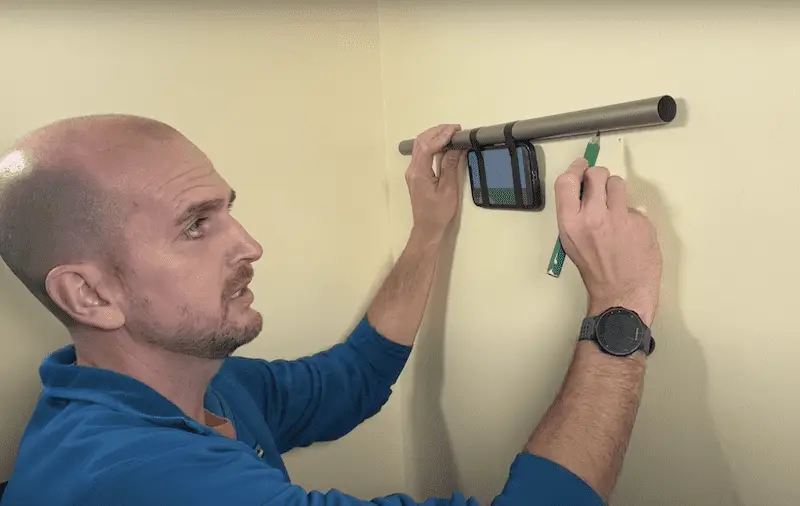
The only drawback is that it turns green once you’re in the level zero degree range. So there is a little bit more error. But surprisingly, it works fairly well if you’re limited on the tools or levels that you have at your disposal.
4. Check the work
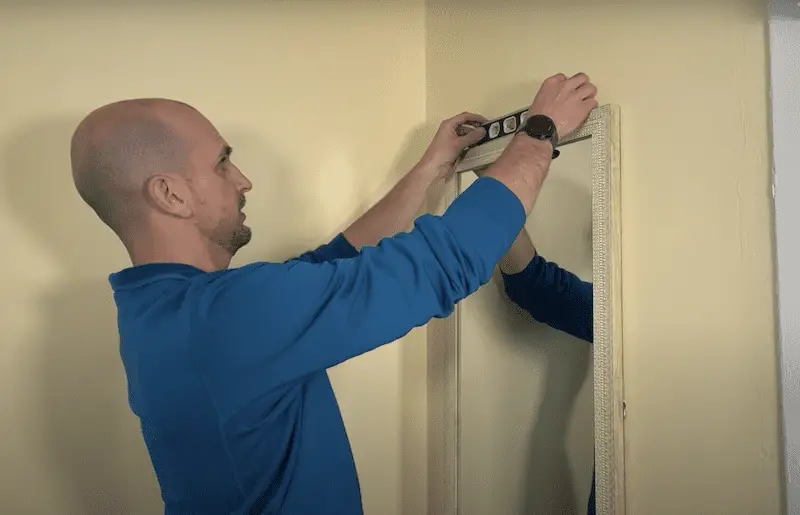
With the mirror securely mounted, I checked to make sure it passed the eyeball test. I also like to check with my torpedo level to make sure the bubble is right in the middle.
5. Finishing touches: bumper pads
Do you have attachment points and a little bit of weight on the bottom causing the mirror to rest against your wall? It’s always good to have some bumper pads on the left and right corners of the bottom frame. This will protect your wall from additional mounting hardware that might slide on the wall and potentially scratch it up.
What should you do when you want to remove the anchors from the wall?
It’s good to think about what you’ll do if and when you want to remove those drywall anchors.
If you have a little bit of drywall damage, I’d use this product made by 3M for small holes. (It’s especially useful for DIY homeowners who don’t have a bunch of tools, different size putty knives, or experience doing these kinds of projects.) The product includes a putty knife to scrape and smooth the surface and spackle and primer in one. The primer is important because it will help mitigate the difference between the hole you patched and the rest of the wall surface after painting. There’s also a little sanding pad you can use once it dries to smooth off the patch and match it up with the rest of your walls.
Don’t forget that you need to know your wall color and the sheen. Otherwise, it’s not going to match up and small holes might result in you repainting the whole wall. Think you have a color match, but you don’t have the exact one now? Watch this video to see how I patched a small amount of drywall damage from a larger thermostat when I swapped it out for a Nest Thermostat.
The Wrap Up
Overall, this is a project that involves minimal tools and experience. You can definitely take on yourself — as long as you’re comfortable lifting the piece you’re working with.


