Bookmark this house inspection checklist for future reference!
Older homes can have so many perks. From the unique charm to the mature trees to the wonderful neighborhoods, there’s no question it can be a fantastic investment. However, there are some challenges and potential risks you need to be aware of before buying – and possibly getting in over your head. (No one wants to buy a money pit!) In this blog, I’m sharing a non-exhaustive house inspection checklist for old homes. I’ll walk you through a 102-year-old house I was considering purchasing and cover the top five areas that could cause you big issues and serious additional expenses.
Many of these items will be covered by your inspector. But I think it’s still helpful to know before you get too far along in the home buying process. Plus, if something is a deal-breaker to you – it’s good to know before you spend $300-$500 on a home inspection.
Note: I know the home buying process can be very overwhelming! It can be especially daunting for a first-time home buyer (or anyone new to home maintenance). Be sure to lean on local professionals and know the building code that’s in your area, which is going to vary also depending on where you live.
Old House Inspection Checklist
These are the five main areas you’ll want to give extra attention before getting too far in the home buying process. Some of them may reveal a huge can of worms – or you’ll just have extra things on your radar.
- 1. Electrical
- Main Electrical Panel
- Outlets
- Wiring
- 2. Plumbing
- Exterior water lines
- Interior pipes
- 3. Structure
- Foundation
- Floor Joists
- 4. HVAC & Boiler
- 5. Asbestos and Lead-Based Paint
Top 5 Things to Look for When Buying an Older Home – House Inspection Checklist
1. Electrical
Main Electrical Panel
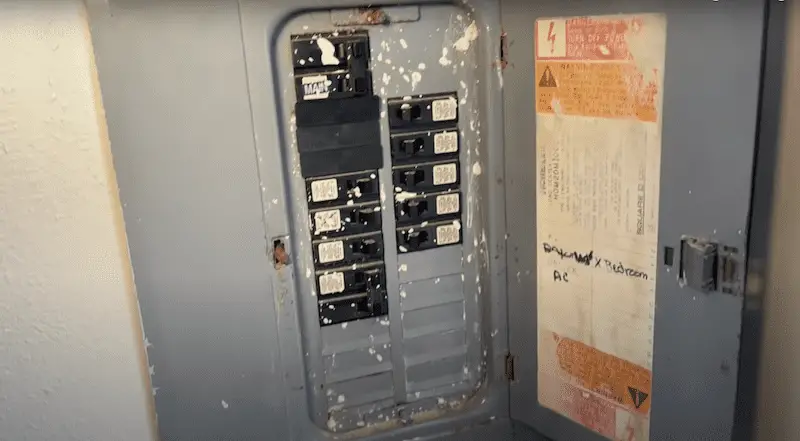
The first thing you want to look for is the electrical situation. Above is the main electrical panel for the home I was looking at, which has been updated over the years. While I’m not saying it’s up to code, I know it’s an updated panel because it has circuit breakers.
If you look at your top main breaker, you’ll see that it either has 60, 100, or 200. This one is 100 – so it’s a 100 amp service. There are also some extra spaces to add circuits later on, which is a good thing. If this whole panel was filled up, it could present challenges expanding and adding new outlets. Or it could be a problem updating for new modern devices.
Outlets
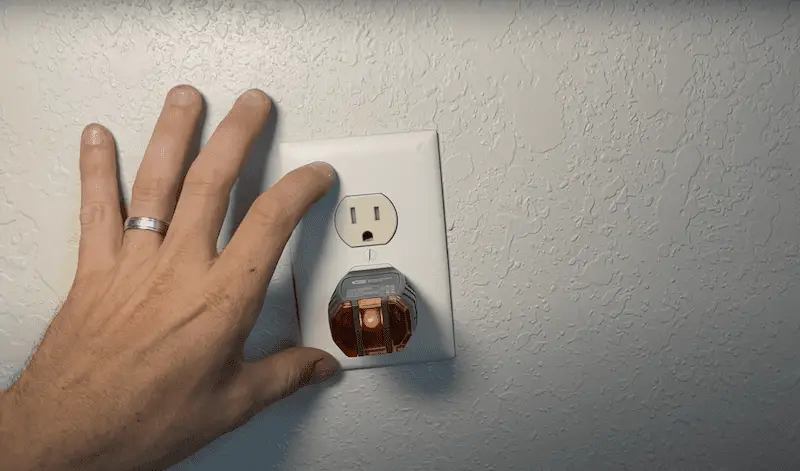
Also, take a look at the outlets. For example, this home has an updated tamper-resistant duplex outlet, and it has three prongs. At first, it looks like it has been updated and should be good to go. The problem is: when I tested it with an outlet tester, I had one single light. This means it has an open ground.
Why does this matter? This indicates that it was an old two-prong outlet at one time and somebody replaced it with the three-prong, but it does not have a ground coming to this box. So it’s actually incorrectly wired. In this case, you would either need to run a ground wire to this outlet which can cost significant money. Alternatively, depending on your area you might be able to put a GFCI outlet in its place – and then that will meet electrical code.
Need help swapping out a two-prong outlet to a GFCI? Check out this video.
Wiring
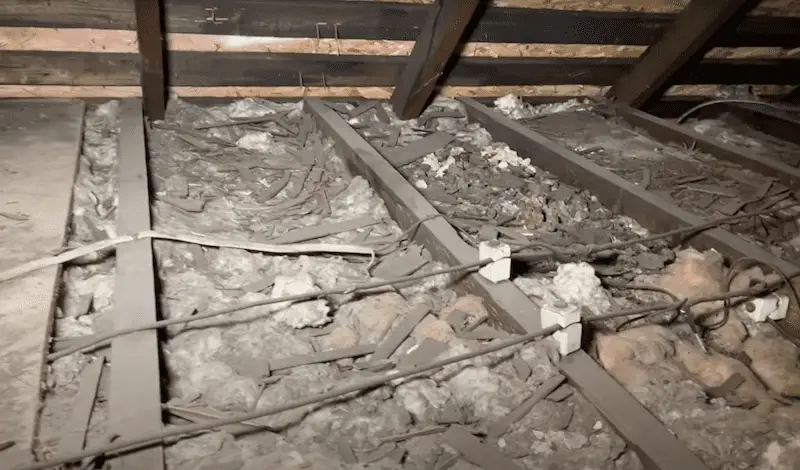
If you jump up into the attic or down in th basement – look out for knob-and-tube wiring, which is generally not preferred. Depending on your region, many homes built prior to the 1950s might have knob-and-tube wiring, which has one neutral and then one hotline.
In this home, there’s a mix (there’s also some updated romex). So it’s something that you may want to consider getting swapped out and updated. Or it’s at least something you’ll want on your radar when you’re looking at older homes.
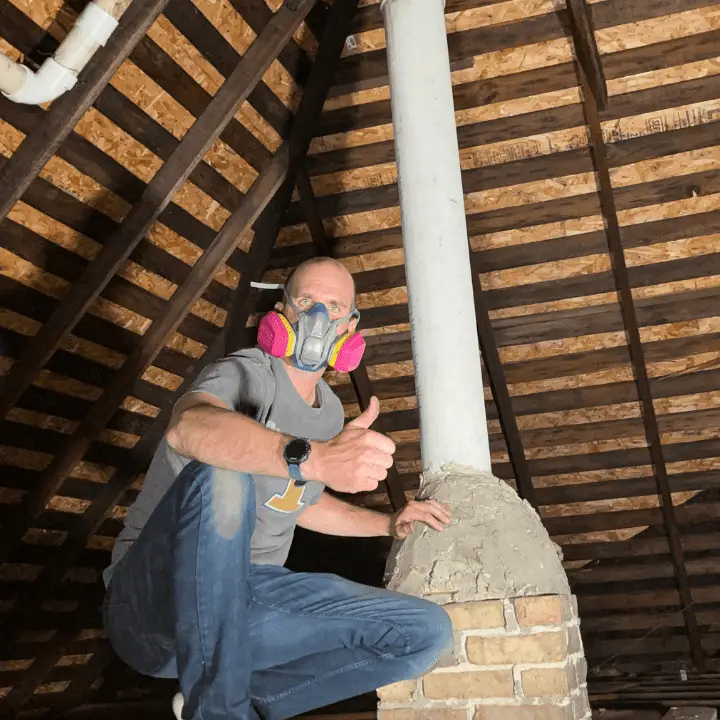
Pro tip: if you’re going to be crawling around in the attic or crawl space, have a respirator. It is a very smart move! Also, if an electrician is giving you a quote for updating the knob and tube wiring make sure you understand are they running new Romex all the way to each receptacle or just new Romex through the attic/basement then to a junction box which will use the old wiring in the wall to connect to the receptacles. Running all new Romex is much better but will cost additional money.
2. Plumbing
Exterior Water Lines
On the exterior of the house, you’ll want to understand when the main water lines were put in (the one coming from the city curb shut off valve to your house and the main drain going out to the city to the sewer). Are they new or very old?
If you see an old clay pipe or old pipe that’s having issues, it can cause you a lot of problems and multiple thousands of dollars to fix (!!!).
It often starts as a small crack in the drain line. Then, tree roots start to get that moisture, which will expand within the pipe because it is a constant source of water. Suddenly, you’re dealing with a clog.
Even if you call somebody out to clean it or chop out the tree roots, the roots will come right back (not good!). So in this case, you’d have to replace the whole line if you have an older drain line that has cracks or issues.
Interior Pipes
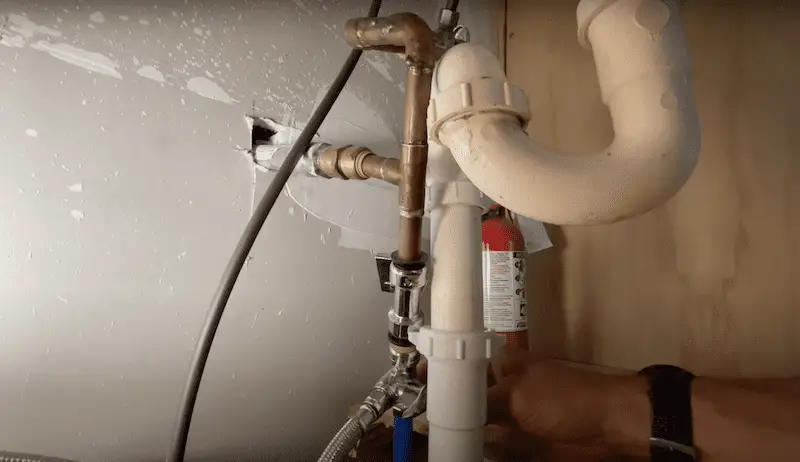
Then, inside the house, you’ll want to know the last time the plumbing was updated. The preference in many areas is usually copper or pex pipes. While copper and pex could be installed incorrectly – it’s something to look for during your inspection report to start to see any red flags.
During this inspection, I noticed signs of a recent rehab where they “scabbed in” some of the plumbing fixtures. When looking at the vanity bases/ sink bases, I saw a combination of pex at the bottom coming into press fittings. These are not necessarily against code, but it is just something you’d want a professional to take a look at to see if it’s going to cause you any additional maintenance costs in the long term. And it’s definitely not pretty to look at.
Also with your drain lines, make sure that your venting is correct. For example, if you have something like an s-pipe under a sink as opposed to a p-trap – you might not have the appropriate venting for the drain lines.
3. Structure
Foundation
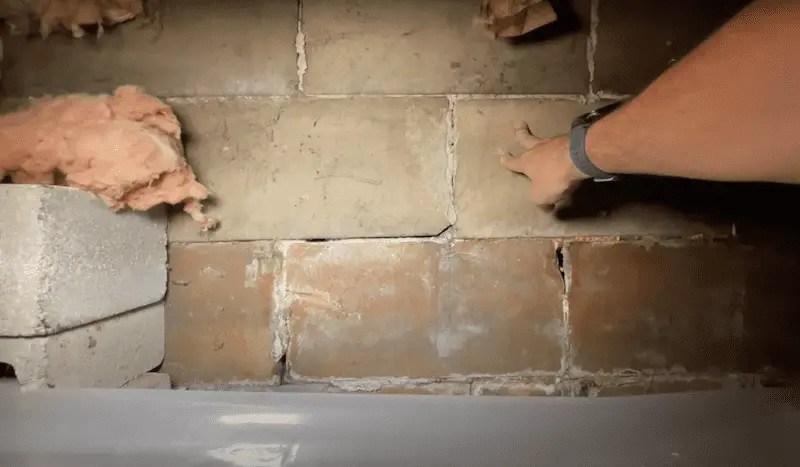
You definitely want to prioritize the structure for your house inspection checklist. If you go down in the crawl space or basement, you might see different types of material for your foundation walls. This house had an older block, but you do want to look at the mortar between the joints because that might be something that you need to get a mason to come in and tuck point. (Keep in mind, getting people down in crawl spaces doing work like this isn’t easy work and it can be very expensive.)
One other thing you really don’t want to see is water or any sort of moisture coming through. That would be a sign of something you really need to address quickly.
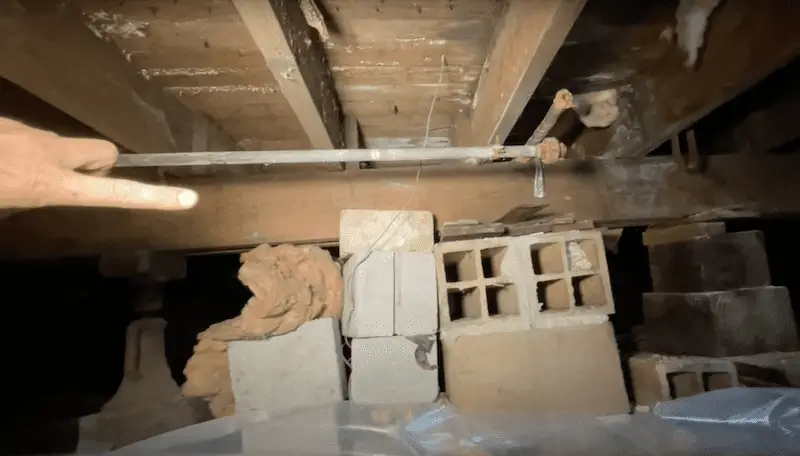
Above is an example of one of the main structural beams coming through and holding the middle of the floor. There’s everything from an old bottle jack to cinder blocks to railroad ties.
This isn’t a great combination because it makes you feel like it’s been pieced in over the years. If you see something like this, you might want to take it all out and get a few more modern adjustable permanent supports in to hold up that main beam. In this case, since it’s the main structural beam going down the floor, it is critical to have that in good shape.
Please note, every crawl space is unique – but it’s good to get an idea of the foundation of your home and make sure there’s not a bunch of moisture.
Floor Joists
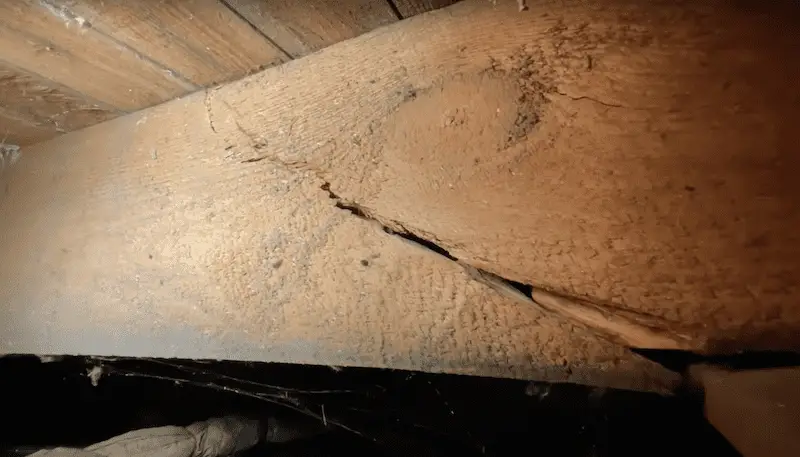
Also, you want to see if any of your floor joists have damage. If so, you may have to provide support and then sister in new pieces of lumber to get the structure back to a sound condition.
Overall, you want to make sure your floor is carrying the load as expected. It’s not good to have parts that are carrying no load and then just applying more force and more pressure onto the adjacent joists.
4. HVAC & Water Boiler
HVAC
The HVAC is how you’re going to heat and cool the home. For this home, there’s just radiant heat and no air conditioner. Depending on your region, it might be common for older homes to not have any air conditioning.
On the other hand, you might have an older home that has been updated with central air, all the ducts are put in, and that’s where you’ll get forced heat and your air conditioning going through those same air ducts. This is great – but you still want to know the age of the central air unit itself and serviceable life on that unit.
Once you start getting into the 15-18 year range (especially 20+ years), you’re starting to get to the end of the life on many of these units. It might be a big maintenance bill that you’ll have in the near term.
If you have a central air system with air ducts, you want to know the last time those air ducts have been cleaned. If they haven’t been cleaned for 10 or 15 years, they might need a good cleaning to remove dust, debris, and possibly even mold. This can also be a little costly.
Boiler
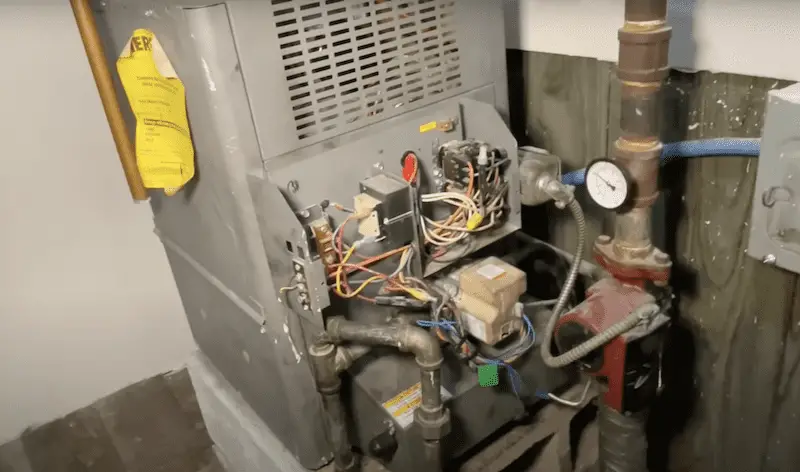
You’ll also want to take a look at the boiler. A boiler just heats up hot water and sends it through lines that go to radiators in each of the rooms to heat your home. It can be very efficient.
Even though the above unit is only 80 percent efficient (and they do make more modern efficient boilers), this boiler has been serviced recently. It’s missing a cover and all the wires are visible (it looks really ugly!), but it should be good to go for years.
5. Asbestos and Lead Paint
Last but not least, you need to look out for asbestos and lead paint.
So if you’re looking to purchase a home, there’s usually a disclosure form for the current homeowner to fill out about if they know of any lead-based paint or asbestos in the home.
Be careful here! Just because you see “no” on those forms – that doesn’t mean the home is free of lead-based paint and asbestos. It just means the current owner has no knowledge of it. I know that can be a little confusing.
Here’s one of the reasons it matters: if you purchase an old home and have big plans for renovation, disposing of those materials safely can be costly. (And unfortunately, that money isn’t going towards a nicer kitchen or to better flooring.) But it needs to be done! So your renovation cost can really expand by something that you didn’t know about.
I recommend asking your inspector additional questions. You may also want to do some tests if you’re really concerned about that before purchasing the home.
The Wrap Up
Whew! I know that was a lot of information. But please note, this house inspection checklist is not exhaustive! But I hope it gives you some tangible examples of where you might incur additional costs, such as with maintenance or long-term renovation projects.
Let us know in the comments if you have experience with buying an older home. Did you have issues? Have you seen this type of thing before? Any feedback is always welcome!
