
 My Account
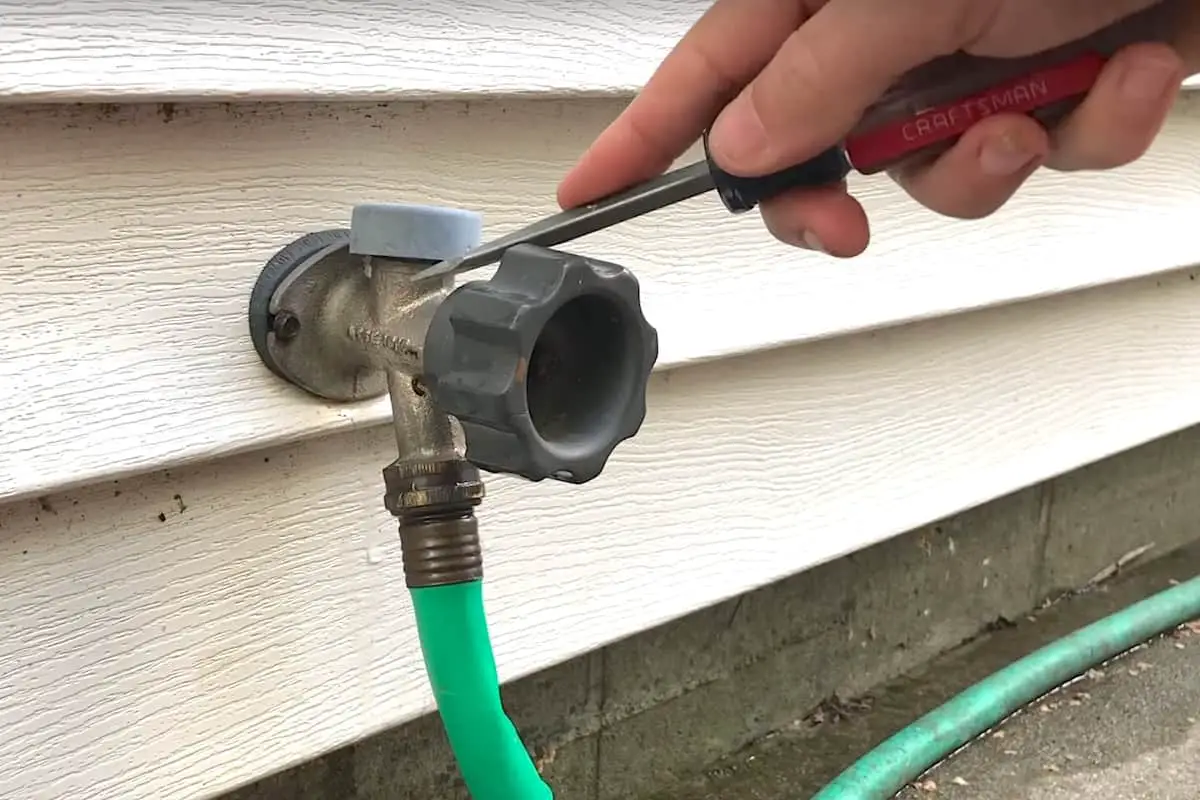
In this article, we’ll be tackling a really simple repair I’ve been putting off for a couple of years. I’m sure that’s never happened to any of you! Not sure why this one’s taken me so long because it’s a quick and easy do-it-yourself repair. Today I’ll show you how to fix a leak in the anti-siphon valve of an outdoor faucet.
Fixing a Leak in the Anti-Siphon Valve of an Outdoor Faucet: Step by Step Guide
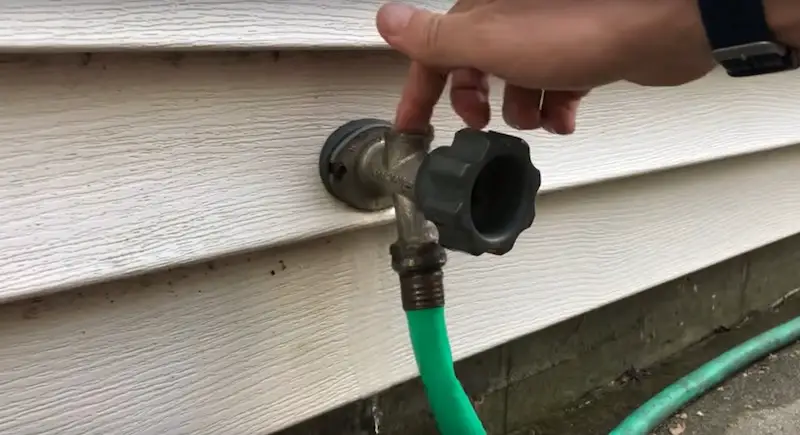
On this outdoor faucet, the anti-siphon valve (also called a vacuum breaker) is leaking when the water is turned on. We’re losing a pretty good amount of water from under the cap here at the top of the spigot. An infiltration of water could cause problems with the foundation and it for sure isn’t helping this concrete slab if it loosens up the under-footing.
In this step-by-step guide, I’ll show you how to remove the cap and pull out the plunger of the anti-siphon valve so you can see if simply removing some debris will fix the problem. We’ll examine the plunger and casing to evaluate wear, and then I’ll walk you through the few steps to replace the components.
Rather watch than read? Check out this 7-minute video.
DISCLAIMER: This video and description contain affiliate links, which means that if you click on one of the product links, I’ll receive a small commission.
How to Fix a Leak in the Anti-Siphon Valve of an Outdoor Faucet: Supplies
Tools
- Flathead screwdriver
- Small channel locks
Supplies
What the Anti-Siphon Valve Does and How it Works
To briefly explain what the anti-siphon valve does and how it works:
There is a small sort of plunger inside the valve that goes up and down. When you turn the faucet on, the pressure of the water pushes and keeps the plunger up. When you turn the faucet off, the valve drops and seats, creating an airflow path so that you don’t get a siphon effect, which could pull potentially contaminated water back into the clean water supply.
The anti-siphon valve is also a key feature to help reduce the chance of water freezing inside the faucet which can cause a water leak inside your home and that is never a good thing.
Causes of Problems (Leaks) with the Anti-Siphon Valve
Debris or something that’s gotten stuck in that little plunger, preventing it from seating correctly in the casing, could be the cause of the anti-siphon valve leaking. There could be some other simple malfunction as well.
I’ll show you how to remove the cap, pull out the plunger and look at it to see if the fix is just a matter of removing debris.
Removing the Anti-Siphon Valve
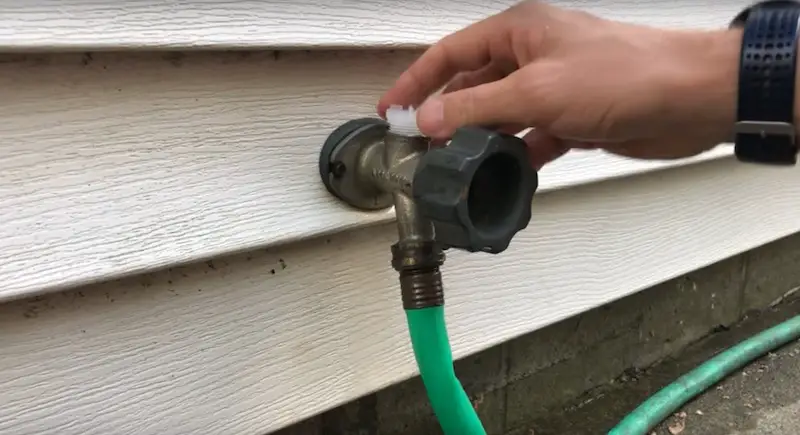
Here we are at the outdoor spigot.
The first thing to do is pop off the cap at the top of the faucet assembly with a flathead screwdriver.
This cap was really loose and came right off; you might have to work yours side to side a bit. This one was easy to take off because there is some plastic missing on the piece underneath it.
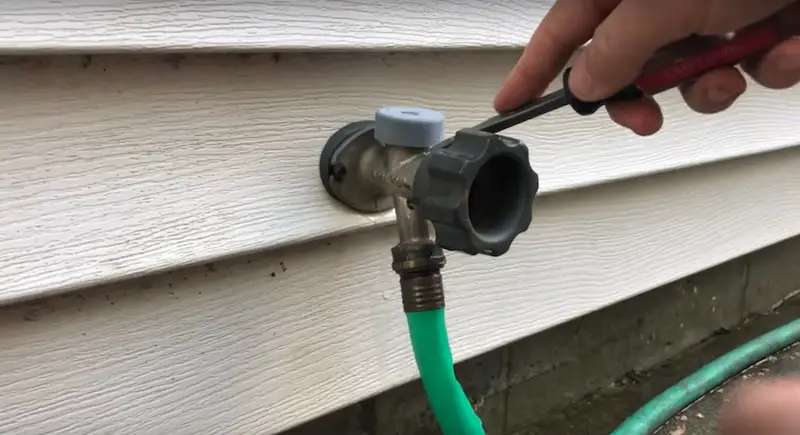
Now I’ll just take some channel locks to loosen this plastic piece. Keep in mind that you might want to salvage and reuse this part, so take your time to coax it out without squashing it.
Once the piece is loose, I’ll finish unscrewing it by hand.
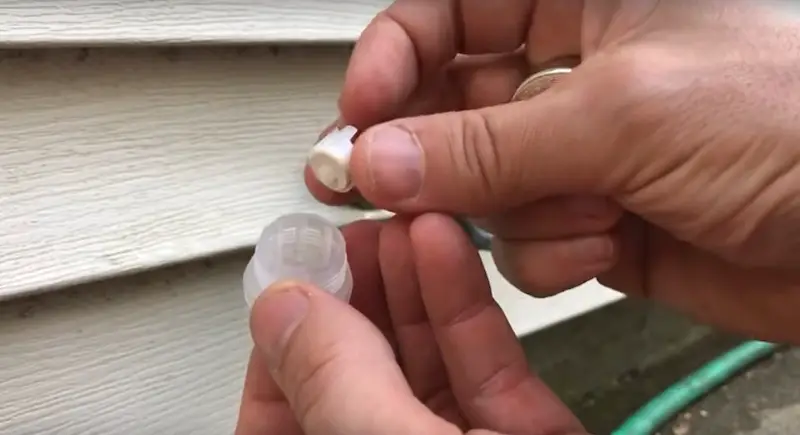
Examining the Plunger of the Anti-Siphon Valve
The valve is pretty simple, it’s basically two components. On the underside, right in the center, is the plunger that we talked about. Around it is a threaded plastic casing.
Clearing Debris Out of the Spigot Assembly
To clear any debris out of the spigot assembly, turn on the water and let it flow. Then give a little stir with your finger inside the spigot and around the internal threads.
This will ensure there’s no debris within the threads or loose in the body of the spigot.
Popping Out and Examining the Plunger of the Anti-Siphon Valve
To pop out the little plunger, take your flathead screwdriver and just push down from the top side of the component, and it should come right out.
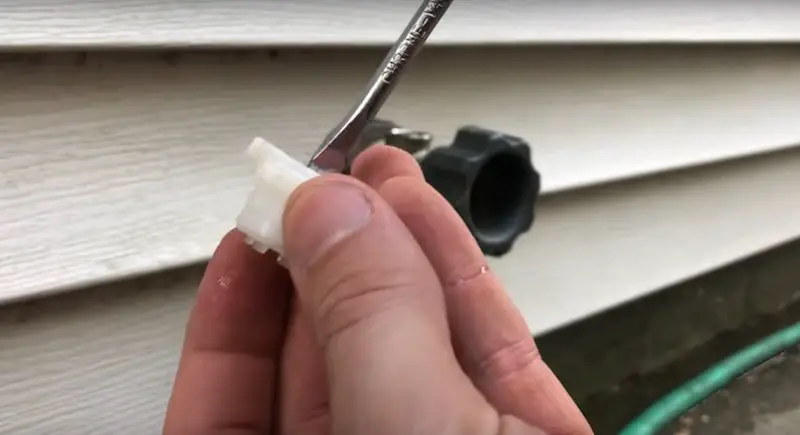
On the top of the plunger is a little seal.
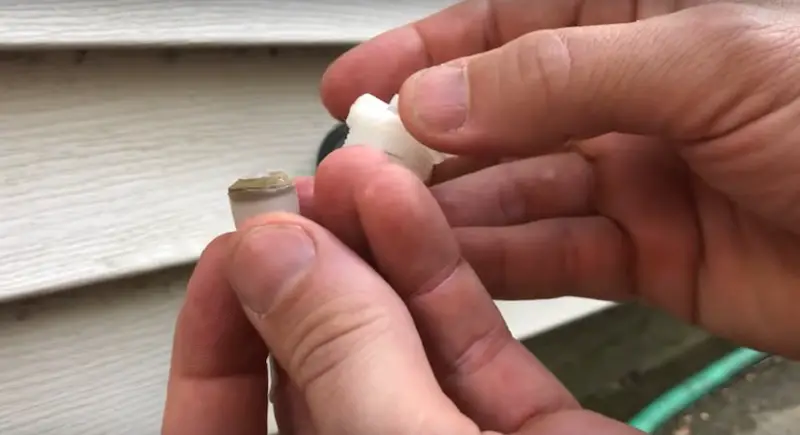
This seal is kind of discolored and it looks a bit oblong. Because it has this cone shape, it’s not going to seal very well, so we’re going to swap out that component.
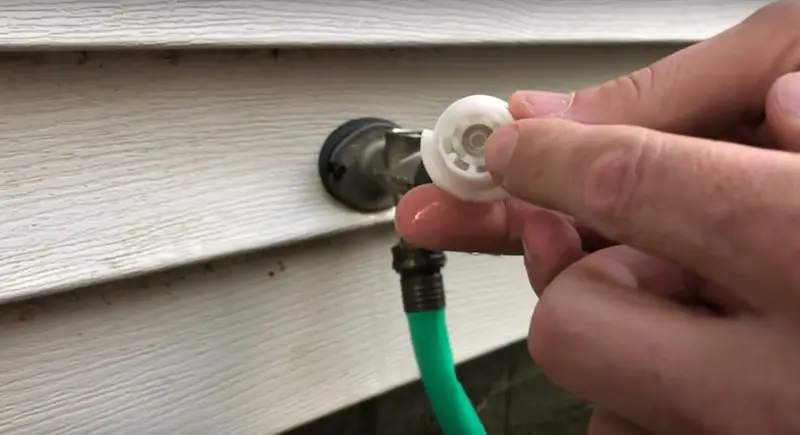
The Anti-Siphon Valve Replacement Kit
Here is the replacement kit for the anti-siphon valve, which in technical terms is a vacuum breaker.
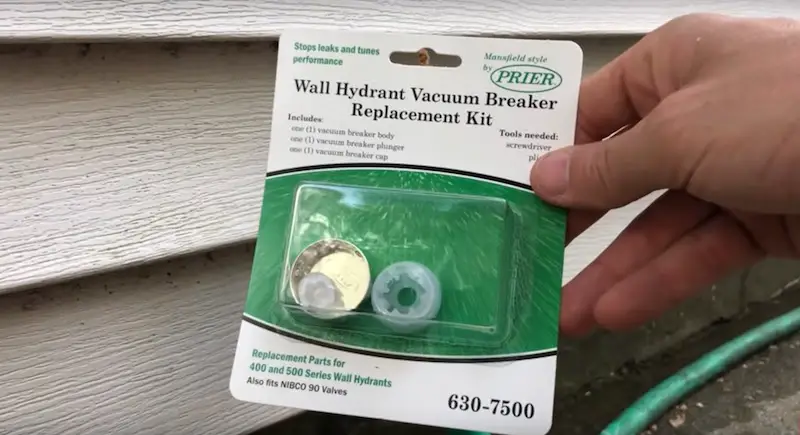
The components are:
- the casing
- the plunger
- the cap
You can get these kits at hardware stores and big-box stores like Home Depot or Lowe’s. Where I live we’ve got Menards. In the Supplies section, there is a link if you want to get the kit online.
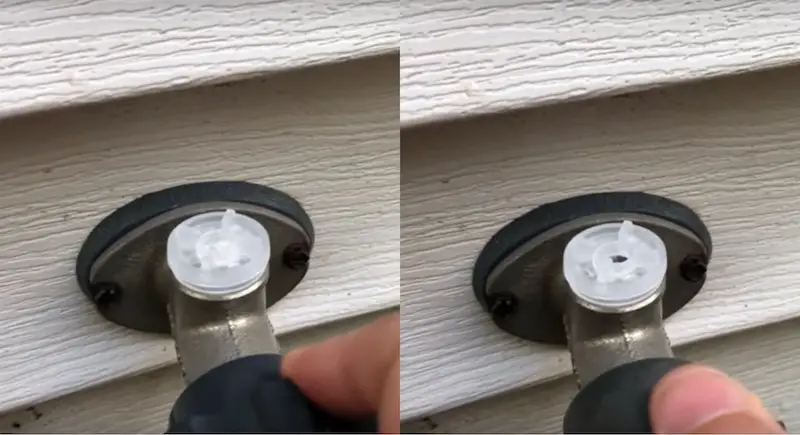
Installing the Plunger and Casing of the Anti-Siphon Valve
A few simple steps here.
1. Put the plunger into the casing. The seal-end of the plunger goes into the threaded end of the casing.
2. Install the casing (with the plunger in it) into the opening on the top of the spigot.

If the plunger falls out when you’re placing the casing into the spigot, make sure it seats
well. Better yet, pop the plunger back out using a flathead screwdriver and put it back into the casing. As you invert it to install it, put your screwdriver over the plunger to hold it in place.
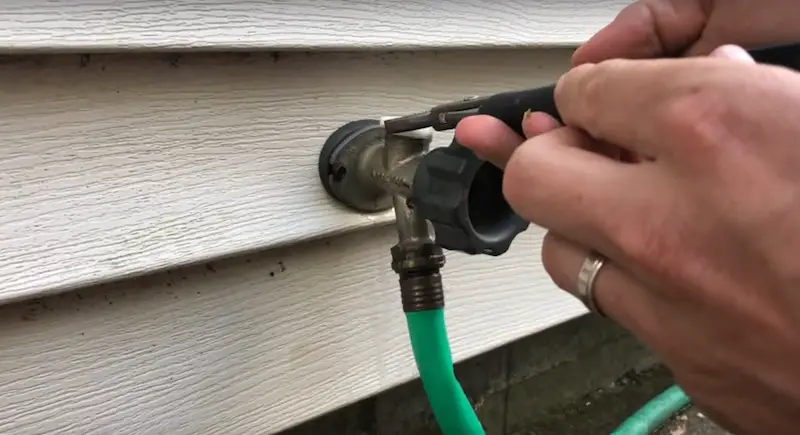
3. Hand-tighten the casing to get it started threading.
Finish tightening the casing with your channel locks, being careful not to overtighten. It’s just plastic, so you can easily break the casing by tightening too hard. Just get it snug in there.
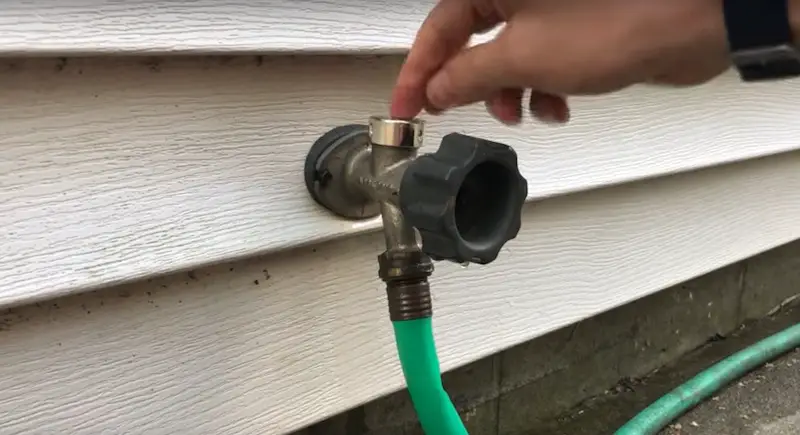
Testing the Anti-Siphon Valve
Before putting the cap back on top of the anti-siphon valve, let’s turn on the water to make sure the valve is no longer leaking. You should see the plunger go up when the water is turned on.
The plunger drops down when the water is turned off. In the down position, the airflow path is opened back up to ensure there’s no siphon-effect pulling water back through the hose.
Putting the Cap Back on the Anti-Siphon Valve
All that’s left to do now is put the cap back on the anti-siphon valve. No tools needed: just push the cap into place with your thumb or fingers.
Believe it or not, it’s that easy! Our vacuum breaker is good to go.
How to Fix a Leak in the Anti-Siphon Valve of an Outdoor Faucet: Money-Saving Tips
Before you go buying a replacement kit, go out to your spigot and take the valve out, as I’ve shown you, to see if the problem is simply some debris that’s not allowing the plunger to do its thing. This is a really easy fix and it will save you a little money.
If you need to buy a replacement kit, check to see if the construction of your component is the same as the kit. There are a few types on the market. Mine is a Mansfield.
Outdoor Faucets: Other Leak-Related Repairs
To see another leak-related DIY repair, namely how to fix a leak behind the handle of an outdoor faucet, please watch our YouTube video or read the step-by-step guide.
Thanks for joining us. Take care!


