
 My Account
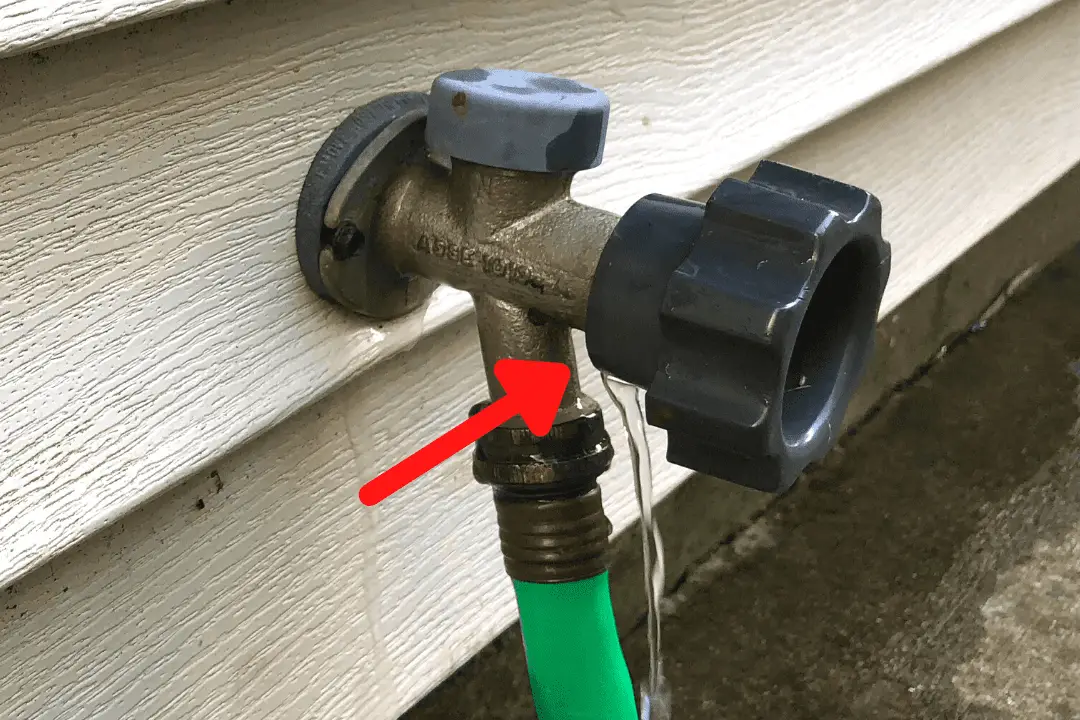
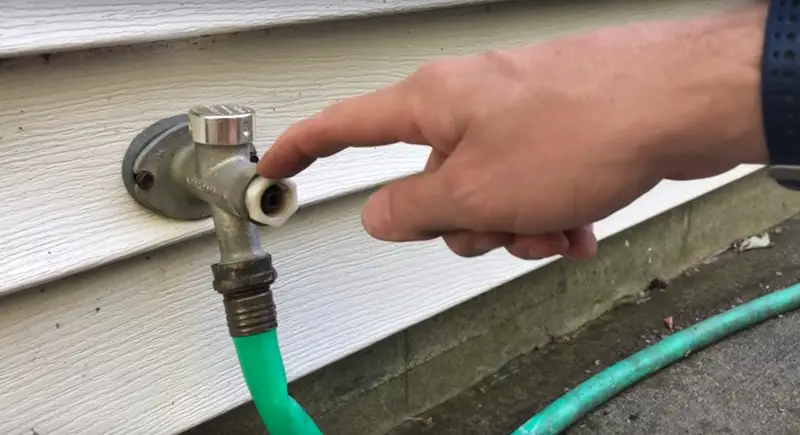
Today we are addressing a water leak on an outdoor faucet. The water is leaking from behind the handle of the spigot.
If you have a leaking outdoor faucet and the leak is coming from the valve on top of the faucet assembly, which is called the anti-siphon valve, check out this video that will walk you through how to fix that problem. Repairing a leak in the anti-siphon valve is surprisingly quick and easy.
Back to the leak behind the knob of our faucet.
Fixing a Leak Behind the Handle of an Outdoor Faucet: Step by Step Guide
In this step-by-step guide, we’ll first be checking out the interior components of the spigot to see if we just need to tighten the nut, or if the O-rings or gaskets are worn and need to be replaced. Then I’ll walk you through the simple steps to replace worn-out parts.
Rather watch than read? Check out this 9-minute video.
DISCLAIMER: This video and description contain affiliate links, which means that if you click on one of the product links, I’ll receive a small commission.
So let’s jump in with what tools and supplies you’re going to need.
How to Fix a Leak Behind the Handle of an Outdoor Faucet: Tools and Supplies
Tools
- Standard flathead screwdriver
- 3/8” Socket
- 7/8″ Socket
Supplies
Removing the Handle from the Faucet Assembly
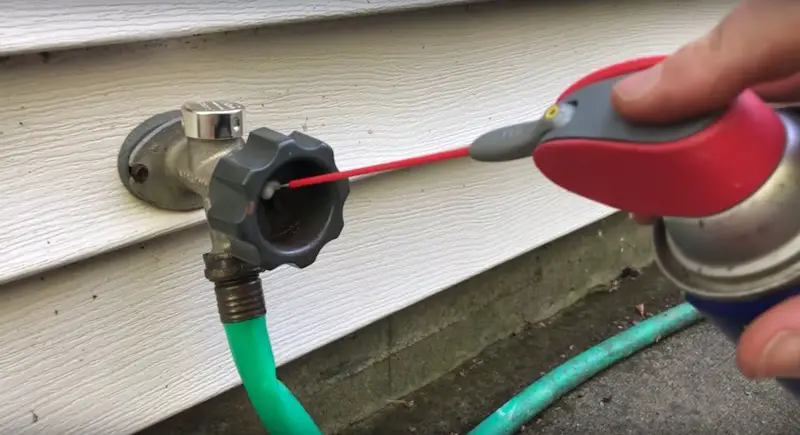
We’ll start by taking out the small bolt that secures the handle of the faucet to the stem that’s behind it. This one is really rusty; possibly yours is, too.
If the bolt is rusty and difficult to dislodge, spray on some WD-40 and wait a few minutes. You might need to repeat this step a couple of times to let the WD-40 penetrate the corrosion.
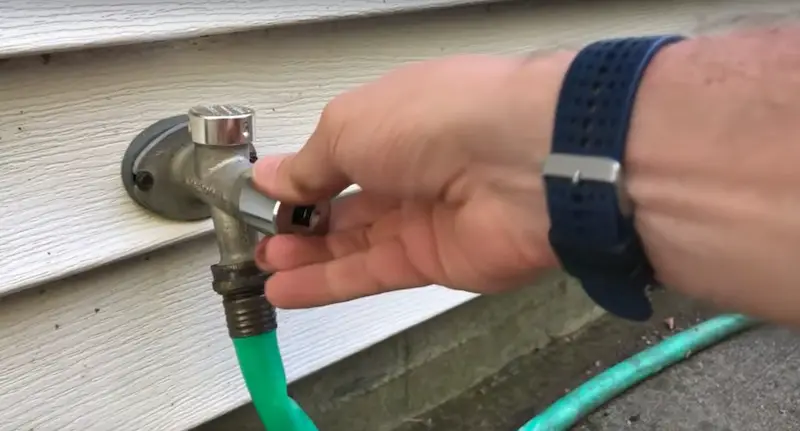
Usually, a flathead screwdriver will work to unscrew the bolt. Because this one was pretty tight I’m going to use a socket wrench. This is a ⅜” socket.
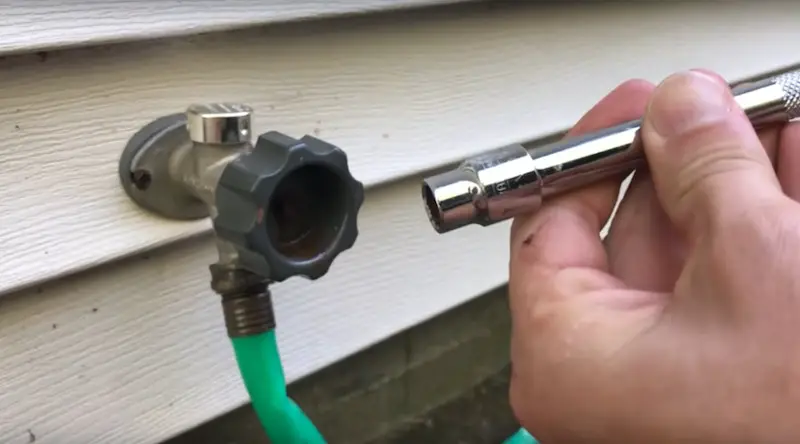
Holding the handle, I’ll loosen up the bolt with the socket wrench. Once it’s loose, I can go back to using the screwdriver for the last threads, again holding the handle still.
Note that I don’t have the water turned off, seeing as I’m just addressing the initial source of the problem. I’m being careful not to turn the stem so that water doesn’t start flowing. If you don’t want to worry about that, you might want to turn the water off at the main water shutoff valve.
Now that the bolt is out we can see that it’s nice and rusty. It’s probably been in place for 20 years without any service done, so not a surprise.
Removing the Nut
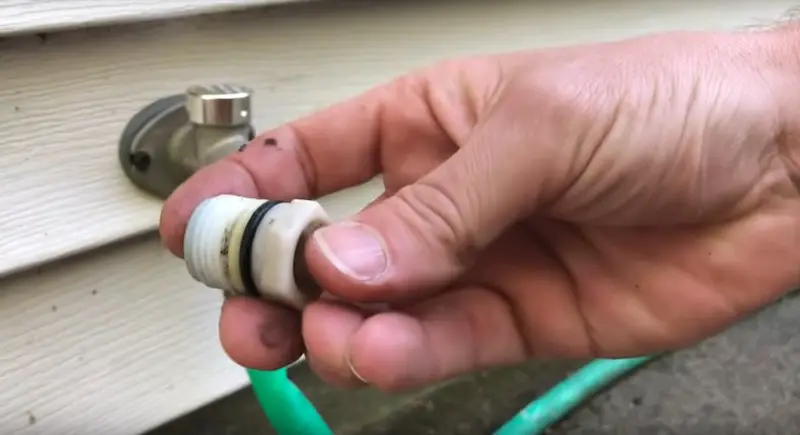
Here’s the nut. It’s white.
This is a right-hand-tightening nut, which means that when you turn it to the right (clockwise), it tightens. There are also left-hand tightening nuts. Those are usually tan-colored.
This nut is loose enough to be unscrewed by hand. That alone could be the source of the leak. A simple test would be to tighten the nut and see if that fixes the leak. After tightening the nut, screw the handle back on, turn the handle to start water flowing, and see if the faucet still leaks.
Now let’s remove the nut. You can do this with a pair of pliers or, if you already have your socket set out, use a ⅞ socket.
Having removed the nut, what I’m looking for is the O-ring and gasket. I want to see the condition of those. If they’re in bad shape, that’s probably going to be the source of the leak.
Here’s the O-ring, it doesn’t look too bad.
Now for the gasket.
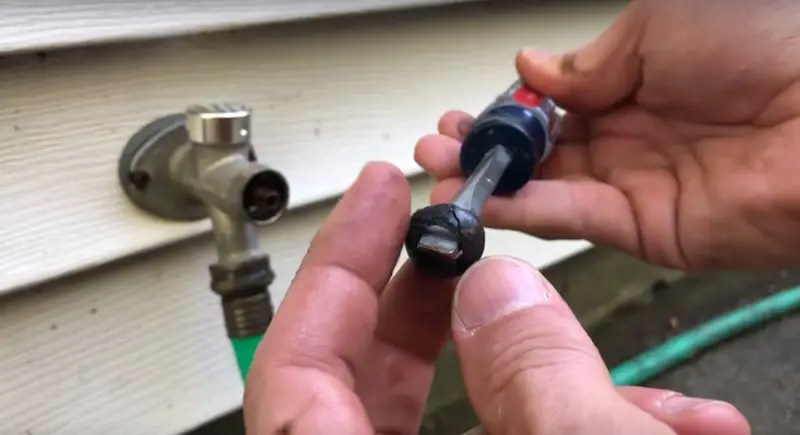
The gasket looks a little dried out, I’m going to pry it out of the nut with a flathead screwdriver.
You can see it’s got cracks in it and chunks are missing. That is definitely not going to make a good seal, which is most likely the source of our problem.
The Wall Hydrant Repair Kit
The wall hydrant repair kit has all the parts we need, even some we don’t for this project, for example, the tan-colored, left-hand tightening nut.
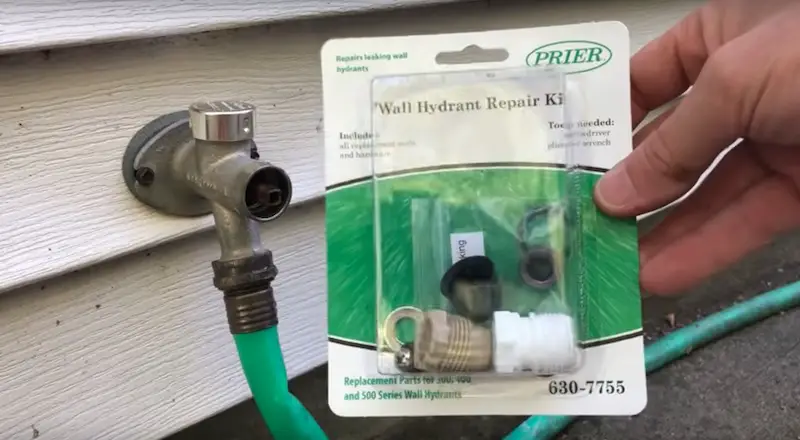
The kit also contains other components — additional gaskets and things — so that you could actually rebuild this entire faucet stem if needed.
For now, we’re going to replace just the white, right-hand tightening nut, the O-ring, and the gasket, and see if that works for us.
Replacing the Nut, O-Ring, and Gasket of the Outdoor Spigot
The first step is to put the (little black) O-ring on the white nut, all the way to the neck of the nut letting it set into the groove.
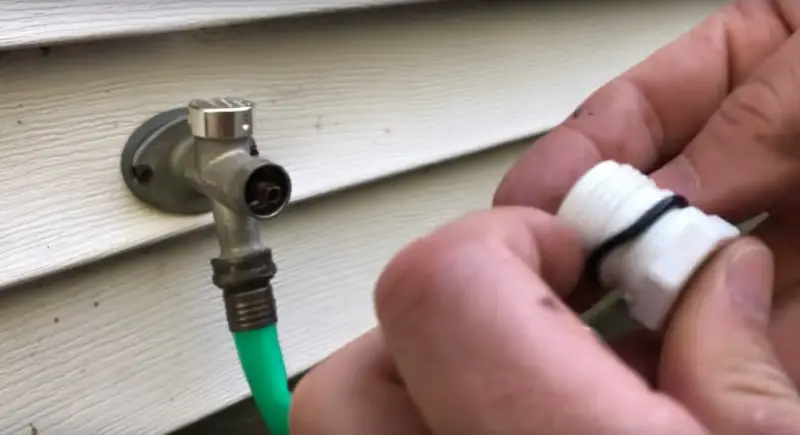
Now take the right-hand gasket. Don’t worry if the gasket that you took off had a concave shape and the new one is a normal flat rubber washer. It’s still going to work.
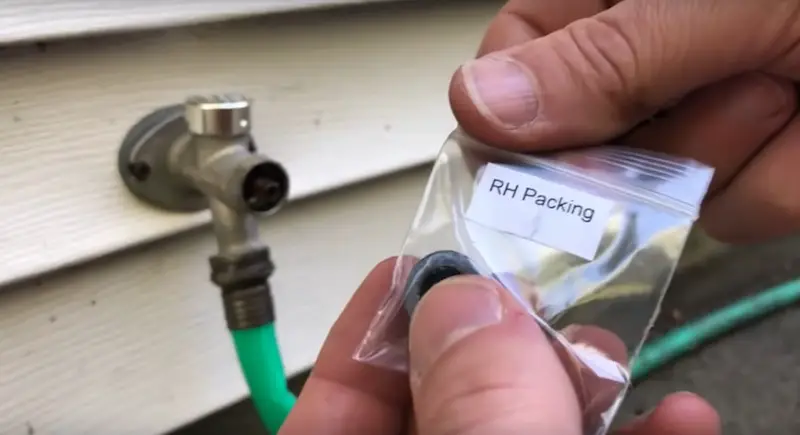
To install the gasket, you can either put it inside the white nut or you can put it on the stem itself. I’m going to apply it to the stem, pushing it into place with my thumb.
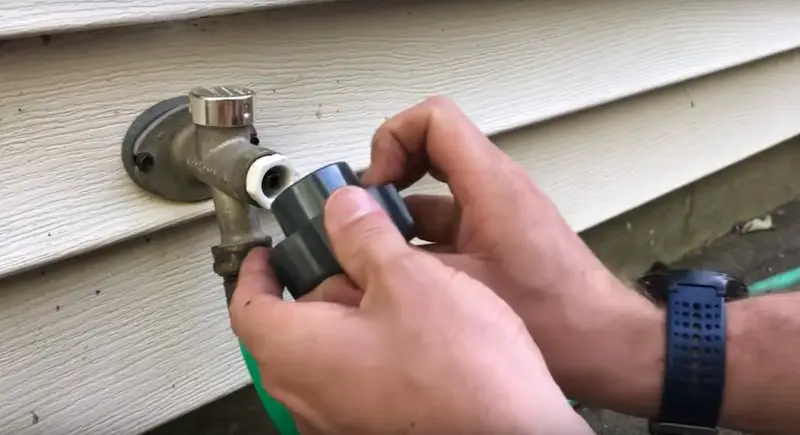
Then I’ll push the new nut over top of the gasket. When the nut is tightened, the gasket is going to conform to the shape of the cone that’s on the nut.
Tighten the nut down with a ⅞ socket wrench. Whenever you’re dealing with plastic parts, it’s a good idea to be careful. Don’t over-tighten them, or you could break the components and have to start over, which is never any fun, especially if you don’t have another kit lying around.
Replacing the Handle and Bolt of the Outdoor Faucet
Let’s look at the handle. I did notice when I took the handle off that it’s cracked on the inside.
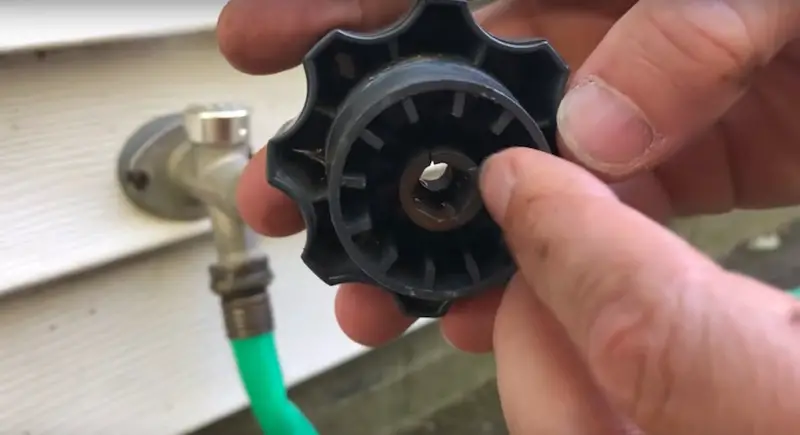
Here’s the handle replacement kit. The nice thing about this kit is that it comes with a new bolt. Recall that my bolt was really rusty, so I’m gonna swap that guy out.

Put the new handle on, matching up the square.
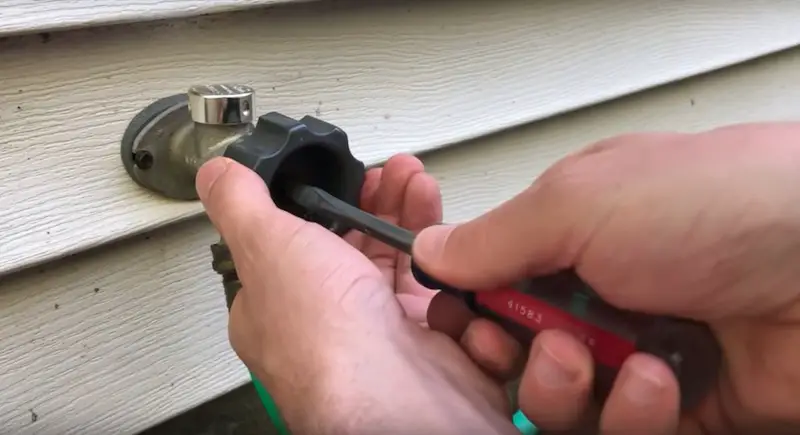
Put the bolt in, being careful not to cross threads. Make sure you get the bolt lined up before starting to screw it in. Tighten that down with your screwdriver.
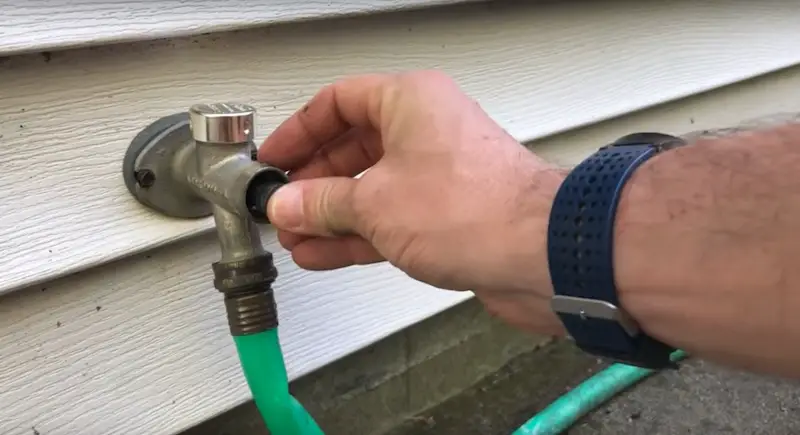
How to Fix a Leak Behind the Handle of an Outdoor Faucet: Testing the Repair
To test our work we’re going to turn the handle to start the water flowing.
That’s it! We are watertight.
To fix the leak behind the handle of our outdoor faucet, we simply swapped out the nut inside of it, as well as the gasket and the O-ring.
Outdoor Faucets: Other Leak-Related Repairs
Don’t forget, I do have another video out there for leaking anti-siphon valves. This is the most common kind of leak on an outdoor faucet, along with the leak behind the handle that we addressed in this guide.
If these videos are useful, please subscribe to our YouTube channel and give us a Like.
We appreciate you joining us here on Everyday Home Repairs! Take care.


