
 My Account
Trying to troubleshoot a ceiling fan light that’s not working? You’ve checked the bulbs and your circuit breaker, but still no luck? In this blog, I’ll share a way to fix to this issue that helped get the lights on my Hunter Douglas Ceiling Fan working again. The best part: It takes a few minutes and the only tool you need is a voltage tester.
Why might a ceiling fan light stop working properly?
First, if your ceiling fan is working but the lights aren’t, I recommend making sure the bulbs are secured in place and not burned out. Tip: you can test them in a lamp to see if they work in a different spot.
If none of those issues are the culprits for your situation and you’re sure the bulbs are the proper wattage for your ceiling fan, keep reading to see how I fixed my malfunctioning light.
Rather watch than read? Check out this 6-minute video below.
Tools:
DISCLAIMER: This article contains affiliate links, which means that if you click on one of the product links, I’ll receive a small commission.
5 Steps to Fix a Hunter Ceiling Fan Light by Removing the Regulator
1. Open the bottom unit and look for the “hot”
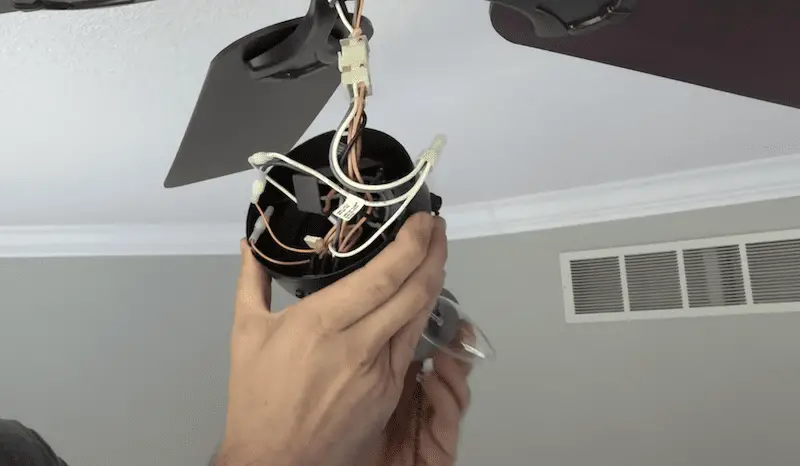
First, I opened the bottom unit, which has all the different splices, regulators, and switches in it. I then looked for the black wire, which provides the hot side to the fan, and the blue wire, which provides the hot side to the light switch.
2. Check voltage and troubleshoot
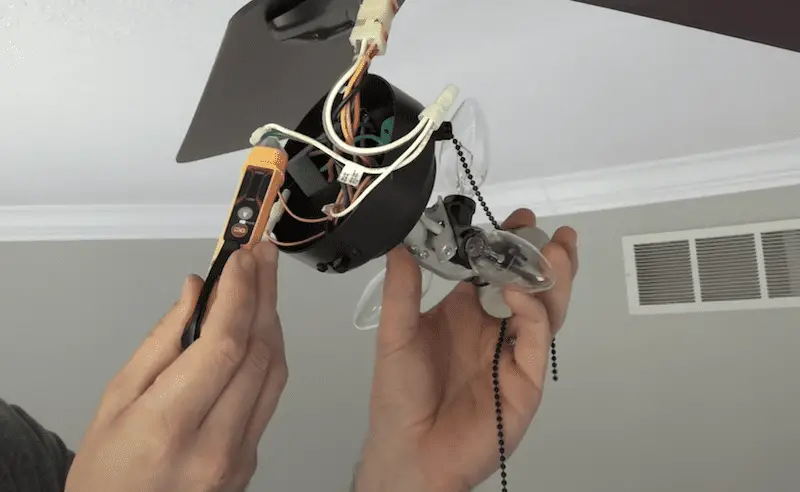
To test the voltage with a voltage detector, I put the fan in the “off” setting and had both switches on.
For me, I had voltage coming through the black wire, which is associated with the fan, but then when I went to my blue wire – I saw nothing.
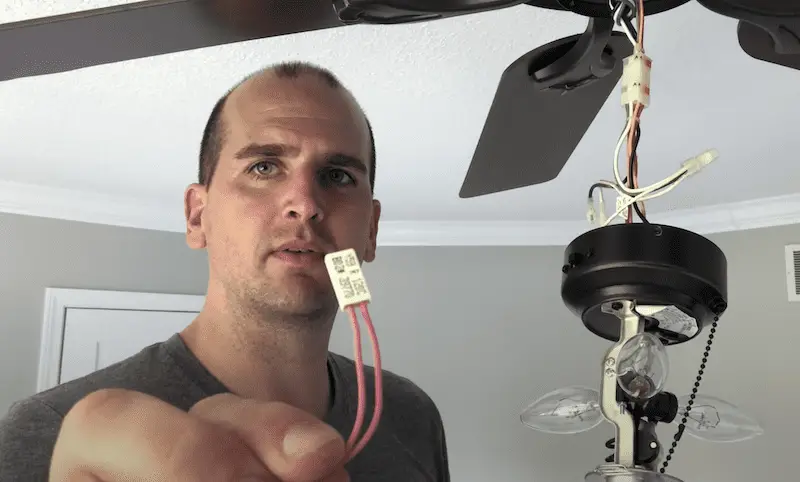
Also, I noticed a small rectangular box. This box spliced in from the blue “hot” side that converts it over to pink → then it went through the box, providing the hot side to the switch and down the on/off switch for the lights.
I figured that this box is a type of regulator that helps ensure the wattage of the bulbs is appropriate for the fixture – and mine needs replacing. While I wait to get a replacement from Hunter Douglas, I decided to remove it to get my lights working.
If you decide to do the same thing, make sure to cut all the power off first (Step 3).
3. Cut power
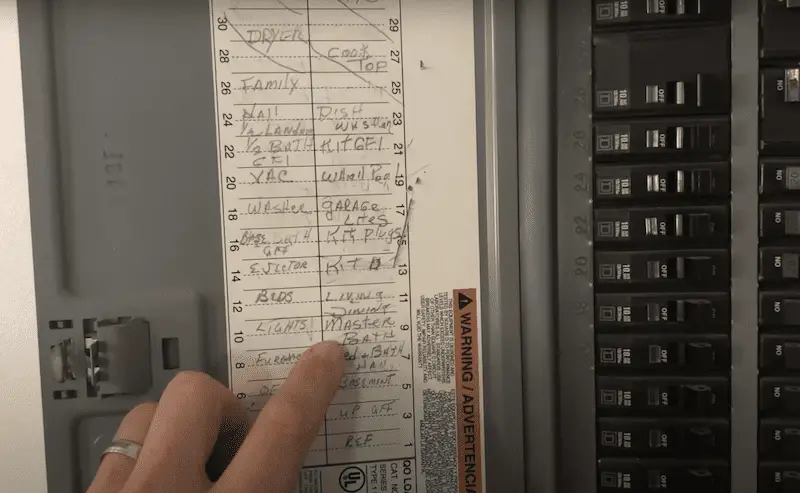
To do this in one trip, set the fan on the lowest speed possible and go to the breaker box.
Hit the breaker that you suspect is for the correct room and then make sure the fan is off to confirm no power is coming to the space – especially if you don’t have one of the voltage detectors!
Note: At the panel, there’s often varying degrees of completeness in terms of labeling. Sometimes this is a little bit of a guessing game.
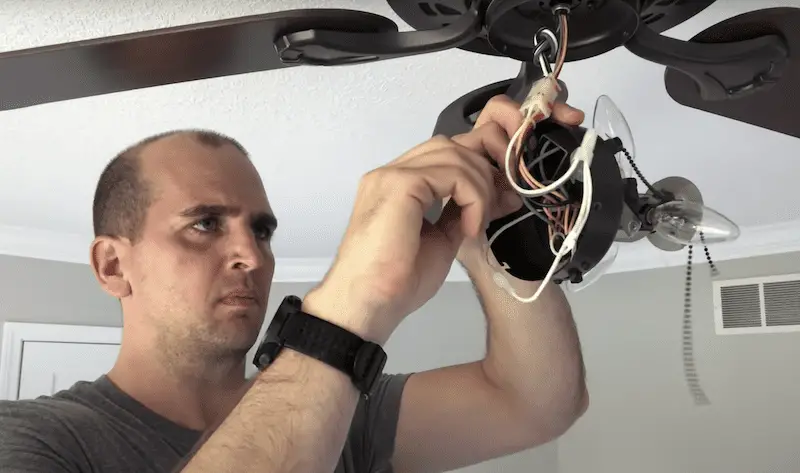
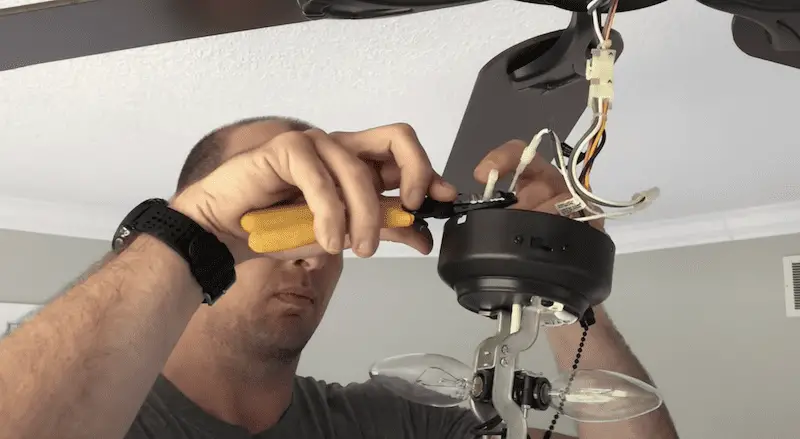
4. Remove or replace the regulator
Once the power is off, you can start the process of removing the small regulator. Keep in mind: if you remove it and you start burning out a lot of the different light bulbs, you might need to switch your unit or see if you can get a replacement.
First, undo the little plastic quick connects to remove the regulator.
Then, strip the blue and black wires by taking off the quick connect and the insulation.
Once they’re both stripped, bring them together with a simple wire nut
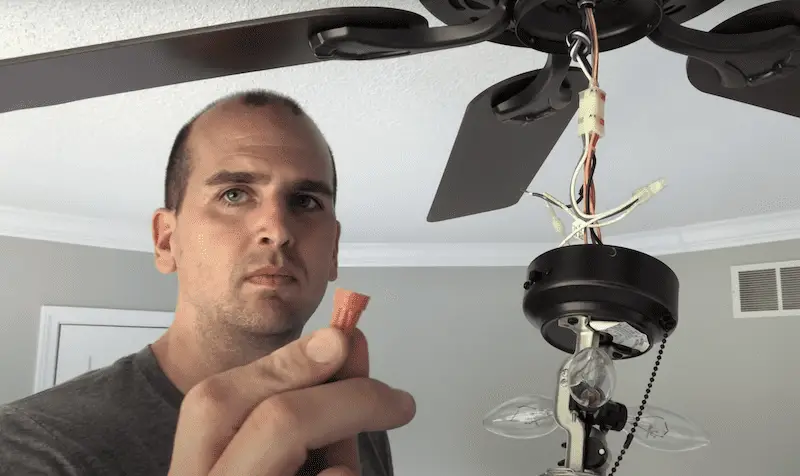
Tip: Make sure you get a good bite on both of those wires, so it’s not twisted.
5. Test and re-install the fixture
Go back and hit the breaker to see if the lights come back on. If so, then go ahead and re-install the light fixture. You’re all set!
The Wrap Up
With this 5-step process, I not only have a functioning fan, but the lights are also back in business. So removing the voltage regulator did the trick for my Hunter Douglas fan issue.
There were also some helpful comments from the community for this post. We learned some fixed their lights without having to strip the connectors off the ends of the blue and black wires. Instead, they removed the regulator and connected them directly together since they “clicked” right into place. Let us know in the comments if you’ve done this project and what worked for you!


