Installing a garage door opener is a great way to keep your home safe and avoid the hassle of having to open it manually. Plus, it’s a relatively budget-friendly and easy process with a big payoff – especially if you live in a place with harsher weather conditions.
I’m particularly a fan of garage door openers with keypads, like the Genie, because they’re convenient and offer extra security. Instead of giving copies of your key to someone who needs access to your home (babysitters, friends, construction workers), you’ll give them a key code that can be changed at no extra cost.
But what exactly does the Garage Door Genie Remote programming process look like? Read on for step-by-step instructions and watch the video below.
Genie Garage Door Remote Programming – Step By Step Instructions
Step 1: Erase the Other Garage Door Codes

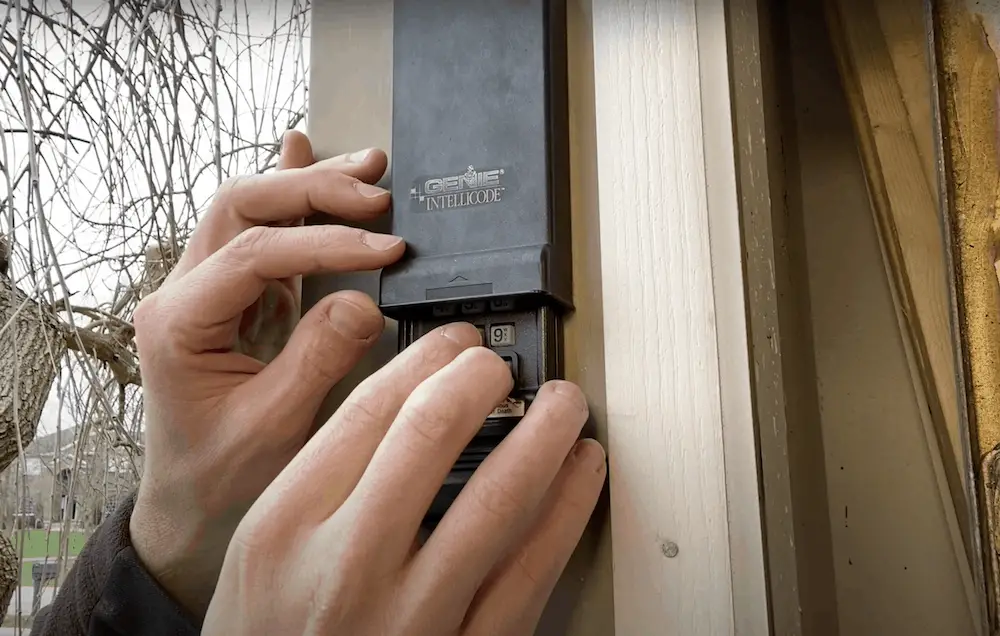
Note how the Genie is only partially open during this step
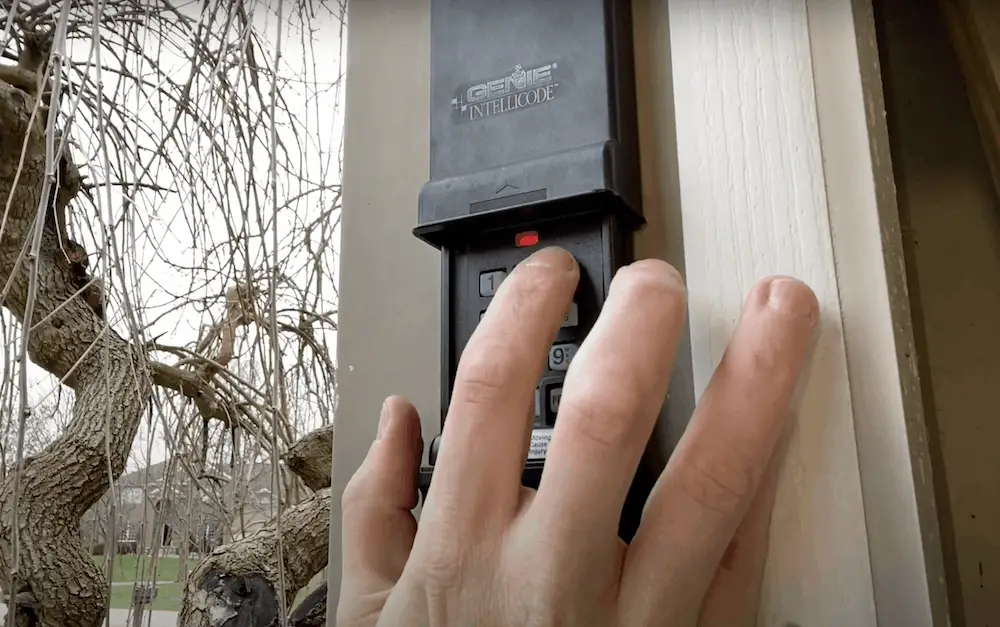
Before you do anything else, you need to erase the other codes. To do that, partially open the cover and hold down the “8” and “Program” keys. While holding down those keys, slide the cover completely open until you see the light flash. Once you see the light flash that means your codes are erased and you’re ready to move on to the next step.
Tip: Don’t see the lights flashing? Don’t worry. There’s a little button underneath the slider that needs to be activated in order for this process to work. That’s why it’s important to only open it partially while holding down the “8” and “Program” keys. So try adjusting the slider cover and give it a go again.
Step 2: Program Your New Garage Door Opener Code

Make sure the cover is fully open and enter your new code. Once you see the LED flashing at a low pace, press in your new code again. You should see a double flash. That means your new code is programmed.
Step 3: Sync The Garage Door Opener With the Remote Keypad

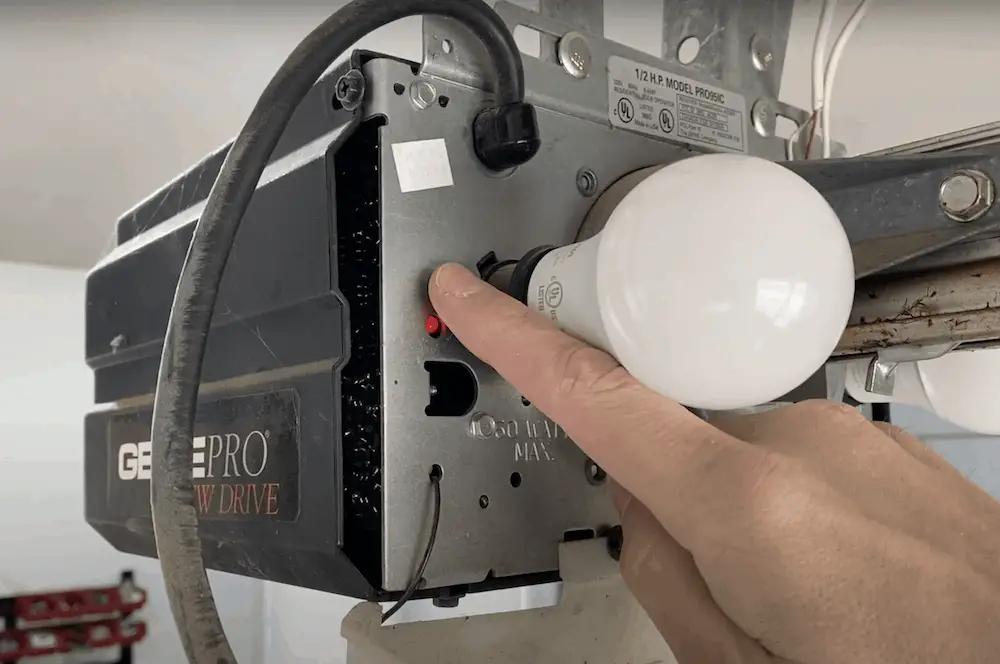
With a step ladder, open the garage door opener light cover. Press the “learn” button and look for a light to flash.
Here’s where a little adrenaline comes in. You have 30 seconds from when you see the light to go back to the wireless keypad and sync it up to the garage door opener.
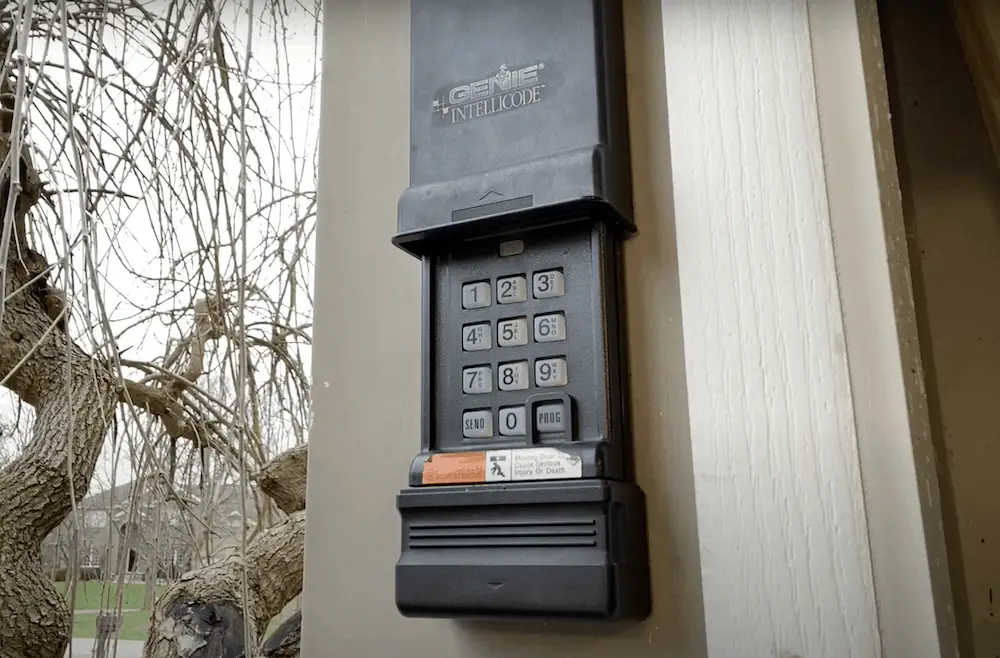
In this 30 second window, you’ll need to press the code you want and hit “send” twice. That will lock it in. Press “send” one more time. You’re all set from there!
Common Questions with the Genie Garage Door Opener
I’m dealing with issues with the light not flashing. What’s up?
If you face an issue at any point in the garage door installation process, you’re not alone. This specific keypad has a slide cover that needs to be in a precise position to get activated because it presses a small button that’s underneath the cover. In other words, you can’t have the cover open too little … or too much or the button won’t be pressed and it won’t work. This can be frustrating, we know!
Solution: Slide the cover all the way off to see the button at the top left side to give you an idea of what we’re talking about. And then fiddle with the slide cover to get it in the correct position.
Are there other garage door openers that don’t have a “slide” cover?
Yes. Chamberlain garage door openers are another choice without a slide. For everything you need to know to install this garage door opener, read this blog for tips to install your Chamberlain Garage Door Opener Keypad.
How long will the Genie Garage Door Opener last?
In general, garage door openers should last 10-15 years. However, this number will vary depending on how often you use it and maintain it.
The Wrap Up
While installing a new code for your garage door opener may be the last thing you want to do on a Saturday afternoon, you’ll be grateful once you have it set up. A keypad is one of those features that once you have – you’ll never want to go back!


