
 My Account
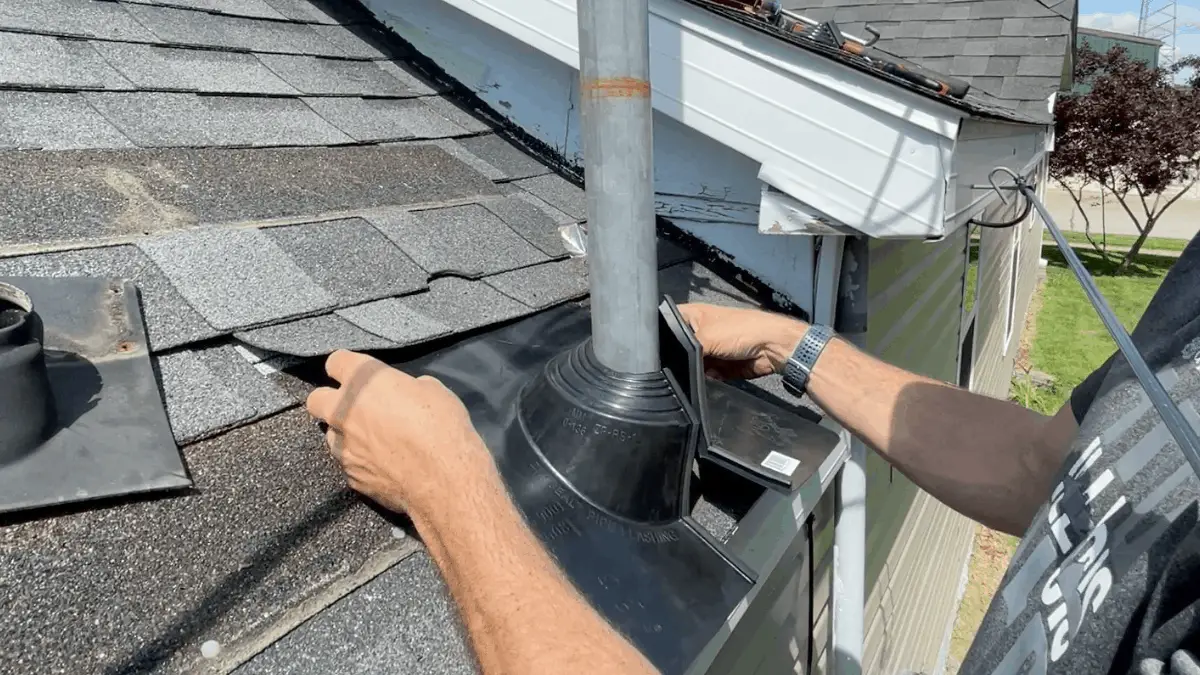
A roof boot is installed to form both a watertight seal around the protruding pipe and a water-shedding seal against the surface of the roof itself. Over time, however, the flexible material of the boot (as well as any sealants and adhesives) can dry out, crack, and fail, eventually leading to failure and water coming into your home.
Slipping a new roof boot over an existing plumbing vent certainly sounds easy, right? Well, in many cases it is! Though, while replacement boots are readily available at your local home center or building supplier, not all situations are created equal. What if your job involves something a bit more tricky, like an electric mast with wires attached? If this is you, then you know you couldn’t simply slip a new boot right over the top if you wanted to, since the wires would be in the way.

NOTE: For safety, always use extra caution and common sense while working around electrical lines.
Fortunately, there’s a type of replacement boot made just for this sort of scenario! It’s called a retrofit electrical mast flashing kit, and it has a crimp-secured opening along the front which allows it to be slipped right around the pipe and sealed. Though you’ll still find this sort of boot at many suppliers and home centers, it is somewhat more specialized. If you have trouble or are not in a rush, then ordering one online should not be a problem. Even if your situation is simpler and you’re just replacing a standard roof boot, the steps will be very similar, and the instructions in this article won’t steer you wrong!
Rather watch than read? Check out this 5-minute video.
Tools and Parts Used:
- Ladder
- Flat Pry Bar
- Utility Knife
- Retrofit Electrical Mast Flashing Kit
- Side Cutters or Utility Snips
- Hammer
- Roofing Nails
- Lineman’s Pliers
- Roof and Flashing Sealant
- Caulking Gun (If Needed for Sealant)
DISCLAIMER: This blog contains affiliate links, which means that if you click on one of the product links, I’ll receive a small commission.
Project Costs: Expect to pay around $70 for the flashing kit, as of September 2021. Anticipate an additional $10 to $15 for the sealant and roofing nails if you do not already have these items, and don’t forget to consider any additional tools which you may not already have.
Step 1: Break the seal and remove shingles around the old boot
Using a flat pry bar, carefully separate the layers of shingles around and about two to three layers above the old boot, breaking them free from the thin adhesive that sticks them together. Remove the shingle(s) covering the top of the boot by carefully working the pry bar toward each nail from underneath the shingle, slightly loosening it. Be careful not to use so much force that the nailhead pops through the relatively soft asphalt shingle. Once loosened, insert the pry bar directly under the nailhead from above the shingle and carefully pry out.
Step 2: Remove the old boot
With the shingle(s) removed, you can now see that it covered the points where the old boot is fastened to the roof. Using the pry bar, pull up and remove the nails holding the old boot in place, then cut it away with a utility knife, being careful not to damage any of the roofing under or around the old boot.
Step 3: Prepare and install the new boot
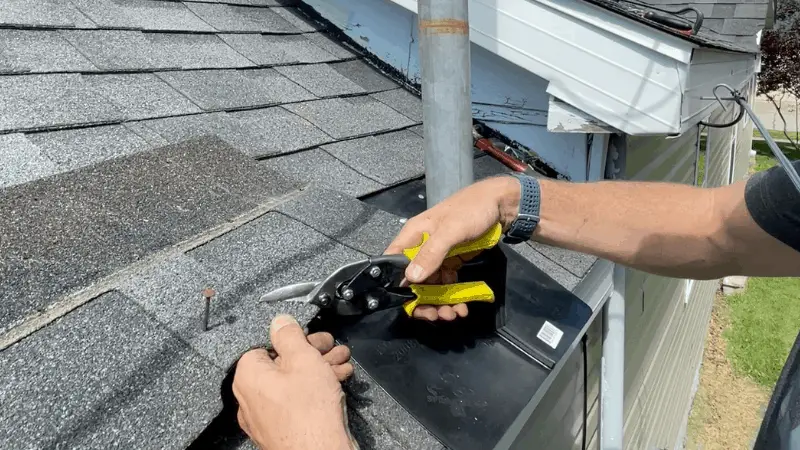
Since the boot is designed to fit around a multitude of pipe and conduit diameters, you’ll need to cut it using side cutters, utility snips, or a utility knife to fit around your specific size of pipe. In my case, I’ve got a 3” diameter pipe, so I’m cutting along the 2-⅜” to 3” marking. Take your time, and cut as cleanly as possible. Remember, this cut will be the final seam that seals between the boot and the pipe.
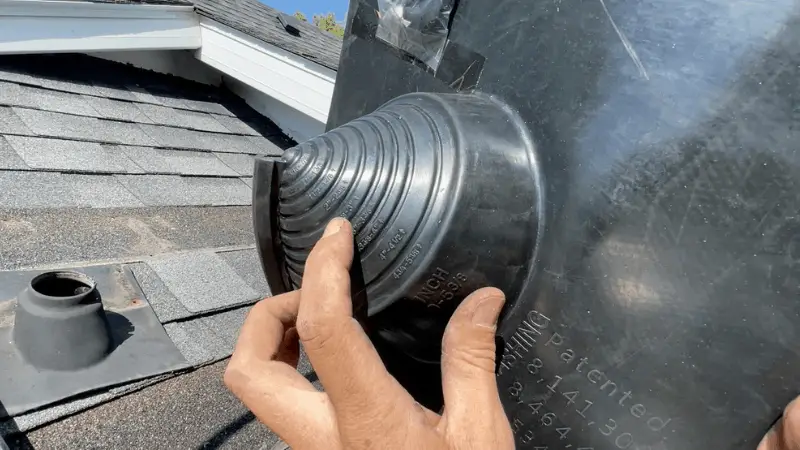
Once cut to size, you can put the boot in place, fitting it around the pipe and mating the two sides of the front seam securely together. Next, fasten it in place with three roofing nails along the top, being sure to drive the nails where they’ll be covered by the shingle above the boot.
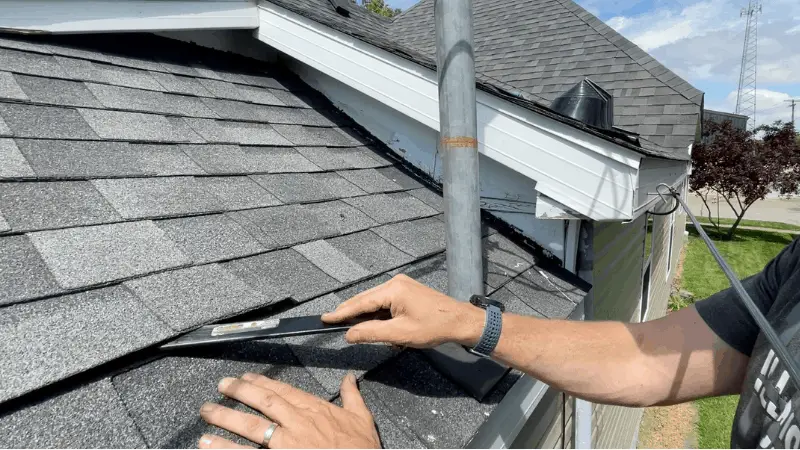
Step 4: Replace the shingles
If the new boot is bigger than the old (as was the case with mine), you may need to trim the shingle(s) to fit the larger radius before replacing them. Just measure and re-cut the contour appropriate to your case, using a utility knife or utility snips. Again, be careful not to damage any roofing around you while cutting.
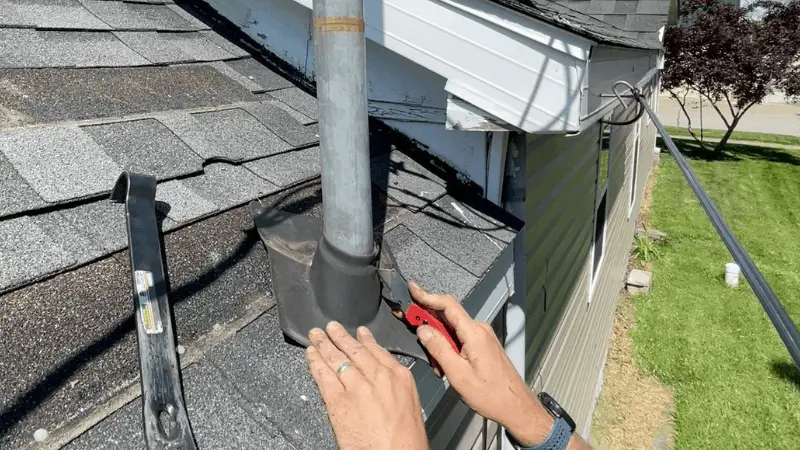
Step 5: Wrap-up and important finishing touches
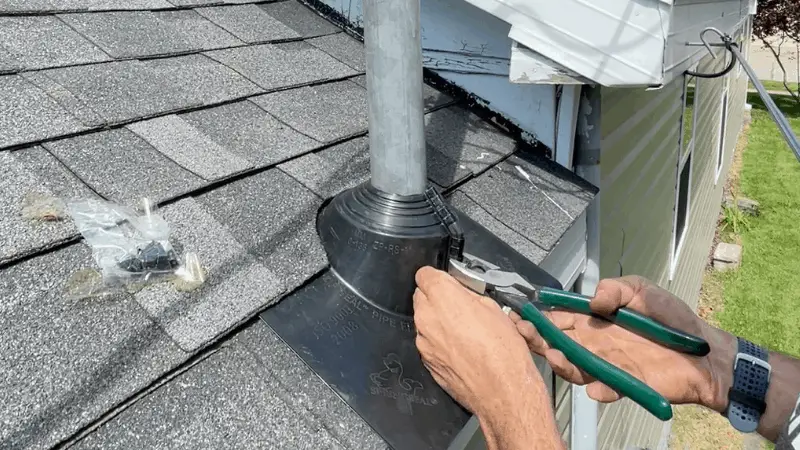
Using lineman’s pliers, squeeze the metal clips that came with the kit over the seam down the front of the boot to permanently secure and seal it. If your boot also happens to be very close to the roof edge as mine was, then you may need to trim the bottom edge to fit. This is accomplished easily enough with utility snips or cutters.
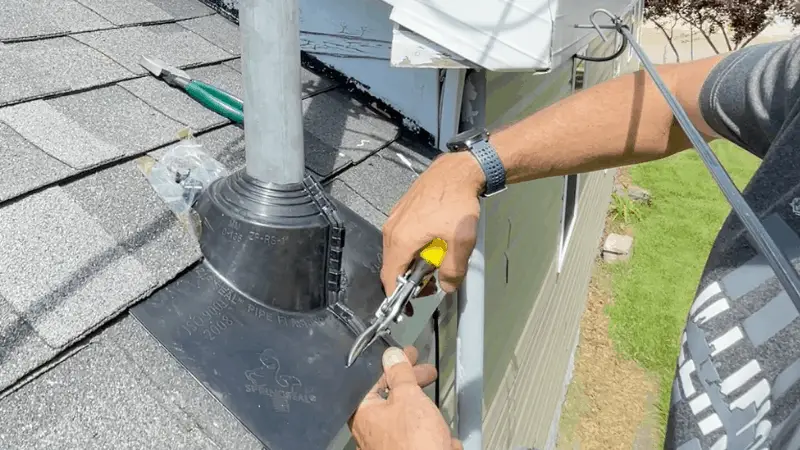
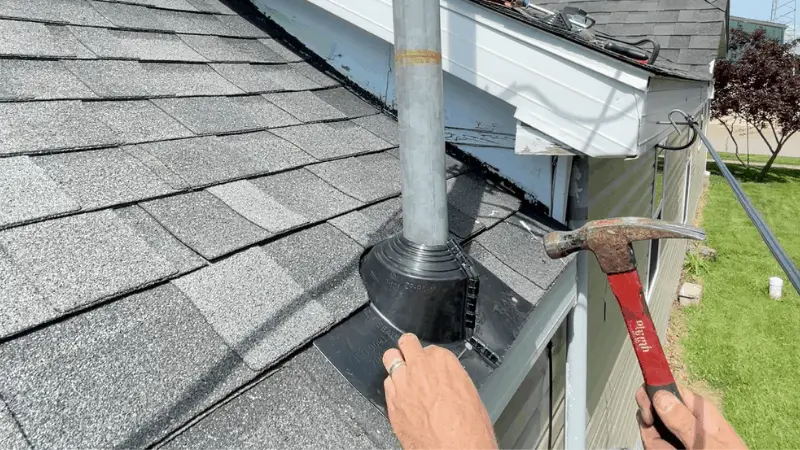
With everything secured, fasten along the front edge of the boot with four roofing nails. Lastly, using roofing sealant, re-adhere any shingles previously pried apart and separated, making sure to also seal over the exposed nailheads.

This is a fairly simple DIY project, although it does require working on your roof at potentially unsafe heights, so use caution. And as previously stated, any time you’re working near or around power lines, exercise extreme caution and only take on projects you’re comfortable with.


