
 My Account
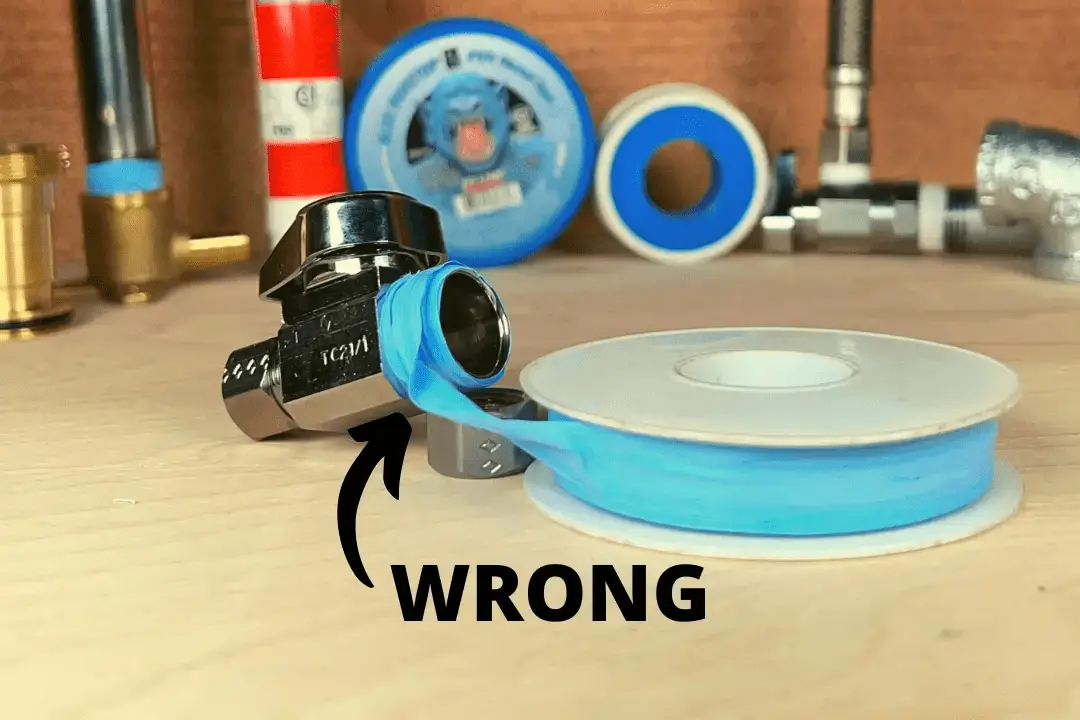
If you’ve ever taken on a DIY plumbing project, you know Teflon tape is a must-have. In this tutorial, I’ll be going over when and how to properly use it, and also when not to use it. You might be surprised to learn that not all fittings with threads require Teflon tape for a leak-free seal.
I’ll also talk about the brand I prefer and why.
Rather watch than read? Check out this 11-minute video.
DISCLAIMER: This video and description contain affiliate links, which means that if you click on one of the product links, I’ll receive a small commission.
When to Use Teflon Tape
Our first example of when to use Teflon tape is a half-inch National Pipe Thread (NPT) nipple. This one is tapered. For every inch of threads, the diameter of the pipe decreases by 1/16 of an inch.
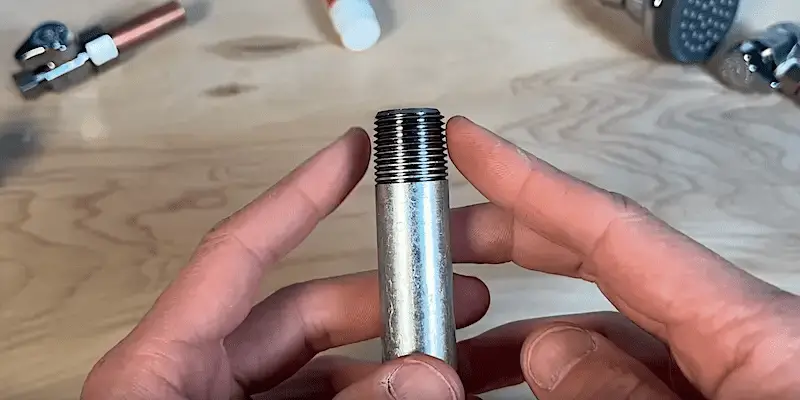
I’m going to thread this tapered nipple into an elbow joint. At a certain point, I start to get some good resistance and the fit is pretty snug but it’s not sufficient to create a leak-free seal.
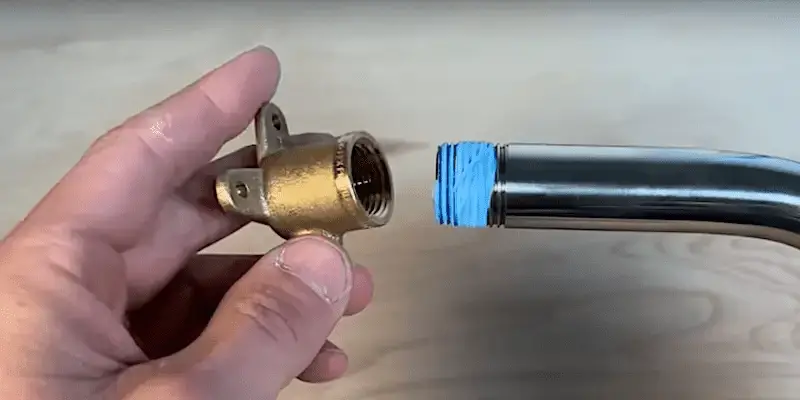
Another place where this product can be a lifesaver is a showerhead, especially if it’s a cheap one. Even though there is a gasket inside the shower head, some Teflon tape and perhaps also some pipe dope might be necessary to stop leaks.
It’s annoying when the conjunction at the shower head leaks, but a leak where the shower arm goes into your wall can cause serious mold and damage. At this joint, you will want to take extra care to make sure the connection is leak-free.
How to Properly Apply Teflon Tape
Teflon tape needs to be applied in a clockwise direction (as you’re looking into the pipe), the same direction that your fitting will be turning when you screw it on. This ensures that the material stays put as you’re tightening your fittings.
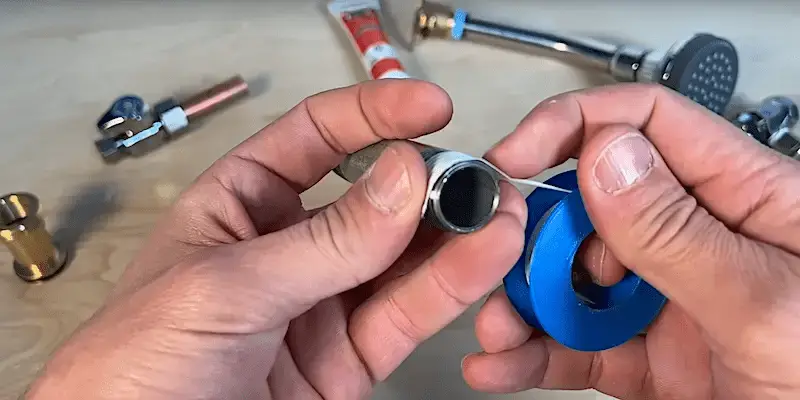
Apply one revolution of tape to the end of the fitting to start, pressing the tape into the threads as you go to contour it.
Once the first wrap is complete, you can start to pull slightly on the tape as you apply it. You can either roll the pipe in your hand to pull the product onto it, or you can wrap the tape around the fitting with the other hand.
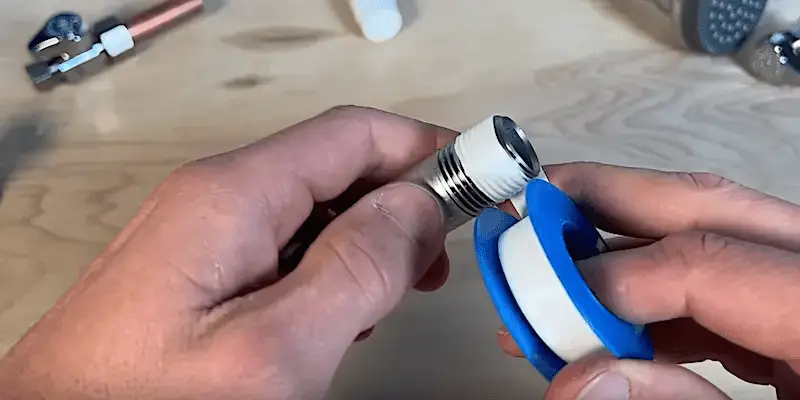
In either case, apply three or four revolutions of product.
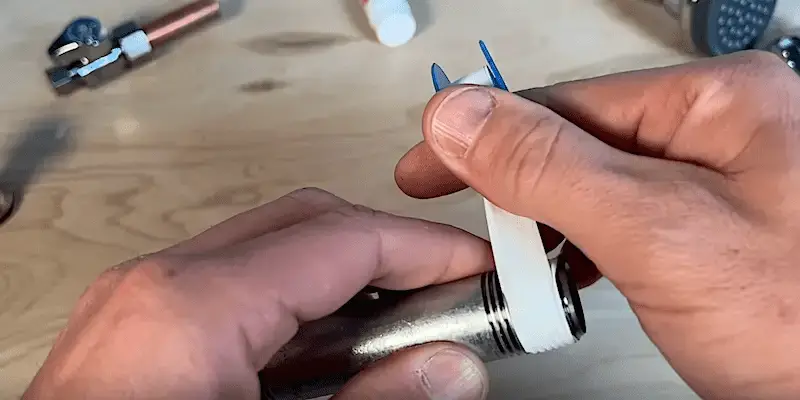
Pull firmly on the tape to break it from the roll. Pat down any dangling bits.
If you are retaping old fittings, clean off any old material first. A toothbrush is useful for this. Gently work old tape with the toothbrush until it starts to lift off, then unwind it to fully remove the remaining material.
Tips for Getting a Better Watertight Seal with Teflon Tape
As far as brands of Teflon tape, I prefer Blue Monster because I think it gives a consistently better watertight seal at my plumbing joints.
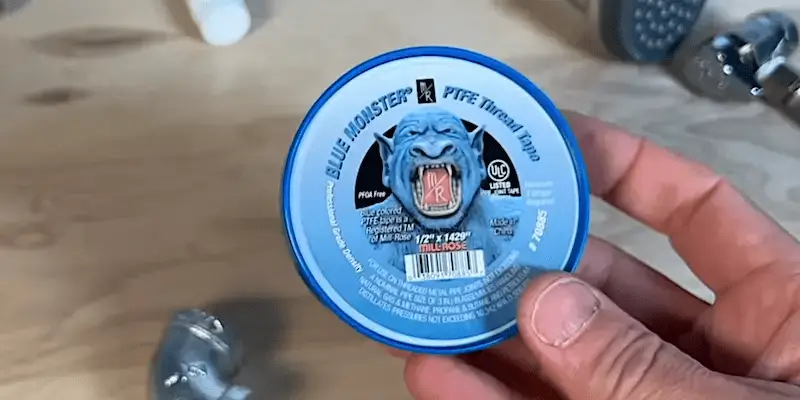
Blue Monster is a premium Teflon tape that costs $4 or $5 per roll. Now, that might seem like substantially more than standard quality, which costs about $1 per roll, but you do get a greater quantity of tape on a roll of Blue Monster. For a few extra dollars, I think the Blue Monster is totally worth it.
The thickness of the Blue Monster is the same as regular Teflon tape but the density and strength of the material are much better.
The Blue Monster tape doesn’t stick to the threads quite as well as standard white Teflon tape so you will need to get a good wrap of 1.5 or 2 times on your threads before you can start to really pull on it.
If you’re having problems getting regular white Teflon tape to give you a good seal, you might want to give Blue Monster a try.
Alternatively, you could apply some pipe thread sealant, commonly called “pipe dope”, on top of the tape.
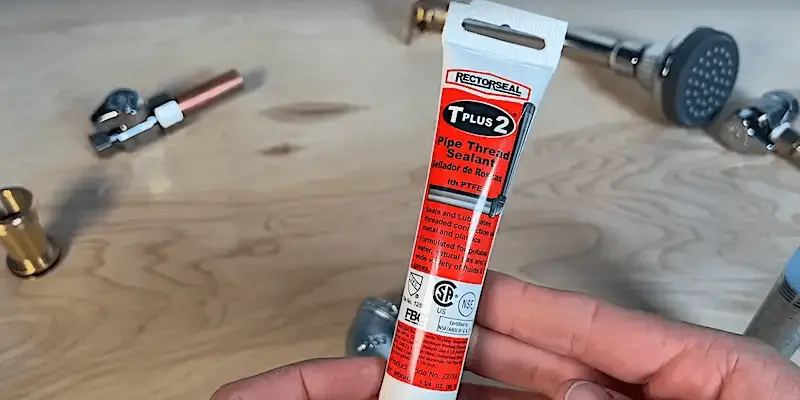
The sealant is easy to apply; just squeeze it on and smooth it towards the end of the threads with the tube.
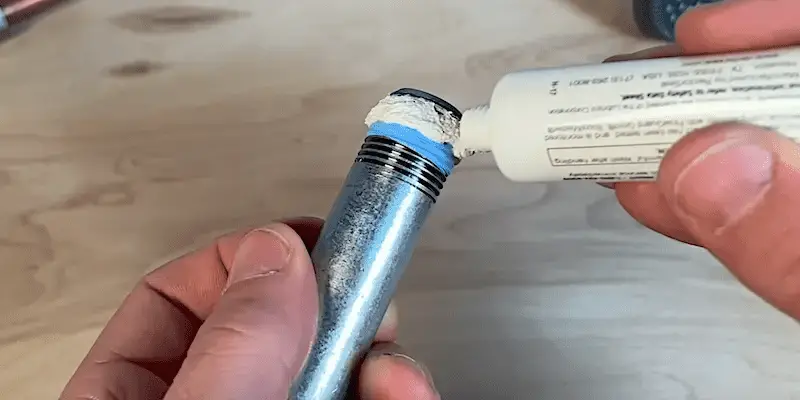
You want to make sure the pipe dope goes inside the fitting.
When to Not Use Teflon Tape
Here’s an example of where not to use Teflon tape (or sealant): on the flexible tubing connecting to a water shut-off valve, such as you’d have under your sink going to your faucet.

Looking inside the line, you see there’s a rubber seal.
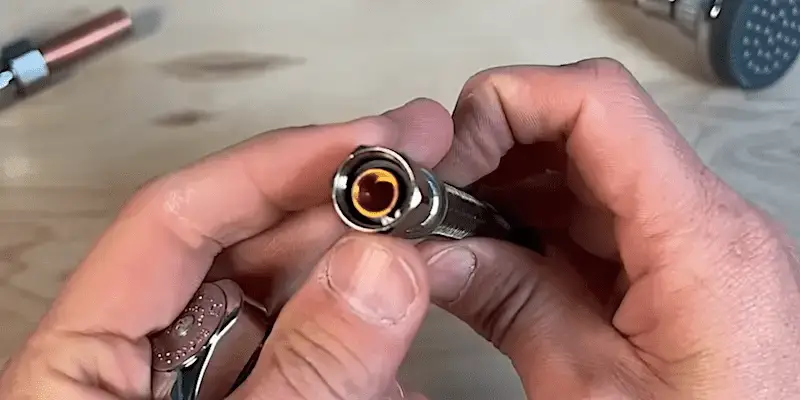
The rubber seal is self-sealing. All you have to do is tighten the connection and your seal is leak-free.
Now let’s look at a Delta tub spout adapter. You would not need to use Teflon tape when mounting a tub spout with this type of connector because the O-ring at the back of the adapter will render the connection watertight.
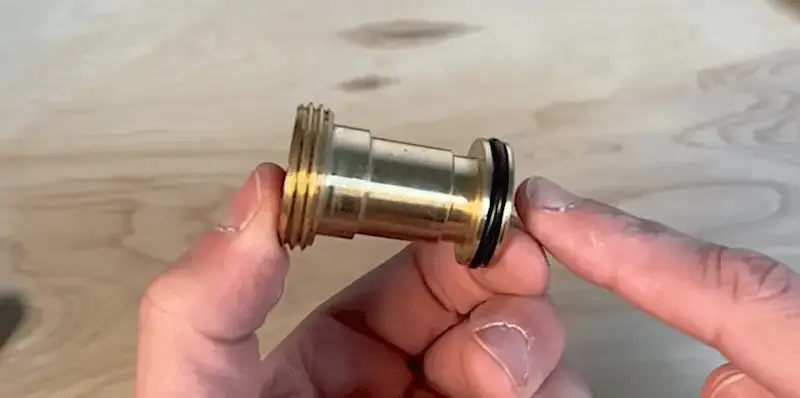
Pretty much any time you have some sort of gasket or seal, you won’t need to use sealant. An exception to that would be a showerhead, as mentioned earlier.
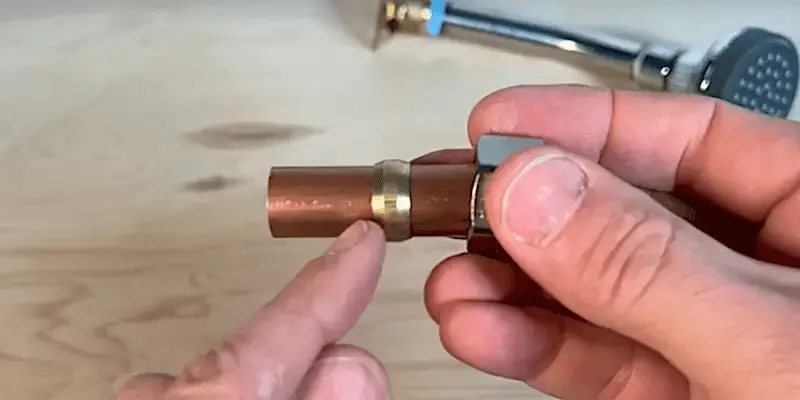
Another example of where you don’t need to use teflon tape is a compression fitting, such as I have here on this copper pipe connection.
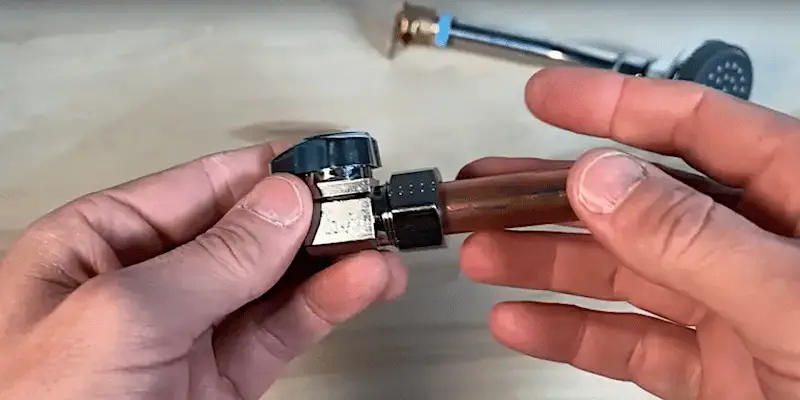
There is a ferrule in here and that is what’s going to compress and give you a leak-free connection.
For More on Making Better Plumbing Connections
If this article was helpful, you might want to check out our video or article on SharkBite fittings. These connectors are, in my opinion, great for do-it-yourself plumbing projects. I’ll explain how they work and how to use them.
To Leave Comments and Questions
Now you have a little more knowledge to apply to your DIY plumbing projects! The comments by our viewers under the video are also a great source of info.
Don’t forget to subscribe to our channel as we have weekly videos coming out to help you with your everyday home repairs.
We’ll catch you on the next one! Take care.


