
 My Account
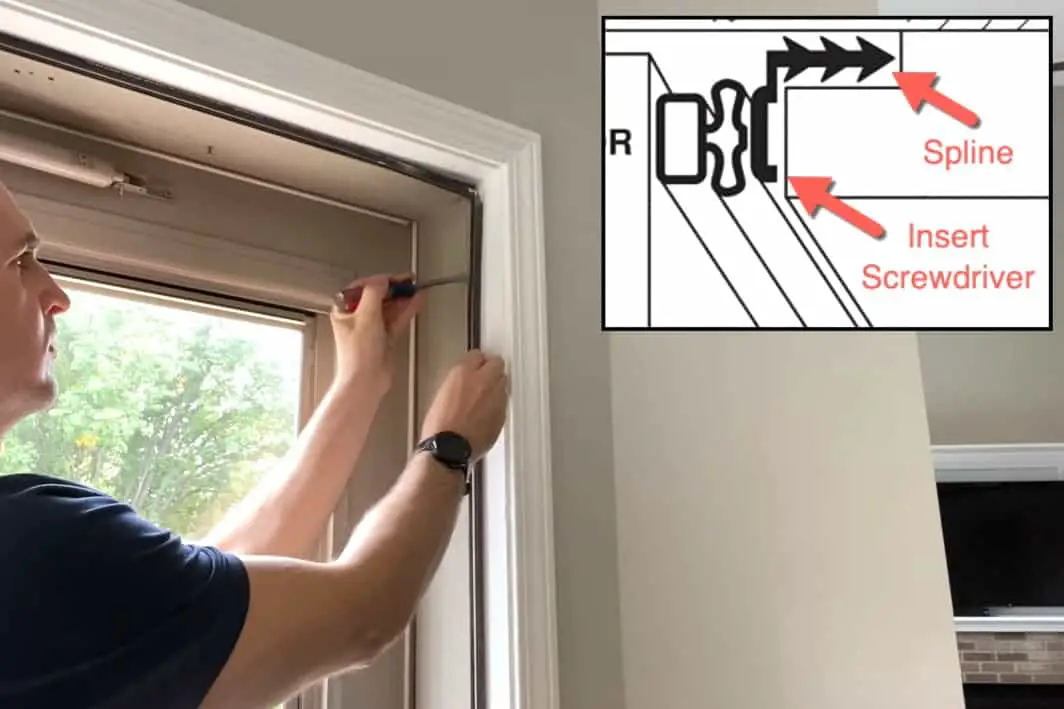
A drafty entrance door can be a real nuisance, allowing outside air in (or inside air out) and hurting the efficiency of your heating or air conditioning system. Older doors can be especially problematic, even if the original workmanship was great and the door remains in otherwise good shape.
The solution to drafts coming from an exterior door is inexpensive and easy: replace the door’s weather stripping. In this article, we’ll show you how to do it in two simple steps.
Replacing the Weather Stripping on an Exterior Door: Step-by-Step Guide
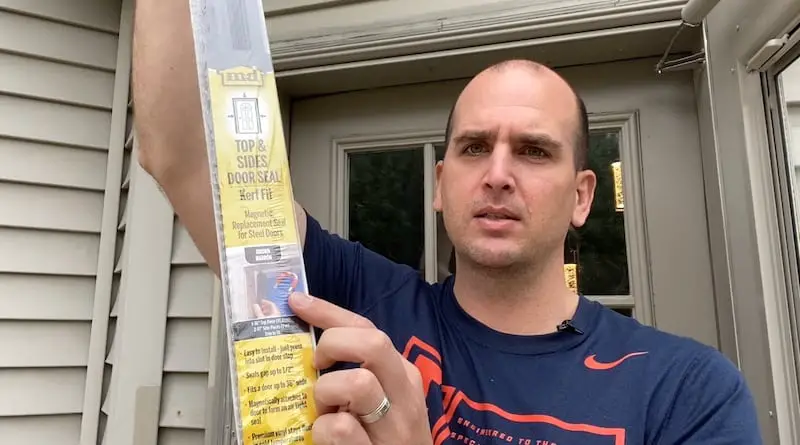
In this tutorial, we’ll use magnetic weather stripping, which is preferable when you have a steel door because it results in a more secure seal. If your door isn’t made of metal, you’ll want to use a different product, such as foam weather stripping.
Although the steps I outline here primarily apply to kerf weather stripping, which fits into a “kerf” or slot in the door stops, there are other types, which we’ll discuss at the end under “Considerations When Selecting Weatherstripping.” No matter your situation, there’s a product out there that’s right for your project and simple enough to install yourself.
Rather watch than read? Check out this 4-minute video.
DISCLAIMER: This video and description contain affiliate links, which means that if you click on one of the product links, I’ll receive a small commission.
How to Easily Replace Weather Stripping on an Exterior Door: Supplies, Tools, and Costs
Supplies
Tools
Estimated Costs
A magnetic weather-stripping kit for most standard doors can be purchased online or in home centers for around $45 (as of January 2022). Other types of kerf and non-kerf compression weather stripping can be much cheaper, in the range of $10 to $40 for an equivalent length or kit.
Step 1: Inspect/Remove Old Weather Stripping
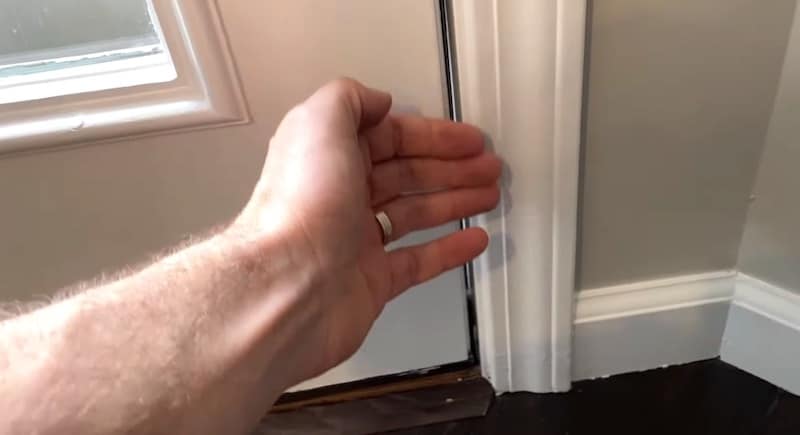
Worn and leaky weather stripping is fairly obvious. If you can see daylight through the space between the door and the jamb, you know you have a problem. If the wear isn’t so bad that you can see daylight, put your hand up to the gap. You’ll feel the air leakage with your hand as a warm or cold draft (depending on the season).
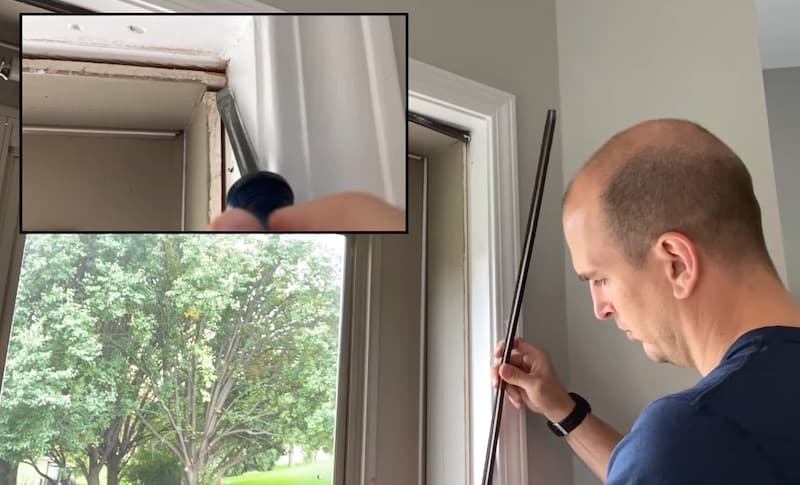
Weather stripping is typically held in place merely by friction, so you should be able to remove it easily with a flathead screwdriver. Start by prying gently with the screwdriver to get it started. As it starts to come away, you can also pull a bit on the loose end to make the work go faster.
When pulling the old material away, take care to remove all pieces of material or debris from the kerf (the slot into which the weather stripping is inserted).
As a follow-up, run a flat-headed screwdriver along the kerf to scrape out any stray bits of material that may remain. With the old weather stripping removed and the kerf clean, it’s time to move on to step two.
Step 2: Measure, Cut, and Install New Weather Stripping
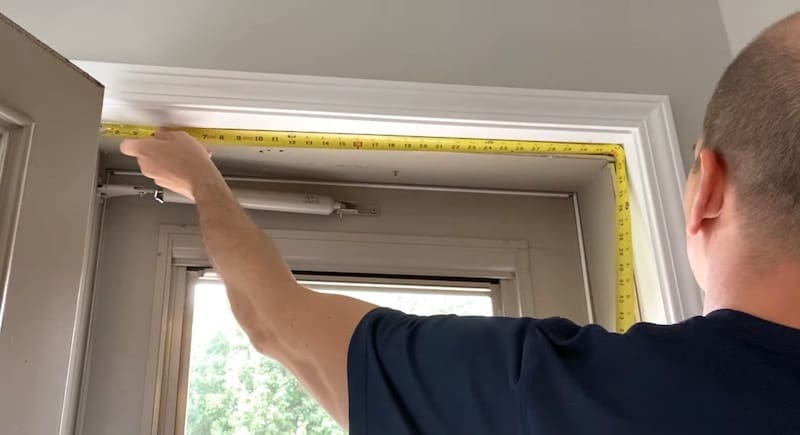
Carefully measure along the top of the door, jamb to jamb. (If you’re unsure of your measuring skills, it’s best to go a little long. You can always trim down if needed.)
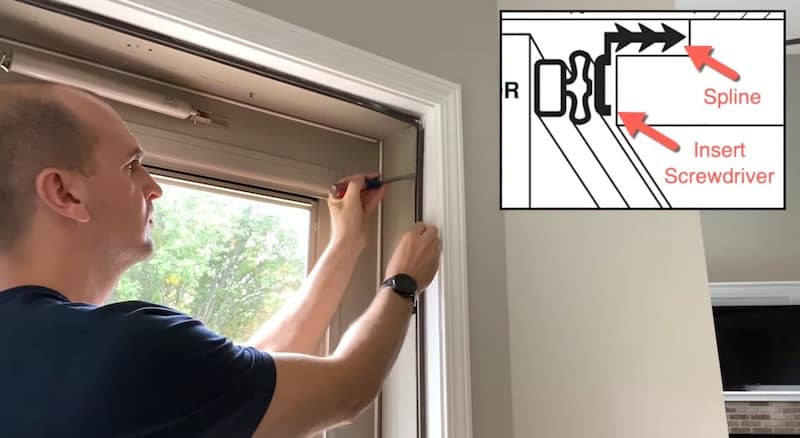
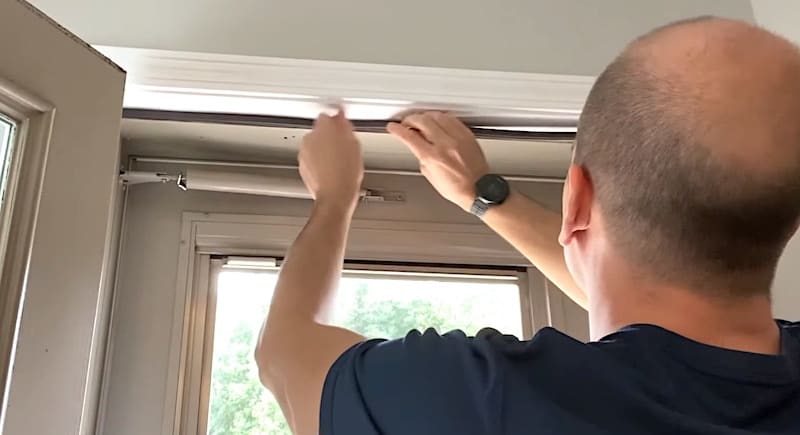
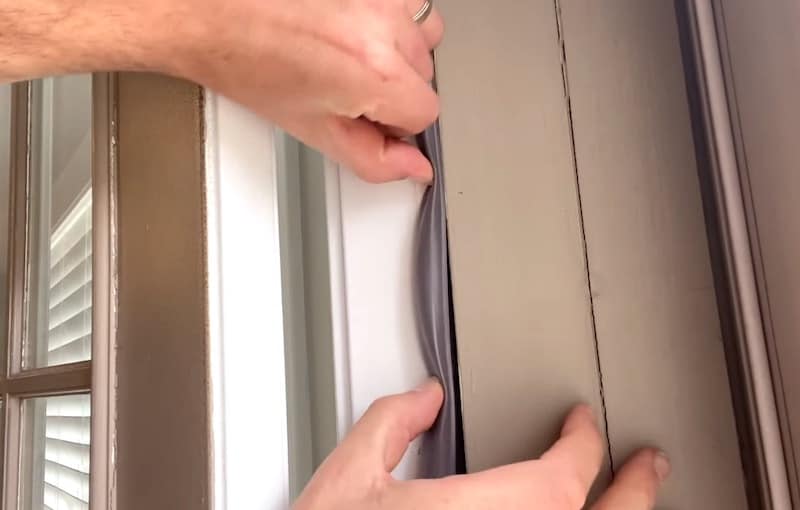
Cut the top piece of weather stripping with some tin snips or heavy-duty scissors and press the fin or barbed tongue of the material into the kerf (slot).
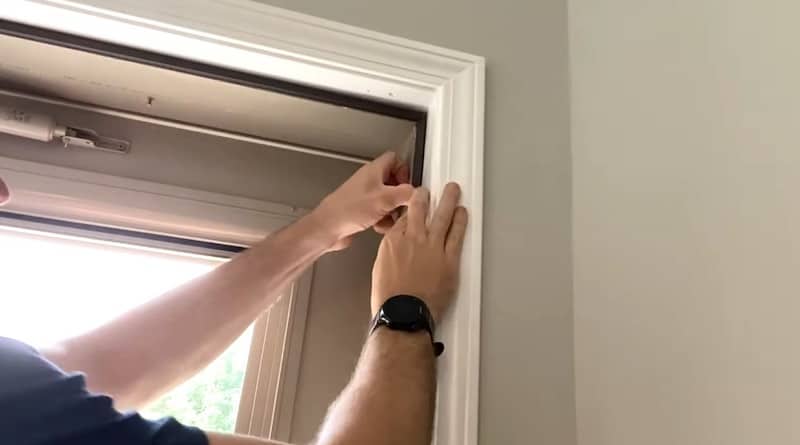
Next, measure and cut the vertical piece for the doorknob side of the frame. Insert it into the kerf, starting at the top and pressing it into place as you work downwards.
Finally, measure and cut the weather stripping for the hinge side of the door frame. Note that the hinge side takes a compression seal rather than a magnetic one. A compression seal resists pinching and damage when the door is closed better than other types of seals, so it’s the best material on the hinge side of the door frame.
Considerations When Selecting Weatherstripping
The type of weather stripping you need depends on the type of door and frame you’re working on. Many types of weather stripping are available at home centers and hardware stores. Not only will you find various materials for the weather stripping itself, but the mode of applying the product can vary also. For example, some weather stripping fastens with a self-adhesive strip.
For doors with no kerf (the groove in the door frame that holds the weather stripping), a better alternative might be to purchase a kit that includes both new kerfed door stops and preinstalled weatherstripping. Though more expensive and a bit more time-consuming, the result is well worth the extra time and cost.
Below are a few important tips and recommendations to help you with your project:
- Cut off a small piece of the old weather stripping and bring it with you to the home center. This makes finding the correct size and shape a whole lot easier.
- Many manufacturers put a cross-section image of the product on the packaging. Look for this profile and match it up to the sample of the old weather stripping you brought with you.
- Self-adhesive weather stripping can be convenient, but the materials are often prone to wearing much more quickly than other alternatives. The adhesives are also much more prone to failure, especially in cold weather.
- If installing new kerfed stops, it will likely be necessary to remove the existing stops first (if separate from the rest of the door jamb) to prevent interference.
How to Easily Replace Weather Stripping on an Exterior Door: Conclusion
No matter the type of weather stripping that needs to be replaced, the relatively low cost of materials and ease of installation make this a DIY project anyone can tackle confidently. When you consider the potential for improved energy savings and home comfort, it’s a project that’s more than worthwhile.
Other Weather Stripping-Related Repairs
A similar project to this one is how to replace a bottom door seal. To learn more, check out our YouTube video or the step-by-step guide here on the website.


