
 My Account
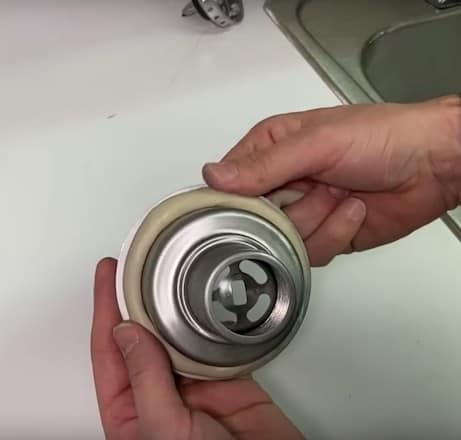
If you’re stopping by this tutorial, something tells me you might have a leak under your sink!
One of the main components that can cause such a leak is your strainer. Over the years, the seal can be compromised and the strainer can loosen up. This can be a source of leakage into your sink base, eventually damaging the sink base.
This guide is going to walk you step by step through how to replace a kitchen sink strainer and also how to tackle the very realistic scenario of the old components being hard to get off. Mineral deposits build up over the years on the slip nuts and locknuts that you need to take off. These can be really bound up and much harder to remove than you’d expect or what you might see in some other videos.
How to Replace a Kitchen Sink Strainer: Step-by-Step Guide
The first step in installing a new sink strainer is dealing with the roadblock of stuck-on parts. I’m going to show you how some basic vinegar that you have in your kitchen can resolve this issue. Plain old household vinegar is the key to unlocking these cemented-on nuts and making this job much easier.
Once we get past the issue of stuck-on parts I’ll show you how to mount the new strainer assembly one step at a time.
Rather watch than read? Check out this 10-minute video.
DISCLAIMER: This video and description contain affiliate links, which means that if you click on one of the product links, I’ll receive a small commission.
Let’s jump in with what tools and supplies you’re going to need.
How To Replace a Kitchen Sink Strainer: Supplies
- A bucket
- An old towel or some shop towels
- Large channel locks
- Needle-nose pliers
- Strainer Kit
- Plumber’s Putty
Optional:
Dealing with Crusted-On, Hard-to-Remove Old Parts
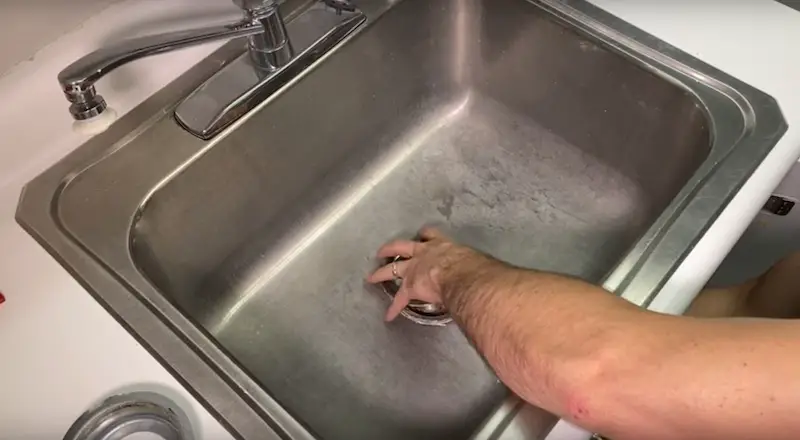
First, we’ll see if we can remove the slip nut.
Taking the needle-nose pliers or the rigid sink tool, hold the strainer secure from the top side of the sink.
Now, underneath the sink, use your large channel locks on the slip nut at the bottom of the strainer assembly where it meets the tailpiece (the straight piece of pipe that connects to the bottom of the drain assembly).
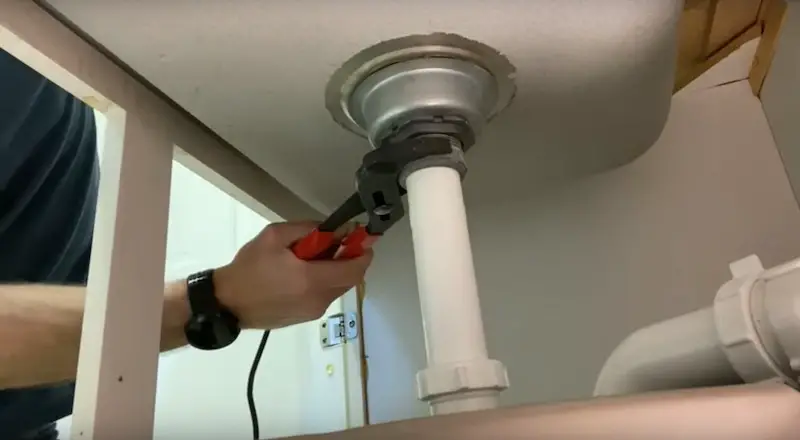
For this type of strainer (keep in mind there are two other types of strainer designs) we’ll start by taking off the tailpiece so that we can disassemble the fittings and disconnect the drain assembly from the P-trap.
Now, this piece can be gummed up with mineral deposits from years and years of use, which makes it pretty tough to remove.
So how do we loosen this up?
Tricks for Loosening The Slip Nut
Method One: Heat Gun
This method, which I have had work in the past, is to use a heat gun and slowly heat up the slip nut and the strainer itself, which can weaken the bond of the mineral deposits.
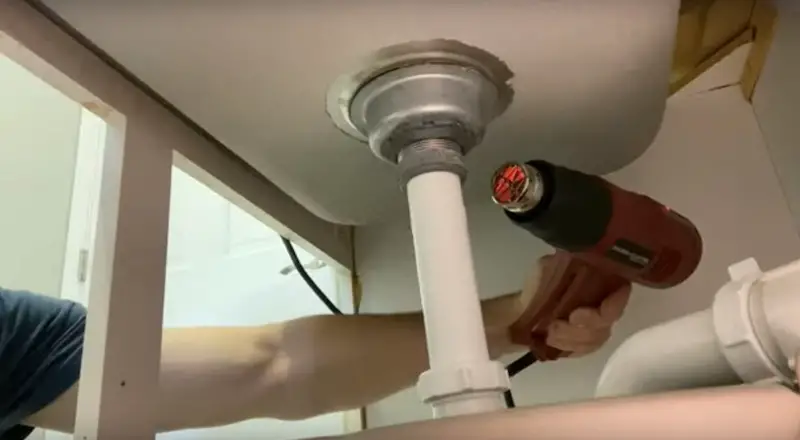
Now, once you have warmed up the components, obviously you won’t want to touch it, because it’s going to be pretty hot. Secure the top side with your needle-nose pliers or rigid sink tool and get your channel locks going on the slip nut on the underside and see if it works. In this case, it doesn’t.
Method Two: Household Vinegar
Let’s turn to Method Two, which is basic household vinegar.
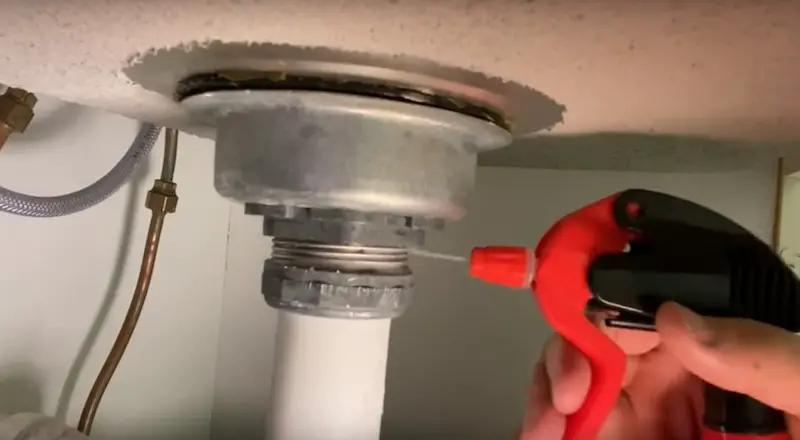
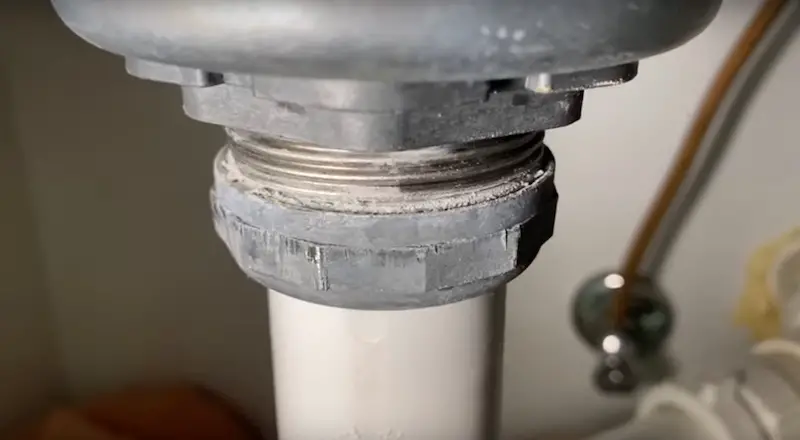
I put the vinegar in a spray bottle. This isn’t necessary, but it does make it easier. What I’m trying to do is get the vinegar around all the threads and create a pool in the lip of the slip nut.
The standing vinegar at the top of the slip nut will work its way down, eating through the mineral deposits. I’ll leave the vinegar to sit for five to ten minutes to see if it will help loosen up the crust.
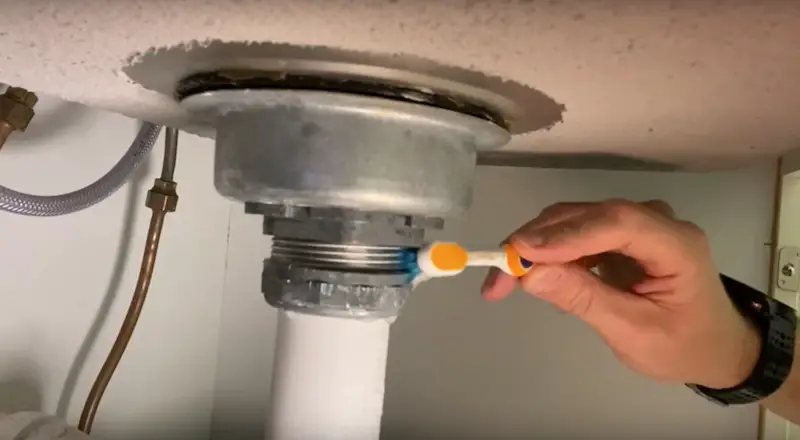
Time passed, let’s give it a go. Remember you still need to hold the strainer still from the top side with needle-nose pliers or the rigid sink tool and then use your channel locks on the slip nut. Let’s see if the vinegar helped out.
Bingo! It worked.
Now loosen the slip nut with the channel locks and you’re good to go.
Dismantling the Old Strainer Assembly
Easy as 1-2-3
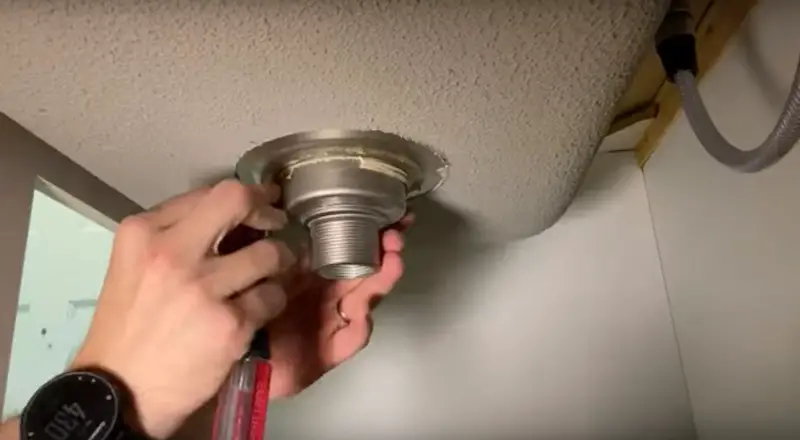
1. With the channel locks, loosen the locknut and remove it by hand. This one’s pretty easy, a lot easier than the slip nut.
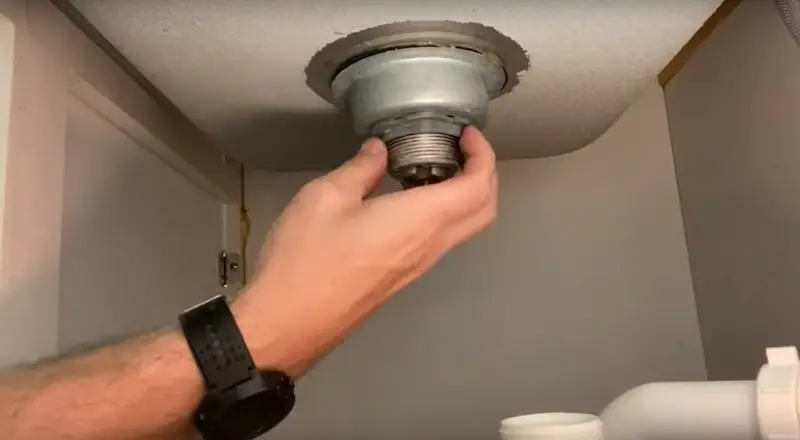
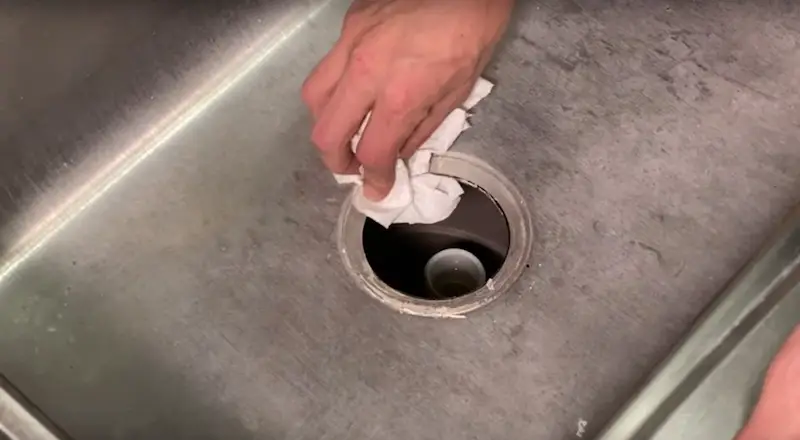
2. Once the locknut’s off, you can take the mounting cup off and also the old rubber seal.
3. Pop the strainer body itself up through the sink.
Prep for the New Strainer
Cleaning the Surface
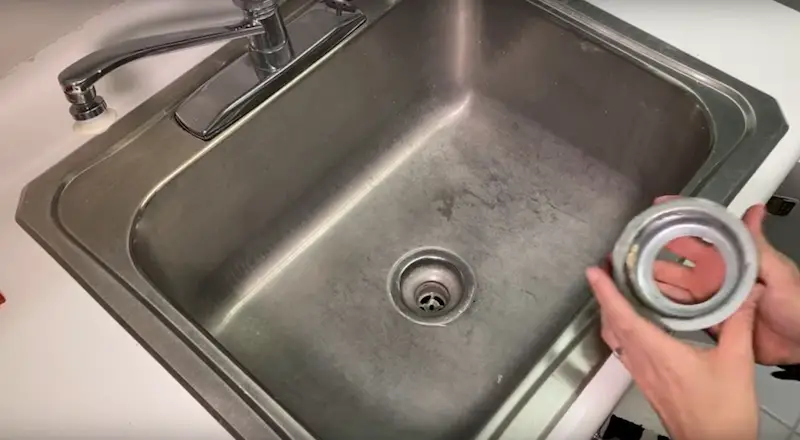
With the old components out, you want to now make sure you clean off all the old plumber’s putty or silicone or whatever was previously used.
You want to get down to a nice clean metal surface before you apply your new plumber’s putty. Having a surface free of any debris or residue is important for the new seal to be watertight.
Installing the New Strainer Assembly
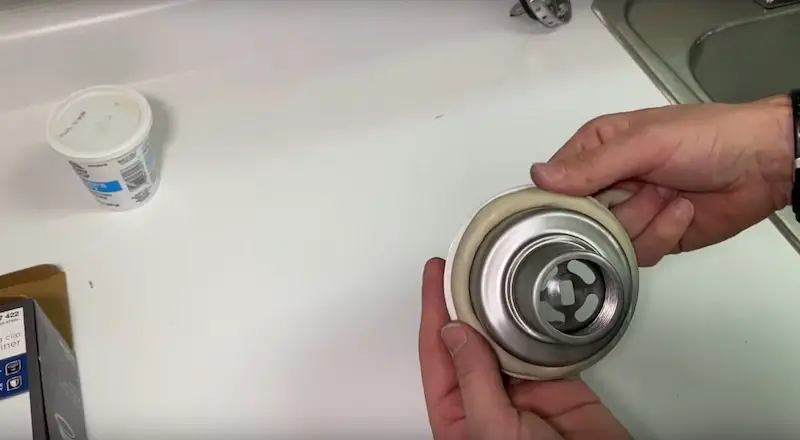
Strainer Components
Let’s look at the components of the new strainer kit.
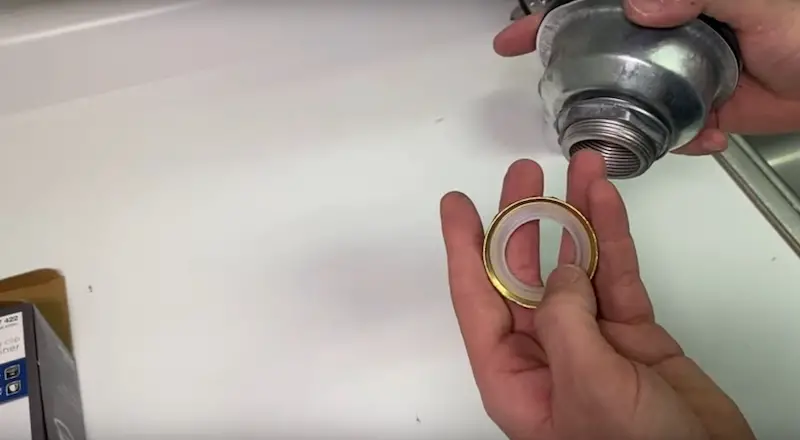
- Slip nut with a washer on the inside
- Locknut
- Mounting cup
- Fiber/paper washer (this is to be used, don’t throw it away!)
- Rubber washer
- Strainer
The order of the final assembly from the top down will be:
- Strainer
- Plumber’s putty
- Sink
- Rubber washer
- Fiber/paper washer
- Mounting cup
- Locknut
- Slip nut and washer
The strainer itself will go into the sink with some plumber’s putty. The other components will be mounted on the underside.
Installing the New Strainer Fittings
On the top side of the sink:
First, get some plumber’s putty. A blob about the size of a ping-pong ball should be enough for what we need.
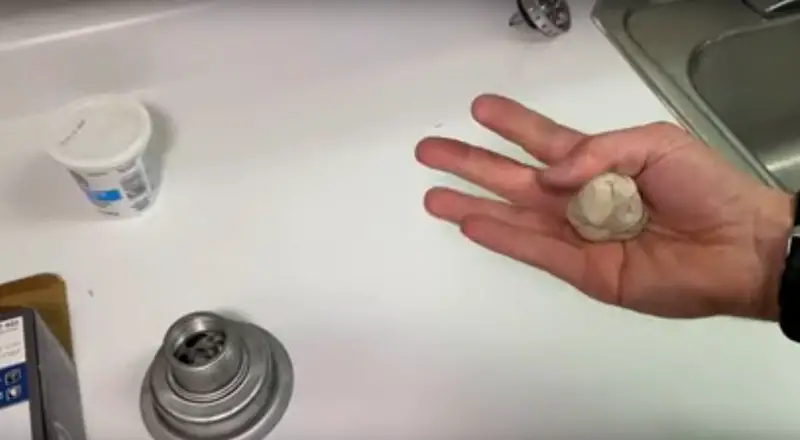
Roll out the plumber’s putty until it’s about a half-inch (roughly 1 cm) thick. Some people apply the plumber’s putty to the strainer; that’s what I’m going to do. Some people prefer to put the putty directly onto the sink. It’s up to you.
Wind the roll of putty around the bottom side of the strainer.
Pinch the excess off and press the putty gently against the strainer. You want to make sure you have a nice healthy bead all the way around. Extra is no problem, we’ll take that off later.
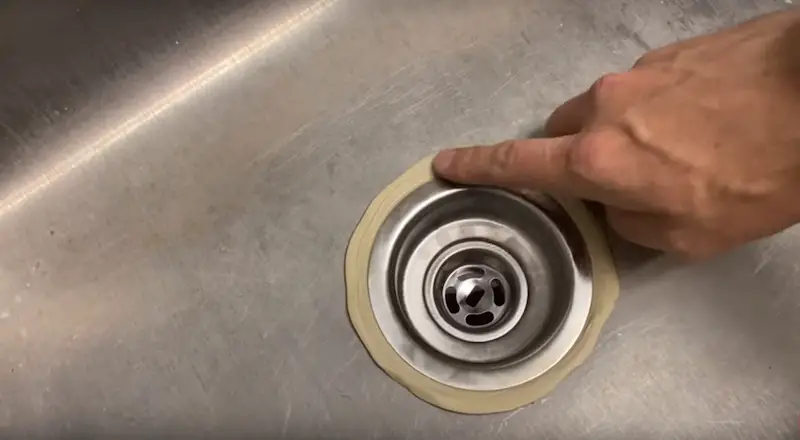
Now insert the strainer through the top side of the sink and press down to push the plumber’s putty out all the way around.
On the underside of the sink
Go under the sink and remove the excess plumber’s putty that has come through on the bottom side.
Then, one by one, we’ll mount the underside components:
- First the rubber washer
- Then the fiber (paper) washer
- Then the mounting cup
- Finally the locknut
Hand-tighten the locknut.
Once the locknut is snug, secure the strainer from the top side with needle-nose pliers or the rigid sink tool and tighten the locknut with your channel locks.
The plumber’s putty will start coming out from around the strainer while you’re tightening the locknut. You’ll want to see a nice consistent bead all the way around.
You don’t want to see any dry parts because that could be the location of a future leak. The plumber’s putty should be oozing out all the way around. Just remove the extra plumber’s putty from the inside of the sink around the strainer, and this step is done. Your strainer is secure.
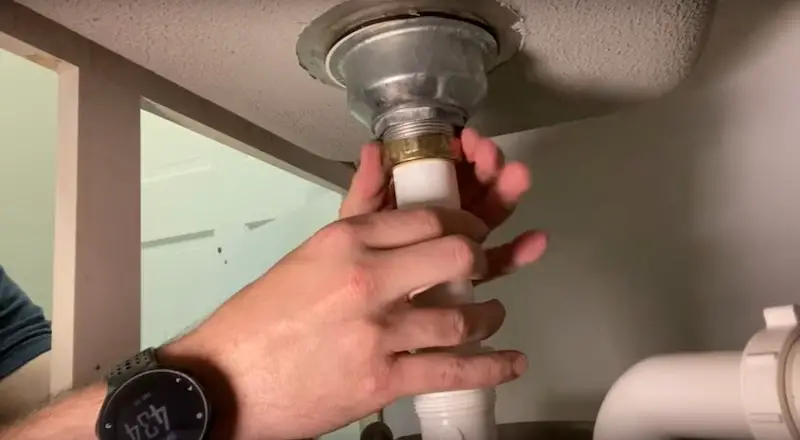
Reattaching the Tailpiece
- Slide the new slip nut and washer onto the tailpiece (the straight piece of pipe that attaches to the P-trap).
- Reattach the tailpiece to the bottom of the strainer by tightening the slip nut by hand.
- Tighten all the other nuts on the P-trap (checking all of them, not just the ones you know you loosened).
- Hold the strainer in place from the top side with needle-nose pliers or the rigid sink tool and use your channel locks to fully tighten the slip nut.
How to Replace a Kitchen Sink Strainer: Checking your work
Test One: Check for Slow Leaks with Running Water
- Put the bucket under the sink.
- Turn on the water and look under the sink, checking for any leaks.
These are usually slow leaks that can come from any of the connections we’ve disturbed or added, like the strainer, the tailpiece connection, and the nuts on the P-trap. The handy thing about having the bucket right there is that you will easily hear it if dripping starts.
Test Two: Check for Leaks with a Large Flow of Water
We’re going to see if a large flow of water creates any leaks.
- Fill the sink up at least halfway, so that there’s a volume of water sizeable enough to get some head pressure going.
- Once you let the water start draining, listen and look underneath the sink for any leaks. I also will set down paper towels which will easily show the location of drips.
Both tests are done and everything looks pretty good.
To Leave Comments and Questions
Now you have the information and confidence to replace a kitchen sink strainer at your own house!
If something doesn’t make sense or if your situation is a little different, please leave a comment under the YouTube video. I check the comments on a daily basis and am happy to help out.
Don’t forget to subscribe to our channel as we have weekly videos coming out to help you with your everyday home repairs.
We’ll catch you on the next one! Take care.
See More Home Repair Projects
Got other home repair projects to tackle? Check out our tutorial on How to Install Cabinet Drawer Pulls.


