
 My Account
If you have a gas water heater, at some point you’re going to have to relight your pilot light.
If you have a modern control valve on your hot water heater, you shouldn’t even need a lighter to relight the pilot! Everything you need is already part of the water heater itself.
Relighting the Pilot on a Water Heater: Step-by-Step Guide
In this tutorial, I’ll walk you through the steps of relighting the pilot on your water heater by the standard means, including an example of it working correctly. Overall, the process is very easy. Even a total DIY newbie can take this on with confidence.
If this simple method of relighting the pilot doesn’t work for you, no worries. I will help you troubleshoot by pulling the burner unit out of the water heater to show you how to visually inspect it for problems. I’ll explain all the components of the burner unit and what they do. This should help you understand where your problem lies.
Even if you’re new to do-it-yourself repairs, servicing the burner unit of your water heater is an approachable project. It really requires more common sense than experience. The components are readily available. Hopefully, with help from this guide, you won’t have to call in a pro, which could save you a ton of money for the minor investment of time.
Let’s jump into it!
Rather watch than read? Check out this 10-minute video.
Method 1: Standard Procedure to Light the Pilot
Before Starting: Check That Gas is Flowing
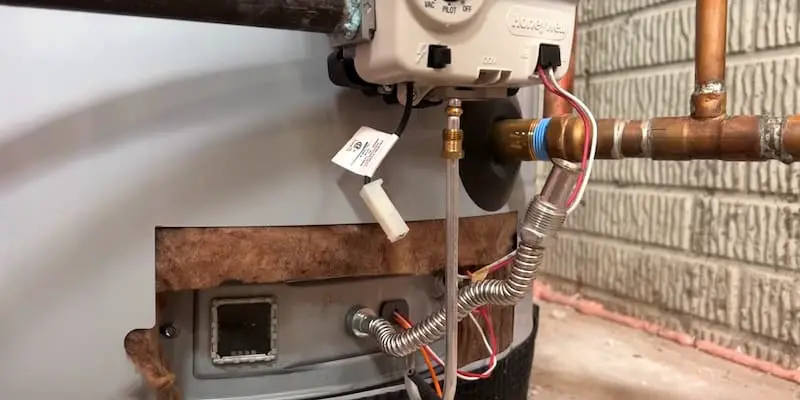
Before starting the procedure for relighting the pilot on your gas water heater, you want to make sure that the gas valve is open. Follow your gas pipe, whether it’s rigid (like the one in the image) or flexible, up until you reach the ball valve.
If the arm of the valve is parallel to the pipe, the valve is open. If it’s perpendicular, it’s closed.
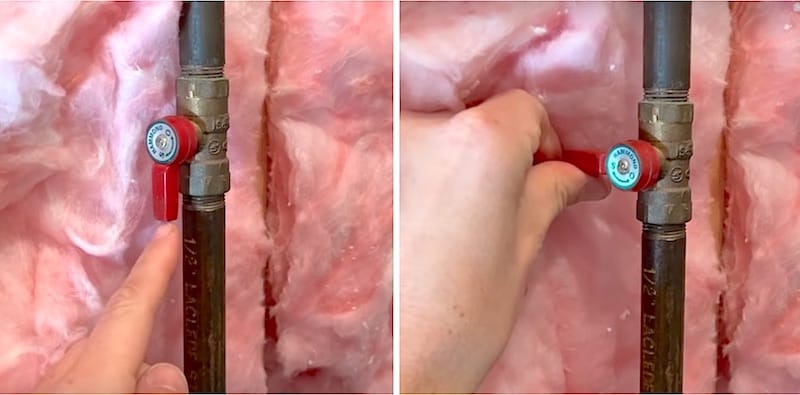
SAFETY NOTE: If you smell gas when the valve is open, I recommend you turn the gas off at the ball valve and call a professional if you’re not comfortable with troubleshooting further.
I don’t smell gas, so we’re good to go on.
Before Starting: Let the Gas Control Valve Sit Off for Ten Minutes
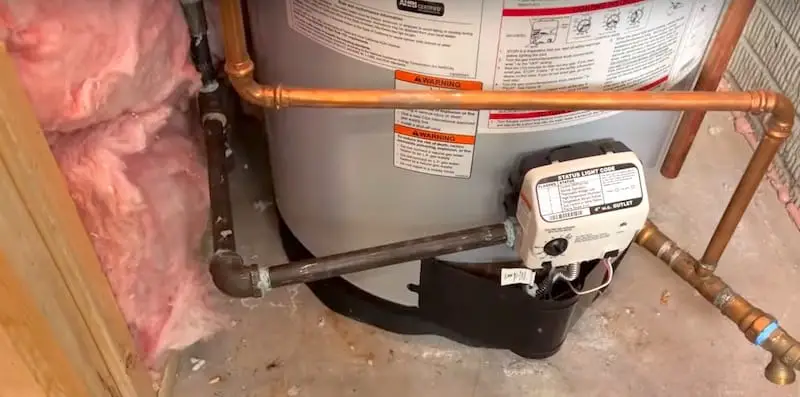
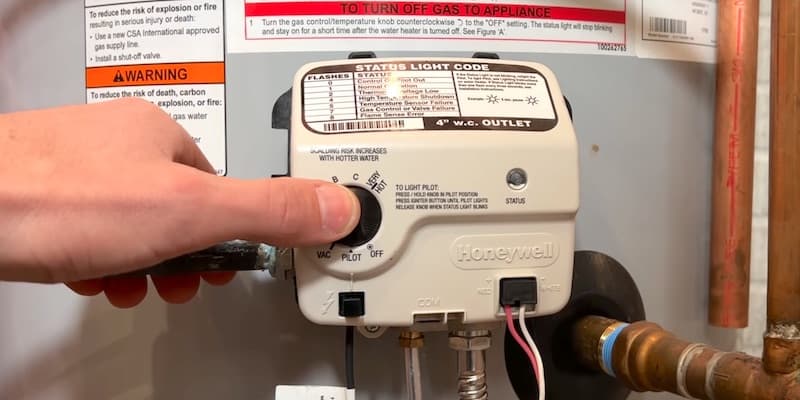
The gas control valve on the water heater I’m using in this tutorial is a Honeywell, which is pretty common.
Once we’re assured that gas is flowing and there is no smell of gas, the next thing to do before trying to relight the pilot is switch off the gas control value and let it sit for a good ten minutes.
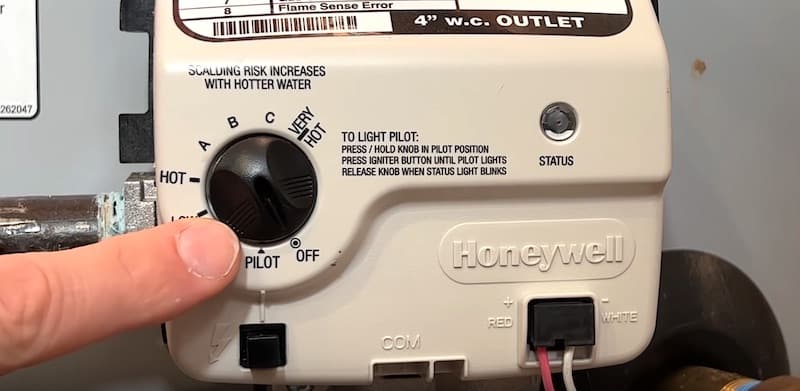
To turn the valve unit off, just turn the dial to the OFF position.
Letting the control valve sit in the OFF position will basically reset the unit.
This will give you a clean slate for lighting the pilot. If, for example, you’ve been trying to relight the pilot and you go past three failed attempts, the control valve will go into safety mode and won’t let you continue. Turning the control valve to OFF and letting it sit for ten minutes or more will clear out the safety status.
Steps for Relighting the Pilot
Once the control valve has had a chance to rest in the OFF position for a good ten minutes, I’m ready to tackle the procedure for relighting the pilot of my water heater.
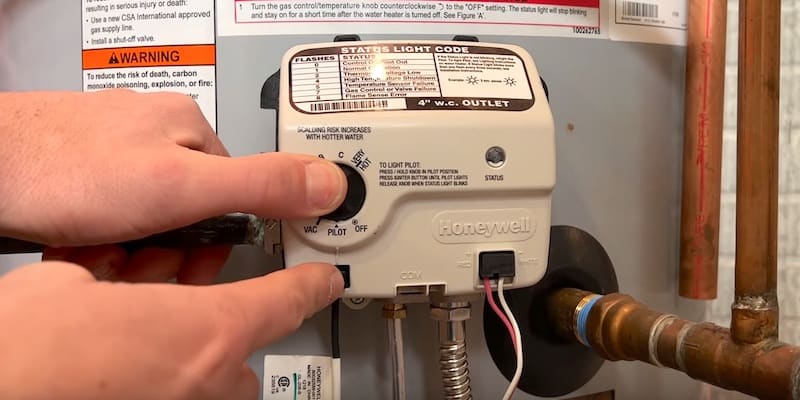
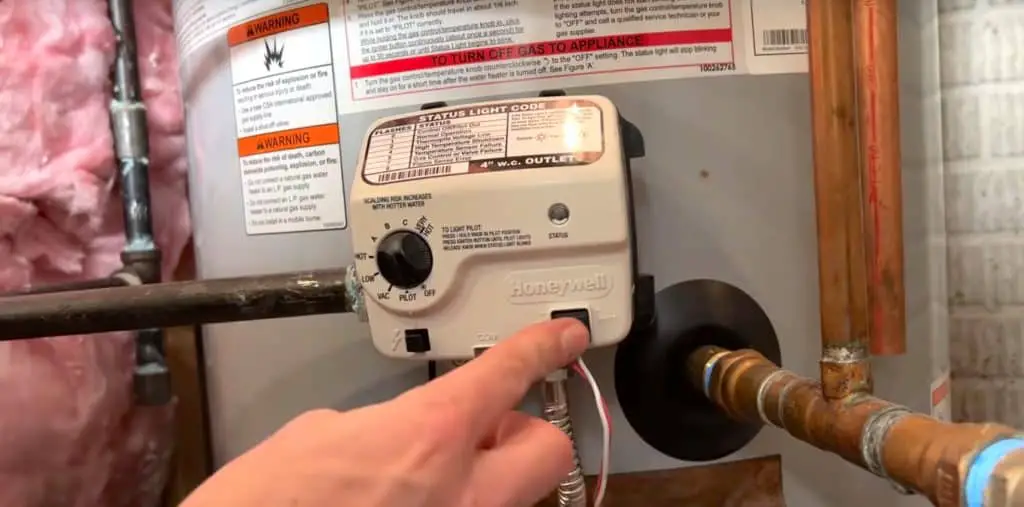
Now I’ll move the control valve dial to the PILOT position.
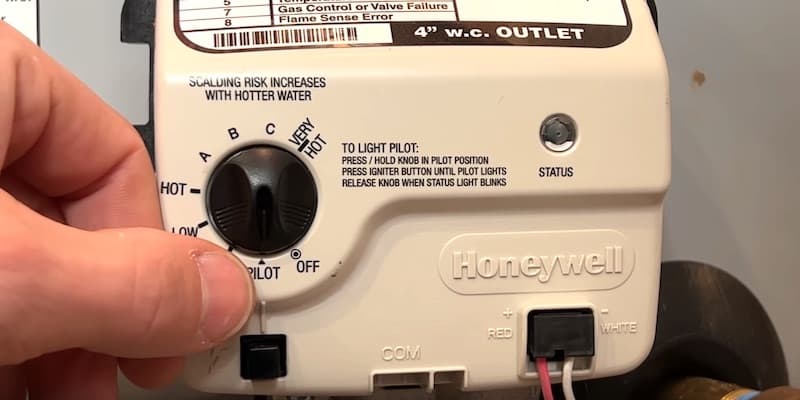
Then I’ll press on the knob and hold it down.
Note: When you press and hold the dial, you should hear a small hissing sound, which is gas being delivered through the pilot line.
Next, I’m going to continue to press and hold the dial in the Pilot setting and also start to press the igniter button below it. You may have to press the igniter several times to get the pilot to relight.
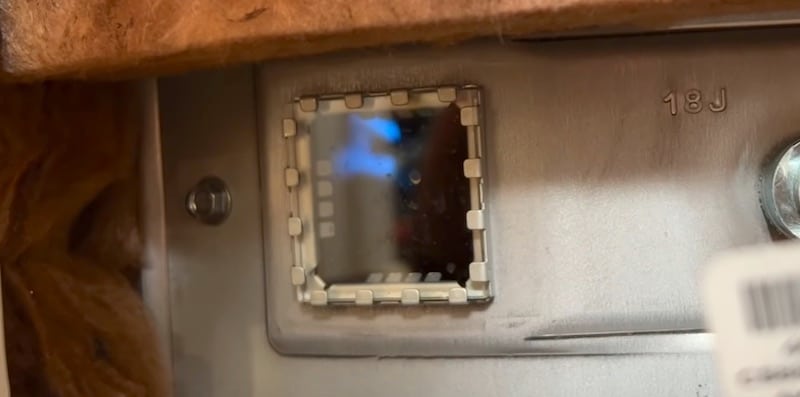
I got lucky and it started up on the first try.
Don’t be concerned if you have to try many times; it’s very common to have to click the igniter repeatedly to get the pilot to relight. Remember to hold down the control value button in the PILOT position when you do this.
On more modern control valves like this Honeywell, the STATUS light will start to flash when the pilot light has reignited, signaling you to release the dial.
Turning the Water Heater On Again
The STATUS light flashing is telling me I can move on.
I’ll release the dial and then turn it past the “A” setting (halfway between A and B).
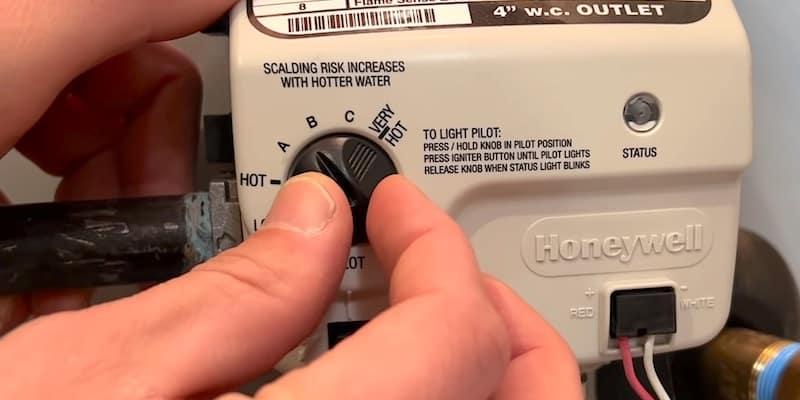
The burner should reignite.
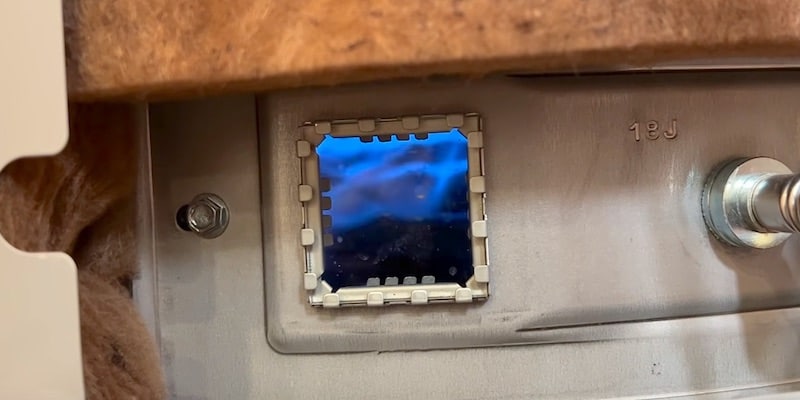
There we go! We’re back in business.
If you’re not back in business, jump down to Method 2 where I’ll show you all the components of the burner unit. I’m going to open up the water heater and take the burner unit out, which hopefully will help you troubleshoot your situation and get back up and running.
After Relighting the Pilot: Checking the Water Temperature
Hopefully relighting the pilot went as smoothly for you as it did for me.
If it did, great — but don’t forget, we changed the temperature setting in order to reignite the burner. This could result in increased water temperature in your house, so you’ll want to have a look at that.
To assess the water temperature, first give the water heater time to get a new supply of hot water ready. Usually, 30 to 45 minutes is sufficient.
Then go to one of your indoor faucets and let the hot water run for a bit so that it reaches its hottest temperature. Collect some of the hot water in a sturdy container, then go to the kitchen and measure the temperature of the water with a candy thermometer.
The temperature of the hot water in your house should be less than 130 degrees Fahrenheit. I like to keep mine at 125 F. This is especially important if you have small children in the house, to reduce the risk of accidental scalding.
Method 2: Troubleshooting the Burner Unit
Now to show you the internal workings of the burner unit of the water heater so that you can troubleshoot, in the event that you weren’t successful in relighting your pilot with Method 1.
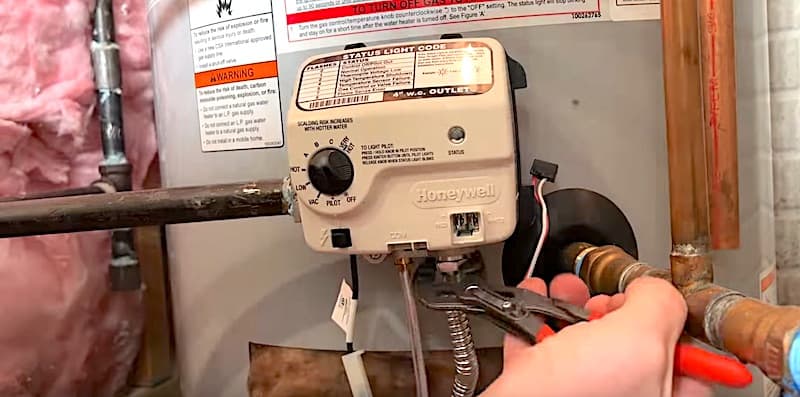
SAFETY NOTE: Before removing the burner unit, TURN OFF THE GAS at the shutoff valve coming into the water heater.
Removing the Burner Unit
To remove the burner unit so we can look at the components, I’ll first loosen up the pilot gas line and the main gas line.
The next step is loosening the two screws on the front of the burner housing. You might need to push the insulation out of the way to get to the screws.
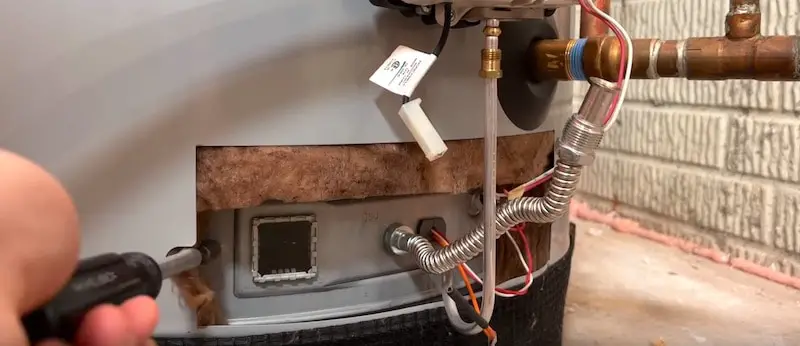
Finally, I’ll disconnect the wires leading to the control valve, and pull the burner unit out.
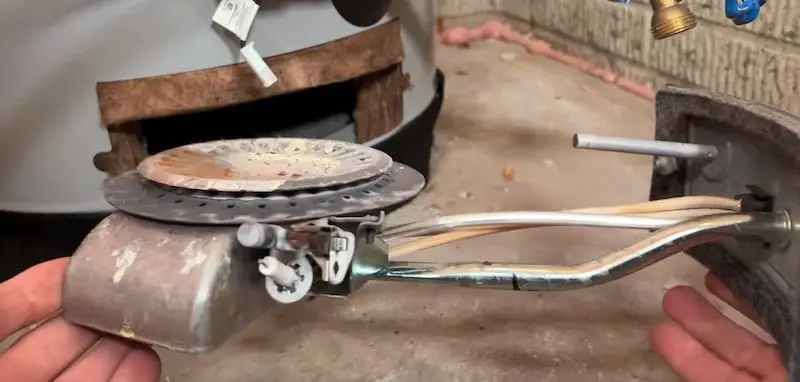
Now we can get an up-close look at the internals of the burner unit itself, which will allow us to inspect the various components.
There aren’t many components and they’re pretty simple. Any damage or issues will be pretty obvious.
Inside the Burner Unit
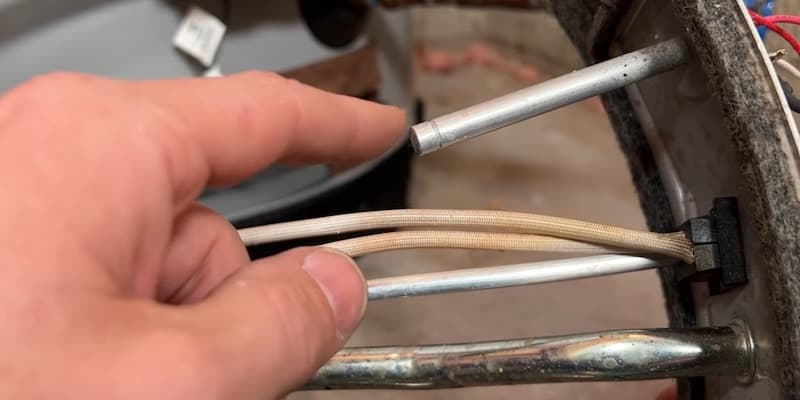
Here is the igniter, which gives us the spark to light the pilot of the water heater.

Above the igniter is the thermopile, a cylindrical instrument that gets heated up by the pilot light.
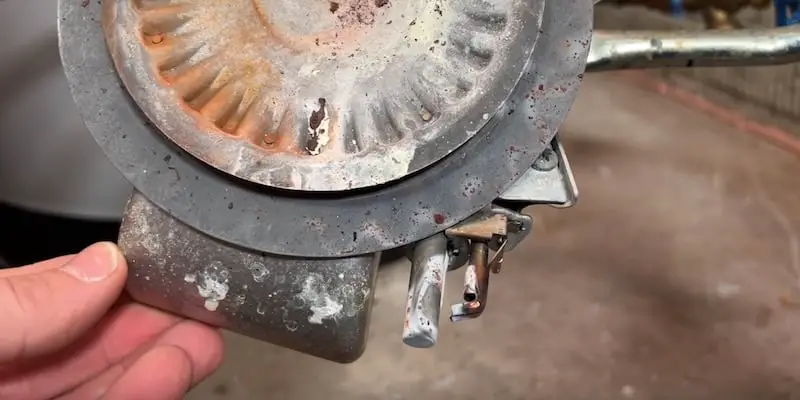
When the thermopile heats up, it creates current sufficient to power the gas valve. (When the pilot light goes out, the thermopile cools down, shutting off the gas value and keeping gas from being released into your home.)
The igniter, thermopile, and pilot light in my burner unit look good. Sometimes you can get some build-up on the thermopile, which can cause issues if it diminishes the amount of current needed to keep the valve open. (If your pilot won’t stay lit, this is likely the cause.)
Next, let’s look at the wires.
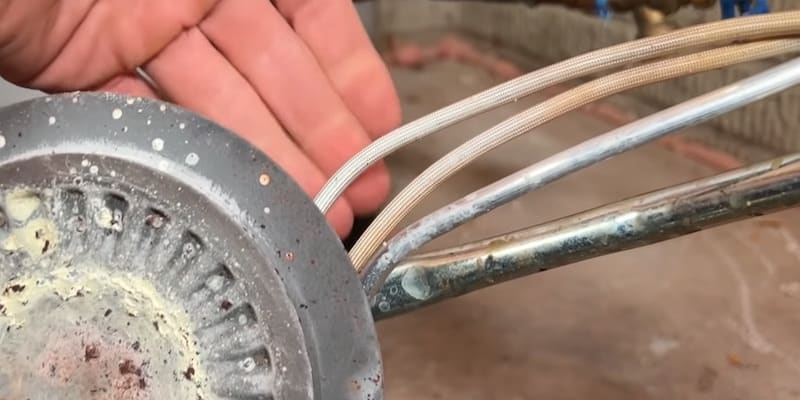
The wires are covered with heat-protection sleeves. The sleeves should be integral and in good shape.
Finally, we have a temperature sensor and switch. This is a safety feature.
If the temperature inside the unit gets too high, this switch will turn the burner off to reduce the risk of fire.
The last thing to check on the inside of the burner unit is the felt gasket. If it’s in bad condition, you’ll want to replace it.
Outside the Burner Unit
On the outside of the burner unit, we see white and red wires coming from the thermopile. The white wire goes to the gas control valve and the red wires go through the temperature switch.
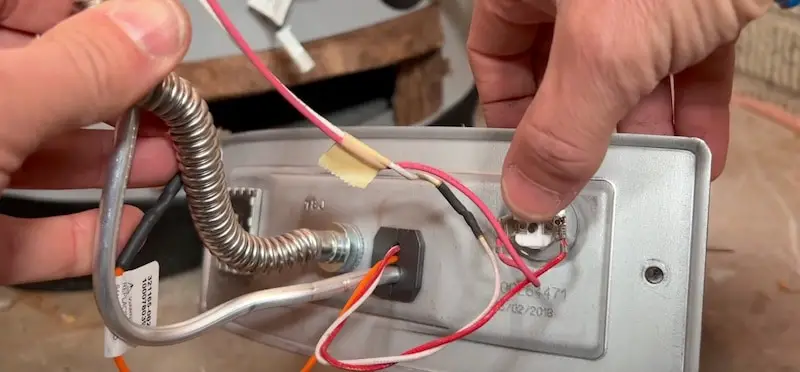
If everything is operating correctly, the red wire forms a complete circuit and things keep running. On the other hand, if there’s a problem because the internal temperature in the burner chamber is too high, the switch will open, interrupt the circuit, and shut everything down.
There is a small reset button on the switch. Pushing the button to reset the switch might resolve your problem. A switch that keeps tripping could be a sign that there’s an internal problem that needs to be addressed.
Servicing the Burner Unit
Now you have a good picture of the components of the water heater burner unit. Hopefully this gives you the tools to troubleshoot and service it yourself!
Components for the burner unit are readily available online or at a home improvement center.
Reinstalling the Burner Unit
When reinstalling the burner unit into the water heater, the trickiest part is getting the unit seated correctly. Typically, there’s a shelf or bracket that it sits on. There are also clips that connect on the inside to give you the threads for your mounting screws, which adds to the challenge of getting everything to line up.
You also want to make sure your insulation is not pinched between the two surfaces.
After ensuring that the burner unit is seated properly and there’s no insulation impeding the seal, tighten up the screws on the front of the burner unit housing. Then, reconnect the tubes by first hand-tightening the nuts that connect them to the gas control valve, then tightening all the way with a wrench.
Finally, plug the wires back into the gas control valve.
To Leave Comments and Questions
Please let me know if you’re running into any issues or if something doesn’t make sense by leaving a comment under the YouTube video. I check the comments daily and will do my best to help you out.
Don’t forget to subscribe to our YouTube channel as we have weekly videos coming out to help you with your everyday home repairs and improvements.
Other Hot-Water-Related Repairs
If you are not getting the hot water you want in your shower or tub, it could be a function of a limiter within the shower valve itself. Check out our YouTube video or read the How To Increase Water Temperature For A Delta Shower Valve, where I’ll walk you through how to adjust the limiter inside a Delta shower valve.
Thanks for stopping by! Catch you on the next one.


