
 My Account
An easy way to update the look of your bathroom is to replace the vanity light. Perhaps you also want to relocate the light fixture, as I do in this bathroom I’m completely remodeling.
The vanity light in the bathroom I’m featuring in this demonstration is on the ceiling. I’m going to move the light to the wall above the mirror. Not only will this look better but it will give me a lot more choices when it comes to fixtures.
This DIY tutorial on how to relocate or replace a vanity light is part of a complete bathroom renovation, which can be viewed on our YouTube channel and will be available soon in written format.
How to Replace or Relocate a Vanity Light: Step-by-Step Guide
In this step-by-step guide, I’ll walk you through how to properly install a vanity light, whether you’re simply replacing the fixture or relocating it. This will include:
- Things to consider when selecting a vanity light
- Tips for a safe and code-compliant installation
- Different types of electrical boxes for vanity-light installations
- How to calculate the position of the electrical box
- How to install various electrical boxes
- How to wire a vanity light
Because I’m going to relocate this vanity light, I’ll be removing drywall and running new electrical lines. If you’re just replacing a fixture, these sections obviously won’t pertain.
Rather watch than read? Check out these videos.
To replace a vanity light:
For relocating a vanity light (video is cued up to the relevant starting point):
DISCLAIMER: This video and description contain affiliate links, which means that if you click on one of the product links, I’ll receive a small commission.
How to Replace or Relocate a Vanity Light: Supplies, Tools, and Costs
Supplies
- Southwire Smart Box
- Electrical Box With Built In Hole Saw
- Wago 221 lever nuts
- EZ Guard wire protectors
Tools
- Oscillating tool (for cutting out drywall, if needed)
- Wire strippers
- ECX Screwdriver
- Torpedo level
Costs
I spent $209 on the vanity light and electrical supplies.
Tips for Choosing a Vanity Light
If you’re replacing a wall-mounted vanity light, take a look at your wall with the old fixture off. You might have different colors of paint or drywall damage; you’ll want to cover this with the new fixture. It’s a lot easier to cover up these old messes than to repair them.
Make note of the wall area to be covered before making a trip to your home improvement or lighting center to select your new vanity light. Choose a fixture that has a base large enough to cover any imperfections.
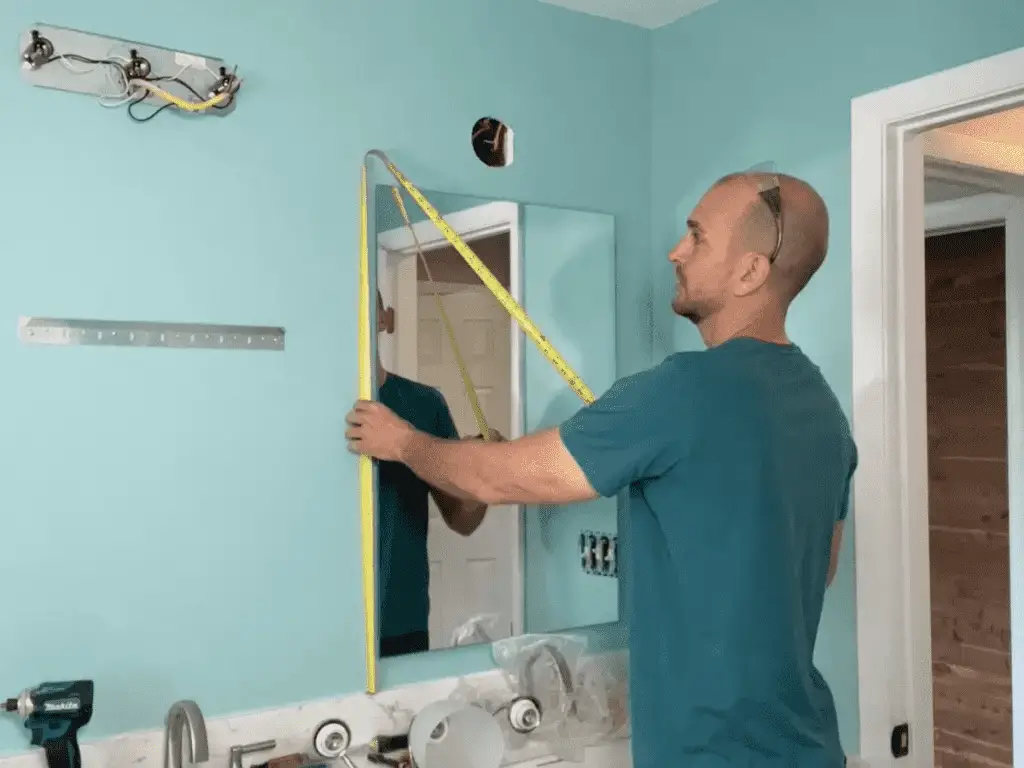
If you have limited vertical space (due to a low ceiling) in your bathroom, measure the distance above the mirror to make sure the new vanity light will fit.
Figuring Out Where to Place a Vanity Light
Figuring out where to place a vanity light will comprise several factors: the distance from the top of the sink or backsplash to the ceiling, the height of the mirror, and the dimensions of the vanity light.
In this vanity area, I’m going to be installing a fairly large framed mirror in the horizontal position. I want the bottom of the shades of the vanity light to sit just above that, which is always a good rule of thumb.
Generally speaking, you want the center of a mirror to be at eye level, which is a height that will depend on the people using the bathroom. If, for example, those people are over 6 feet tall, the placement of the mirror would obviously be different than it would be for, say, a family where the average height was 5 feet. This house will be a rental unit, so I’ll be placing the mirror in line with more average heights.
The distance from the top of the sink or backsplash to the ceiling is important if you’ll be installing a new mirror and fixture. If you’re replacing only the vanity light, you’ll want to know how much clearance you have above the mirror before selecting your fixture.
In most cases, you’ll want to leave a little clearance between the backsplash and the bottom of the mirror for the most esthetically pleasing effect, if you have enough vertical space.
I’ll be placing the vanity light 85 inches above the floor.
How to Replace or Relocate a Vanity Light: Tips for a Safe and Code-Compliant Installation
SAFETY: Before starting to work on any electrical project, switch off the power at the breaker and check the circuit with a non-contact voltage tester to ensure no current is flowing.
CODE COMPLIANCE: Be sure to consult the electrical code in your area before taking on any electrical project.
A vanity light needs to have an electrical box. The connections need to be encapsulated within an electrical box in order to be safe and meet code.
Here’s a scenario that doesn’t meet code: a cheap vanity light with a mounting plate that has the Romex coming directly from the wall into the fixture.
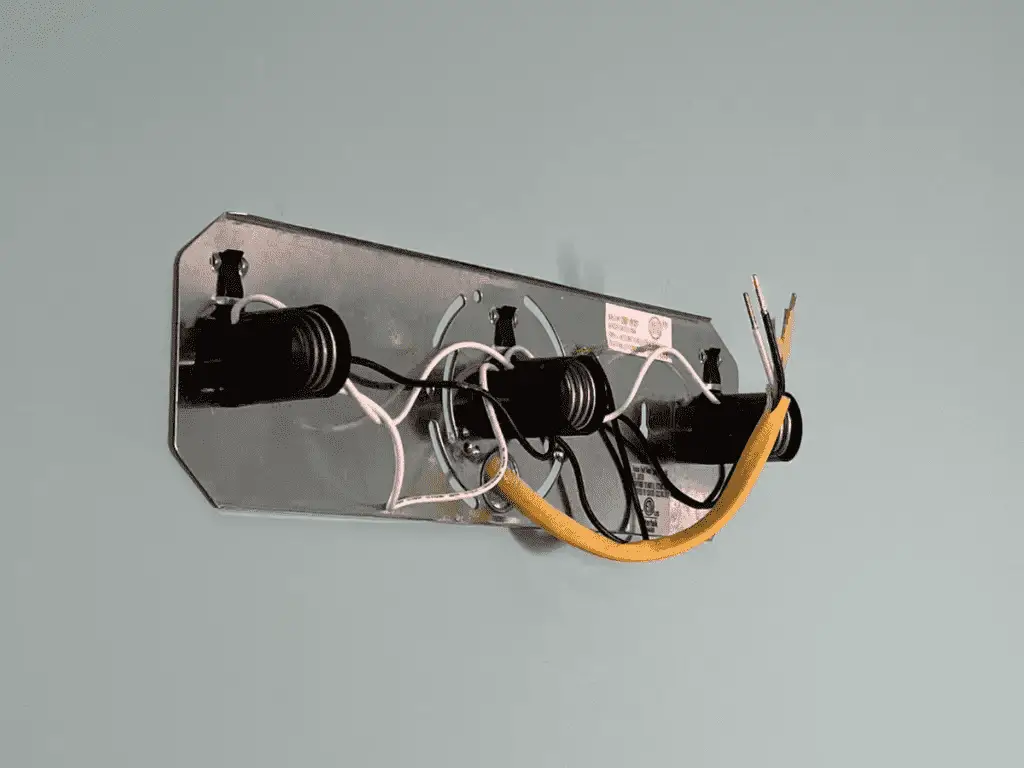
When Romex comes directly into the fixture like this, it will sit in the small space between the face plate and the mounting plate. This could cause damage to the sheathing of the Romex and cause issues with the wiring. If you have a setup like this, it would be a good idea to remedy it by installing an electrical box.
How to Replace or Relocate a Vanity Light: Common Types of Electrical Boxes
Boxes that Mount onto Drywall or Plaster
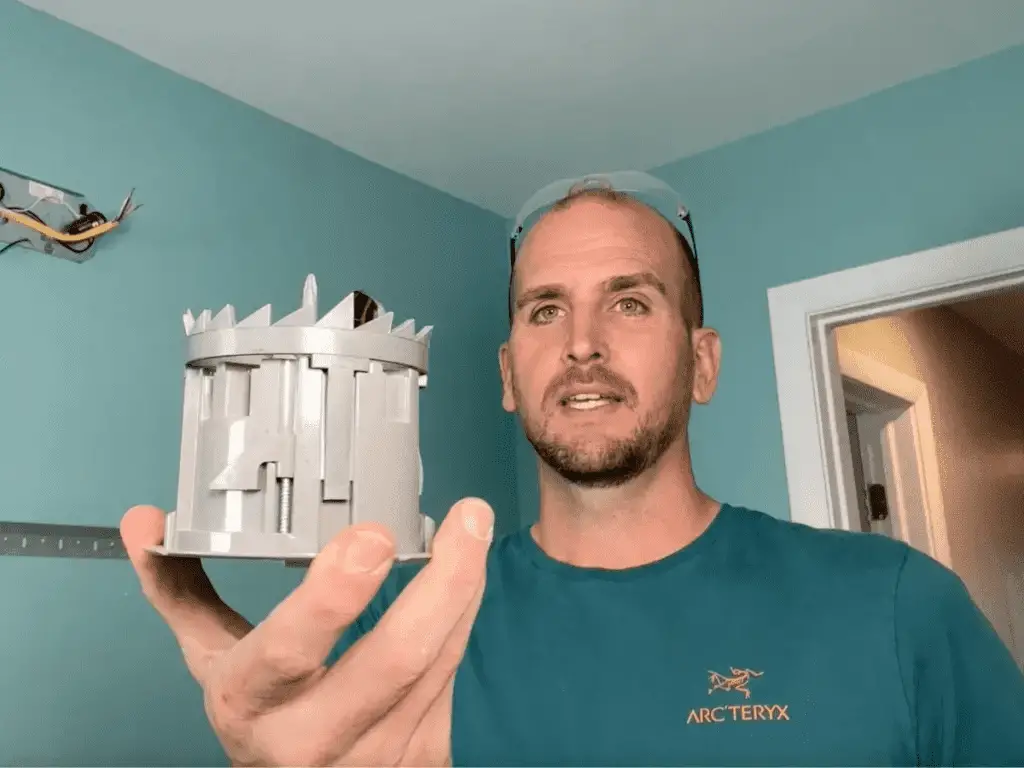
The first and most classic type of electrical box for a vanity light is an “old-work ceiling box”.
(“Old-work” refers to the box being mounted onto an existing surface. A “new-work” box is one that you’d use in new construction or on bare framing.)
The old-work ceiling box mounts onto a wall surface such as drywall or plaster. You’d use it when you have no restrictions in the wall cavity and no studs in the area where you need to mount the box.
The old work ceiling box has tabs that fasten the box to the back side of the wall surface when you tighten the screws. (If you have plaster, you’ll want to check its thickness to ensure the depth from the front flange to the tabs is sufficient.)
Another version of this old-work ceiling box comes with a hole saw built into it.
Boxes that Mount onto a Stud
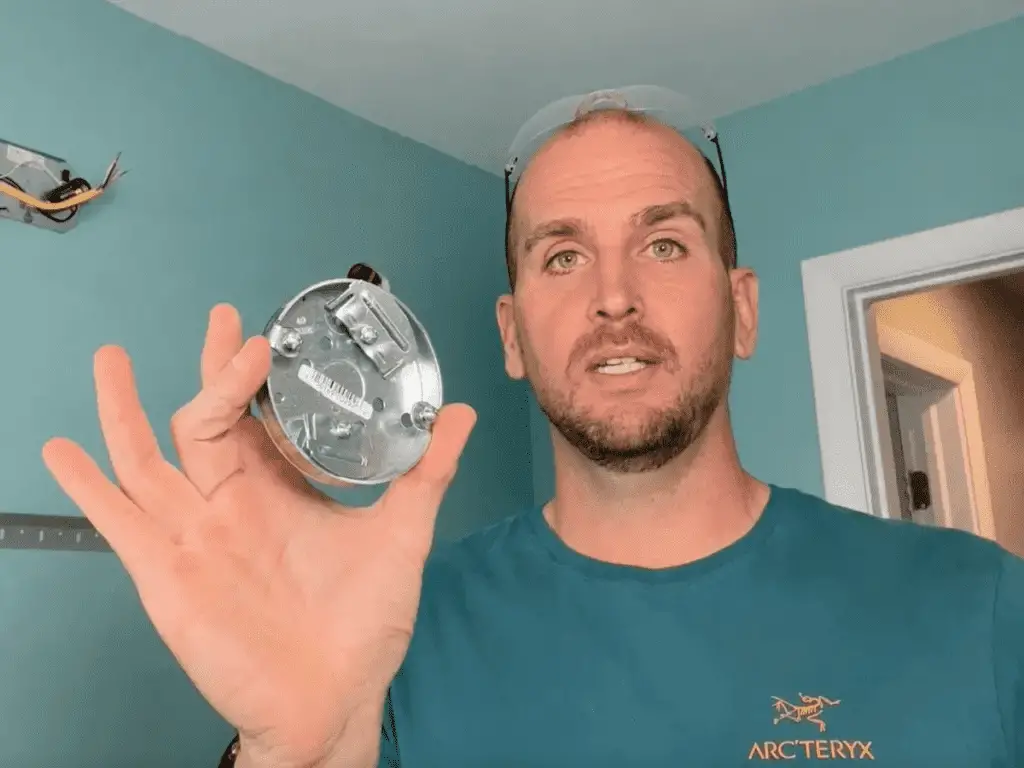
In the event that you have a stud alongside where you want to install your box, there is this type of old-work box:

This circular box has one flattened side that mounts to a stud with two screws. If you have a stud in the right place, this is a good option to go with because the hold is very secure (can carry up to 50 pounds).
Boxes that Mount in a Restricted Wall Cavity
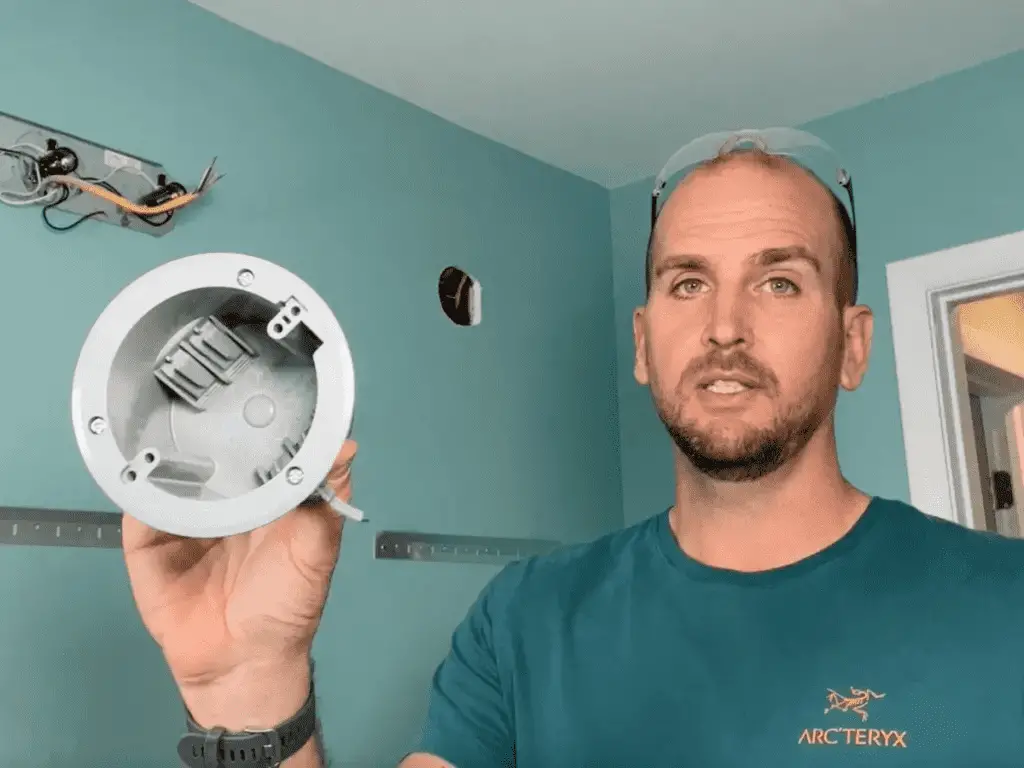
If something is restricting the space inside your wall cavity (typically a stud) and you don’t have the depth for a classic old-work box, a pancake box is the solution. I’ll be installing one In this bathroom, seeing as both a plumbing vent tube and a stud are located where I want to install the box.
A pancake box is only a half-inch thick, basically the depth of standard drywall.
Being such a small box, you can’t put a lot of connectors in it. It’s certified with a “box fill factor” that amounts to the incoming Romex and the connectors to the light fixture. It wouldn’t be suitable when you need to connect power to another fixture downstream or want to mount a heavy vanity light.
Typically, you’ll secure a pancake box to a stud with two screws.
How to Replace or Relocate a Vanity Light: Installing the Electrical Box
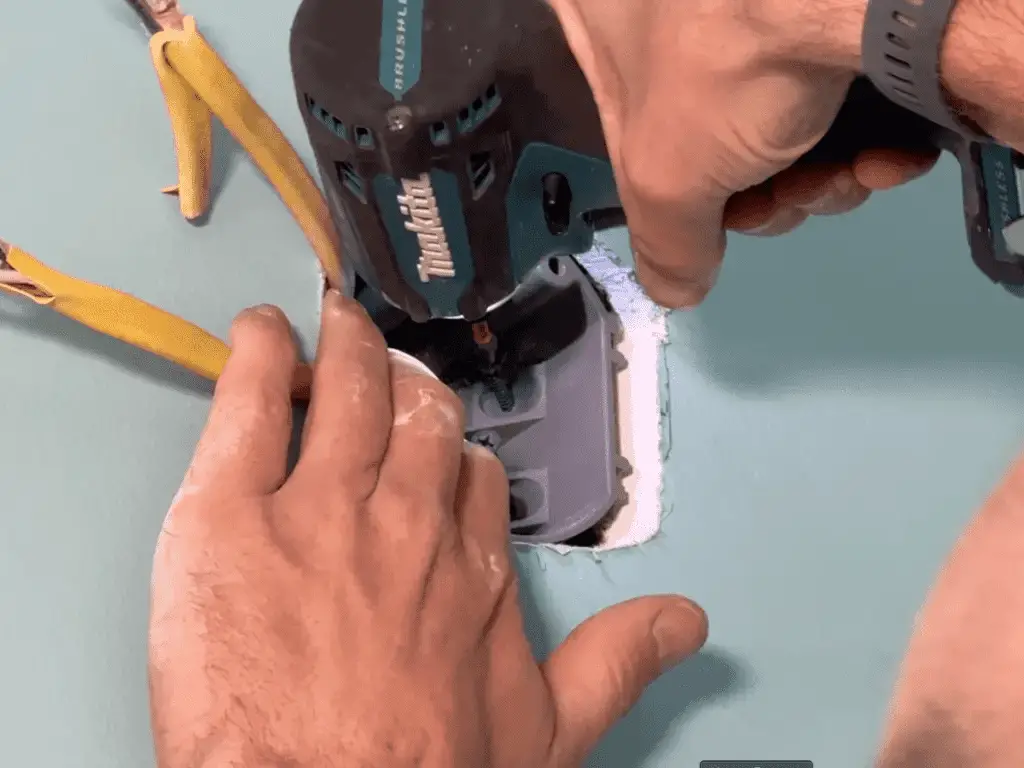
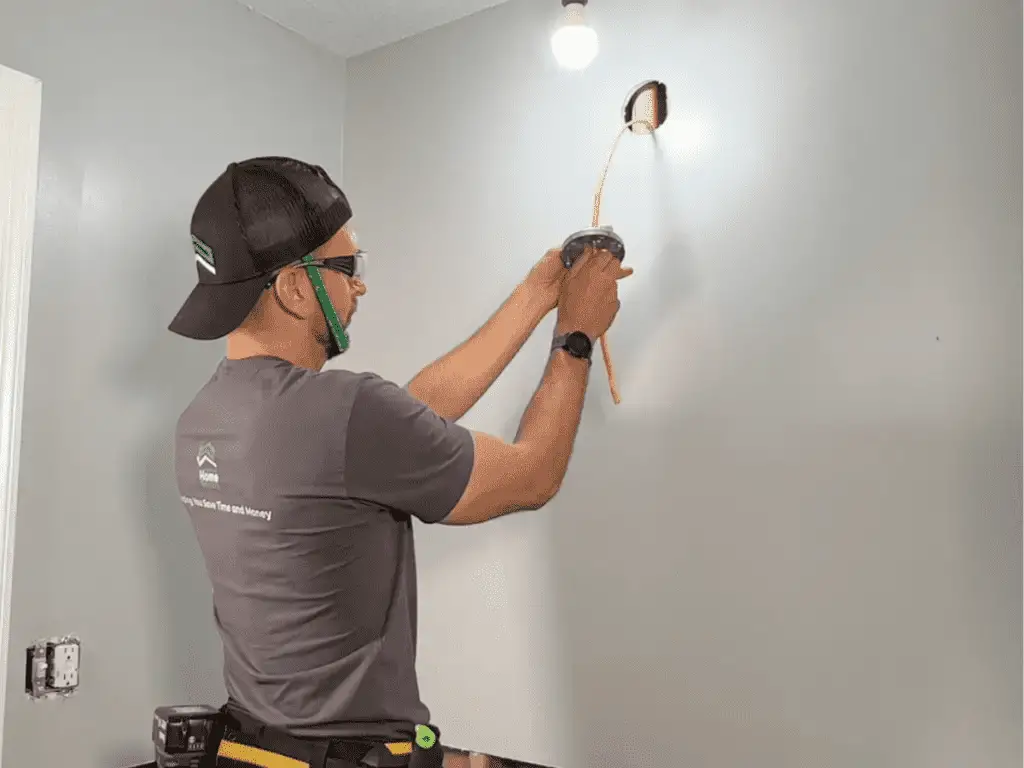
Cutting the Hole for the Box
Once I’ve determined where to place the light and which type of electrical box I need, I’ll measure and mark the center point.
NOTE: If you’re simply swapping out a vanity light, you won’t need to worry about this step, unless you are installing an electrical box to resolve a code non-compliance situation.
I’ll be mounting my electrical box at a height of 85 inches from the floor to the center of the box. I’m also going to center the vanity light in the alcove. Your placement may be different depending on the configuration of your space.
With my center point marked on the wall, I’ll trace the shape of the box onto the wall and then carefully carve away the drywall with a jab saw.
TOOL TIP: You could use an oscillating tool here but I find a jab saw gives me a little more control. Any time you have electrical or plumbing lines in the wall where you’re cutting (or if you have no idea what’s in there), it’s a good idea to use a tool you can finely control.
My habit is to undercut the hole on the first pass and gradually trim off more until I can tamp the box into place. You want the box to fit snugly in the hole, especially if it’s mounted onto drywall or plaster.
Fastening the Mounting Bracket
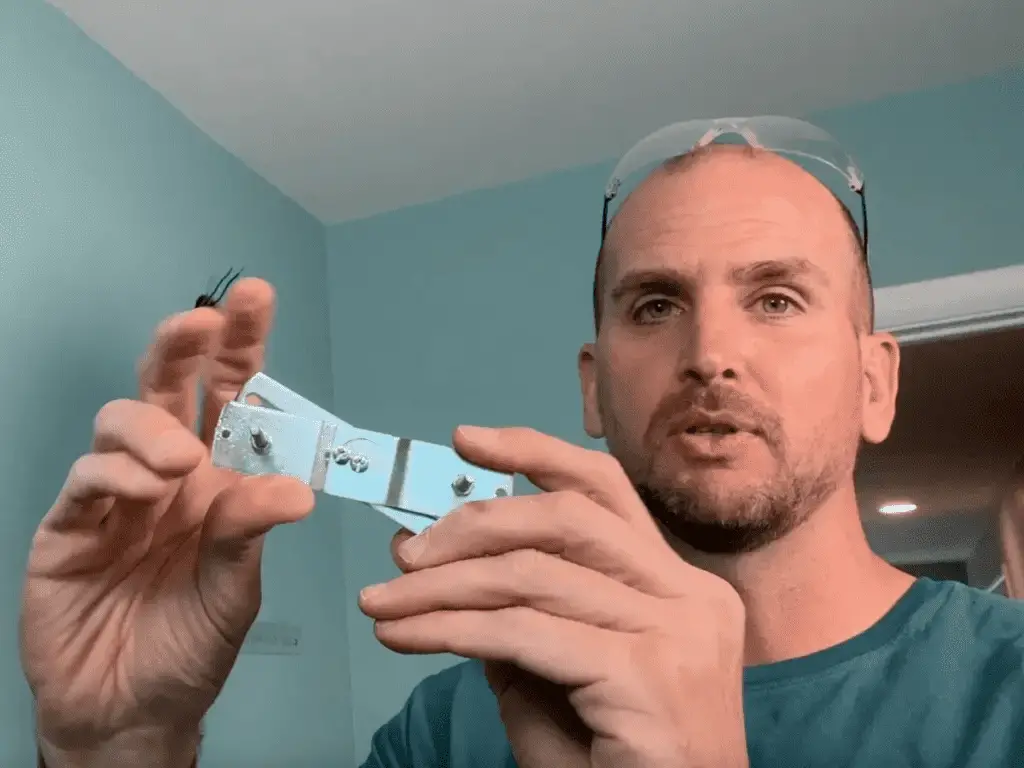
Vanity lights that mount onto an old-work box generally come with two types of mounting devices. On lower-quality fixtures, you’ll often find a mounting plate that fastens directly to the wall. On better-quality fixtures, there will be a mounting bracket that enables you to adjust the mounted vanity light to get it perfectly level.
The mounting bracket is two flat pieces of metal fastened in the center. One piece is slotted; this is the part that attaches to the box with screws. The other piece has two bolts on it that hold the fixture. This is the piece that you can later rotate to get the light perfectly horizontal.
If you’re mounting your vanity light onto a pancake box, you’ll use a universal light fixture mounting bracket, which is a circular bracket.
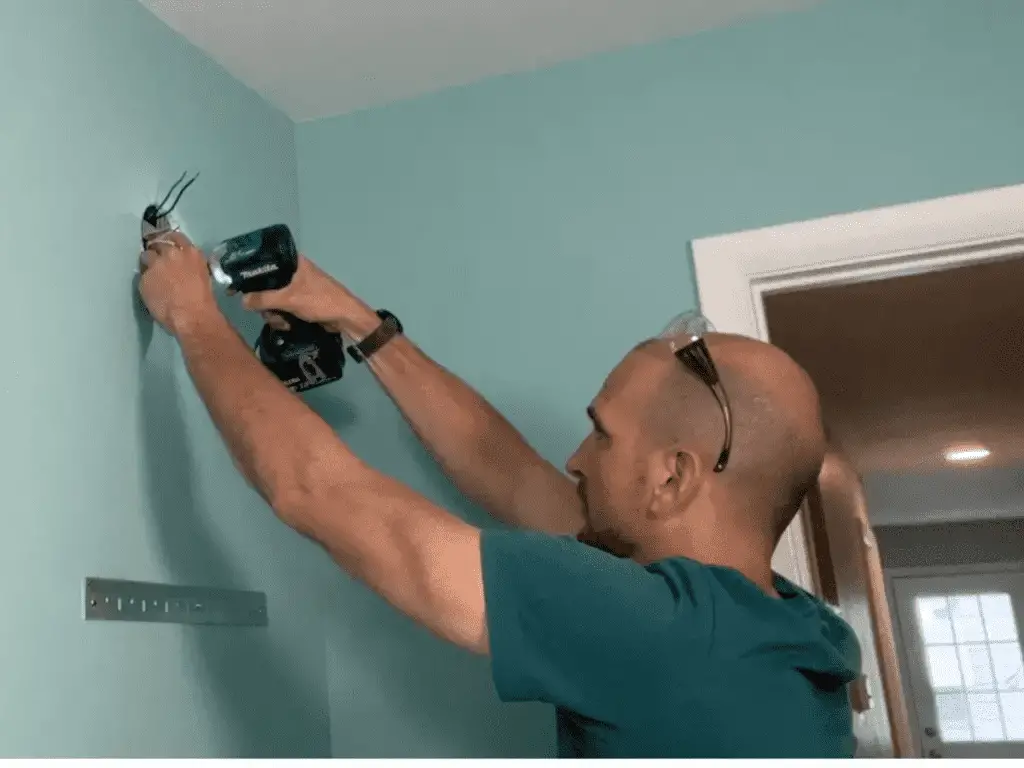
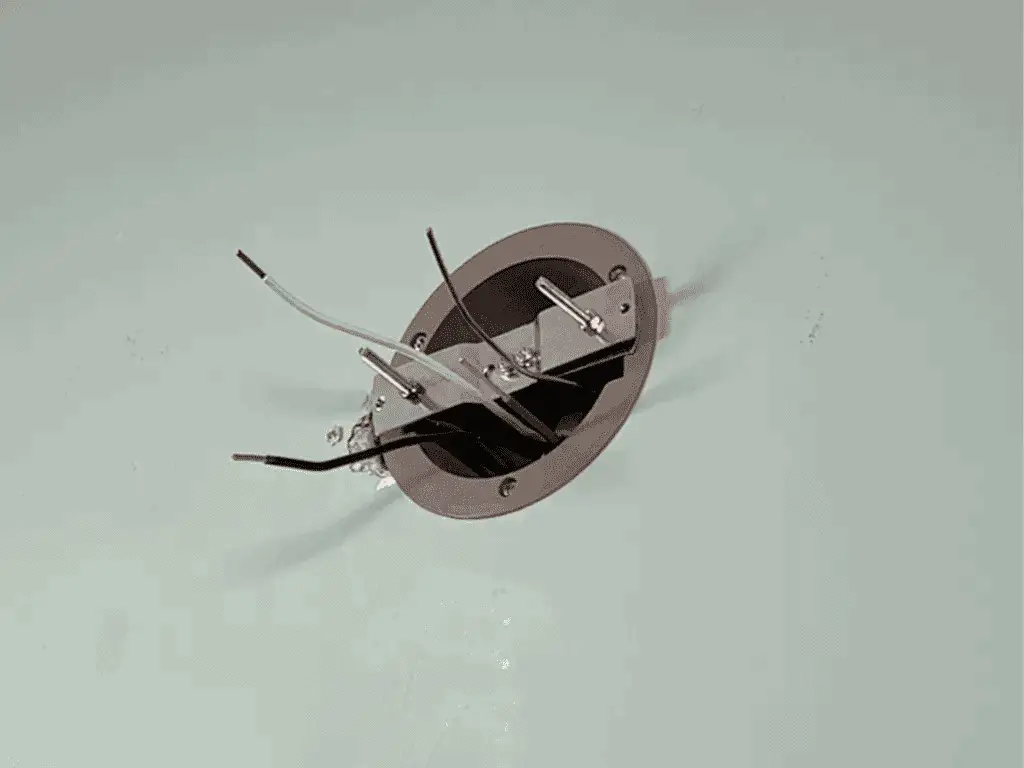
Grounding the Box
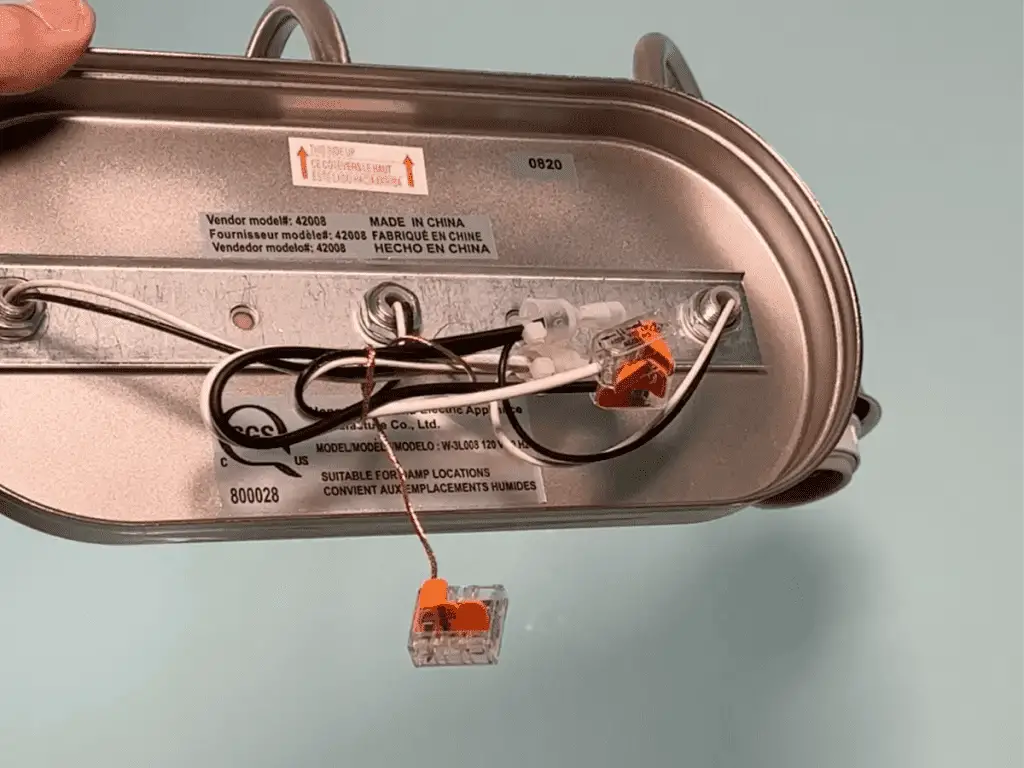
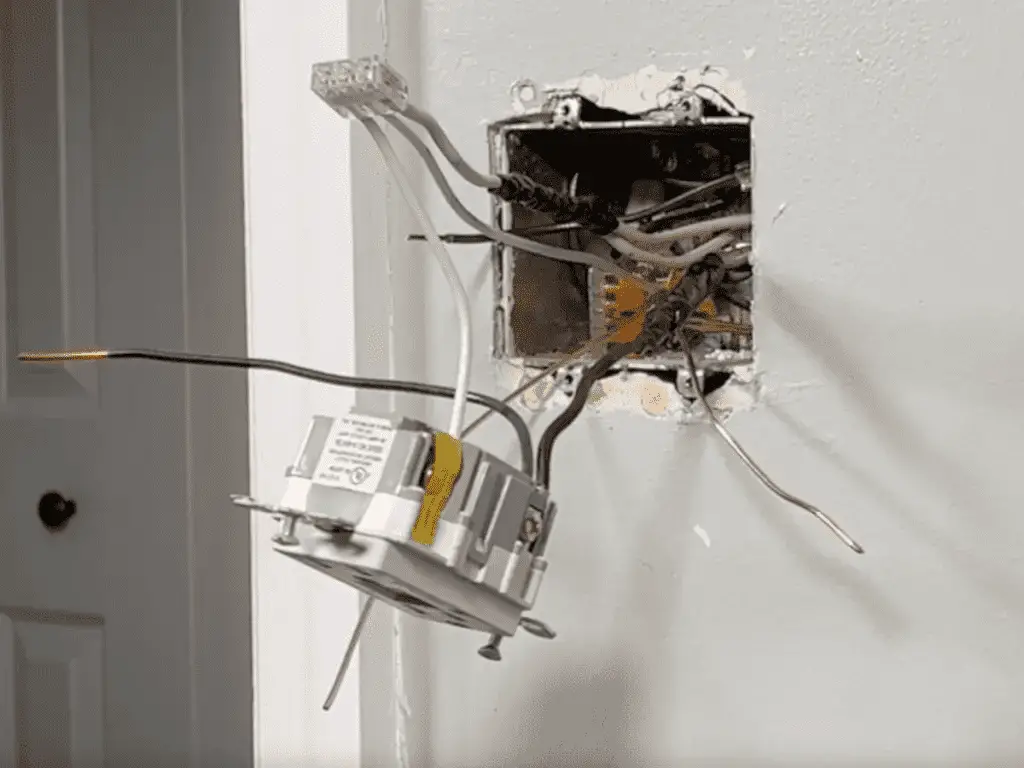
Wiring the electrical box for the vanity light is pretty straightforward. The first and most important thing when wiring up the box is to ground it.
In this image from a different project (where I was installing a new electrical box and vanity light at an existing location) you see the incoming hot (black), neutral (white), and ground (copper) wires of the Romex plus the green grounding pigtail I’d already secured to the mounting bracket.

NOTE: Ideally, you’ll want to install the mounting bracket with the slotted arm in a more vertical position and the bolt-bearing arm in a horizontal position. The way I’ve mounted the bracket here is preventing me from adjusting the bolts.
Seeing as I’m relocating the vanity light from the ceiling to the wall in my current project, I’ll need to open up the wall and run new Romex before I can connect any wires. If you’re not relocating your vanity light, skip past the next section on removing drywall to continue to read about wiring.
How to Replace or Relocate a Vanity Light: Removing Drywall and Running New Romex
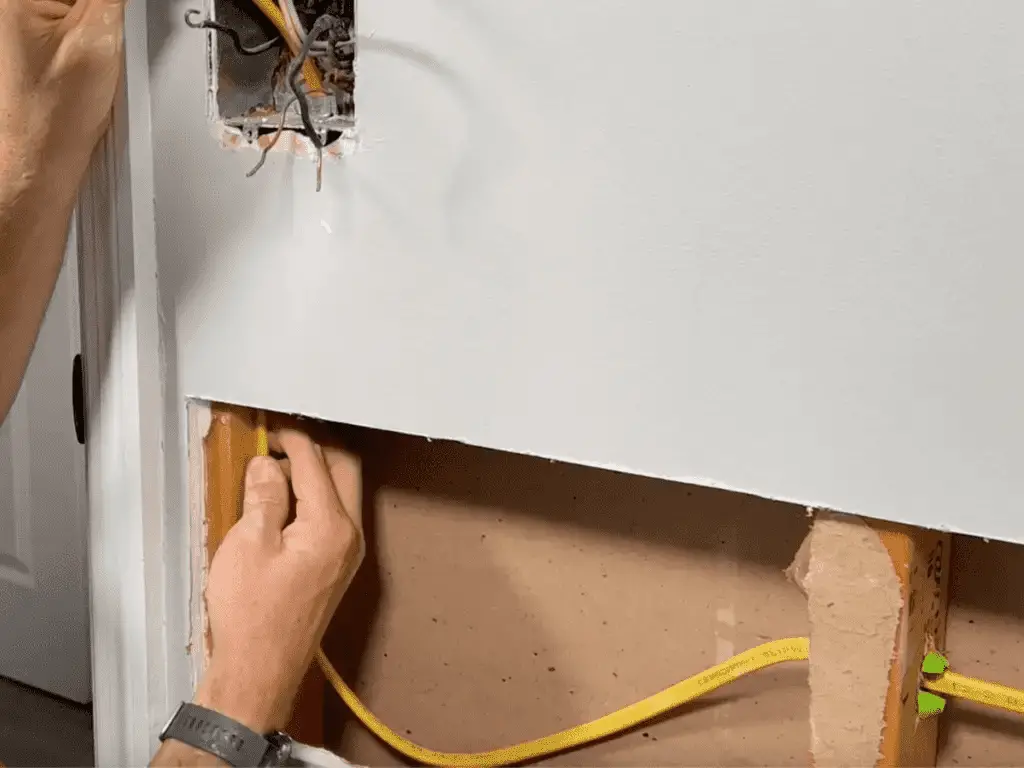
There is some damaged drywall around the vanity in this bathroom. I’ll need to cut it out and replace it, which is a perfect opportunity to run Romex from the new location of my vanity light to the switch.
To cut out the drywall, I’ll use an oscillating tool and something to act as a guide (in this case, a piece of vinyl plank flooring, but a scrap piece of lumber would also work). I want to be careful as I’m cutting, penetrating with the oscillating tool only deep enough to perforate the drywall.
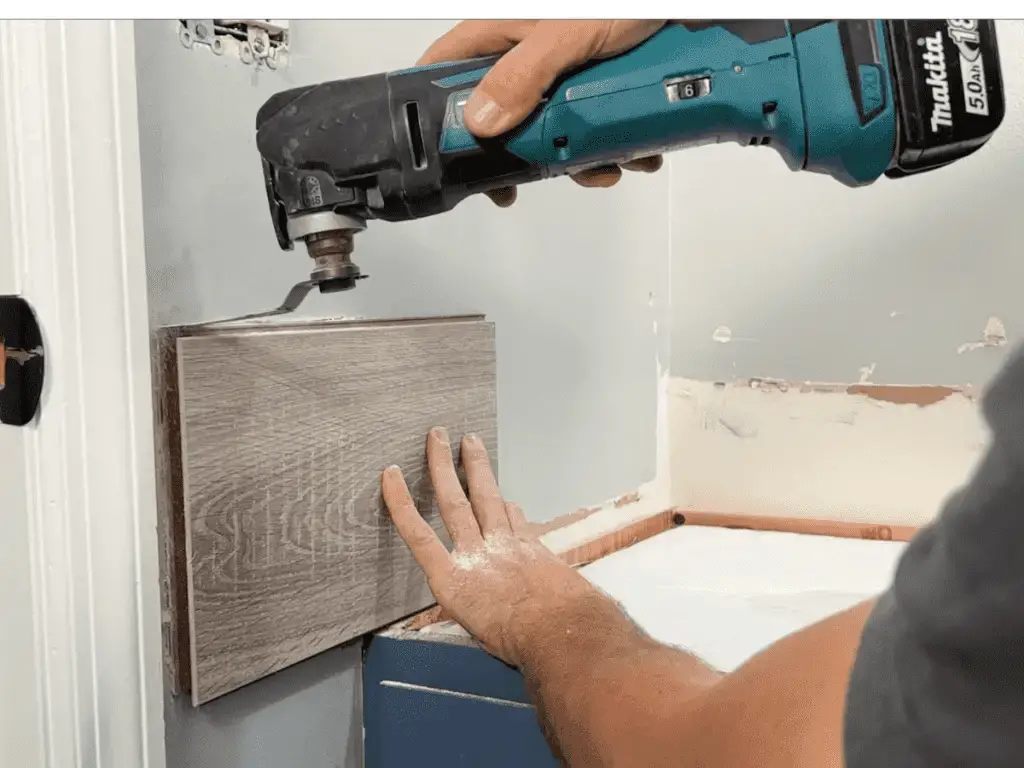
I’ll cut away about 8 inches of drywall around the perimeter of the vanity, opening up a path from where my Romex will come down from the vanity light to the light switch.
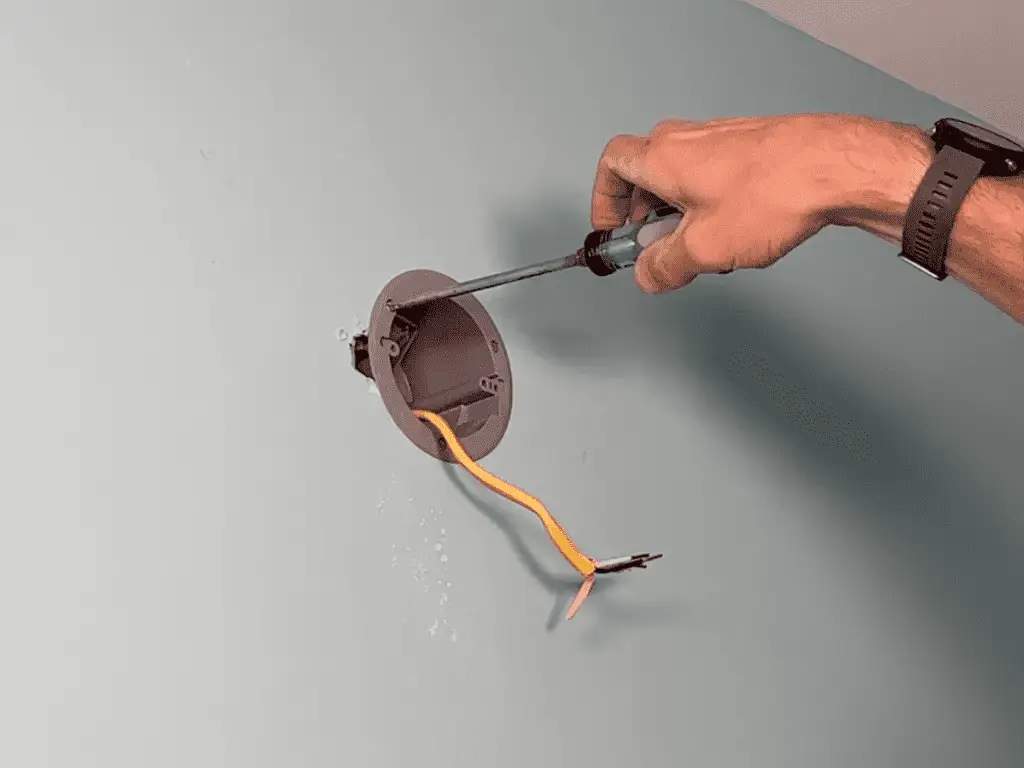
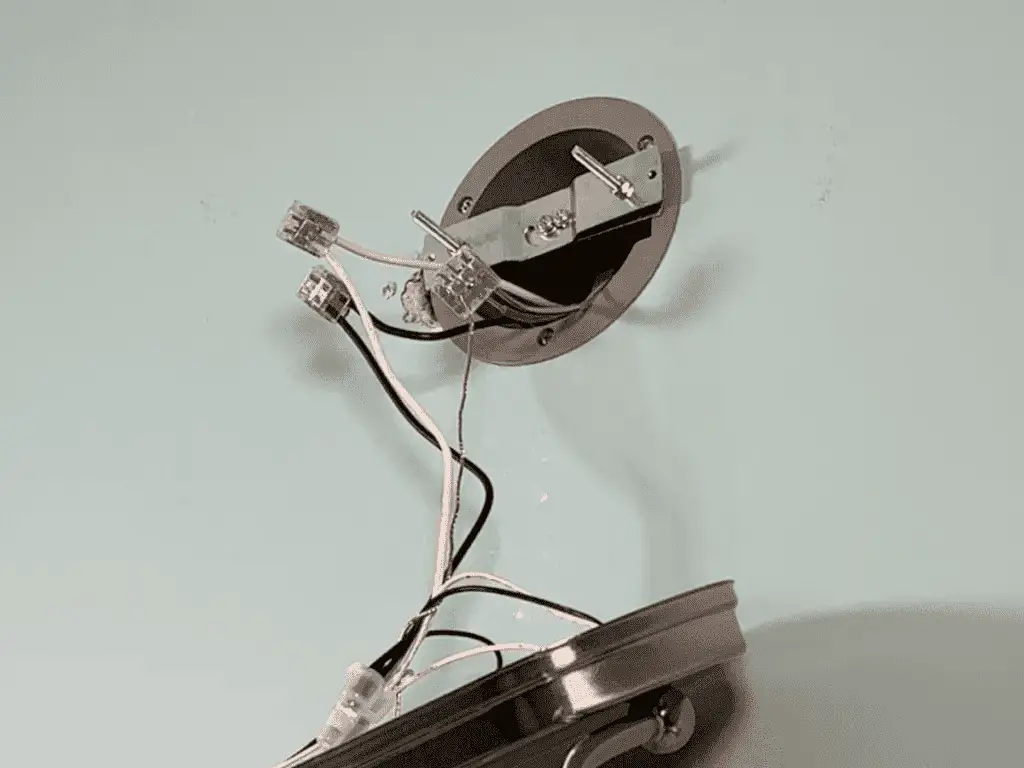
With the wall opened up, I’ll feed my Romex through the hole I previously cut for the electrical box and pre-install a clamp on the back of the pancake box (some pancake boxes have an integrated bushing that serves the same purpose). The clamp will securely hold and protect the Romex where it passes through the box.
Once I’ve tightened down the clamp to the Romex coming into the box, I’ll secure the box to the stud with two screws.
Then, I’ll strip down the wires a bit and install a grounding pigtail. (You should leave about ¼ of an inch of the Romex sheathing inside the box.) The grounding pigtail will be connected when I install the light fixture.
When passing the Romex through the studs to arrive at the switch, I like to use EZ Guards as a measure of protection. This simple piece of hardware is a cylindrical metal casing that lines the inside of the hole you drill in the studs. As the name implies, EZ Guards are easy to install. They are also a much better safeguard than nail plates.
How to Replace or Relocate a Vanity Light: Wiring and Mounting the Light
Wiring the Vanity Light
I have pre-installed Wago 221 lever nuts on my lighting fixture.
You see that I have one lever nut for each type of conductor (hot, neutral, and ground). On the hot and neutral wires, I’ve installed a 2-wire connector. On the ground wire, however, I’ve placed a 3-wire (because I’ll need to connect the ground from the Romex, the ground from the fixture, and the grounding pigtail).
To install a lever nut on the fixture, open the levers and insert the stripped end of one wire coming from the vanity light into an open chamber, then close the lever.
To wire up the vanity light, insert each wire coming from the electrical box Into an open chamber in its respective lever nut (hot with hot, etc.), then close that lever.
Once all the connections are made, push the wires and connectors into the box. You want to be sure that the connections are contained within the box and not within the plate of the fixture.
If you’re just installing a new fixture at an old vanity light location, switch the power back on and test out your work.
If you’re relocating a vanity light, you’ll need to wire the switch first.
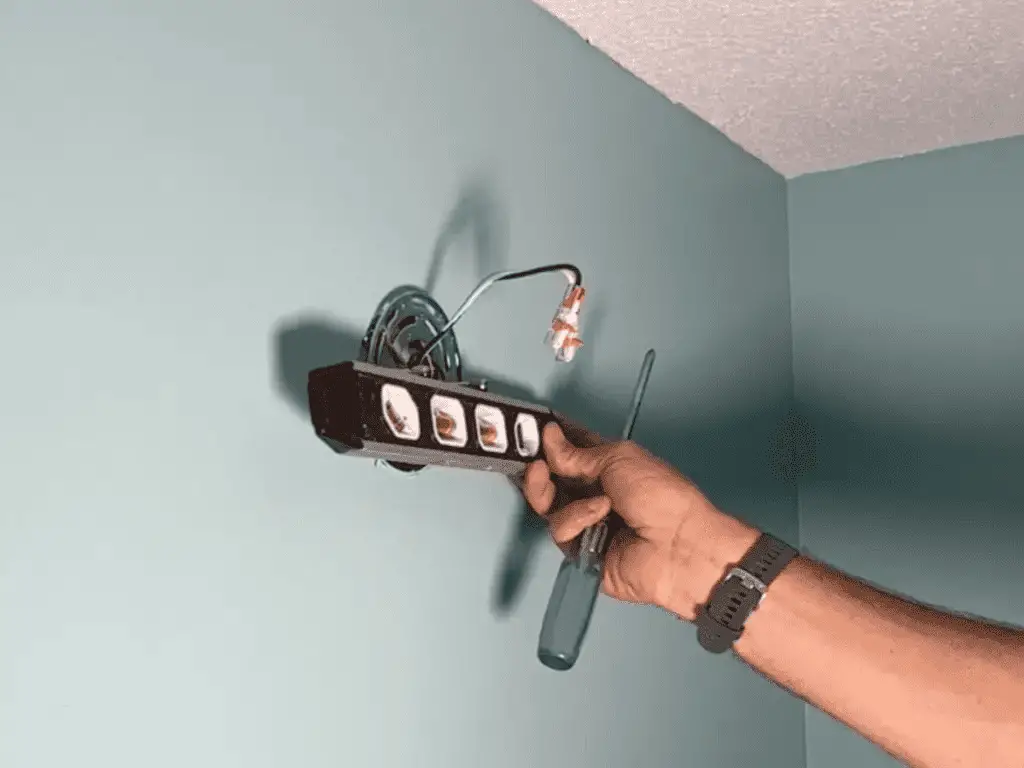
Mounting the Vanity Light onto an Old-Work Box
The housing of this vanity light slides over the two bolts in the mounting bracket. Normally, you can adjust the depth of the mounting bolts by simply twisting them.

(I ran into a snag here because I mounted the slotted part of the bracket horizontally, which meant I couldn’t adjust the bolts and had to cut them down. I used the bolt-cutter feature of my wire strippers for this, which was the most convenient option because I didn’t have to dismantle anything.)
After getting the mounting bolts to the correct length, I’ll tighten the two screws in the middle of the bracket.
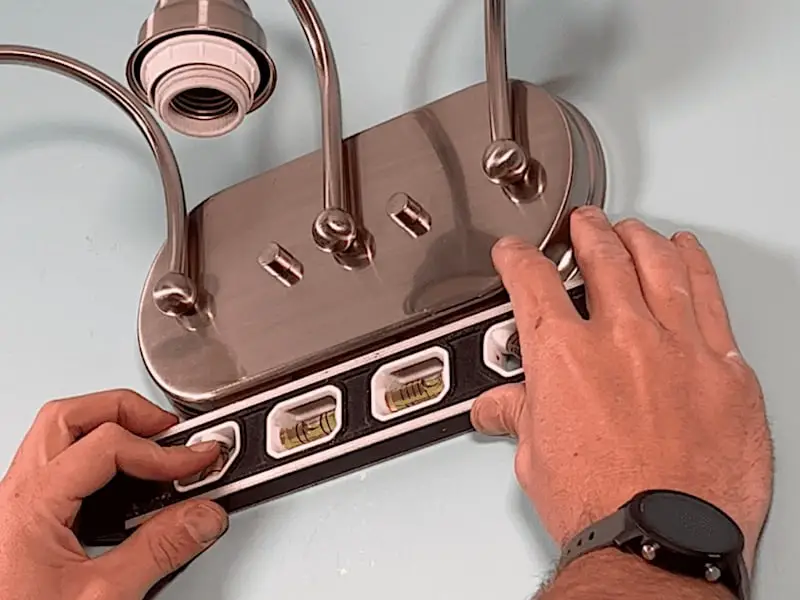
Once I secure the vanity light housing to the mounting bracket with its mounting nuts, I’ll make sure it’s level.
Mounting the Vanity Light onto a Pancake Box
When mounting a vanity light onto a pancake box, you need to use a circle mounting bracket, also called a universal light fixture mounting bracket.
Once installed, this bracket will bond to the metal pancake box, which already has a ground.
A circle mounting bracket needs to be leveled and tightened before mounting the vanity light.
How to Replace or Relocate a Vanity Light: Wiring the Switch
When it comes to wiring a switch, we’re all going to be facing different scenarios. In my case, I’ll also be wiring a GFCI outlet in the same gang box with the switch. (If you’re only swapping out a vanity light, this section won’t apply.)
In this old metal box, I already have built-in clamps, so I’ll utilize those where I’m pulling in the Romex coming from the new vanity light. Don’t pull the Romex too tightly up to the box; leaving a little slack will ensure you have enough material in the event you need to do repairs in the future.
There are a lot of soldered joints in this house. The neutrals and the hots coming into this box are soldered with electrical tape protecting the soldered, open wire. Those wires are already pretty short and I don’t want to shorten them any more so I’ll just put fresh electrical tape on them. Then I’ll connect all the wires using Wago lever nuts.
NOTE: I highly recommend Wago lever nuts for DIY projects. They’re easy to use and give you a solid connection. Read our article Which Wire Connector Should You Use and What’s Inside? for more info.
Once I have all the wires connected to my switch, I’ll turn the power back on and see if the light works.
How to Replace or Relocate a Vanity Light: Finishing Touches
Once I know that my wiring is good and the vanity light is functional, I’m on to the finishing touches: installing the shades and light bulbs.
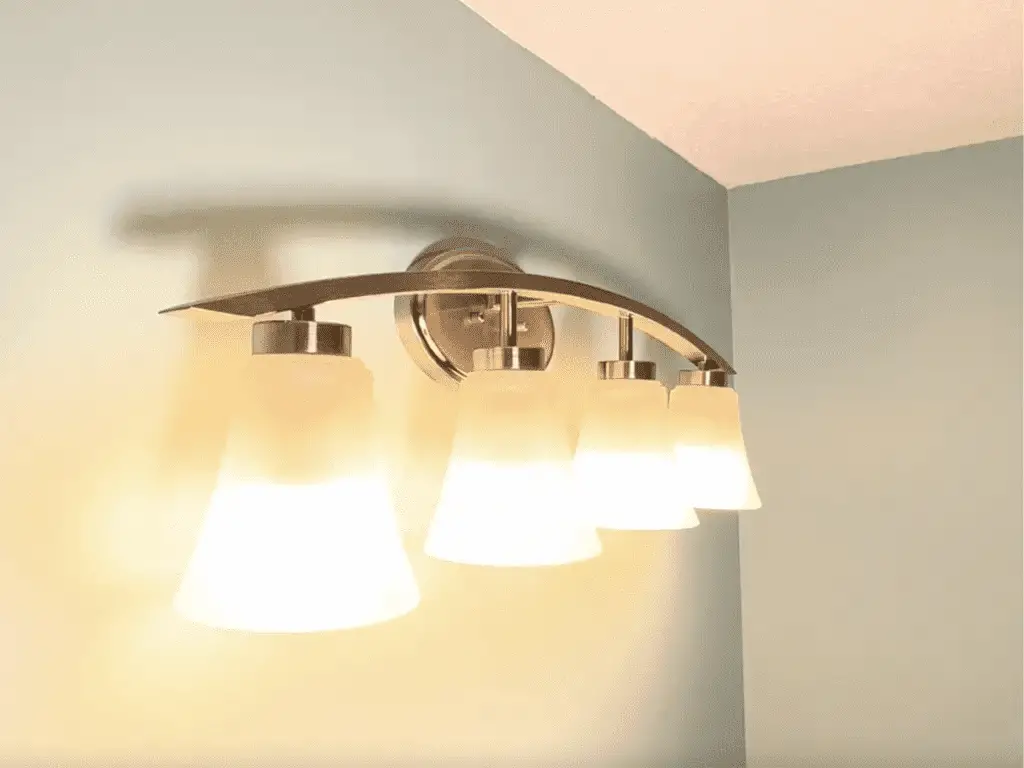
Take your time when you install the shades; it’s a bummer when they fall and shatter and you have to make another trip to the home center to search for a replacement.
How to Replace or Relocate a Vanity Light: Conclusion
As we’ve discussed, there are a lot of variables and things to consider when it comes to replacing or relocating a vanity light. Fortunately, the steps involved are pretty straightforward and the work isn’t laborious. I hope this tutorial has given you enough guidelines to understand what products are right for your project and get started with confidence.
For the Full Bathroom Remodel
The entire bathroom renovation from demolition to towel bar installation is available on YouTube.
Related Articles
Here are some related articles that might be useful for your bathroom repair and upgrade projects:
- How to Install a Delta Custom Reflections Mirror
- Custom Wood Vanity and Vessel Sink
- How to Waterproof a Vanity Base
To Leave Comments and Questions
If something doesn’t make sense or if your situation is a little different, please leave a comment under the YouTube video. I check the comments on a daily basis and am happy to help out.
Don’t forget to subscribe to our channel as we have weekly videos coming out to help you with your everyday home repairs.
We’ll catch you on the next one! Take care.


