
 My Account
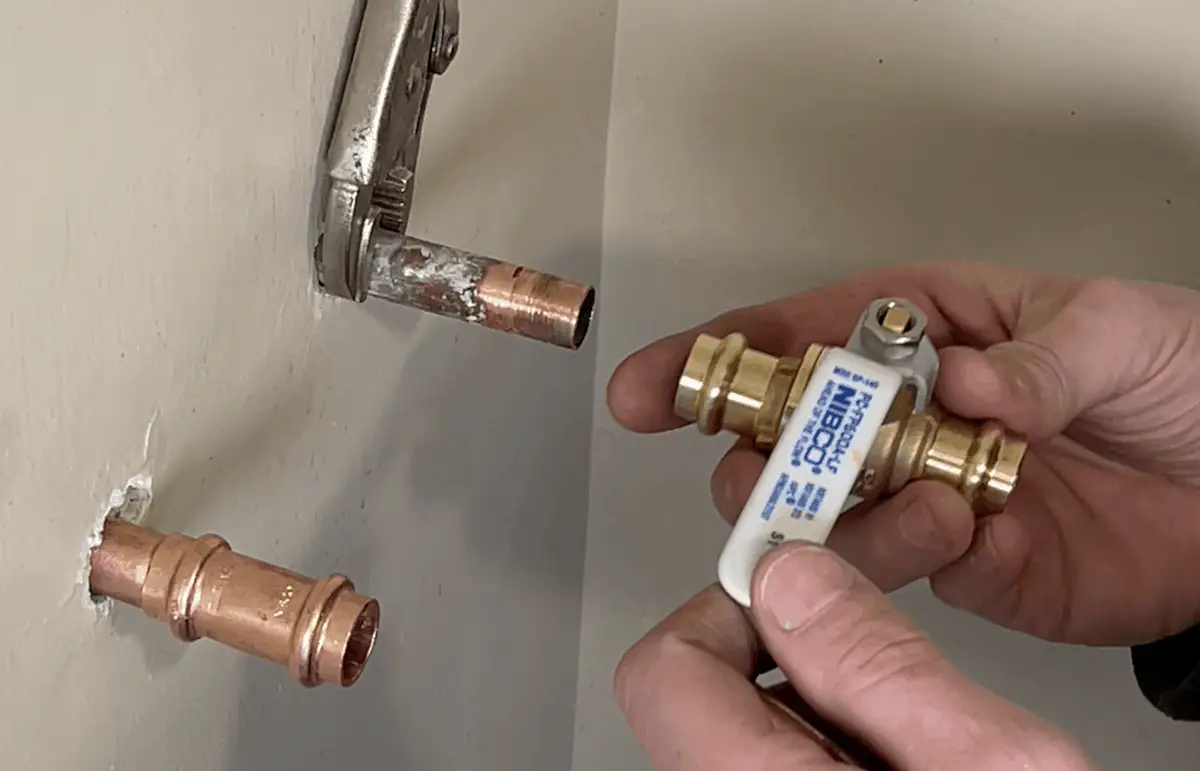
The main water shut off valve does a very important job: it controls the supply of water to your entire house. So if this underrated hero of the house leaks, gets clogged or damaged, you’ll want to fix it quickly — which is probably why you’re here.
While replacing a valve may be intimidating, I hope this step-by-step DIY tutorial makes the process a little more approachable. I used copper press fittings to fix my water shut off valve but we will also review the other options available. Additionally, I used a manual press tool to make this home repair project budget-friendly, but you’ll see links to other popular electric tools that require more investment.
(If you currently have a globe valve and would rather try to stop the water leak without replacing it with a new ball valve, check out this blog instead.)
Disclaimer: Whenever you’re doing a home repair project involving plumbing or electrical, be sure to know your local codes and rules. You may need permits and/or licenses, so it might be best to consult a professional.
| Estimated time to complete | 2-3 hours |
| Materials Used: | Description: |
| Nibco Ball Valve | I used a standard 1/2″ ball valve with press fittings. I couldn’t find them at Home Depot or Lowe’s, but they were available at Menards and online. |
| Copper Press Tool – IWISS | This tool is needed if you’re working with Nibco press fittings. It’s similar to a bolt cutter – but it also has different adapters for different size pipes. You can also invest in electric versions. Rigid and Milwaukee are two popular ones, but they’re much more expensive. |
| Sandpaper | Available at any home improvement store I use 120Grit sandpaper |
| Pipe Cutter | Standard and/or Close Quarters |
| Deburring tool | Small curved blade which helps to remove any sharp slivers from copper pipe after being cut |
| Jaw Horse | A mix between a saw horse and a table vise which comes in handy for plumbing projects |
DIY Instructions: How to replace a main water shut off valve with a new ball valve
Whether or not you’re repairing a ball valve with SharkBite or one with press fittings on the end, the installation is going to be about the same. But please note, depending on your plumbing, you’ll likely need to adapt these instructions to work best for your situation.
1: Turn off water valve on the curb & make a plan

Once you’re oriented and know where your main water shut off valve is, you’ll need to turn off the water valve on the curb with a curb key. (Watch this video for step-by-step instructions.)
If you haven’t done this before or feel unsure how to do it, I recommend calling your water company to cut off the water to your house. Usually, they can do this the day you call.
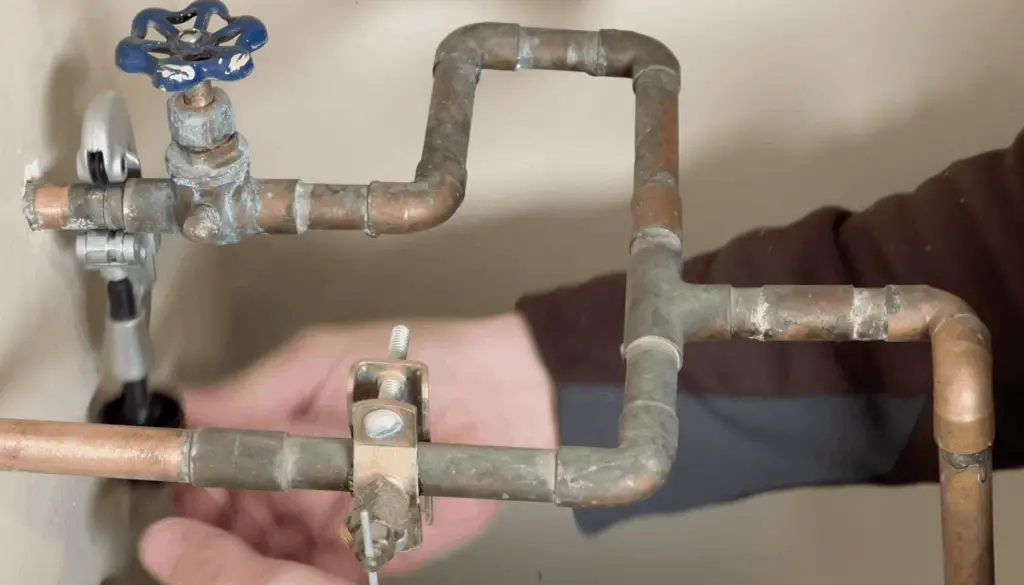
You’ll also want to make sure you have a plan of how you’re going to replace your valve before you start cutting pipes open. Sometimes it’s as easy as changing the old valve to the new valve. However, in some cases you need to do a little planning to make sure you have the parts to reconfigure the lines to the main water shut off valve.
Here’s what I did: I planned any reconfiguration of the water lines, assembled as much as possible prior to installing on the water lines coming from the wall, capped the line going to the water heater, and then completed the install. Should be noted my water lines were ½” but most main water lines coming into a house are at least ¾”. Then once the new valve was installed II got water turned back on.
2: Swap out the valve
With the Nibco ½” press fittings, I needed to mark 11/16″ to go inside the fitting, properly crimp it + give a bit more space away from the wall for clearance.
Depending on your clearance, you can use a standard pipe cutter or close quarters pipe cutter. Be mindful of where the wall is to ensure you have enough clearance.
- Cut out the old valve, this is where it is important to have a plan so you cut the pipes off in the correct location to fit the new valve and fittings.
- I needed to use both a standard pipe cutter and also a close quarters pipe cutter because of the clearances I was working with for this job
- Clean up the pipe with sandpaper and use a deburring tool to clean the inside to make sure there are no metal shavings. It’s important you don’t have burs or anything sharp on the end of the pipes because it can cut the o-ring and lead to leaks.
- You’re ready to install the ball valve!
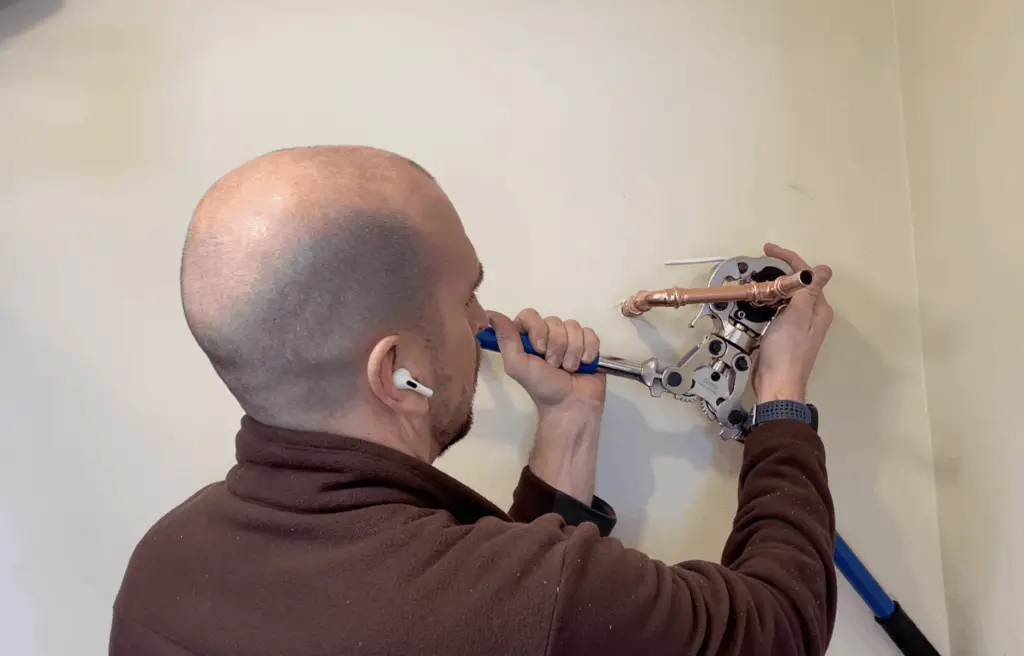
3: Apply the new ball valve
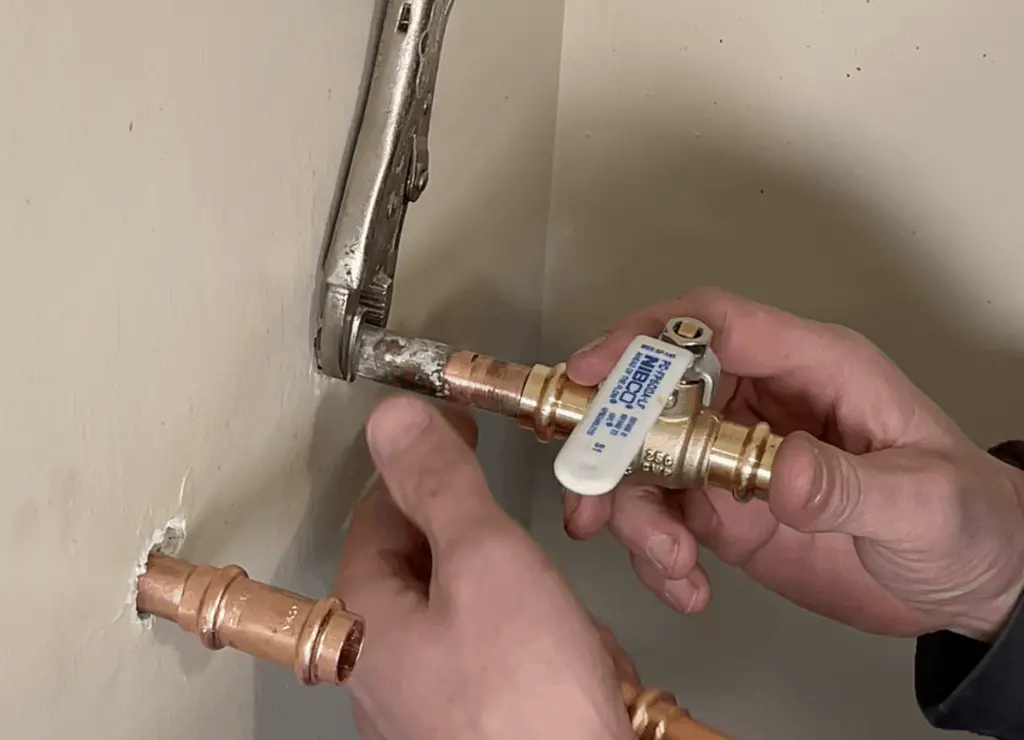
Since the ball valves don’t have a direction of flow, you can install it in either direction. I marked the 11/16” , which is the depth I needed to pass the copper pipe into the ball valve as recommended by the manufacturer. This may be smaller than other fittings. If you need help figuring out the depth, here’s a chart with fittings & depth fractions for reference.
- Slide the ball valve on the pipe. Before you crimp it on, figure out what else is going on your valve. (I made the other replacement pipe, dry fitted and confirmed it was aligned, so I knew I could crimp on the ball valve).
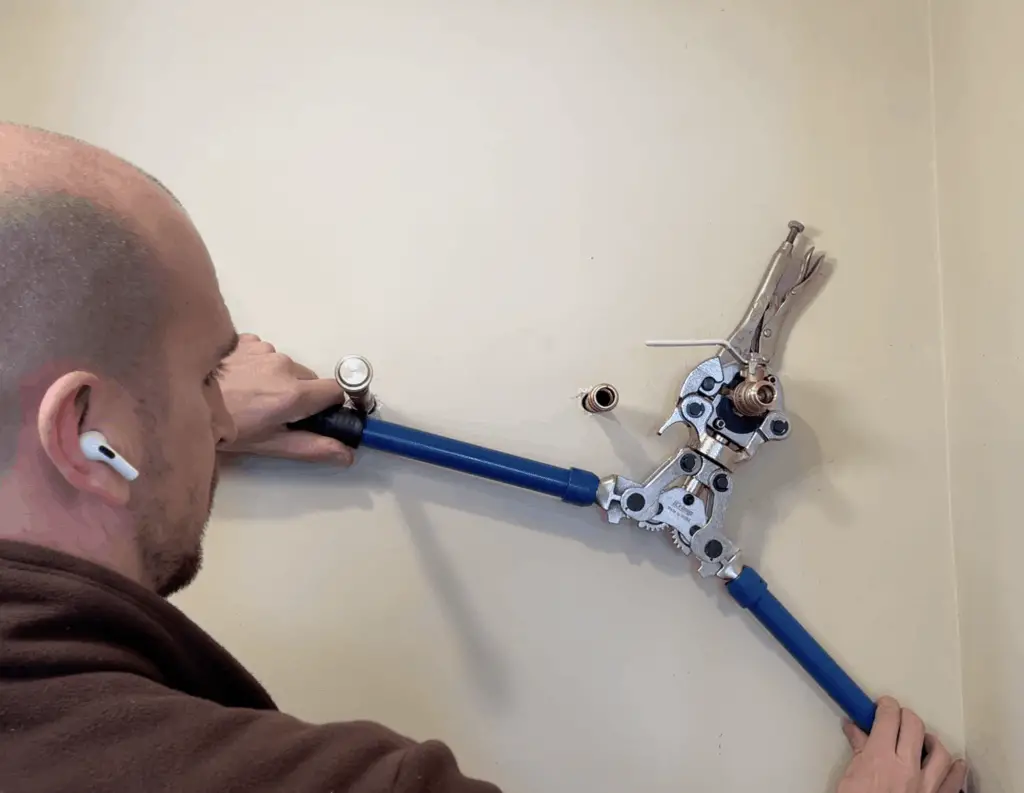
- Once you make sure everything is lined up, you need to open up the handles of the press tool to release and secure it in place. Don’t move the ball valve away from the line, so the copper pipe is still the correct depth. Then, line it up to make sure the handle is where you want it
- Apply the pressure to the handles and once the handles go over center, you know you have a complete crimp and press.
- Remove the jaws of the press tool from around the pipe
4: Finishing touches
Now I have the ball valve crimped on one side and I lined the rest of the piping up. Everything is going to the 11/16″ marked line – both on the ball valve and cold water supply to the bathroom.
I have two crimps to make: 1 on the ball valve and 1 on the coupling.
Do as much of the crimping as possible on a wide open space or work bench (like the jaw horse I used) for freedom and think through the order of operations to make the job as easy as possible.
Other Option: Soldering and Sharkbite
Another option is soldering, which is what most professionals would recommend. This process makes it easier to get the correct fittings and is overall cheaper to do.
However, soldering has a learning curve. And there are open flames, so you want to make sure you feel (very) confident and know what you’re doing.
If you don’t know how to solder and don’t want to buy a press tool like the IWISS, SharkBite is an option that’s relatively easy and accessible for DIY-ers, like me.
Notes on the IWISS press tool
I didn’t want to invest in as much money in an electric press tool, which can cost thousands of dollars. So I picked a manual one for less than $200.
- Pros: It’s more budget-friendly, rotates 90 degrees, simple to use, telescoping arms, and is overall like a fancy bolt cutter
- Cons: It wouldn’t be ideal in a tight space (crawl space, etc) because you’ll need room to apply force and get leverage on the handles. Also, it may not be worth the investment if you only will be using it for one project. Plus, it’s pretty big and requires some storage space wherever you plan on putting it
The Wrap Up
I personally like the press fittings for ease of install and the look compared to SharkBite. From a fitting perspective, I saved about $15 using Nibco instead of SharkBite. However, I did have to spend $175 for the new tool.
I also think the IWISS is a good tool to have for some plumbing projects during the year or other everyday home repair projects that you can check out on the main Youtube Channel. But I’ll leave it up to you if it’s worth the investment or not.
What are your thoughts on replacing a main water shut off valve? Would you try this? Or is this something you’d call a professional for instead? Either way, I hope this tutorial gives you some clarity about what steps you want to take next and makes you feel more empowered when it comes to taking care of your home.
Let us know your thoughts in the comments!


