
 My Account
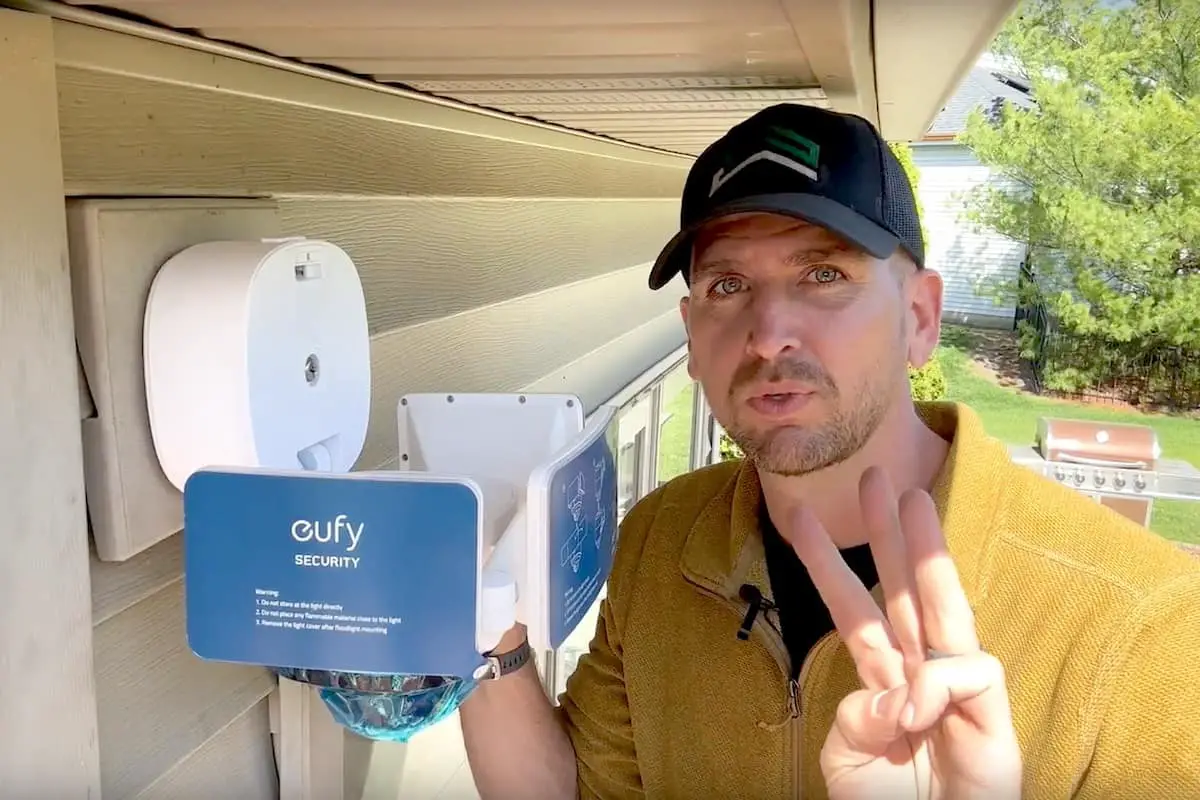
Today I’ll be showing you how to install a replacement exterior light. The concepts I’ll be covering apply to a variety of scenarios, whether you need to install simple fixtures on either side of your garage, for example, or a more sophisticated fixture that incorporates a motion sensor or even a surveillance camera.
The focus of this article is achieving a safe, long-lasting installation that is code-compliant. To that end, I’ll be addressing some mistakes commonly made by do-it-yourselfers.
How to Install an Exterior Light: Step-by-Step DIY Guide
In this step-by-step DIY guide, I’ll walk you through the process of installing an exterior light. I’ll be replacing an existing fixture with a Eufy integrated security light and 360-degree camera on a house with vinyl siding. If your home has a different type of exterior, I’ll touch on that as well.
This article is broken down into three sections that highlight common mistakes you’ll want to avoid.
Rather watch than read? Check out this 9-minute video.
DISCLAIMER: This video and description contain affiliate links, which means that if you click on one of the product links, I’ll receive a small commission.
How to Install an Exterior Light: Supplies and Tools
Supplies
- Replacement lighting fixture
- Wago 221 lever nuts (assortment pack)
- Pancake box (if missing)
Tools
- Non-contact voltage tester
- Wire strippers (I prefer Knipex)
- Screwdriver or impact driver
How to Install an Exterior Light Tip #1: Use a Proper Mounting Surface
The first element in a proper exterior light installation is a flat mounting surface.
Most fixtures come with a gasket that goes between the fixture and the mounting surface. A flat surface is necessary for the gasket to do its job of keeping moisture and debris out of the junction box.
The house in this demo has classic double 4-inch vinyl siding. This is the most common type of siding that you’ll see on any modern home. The surface isn’t flat, however. Whether you have vinyl siding, cedar siding, or wood siding, you’re going to need a mounting block.
This vinyl mounting block is about 7 inches square. That’s a good amount of surface area. The base of most lighting fixtures will easily fit on a mounting block this size.
How to Install an Exterior Light Tip #2: Use an Electrical Box
SAFETY NOTES: Before starting any electrical project, you’ll want to cut the power to the circuit. You should also check the electrical codes for your area. These vary from state to state and even from city to city, so it’s wise to be diligent with regard to this.
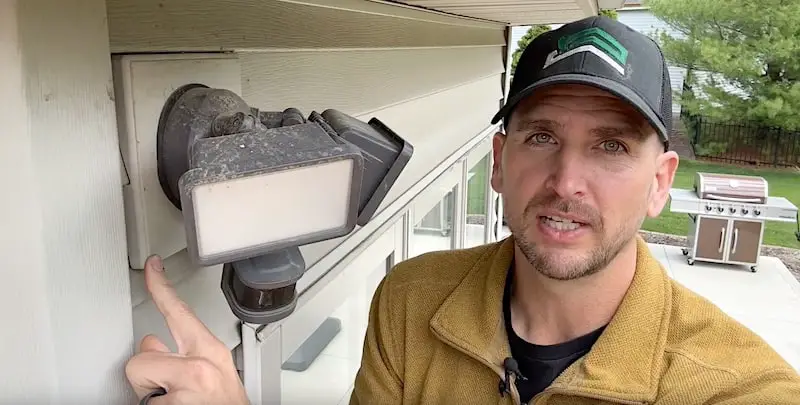
I’m going to remove the old light fixture and then use my non-contact voltage tester to make sure no electrical current is flowing.
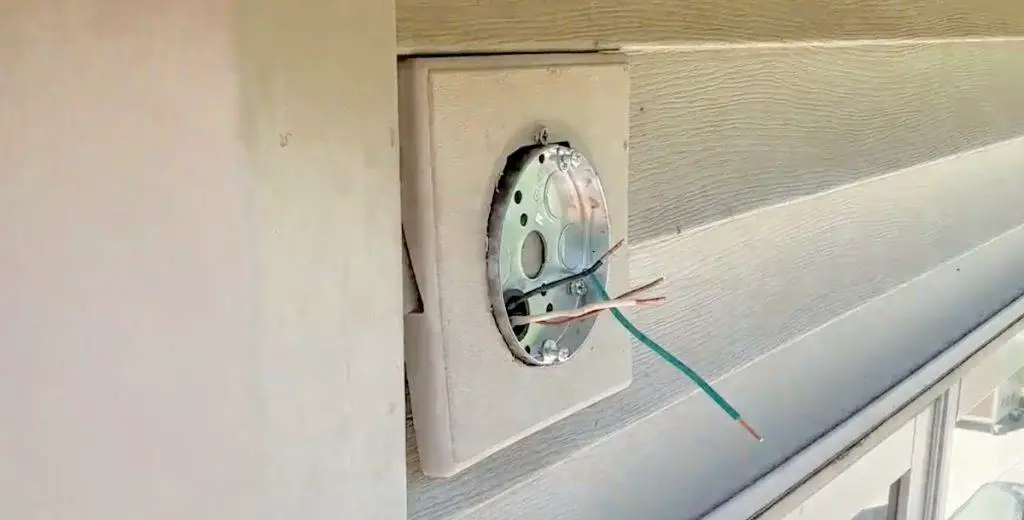
Now that the fixture has been removed, you can see that there is no junction box in here. This is a violation of electrical code.
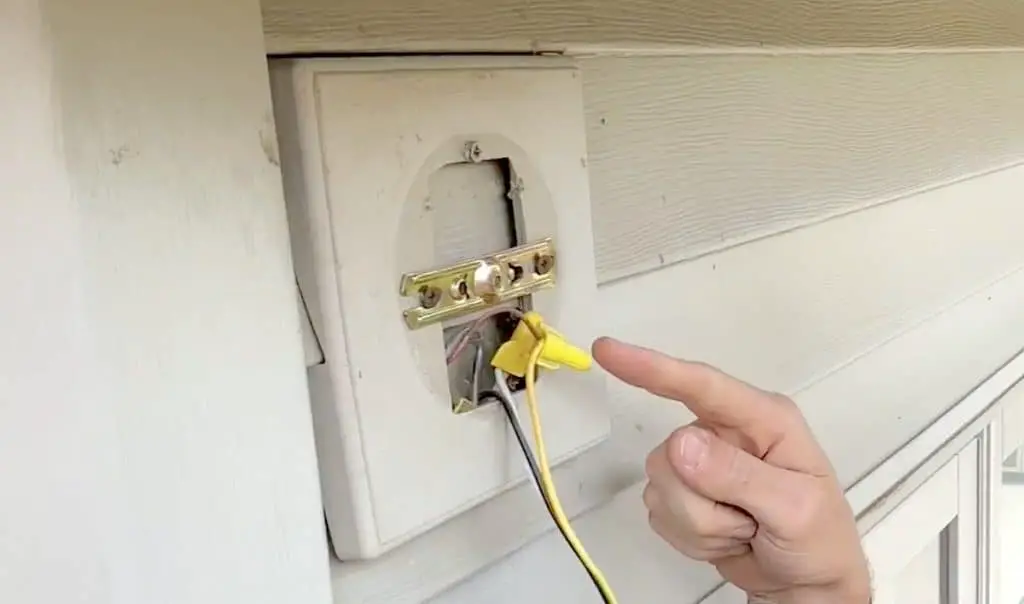
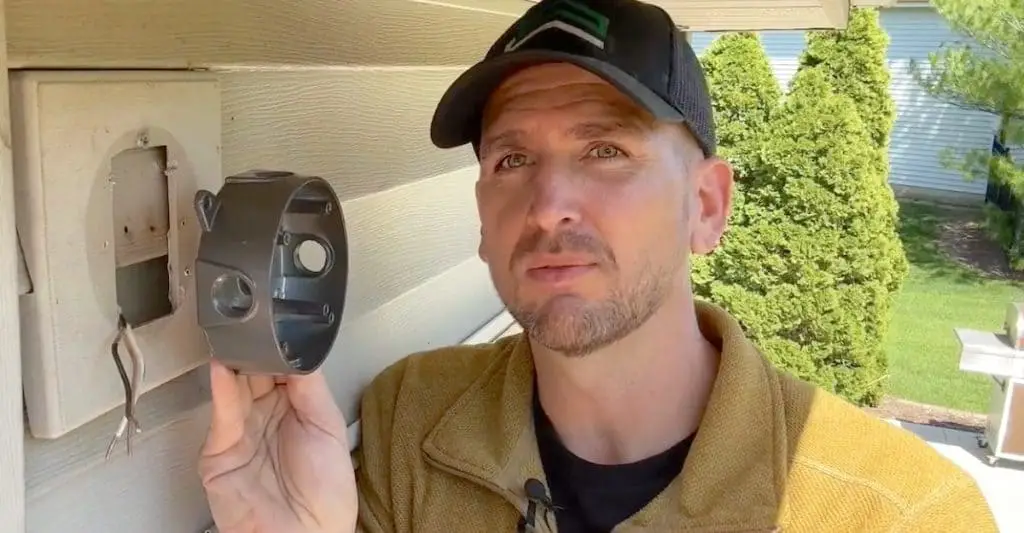
To meet code, electrical connections must be housed in a junction box, so the first thing we’re going to do is install a pancake box. A pancake box is only 5/8 of an inch thick and four inches in diameter.
I’ll first remove the bracket, then undo the wire nuts so that I can detach the old fixture.
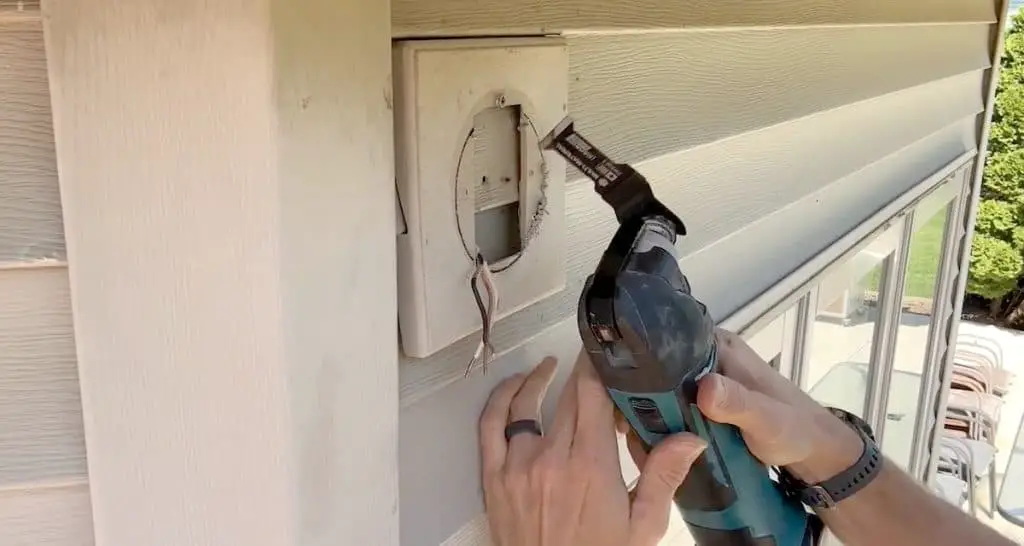
Next, I’ll cut out a circular section of the mounting block to accommodate the pancake box. I’ll use the pancake box as a template and mark with a Sharpie the area to be cut away. With an oscillating tool, I’ll take my time and carefully cut away the necessary sections of the mounting block.
Once my hole is cut, I’ll pull the Romex through the pancake box, using the plastic insert in the opening of the box to protect the incoming wires.
Then I’ll sink two screws to secure the box to the sheathing of the house, getting it as close to flush as possible with the mounting plate.
Installing an Exterior Light on Brick
If you have brick on the exterior of your home, you might want to turn to an exterior box such as this:
This type of exterior box mounts right onto the brick. (You’ll need to drill holes into the brick to fasten it.) You will have a bit of an offset when you mount the fixture to the box but they do come in a variety of colors, which will reduce the visibility of the box.
How to Install an Exterior Light: When You Get Past Your Comfort Level
Sometimes we jump into these DIY electrical projects and then reach a point where we get past our comfort level. Sometimes we just don’t have the time to tackle a project. I totally get it.
If you feel you need to hire a professional, we’ve put together a couple of resources that could be useful. The first is a cost guide to help you estimate the cost of having a pro install your exterior light. The second is an online referral platform to help you locate and screen electricians in your area.
How to Install an Exterior Light Tip #3: Use Lever Nuts Instead of Wire Nuts
Using lever nuts instead of wire nuts to make your wiring connections can help you avoid a variety of problems when installing an exterior light (or a vanity light or ceiling fan). When you’re up a ladder and juggling a somewhat bulky object, lever nuts make the job of connecting wires a lot easier. They also give you a safer connection, especially if you don’t have a lot of experience with electrical work.
Connecting the Wires
The first step in connecting the wires is to bond the ground from my Romex to the pancake box. To do this, I first secured a short piece of green ground wire (about 6 inches long) to the grounding screw in the box. I then connected this short piece to the ground wire coming from my Romex with a Wago 221 3-pin lever nut.
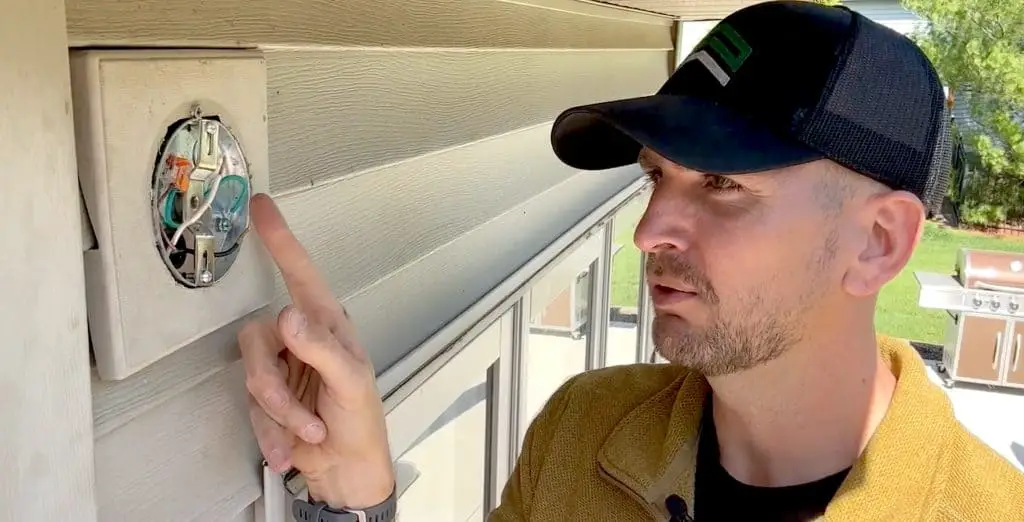
Note that the Wago 221 that I’m using for the ground connection has three chambers. The third one will house the ground wire coming from the fixture.
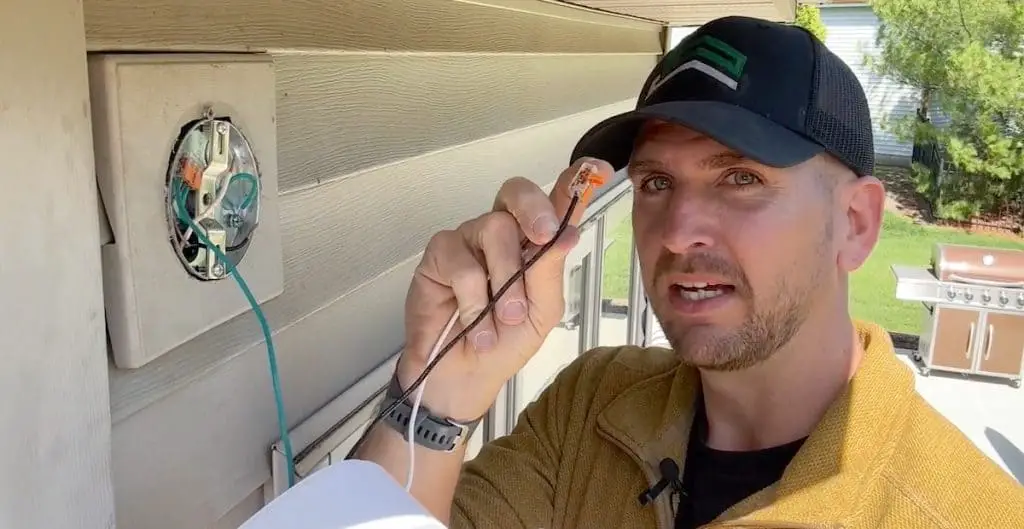
Before I climb up the ladder to mount the light, I’ll connect Wago 221 lever nuts (2-pin in this case, to save a little space) to the hot and neutral wires on the fixture itself. I’ll also open the lever on the chamber that will receive the corresponding wire from the Romex. This way, I’m not fiddling with anything while I’m on the ladder.
To finish the ground wire connection, I’ll insert the ground coming from the fixture into the third (and empty) chamber of the Wago lever nut already inside the pancake box. Looking through the transparent housing, I can see that the stripped end of the wire goes all the way in. Then I’ll close the lever, and do a little pull test to make sure it’s securely seated, and my ground connection is complete.
To connect the hot wires, I’ll insert the hot coming from my Romex into the Wago lever nut attached to the hot coming from the fixture and close the lever. To connect the neutrals, I’ll repeat the procedure with the neutral wires.

After connecting the hots and neutrals, I’ll do the usual pull tests to make sure the wires are securely seated inside the Wagos.
A NOTE ABOUT WAGO LEVER NUTS: For this kind of application, I think these Wago lever nuts really shine. I highly recommend them. They come in 2-wire, 3-wire, and 5-wire configurations. If you need a quick reference to purchase them, you can find them in the Electrical section of our Amazon store.
Mounting the Fixture
Now that I’ve made all the wiring connections, I’ll push everything into the pancake box. This can take a little doing; there’s not a lot of room inside the box but do take care to ensure all the wires and connectors are contained within it.
The last step is to secure the fixture to the box. My Eufy security light and surveillance camera mounts with just one bolt in the center.
And that’s it! The installation of my exterior light is complete and I resolved both existing and potential issues in a few simple steps.
Tutorial on DIY Electrical Basics
If you feel you need to dive a little deeper into the fundamentals of electrical work, check out our tutorial that walks you through the basics of installing an electrical outlet. This beginner’s guide covers all the essentials: the tools you’ll need, common domestic wiring scenarios, how to choose a receptacle, and best practices for safe installations.
Please have a look at the Electrical & Lighting section of the website for a variety of posts. You’ll find guides containing step-by-step details for popular DIY projects as well as informational articles to boost your knowledge.
To Leave Comments and Questions
If something doesn’t make sense or if your situation is a little different, please leave a comment under the YouTube video. I check the comments on a daily basis and am happy to help out.
Subscribe to our channel! We have weekly videos coming out to help you with your everyday home repairs.
Thanks for stopping by! We’ll catch you on the next one.


