
 My Account
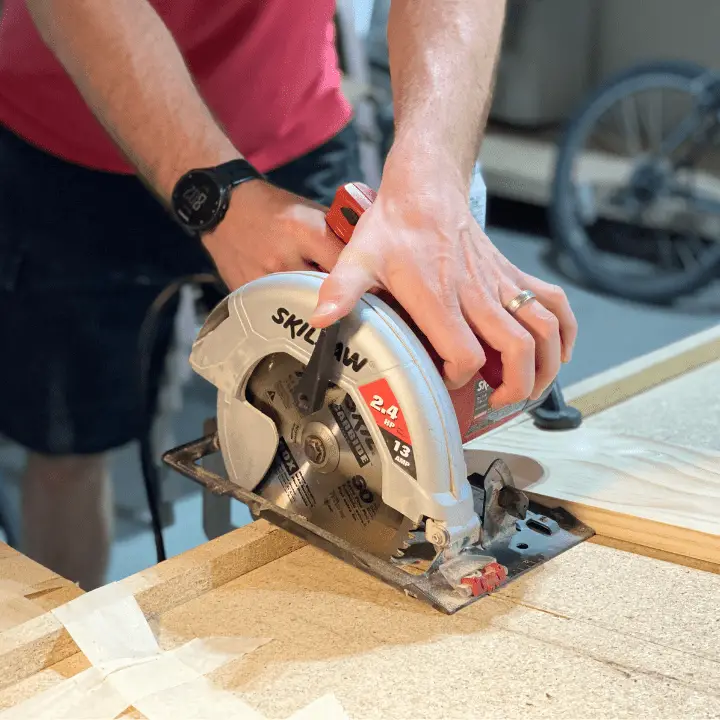
Manufactured laminate countertops commonly come in standard 6, 8, and 10-foot lengths. Because they’re readily available at most home centers, they’re also a favorite of do-it-yourselfers. The problem is: you rarely need a countertop that’s 6, 8, or 10 feet long exactly.
Countertops often include a wrapped front (or “bullnosed”) edge and an integrated backsplash, which can pose some challenges to achieving a clean and straight cut with normal cutting tools like a circular saw. In this article, we’ll review a simple technique, along with a few tips that’ll help you achieve a professional-looking result. All you need is a little careful planning – no special tools needed.
Rather watch than read? Check out this 9-minute video
Tools and Materials Needed:
- Skilsaw
- 60-Tooth General Purpose Blade
- C-Clamps
- Bar/Quick Clamps
- Speed Square
- Framing Square
- Tape Measure
- Blue Painter’s Tape
- Material for Saw Guide (Lumber, Level, Straight-Edge)
Expected Costs:
Sections of laminate countertop can vary widely in cost based on size, style, and other factors. Expect to pay as little as $100 (or even less). Usually, your best bet for saving money is to pick from the instock selection of countertops at your local home improvement store. However, cutting it should take no special skills or tools other than the ones listed above.
DISCLAIMER: This blog contains affiliate links, which means that if you click on one of the product links, I’ll receive a small commission.
How to Cut a Laminate Countertop in 3 Steps
Step 1: Measure and Mark the Laminate Countertop
Set the countertop down, laminate side up, using sawhorses or a large enough work surface on which to easily maneuver it. Make sure it’s at a comfortable working height before you begin.
Next, measure and mark at least three points across the width of the counter. This will guide the placement of a strip of blue painter’s tape along the cut. Final markings will be made on the underside of the counter later, so these don’t need to be exactly perfect just yet.

Now lay a strip of tape – wider is better – along the cut line, straddling the marks you’ve just made. Try to keep the tape centered to ensure the tape covers both sides of the eventual cut line. Then, press it firmly into place.

The purpose of the tape is not for marking, but rather to protect the laminate surface from being chipped by the saw during the cut. This is what ensures a nice, clean, professional edge.
With the tape in place, flip the counter over so that the underside is facing up. Measure again and mark the underside carefully.

Using a large framing square, you can now easily transfer your marked point into a perpendicular line to mark the cut. Next, a small speed square can be used to extend that line up and around the shorter edges and rear of the backsplash.

Use a large framing square to transfer the mark into a straight, square line.
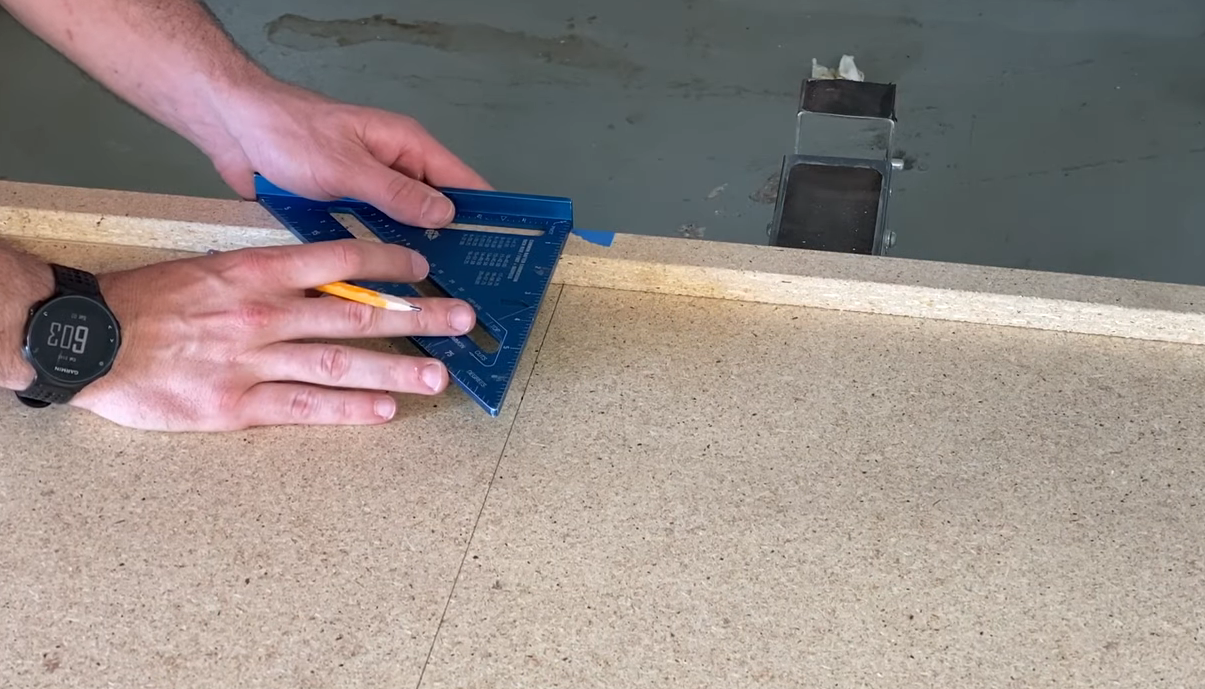
Use a small speed square to transfer the line to the shorter segments and backsplash..
Step 2: Line-Up Saw and Set Guides
With the saw raised to its maximum height and the guide in place, carefully line up the saw at the beginning of the cut. You want to ensure the blade is in line with the cut mark. Once lined up, mindfully place and clamp down the scrap length of wood (straight-edge, or level) so that it’s positioned flush against the saw guide.

Now slide the saw up to the opposite end of the cut line and repeat, lining up the other end of the wood/straight-edge with the saw and cut line, before clamping securely in place. Once fully clamped, slide the saw (with blade raised) flush against the wood/straight-edge to be certain the blade follows the line for the entire length of the cut.

Using a small wooden block or another scrap with a straight edge, continue the guide along the back of the backsplash clamping it in place. Again, slide the saw along the guide to ensure the blade remains in line with the cut along the backsplash and adjust as necessary.

In order to keep the cut clean, you’ll need to make sure that the waste piece is supported, so that gravity doesn’t pull it to the floor as the saw reaches the end of the cut. This would likely twist and break the last of the cut leaving damage to the edge laminate surface and/or substrate.
If you don’t have someone to help you by holding and supporting the countertop end, you can support it with another sawhorse or similar, shimmed to the same height as the rest of the countertop. To keep vibration movement to a minimum, it’s helpful to clamp or tape the loose waste end of the countertop in place, depending on its size.

Pro Tip: Before making the cut, slide the saw along the full path of the cut line. Make sure there are no obstructions, like a clamp in the way. Adjust as necessary before proceeding.
Step 3: Make the Cut On the Laminate Countertop
Beginning from the front edge of the countertop, carefully start the cut. Keep the saw straight and flush against the guide. Move slowly and steadily to avoid binding the saw or causing unnecessary damage or chipping.

Be particularly careful making the transition around to the backsplash. Rotate the saw carefully. Take your time as the saw may become more awkward to hold and operate upside-down.

Finally, flip the countertop over and peel off the tape to reveal what should be a straight and clean cut with no damage to the top surface of the laminate.

The Wrap Up: Tips and Lessons Learned
Standard dimensional lumber like 2x4s can pose a couple of problems when attempting to use it as guide material for this project. First, it can have significant variance from straight and true, being twisted, bowed, or warped, and second, it can be too thick and end up impeding the saw.

If the guide isn’t straight, the saw can become bound up while cutting and result in an edge that isn’t straight. If it’s too thick, it could bump into the motor housing or blade guard on the saw and prevent it from lowering fully to make the cut.
To prevent this, it’s best to use select/finish boards of smaller dimension where possible such as a 1×6. These tend to be more square/true and thin enough to allow the saw to pass over them. Another option: use something like a metal straight-edge or a long aluminum level – again as long as the saw can clear it.
If you only needed to cut your countertop for length, then you’re done. If you still have more to do, we can help with that too. Check out our article on cutting a sink opening.


