
 My Account
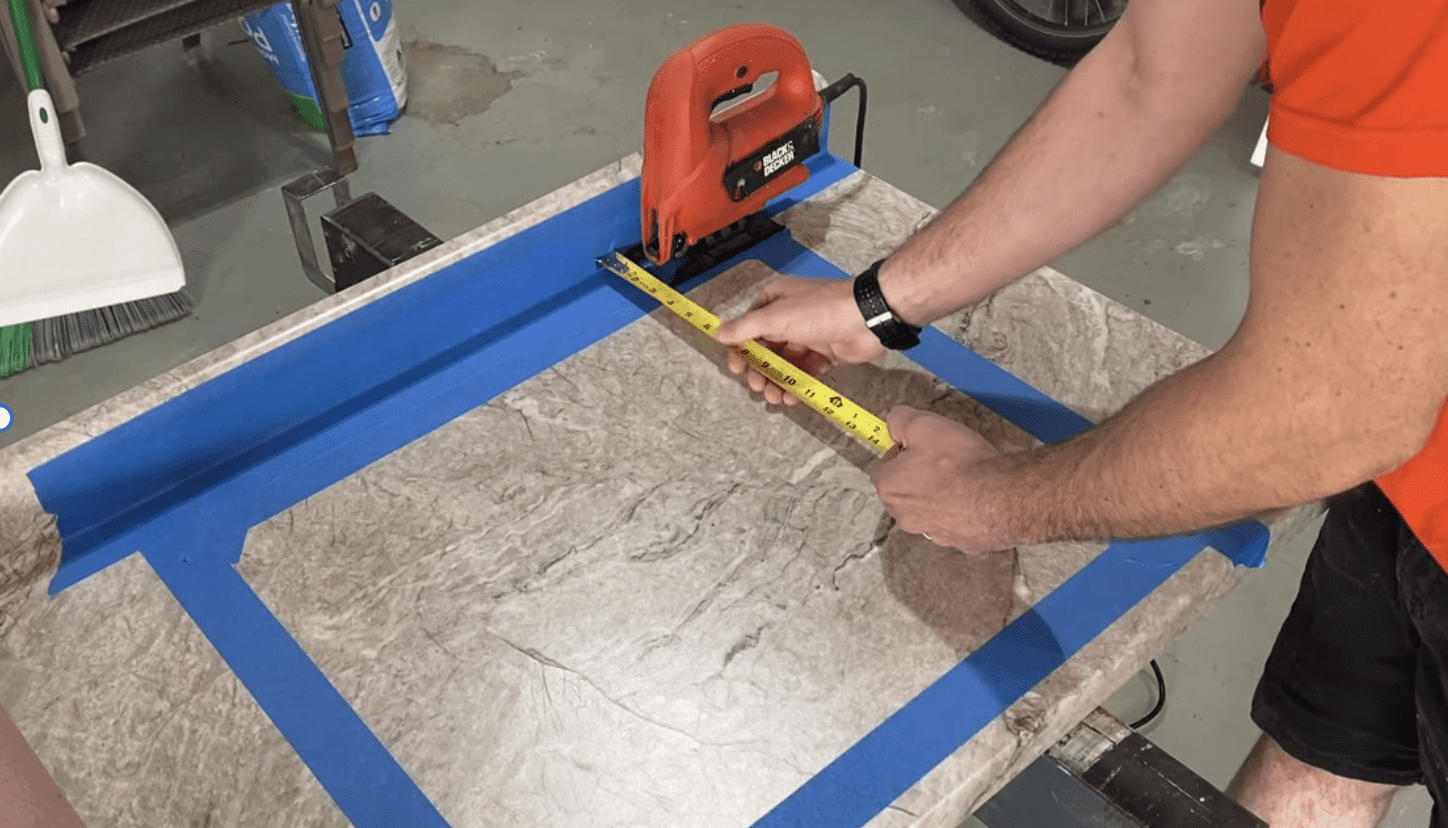
Among the many smaller jobs we can do to give our kitchens a visual facelift, updating the countertops should be near the top of the list. With a wide selection of laminate countertop options at home improvement stores in convenient lengths, this is a very approachable DIY project.
In another article, we cover cutting a laminate countertop to length. But since most kitchens have sinks, there’s at least one additional cut you’re likely to have to make. In this article, we’re covering the how-to, whether you’re reusing your existing sink or installing a new one.
Rather watch than read? Check out this 8-minute video
Tools and Materials Needed:
- Framing Square
- Tape Measure
- Blue Painter’s Tape
- Pencil
- Fine Point Permanent Marker
- Cordless Drill with Bits
- Jigsaw with Blades
- Template for Sink Opening (or paper/carboard to make one)
- Scrap wood wider than the sink opening
- Screws
Expected Costs: Of course, new sinks and countertops can vary widely in cost based on material, size, style, etc. Expect to pay as little as $100 (or less), and as much as $300 (or more) for a new countertop slab. However, cutting an opening should take no special skills or tools other than those listed above.
DISCLAIMER: This blog contains affiliate links, which means that if you click on one of the product links, I’ll receive a small commission.
How to Cut a Sink Opening in a Laminate Countertop – 3 Steps
Step 1: Create a Template
Most new sinks come with a paper template of the rough opening. But if you’ll be reusing an existing sink and don’t have a template, you’ll need to make one. The existing sink opening in the old countertop can be traced or transferred to a piece of paper or cardboard in many ways.
In some cases, you may be able to place the old counter on a work surface, flush on top of the paper or cardboard to trace. For me, I went with what I thought was the simplest and best solution which could be done at any time (before or after the old counter has been removed).
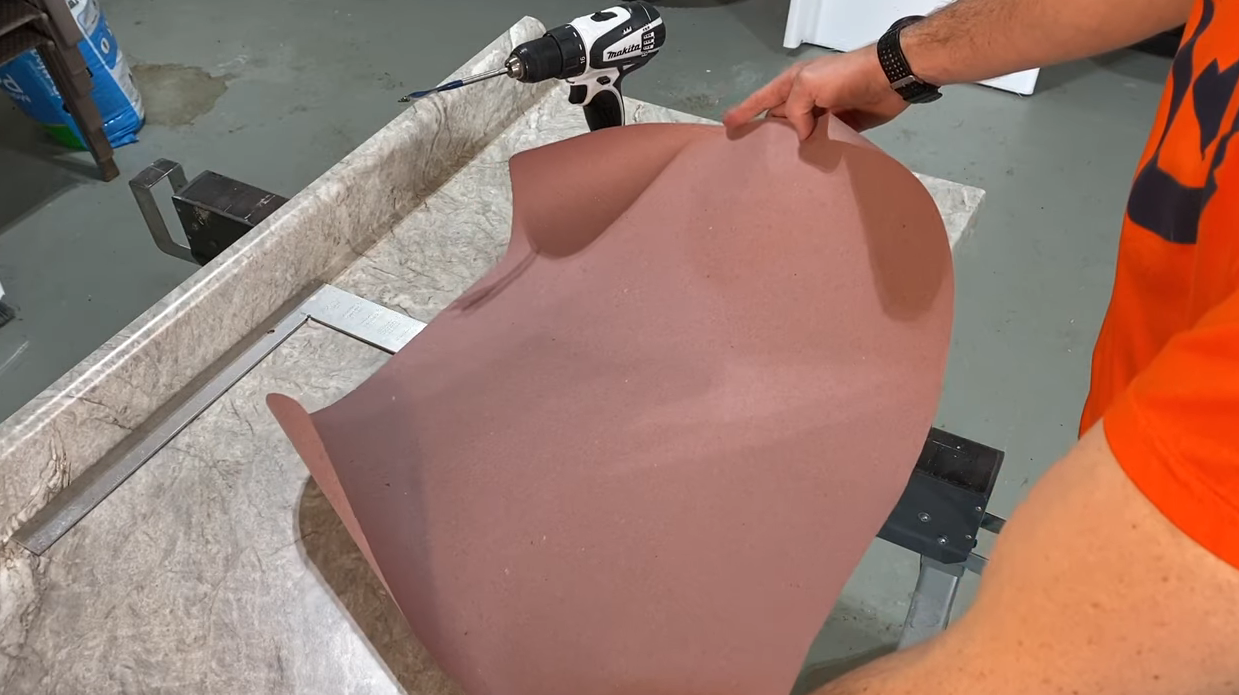
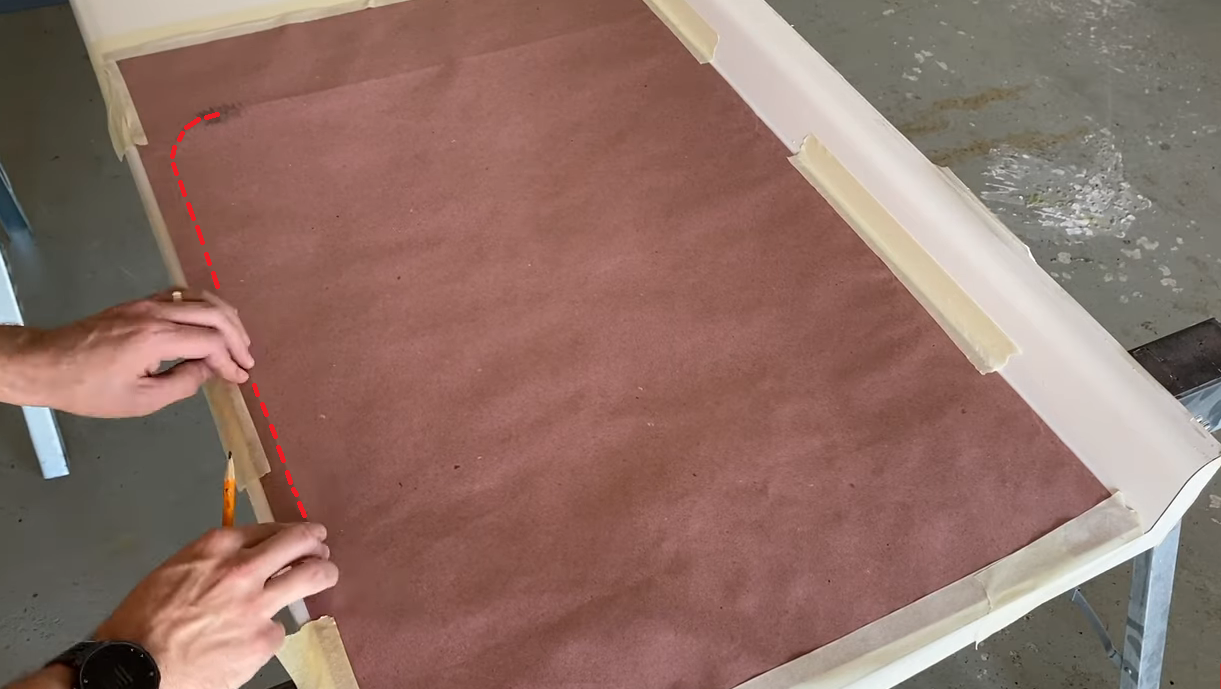
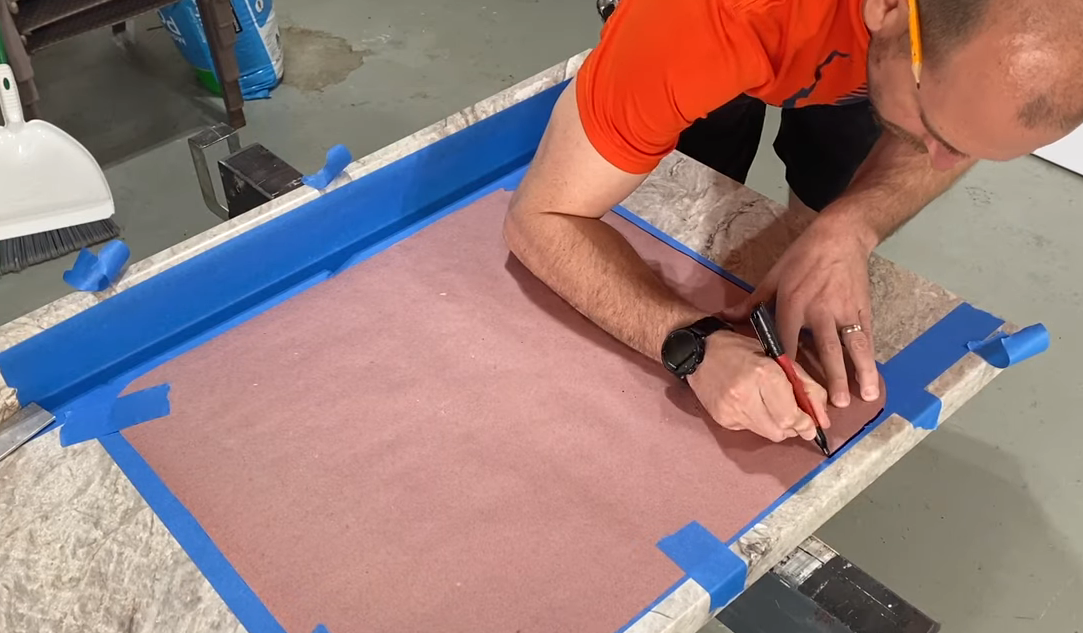
I’m using a piece of leftover rosin paper from another project. But any strong paper should work, just avoid anything thin or fragile like newspaper.
Cut the paper a little larger than the sink opening and secure it in place over the hole. Fasten it with pieces of tape at the corners and along the edges. Then, run a finger carefully but firmly along the edge of the opening. Press gently through the paper so the hard edge of the counter forms a crease, leaving a distinct line. That way, you can easily cut it with scissors or a utility knife.
Step 2: Measure, Mark and Prepare the Countertop
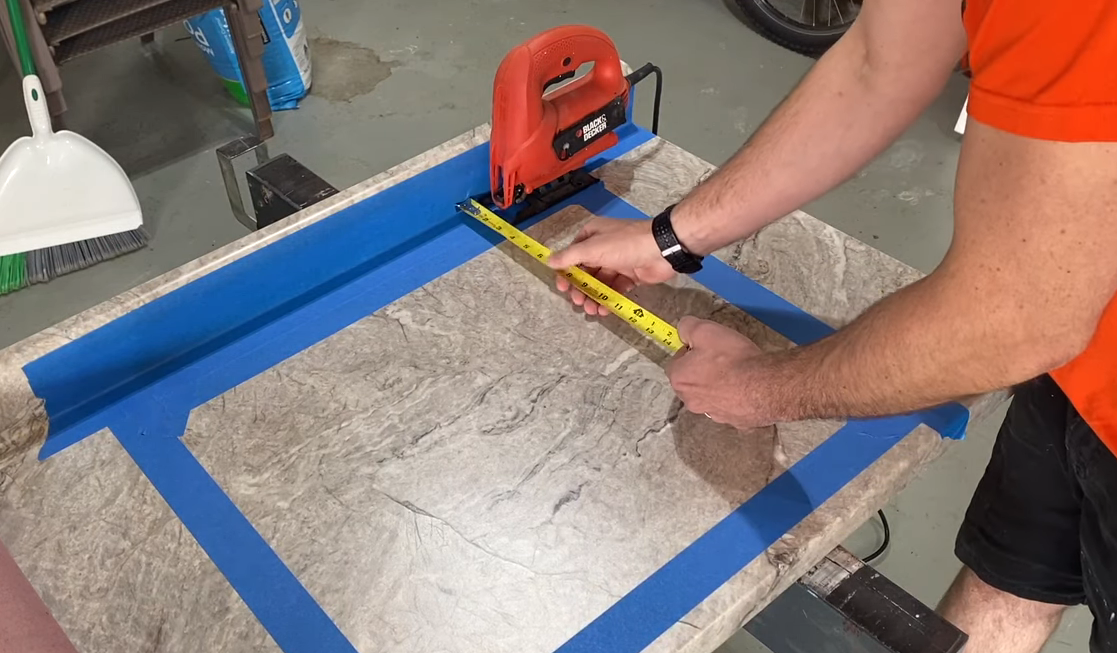
With your template cut, now proceed to measuring. Layout rough marks for the front, rear, and sides of your sink opening, based on the size and desired position of your sink.
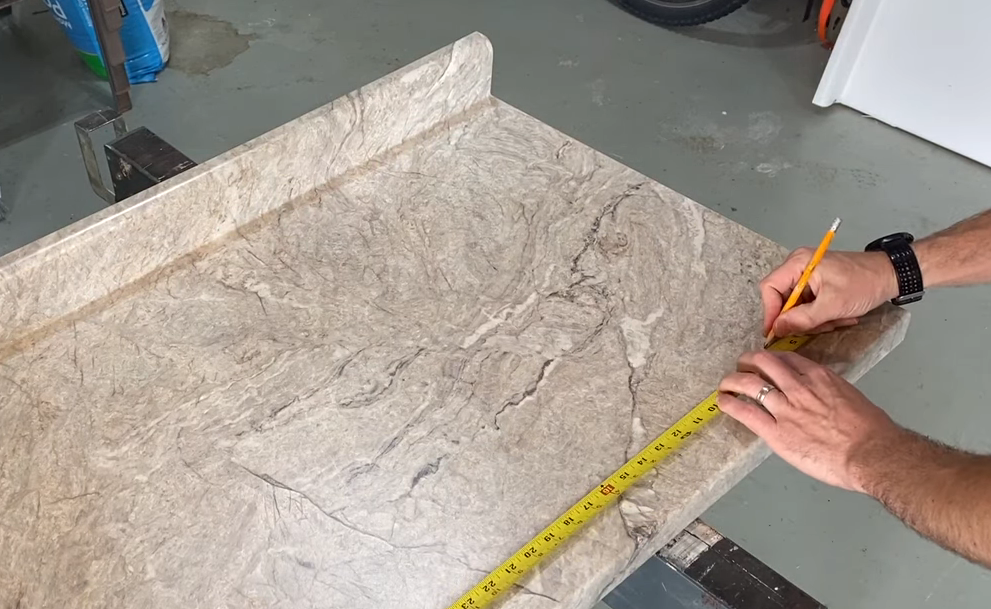
Pro Tip: When laying out the sink opening, be sure to account for the finished dimensions of the lip that sits on top of the counter. For example, if the opening is placed too far forward or back, the lip could overhang the front of the counter or not have enough clearance against the backsplash to sit flush.
Next, using blue painter’s tape, cover the surface of the counter along all cut lines, keeping the cut centered on the tape as best as possible. Add extra tape as needed, especially around corner radii where the saw will turn, along the backsplash, and anywhere else that the saw may otherwise cause damage to the surface as you’re cutting.
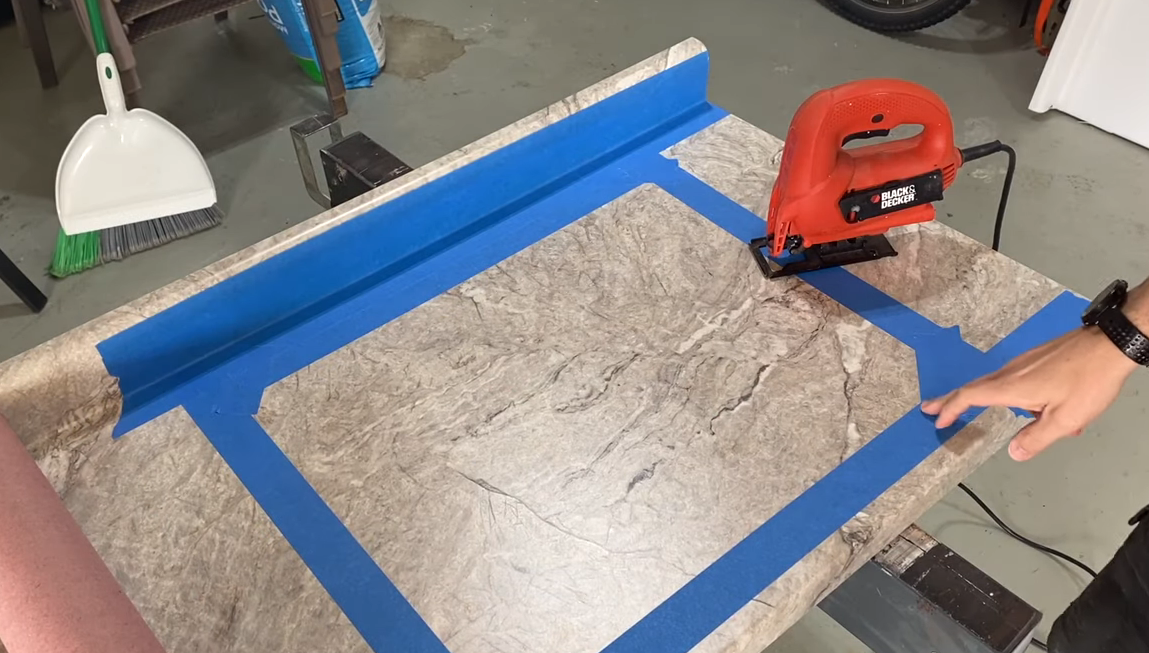
Finally, you can place your template over the measured opening. Using a framing square, make sure the opening will be square to the front, rear and side edges of the countertop. Then, fasten it down with a few pieces of tape. Trace the template onto the blue tape with a fine point permanent marker before removing it.
Pro Tip: Before proceeding to the cut, confirm that your saw will clear any potential obstructions along the cut’s path and adjust as needed. For example, be certain the back of the opening isn’t too close to the backsplash for the saw to fit.
Step 3: Make the Cut
As a starting point for the jigsaw, a pilot hole will need to be drilled. This is best done with a “spade” bit, which allows you to see where the edge of the finished hole will be. And it lets you place it right up against and inside of the cut line at a corner.

The blade you use is an important factor to consider. Most general-purpose jigsaw blades have fewer and more-aggressive upward-facing teeth that will easily damage the laminate surface. Instead, use a finer blade designed for laminate with more numerous and parallel-facing teeth. This will cut more smoothly and minimize the chance of damage to the laminate surface.

With the countertop supported on tables or sawhorses (or otherwise with nothing beneath the opening), you can begin cutting from the pilot hole. Move slowly and follow the line carefully. Start and stop as needed to keep the cut smooth and accurate.


As you move through the cut, it’s important to keep the piece of waste material being cut away supported. If it’s allowed to fall through as the cut finishes, it can splinter, chip, or damage either the laminate or the substrate material or both.
Support can be accomplished with just a couple of pieces of scrap wood screwed down into the waste piece, as long as the wood is long enough to overhang the edge of the opening and keep the waste in place. Consider placement of support carefully so you don’t create further obstacles where you still need to cut.

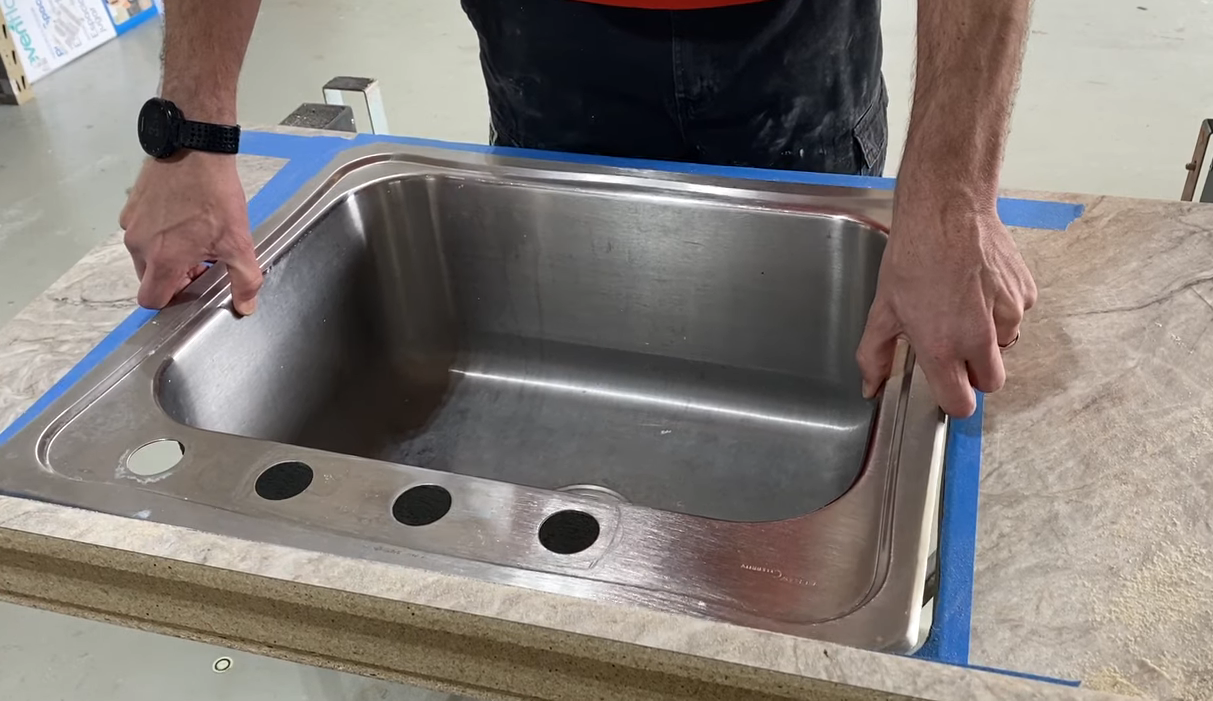
With the cut complete, carefully lift the waste piece out of the opening and drop in the sink to test fit, leaving the tape in place just in case any additional cutting is necessary. Once the fit is good, peel away the tape revealing a smooth and professional cut!
The Wrap Up + Additional Tips
Of course, this article is in the context of a sink opening. That said, you can use the same principles to cut similar openings for other items such as drop-in cooktops or downdraft vent hoods. There are, however, a few things to consider when undertaking this or any similar project:
- Working on plumbing or wiring for appliances/sinks? Turn the water/power off first!
- Take “before” pictures of any plumbing or electrical installations before you break connections or disassemble them. That way, there won’t be confusion when it comes time to reconnect and reassemble them later.
- In any situation where you are removing a sink and the drain tap, block the open drain to prevent dangerous sewer gases from entering your living space while you work. You can do this with reusable drain closure plugs available at home centers or improvised using a wad of plastic wrap or a damp rag.
Unless you’re really lucky, you’ll probably have to make more cuts when installing a laminate countertop. Check out our article on how to cut a laminate countertop for length.


