
 My Account
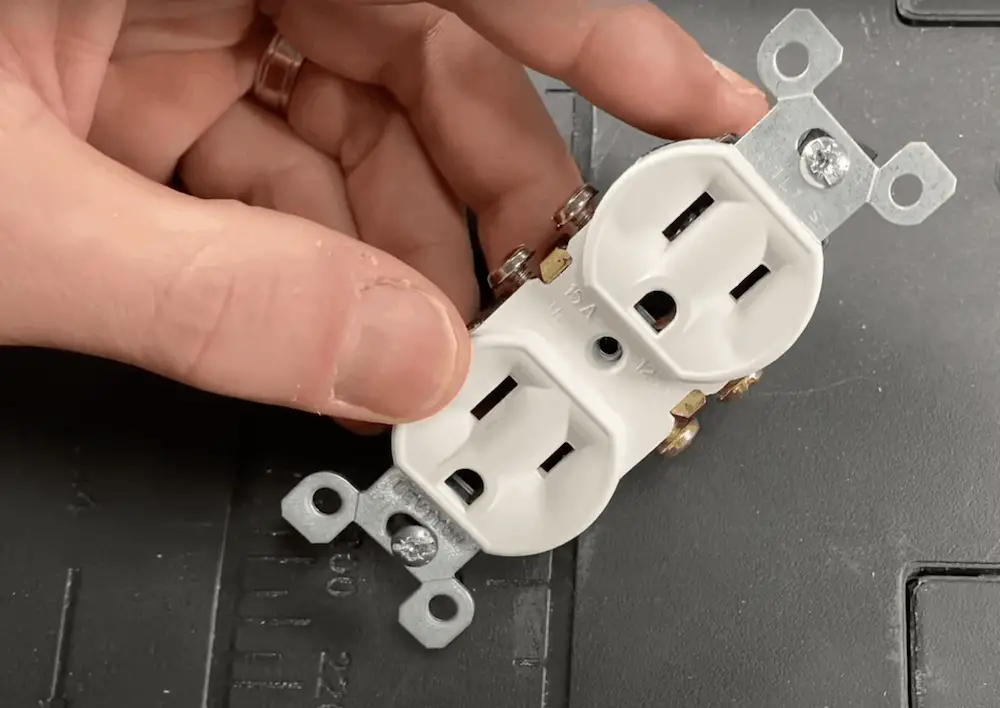
Whether you’re a new homeowner or you need a refresher – this blog will help you get more acquainted with your outlets. Plus, you’ll learn how to wire an outlet in four simple steps. I’ll also mention some common issues that people run into when they’re wiring a standard electrical outlet or switched outlet- in case you’re struggling with something specific.
**But before you do any wiring, make sure you cut power to the box by hitting your circuit breaker or pulling the fuse. This will ensure you keep yourself and your home safe.**
Rather watch than read? Check out this 9-minute video below!
Tools:
- Klein Voltage Tester (I’ve had this one for years. It’s awesome because it has a small light which comes in handy when you’re cutting power and lights.)
- Klein Tools Outlet Tester
- Wire Strippers
DISCLAIMER: This blog contains affiliate links, which means that if you click on one of the product links, I’ll receive a small commission.
Outlets 101
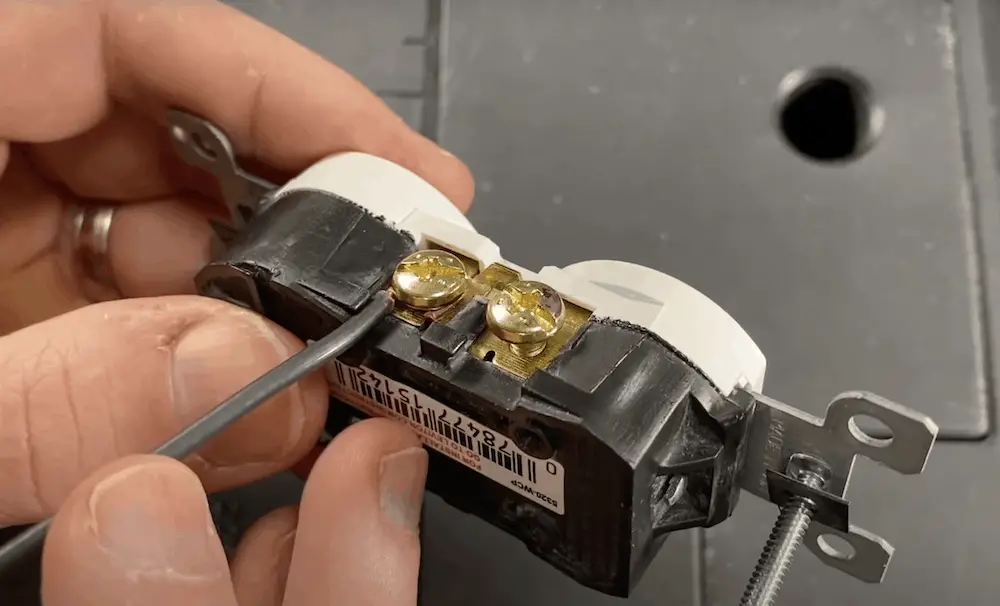
- The first side is the “hot” side. This will be denoted by the brass (gold) screw terminals. You’ll notice black is the predominant wire color for hot. But if it’s a switched outlet/receptacle, you might also see red coming into the side.
- On the other side, you’ll see silver and green. Silver goes to your white or neutral wire, and then your common wire will go to your green.
How do you know if you’re dealing with a switched outlet?
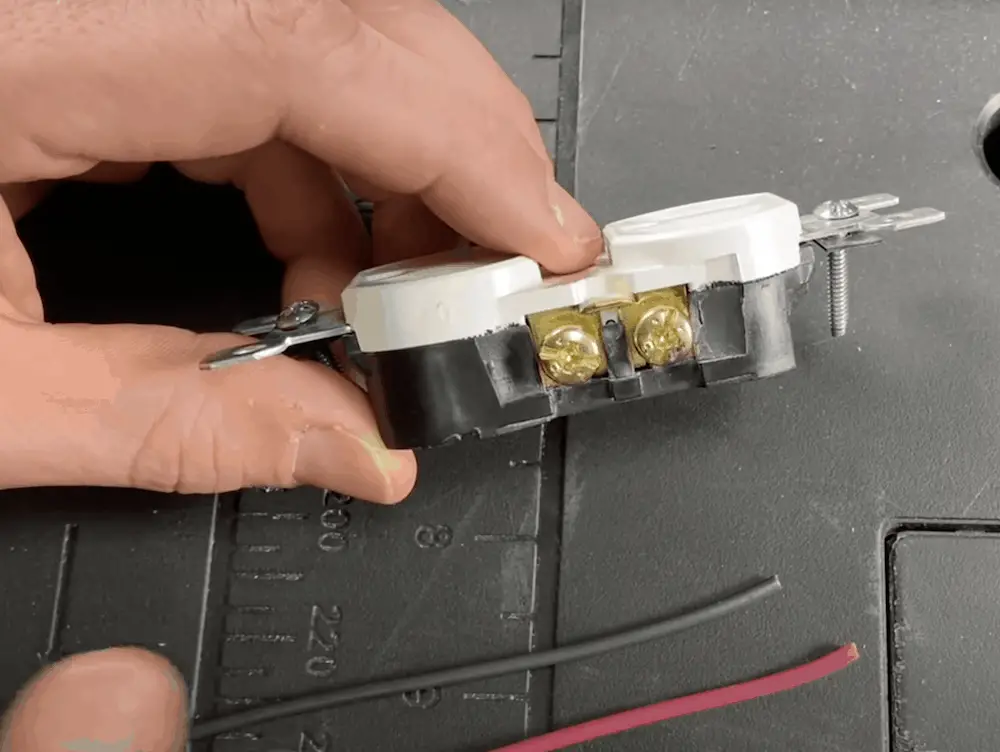
A switched outlet means either the top or bottom outlet can be turned on or off by a light switch. It is common with homes built in the 1960’s and 1970’s where lighting fixtured were not installed overhead.
In this case, you’ll need to remove the little tab connector (seen in the picture above) with needle-nose pliers from the hot side. From here, you’ll wire in black to one side – always hot – and red (or black or yellow) coming from your switch to the other side. Then, they will independently operate.
All that said, for the majority of outlets you will just leave the middle tab in place as both the top and bottom of the duplex outlet will always be powered.
How to wire an outlet: 4 Steps
Step 1: Find out how much insulation to strip from the wire
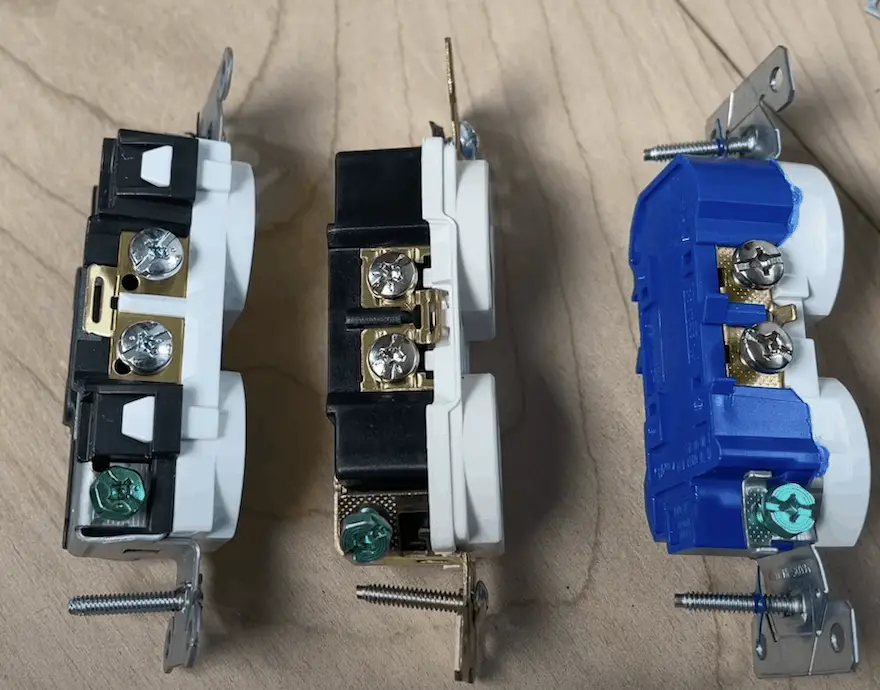
I often notice inconsistencies in how much insulation people strip from the wire before they connect to the screw terminals. Most outlets come with push pins, where you could strip the insulation and press the copper into the outlet. This is called “speed wiring,” usually only meant for 14-gauge wire, and I don’t recommend this wiring method. In fact, it might go against code depending on your area. So it’s always recommended to go to the screw terminals “side wiring” or if you are using a commercial-grade outlet you might have a feature called “back wiring” which is my favorite wiring method for DIYers
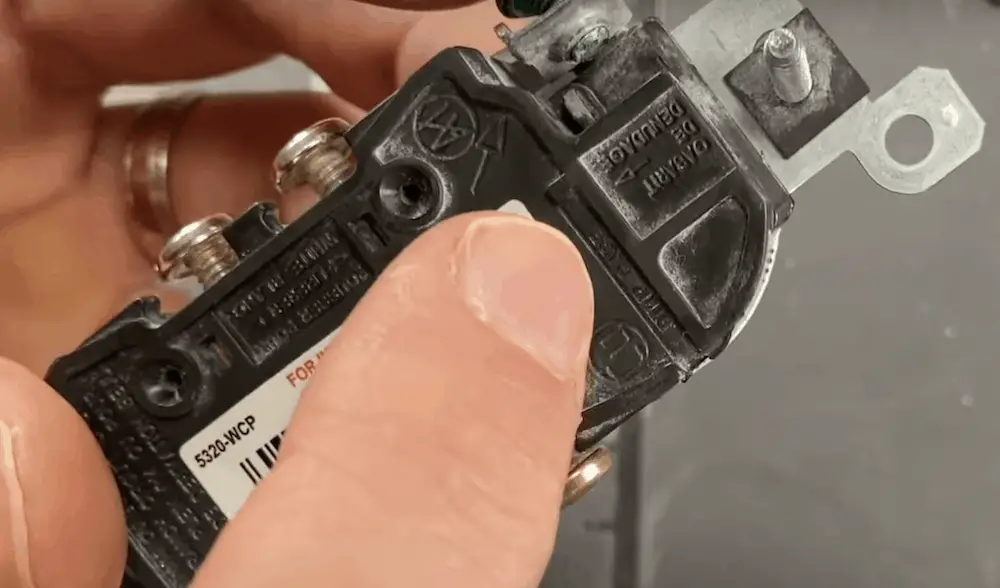
There is a strip gauge built into pretty much any outlet that you’ll see. Strip gauges are a guide to be used for “speed wiring” and “back wiring.” If you are “side wiring” like in this example you will actually want to strip a bit more for proper installation.
Step 2: Get a loop for your screw terminal

There are two different ways to get a nice loop that’s the appropriate size for the screw terminal. If you do have the wire strippers you can pass the copper just through this hole here and then wrap that around the outside and that’s going to give you a nice loop ( go to @4:40 in the video). Or another way, if you don’t have the wire strippers, is you can take needlenose pliers, grip the copper wire and just wrap it around the pliers to get your loop (@4:49 in the video).
Step 3: Secure the terminal
Now, with the wire and the loop, go ahead and place it around the screw terminal and then set it against the little retainer that holds that insulation well. Once you set that against the retainer and then go ahead and secure the terminal.
Pro Tip: You Should always have your hook wrapped in the clockwise direction. This will pull the wire in as you tighten the terminal.
Step 4: Check your work
The goal: the wire will be secured against the retainer and you’ll have copper all the way around connected to the brass terminal with no insulation between the terminal and the bottom brass piece.

Above is an example of a basic circuit:
- We have our hot wire connected to the brass screw terminals – if it’s a basic circuit it does not matter if it’s top or bottom.
- The neutral is connected up to the silver and then ground.
- There’s no wire that’s pushed up and we have a nice connection all the way around
- We have no insulation interfering with the screw terminal, the wires are set against the retainer, and they’re stripped all to the appropriate length.
2 Examples of WRONG ways to wire an outlet
1. Not stripping enough wire
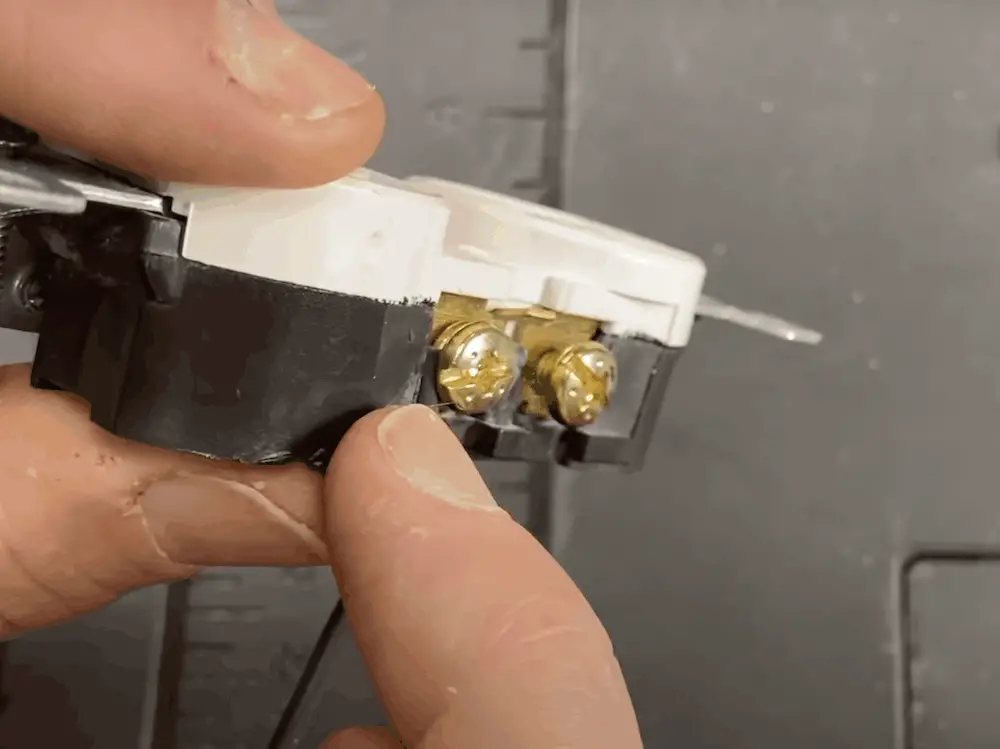
The above image is an example of stripping not enough wire. You’ll notice it’s too short in terms of the copper wire exposed compared to insulation, and you can see the insulation will then interact with the screw terminal and not get you the connection you’re looking for between the wire and the terminal.
2. Stripping too much wire
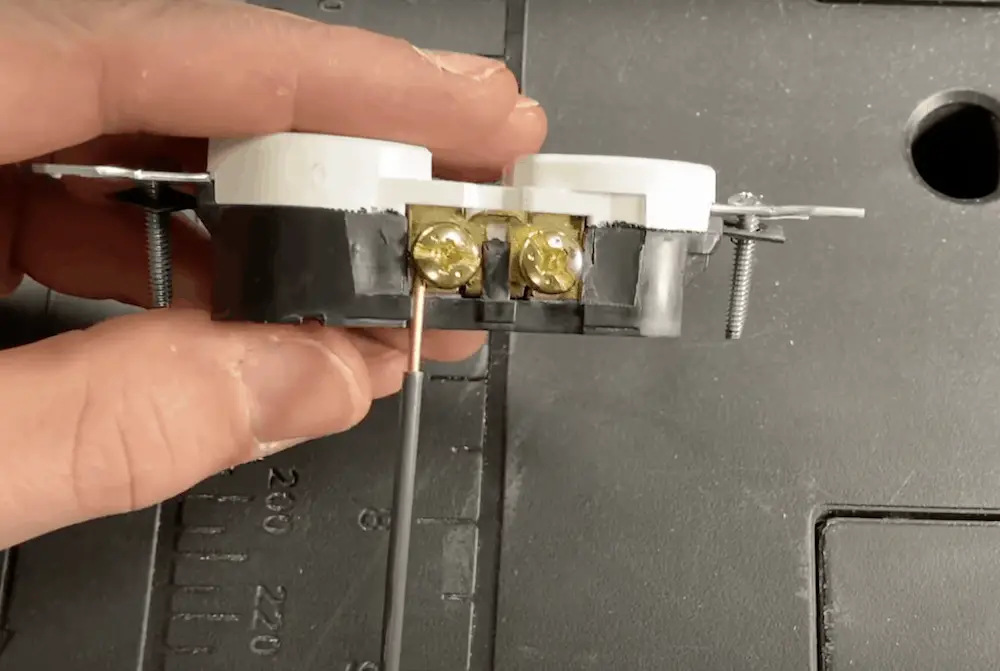
On the other hand, you don’t want to strip too much wire. It’s not best practice to have exposed wire past the outlet as this can increase the chances of a short in the electrical box.
Final note on wiring switched outlets
Again, if you have an older home built in the 60s or 70s or some of the higher-end homes – you may have switched outlets. So in this case you’d have two different hots coming in – one being black which should be your always-on outlet side and then one being switched – which will be controlled (usually for lamps).
Remember: if you’re swapping out a switched outlet, you need to remove the little tab between the screw terminals. If that’s not removed – you cannot control them independently. However, once you remove it – the outlet will be able to power independently to both sides.


