
 My Account
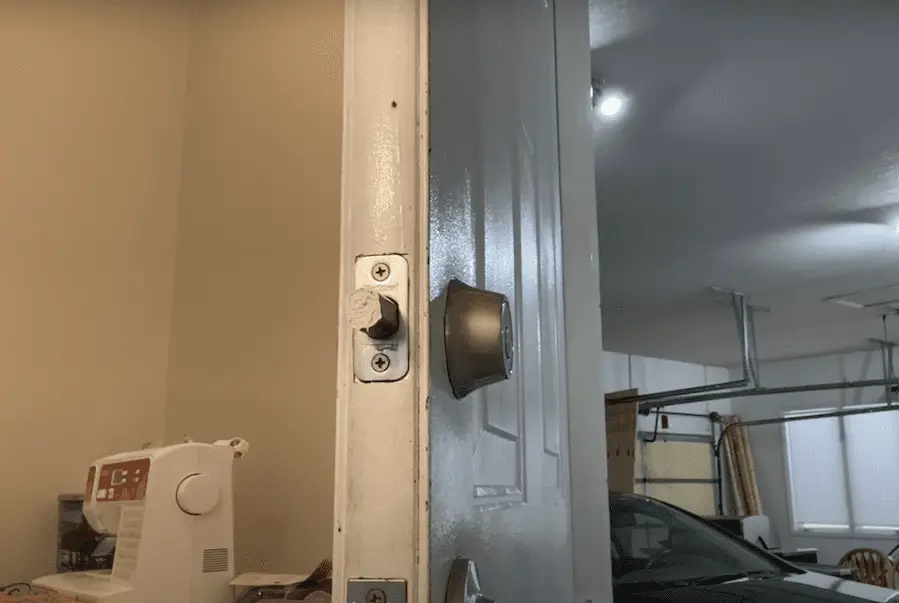
It’s irritating when a door is hard to close and lock. Maybe you have to push or pull harder than you should need to. Or perhaps, misalignment prevents you from throwing the deadbolt lock at all. Whatever the case, there are many reasons this can happen. For example, materials like wood swell and contract with the weather, while buildings also settle and shift over time.
The fix here is simple, and in some cases, all you need are a few seconds and a screwdriver. Even if you’re not so lucky, you should still only need a few minutes and a couple of basic tools.
Rather watch than read? Check out this 6-minute video
Tools and Materials Needed for Fixing a Deadbolt Lock:
Project Cost to Fix a Deadbolt Lock: You can expect to pay about $15 for a 24-pack of appropriate screws online, or a few dollars for a smaller pack at your local home center should you need them. Additionally, a burr file bit that can be chucked into your drill will run about $13 if you don’t already have one (or another appropriate file).
DISCLAIMER: This blog contains affiliate links, which means that if you click on one of the product links, I’ll receive a small commission.
How to Fix a Misaligned Deadbolt Lock – 3 Steps
Step 1: Tighten/Replace Hinge Screws
Just the weight of the door and the swinging action over time can cause the hinge screws to work slightly loose. You might even be able to wiggle the door a little when it’s open and feel or see the loose hinges moving.

Begin by carefully tightening all of the screws on both the door and jamb side, starting at the top and working down. It’s best to use a handheld screwdriver rather than a drill/driver since you want to have a feel for how loose or tight each screw is as you go. Plus, you don’t want to risk overtightening and stripping a screw hole.

Start by tightening up all of the hinge screws. In some cases, you may find that a screw is already stripped, especially along the jamb. It can be helpful to replace the standard 1″ screw with a new 2-1/4″one.
Pro Tip: A short screw only holds onto the jamb, while a longer screw will bite further into the framing behind it. Replacing at least the top screw in each hinge with a longer one provides more long-term strength. It also helps make the door more secure, even if no screws are stripped right now.

If the hinges were particularly loose, tightening alone might bring the door back into alignment so it closes and bolts properly. Either way, making sure the screws are tight and secure is an important first step before moving on.
Step 2: Locate and Mark the Interference on the Deadbolt Lock
Is the problem persisting? It’s time to identify exactly where the strike plate is interfering with the insertion of the deadbolt lock.
First, extend the deadbolt fully with the door open. Next, smear any clean substance on the end of the bolt which is capable of leaving a mark you can see on the strike plate. (Be sure to cover the end completely including the edges.) In my case, I’m using white thread sealer. You could also use almost any opaque paste that’ll clean up easily like caulking, zinc oxide sunblock, lipstick, or even peanut butter.

Retract the bolt back into the door and close it normally without applying extra force. Now, turn the bolt firmly a couple of times so the bolt hits the obstruction, then open the door.

Examine the strike plate, and there should now be a mark left where the bolt was hitting. It’s this area that we’ll need to enlarge so the bolt has clearance to close properly.

Step 3: Enlarge the Strike Plate Opening as Needed
Using a hand file, make repeated and even strokes inward until the area covered by the mark is removed. You can now close the door and check again, making any adjustments as necessary until the bolt passes easily. Then, clean up the marking substance when done.

Pro Tip: Rather than a hand file, a burr file bit for your drill will be much quicker and easier. Alternatively, if you already own a Dremel-style rotary tool, you may be able to use it with appropriate grinding or filing bits to get the job done.

If the deadbolt lock is getting hung up on wood rather than metal, you’ll need to file or chisel out some of the offending wood. Is the strike plate also in the way? It may be easier to remove it and chisel or file the jamb first, before filing down the strike plate as above once it’s screwed back in place.

Additional Precautions and Tips for Deadbolt Locks
Remember that your door is only as strong as its greatest physical weakness, and that’s the doorjamb at the point where the deadbolt enters (learn more about door parts). With security in mind, there’s often a beefy strike plate surrounding the opening, but that alone isn’t always enough.
Similar to the hinges, if short screws are used, the strike plate is only being fastened to the jamb. With longer screws, it’s fastened through the jamb to the framing behind it.
So, while you’ve got the longer screws, take the opportunity to replace the short ones on the strike plate and make your door more secure. If the plate itself is flimsy, damaged, or missing, it too can be replaced with a new security strike plate.

The trick of using a visible paste to blind transfer a mark from the deadbolt onto the jamb or strike plate comes in handy for a number of other uses, including when drilling for an entirely new deadbolt where there wasn’t one previously. It can even be used to align or realign lock bolt holes in other situations, such as garage doors.


