
 My Account
Let’s be honest, cleaning grout isn’t exactly my idea of a good time. And I doubt it’s yours either. Traditionally, you’d have to use harsh chemical cleaners and spend a lot of time and energy scrubbing to achieve a good result.
Fortunately, there are better ways to “scrub” this chore off your to-do list without a lot of aggravation and labor. In this blog, we’ll take a look at the top three no-fuss grout cleaning methods. Plus, I’ll share a few tips to keep those spotless grout lines looking great well into the future.
Rather watch than read? Check out this 7-minute video 👇
Tools and Materials Needed:
- Duster
- All-Purpose Cleaner
- Towels or Rags
- Broom or Vacuum
- Hard Surface Steam Cleaner (like the Bissell SteamShot)
- Replacement Grout Brushes (for steam cleaner, as needed)
- Small Paintbrush
- Stiff Grout Brushes
- Cordless Drill (optional)
- Drill Brush Attachments (optional)
- OxiClean Powder
- Disposable Plastic Bowls (for mixing)
- Baking Soda
- White Vinegar
- Empty Spray Bottle
Expected Cost to Clean Grout: This project can reasonably be completed for little to no cost if you have the basic tools, cleaners, and pantry staples used in many of the steps. If you need to purchase one, even a steam cleaner like the Bissell SteamShot is relatively affordable at a little over $40 online (as of October 2021).
DISCLAIMER: This blog contains affiliate links, which means that if you click on one of the product links, I’ll receive a small commission.
First, Prep Before You Clean – 3 Steps
Regardless of which method you choose to clean your grout, it’s important to start with a clean tile surface. This prevents things like dirt, hair, soaps and oils from getting in your way and making a bigger mess than necessary.
Step 1: Dust Corners and Baseboards

First, run a duster along the baseboards where the floor meets the wall. This tends to be the place where dust, dirt, hair and other debris accumulate.
Step 2: Wipe with All-Purpose Cleaner

Next, using an all-purpose cleaner and paper towels or a rag, spray down and wipe along the baseboards and corners. This helps break free and remove any oil or film now that loose dust and hair are out of the way.
Step 3: Sweep or Vacuum Floor

Finally, sweep or run a vacuum over the entire surface to get up any loose debris and dust that may remain. The first step to clean grout is a clean floor, so try to be thorough!
Method 1: Steam Cleaning the Grout with a Bissel SteamShot
Perhaps the simplest, safest, and least-effort method of all is using a hard surface steam cleaner. Although I’m using a Bissell SteamShot, you should find that most handheld steam cleaners like this one work in a very similar fashion.
Step 1: Setup the Steam Cleaner and Choose a Brush

Fill the steam cleaner with water and attach the hose and brush per the manufacturer’s instructions. Then, plug it in. Typically, there will be an indicator light that illuminates as the unit pre-heats, then extinguishes when the unit is ready to use. From there, simply depress the trigger to release steam.

Most steam cleaners will come with an assortment of brush attachments for a variety of different purposes. So choose the one that best suits the job. The Bissell comes with a linear brush designed to be run along grout lines, so that is the one I’m using here.
Step 2: Steam Away the Grime!
Run the brush slowly and consistently up and down each grout line firmly, while depressing the trigger to release steam. You should see the grout begin to lighten right away depending on its original color, and the lifted dirt will be forced out to the sides by the steam.

Apply firm pressure to the brush without bearing down too hard, which will quickly wear out the brush bristles. Replacement grout brushes (for the Bissell) are available if needed and are relatively inexpensive.

It’s important to move slowly and methodically, as inexpensive steam cleaners of this type release their steam in sporadic bursts of varying intensity. If you move too fast, then some areas will inevitably not get enough steam to be cleaned properly.
- Step 3: Wipe-Up

While the steamed dirt remains wet, wipe it up using a clean towel or rag. Press the towel into each joint as you rub to make sure all of the dislodged dirt is being picked-up.
Pros and Cons of Steam Cleaning
Steam cleaning works because it uses the heat of high-pressure steam rather than chemicals to both sanitize and break the bonds between dirt and hard surfaces. Because there are no chemicals whatsoever, only water, this is an incredibly safe option, especially if you’re concerned about children or pets.
Although it doesn’t take much force or effort, you do need to move slowly and methodically to achieve consistent results, especially with an inexpensive steam cleaner. The smaller water capacity also means more frequent breaks to refill and reheat the steamer when cleaning larger areas.

Even with the utmost care, your steam cleaner’s brush attachment(s) have a finite useful life. They will eventually need to be replaced. How often you need to replace them will depend heavily on how firmly you press down while cleaning, and how smooth or textured your particular grout is.
Method 2: Oxi-Based Cleaning Powder to Clean Grout
Maybe you do not have a steam cleaner, but you do have a bucket of OxiClean in the laundry room. Oxi-based cleaners like OxiClean are an extremely safe detergent option and actually work better than many harsh chemical cleaners, especially when it comes to organic-based stains.

Step 1: Make an Oxi-Cleaner Concentrate
Mix up a concentrated solution of oxi-cleaner and water. If you like, you can use the proportions listed on the container. However, I like to double that concentration for an extra powerful solution.
Step 2: Paint Solution Along Grout Lines
Ideally, use an old paintbrush to apply the oxi-cleaner solution along the grout lines. Work one section at a time and give it anywhere from five to twenty minutes to penetrate and act on the stains. Just avoid letting the solution dry before moving on to the next step.
Step 3: Loosen Dirt and Stains with a Brush
Begin scrubbing the grout lines with a firm-bristled brush. You can make the job significantly easier by using a cordless drill with a drill brush attachment. However, any cleaning brush with stiff bristles will work with a little extra effort.
By now the oxi-cleaner should have broken up and oxidized most of the stains, allowing the brush to mechanically clear away the remaining dirt and debris. Work with constant pressure and pace to maintain a consistent result and avoid patchiness.
Step 4: Wipe-Up Residue and Dry
Using damp rags or towels, wipe up any remaining dirt and cleaner. Then, dry with another clean cloth or towel. Alternatively, if you’re working on a large area, you can complete this step all at once by wet or damp mopping the surface extremely well with water.
If using the damp towel method, you may need to repeat the process a time or two to get all of the dirt and residue off. If using the mop method, be sure to scrub well enough to dislodge any remaining dirt in the grout lines as you go.
Pros and Cons of Oxi-Cleaners
Using an oxi-based cleaner in lieu of more harsh chemical detergents is a very safe option, as these products generally contain non-harmful (though not necessarily non-toxic) ingredients. Oxi-cleaners act on stains by “oxidizing” them with an oxygen-based formula that is far less reactive and dangerous than other oxidizing cleaners and sanitizers, which usually contain chlorine bleach.
Cleaning Grout – Method 3: Baking Soda and Vinegar
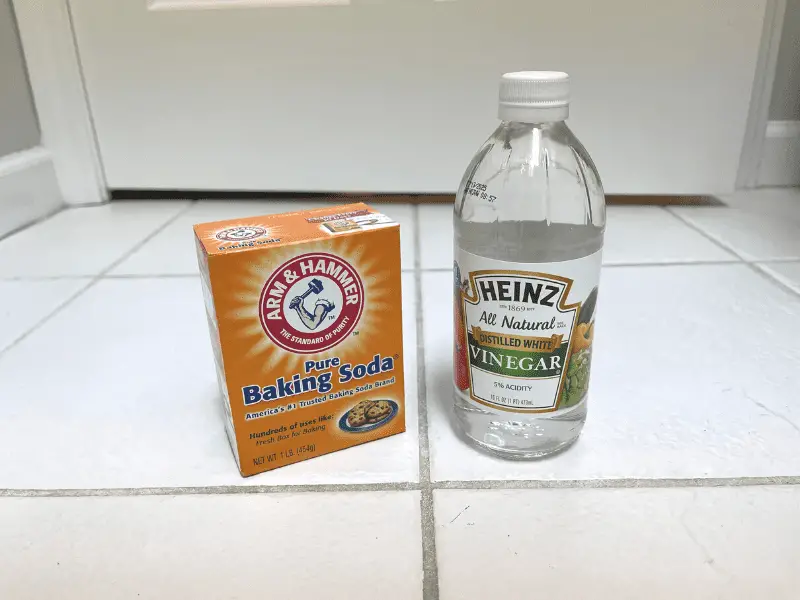
Although it takes a few extra steps, you can get your grout clean with nothing but pantry staples. Baking soda and vinegar each offer their own cleaning properties. When combined, they have an effect similar in many ways to oxi-based cleaners.
Step 1: Make and Apply Baking Soda Paste
Combine baking soda and water to form a relatively stiff, wet paste, then apply along grout lines and brush-in with a stiff brush. The baking soda’s gritty texture helps to dislodge some dirt as it’s initially applied.
Step 2: Apply Vinegar
Using a spray bottle, apply vinegar over the baking soda paste. The acid in the vinegar reacts immediately on contact with the baking soda, causing a bubbling reaction that releases carbon dioxide and helps lift dislodged dirt and stains.
As another alternative, if you don’t have any vinegar, head to the medicine cabinet and use hydrogen peroxide instead. Peroxide has a similar reaction with baking soda, releasing gas bubbles that help lift stains.
Step 3: Brush to Dislodge Dirt
After allowing the vinegar (or peroxide) to sit for five to twenty minutes, work your way along the grout lines with a stiff-bristled brush. This will take a little bit of effort, but again you can use a drill with a brush attachment to make this part much easier.
Step 4: Wipe-Up and Dry
Similar to the oxi-cleaner, use damp rags or towels to wipe up any remaining baking soda and vinegar residue before drying with a clean dry cloth or towel. As with the oxi-cleaners, a convenient alternative would be to wet or mop the area with water to clean any residue.
Pros and Cons of Baking Soda and Vinegar (or Peroxide)
While nothing is quite as simple as steam, this solution also avoids chemical cleaners, accomplishing a similar result with entirely natural products you probably already have in your home. The ability to use hydrogen peroxide also offers a low odor alternative to vinegar. And it even contributes extra stain-lifting power, as the reaction releases both carbon dioxide and oxygen.
You take the good with the bad, and as well as vinegar and baking soda work, they can’t quite match the steam method or other commercial products in terms of how thoroughly they work. Getting a similar result with this method will inevitably take some extra time and elbow grease.
Keep That Clean Grout Clean!
Regardless of how you did it, once your grout is looking good, you want to keep it that way! There are many things you can do to help protect your grout and avoid this chore in the future:
- Keep it Clean: One of the simplest things you can do is to keep tiled floors and surfaces clean to begin with. The less dirt is accumulates on the surface, the less opportunity it’ll have to become worked-into the grout over time.
- Keep it Covered: Covering-up high traffic areas with an area rug or runner can be an attractive option that adds to your home’s décor. And it’ll protect the tile underneath from the everyday traffic that deposits and grinds-in dirt in the first place. This works especially well in front of doors, in hallways, and under or in front of chairs.
- Keep it Sealed: Grout sealing products are widely available and easy to use. They can be applied from a bottle, tube, or with a brush depending on type. These products help prevent dirt and grime from setting in to make future cleaning much easier. When used in a tub or shower, they even help prevent stains and the formation of mildew.
Remember that it’s all about maintenance. When you clean, clean often. And if you seal, reapply as often as the product manufacturer recommends. These tips will keep your grout looking great for the long term!


