
 My Account
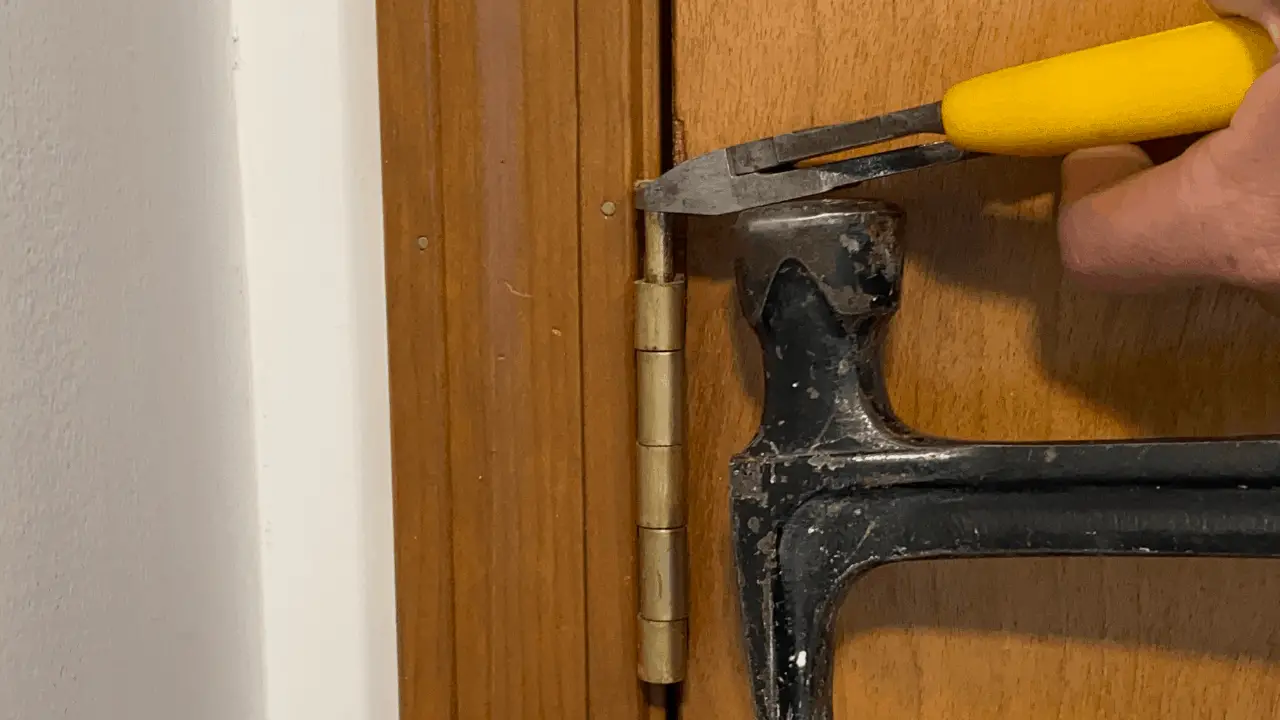
Removing an interior door from its jamb might seem like a daunting task, but in reality, it’s one of the simpler things you can accomplish as a do-it-yourselfer. This is often a one-person job if you have hollow-core doors but you might need a helping hand if you have large solid wood doors.
Maybe your first thought on how to attack the problem is to just start backing out all the hinge screws. So many screws! Fortunately, I’m going to show you a much easier way, along with a little trick that makes this approach even faster!
Rather watch than read? Check out this Quick 3-minute video!
Tools Required:
DISCLAIMER: This blog contains affiliate links, which means that if you click on one of the product links, I’ll receive a small commission.
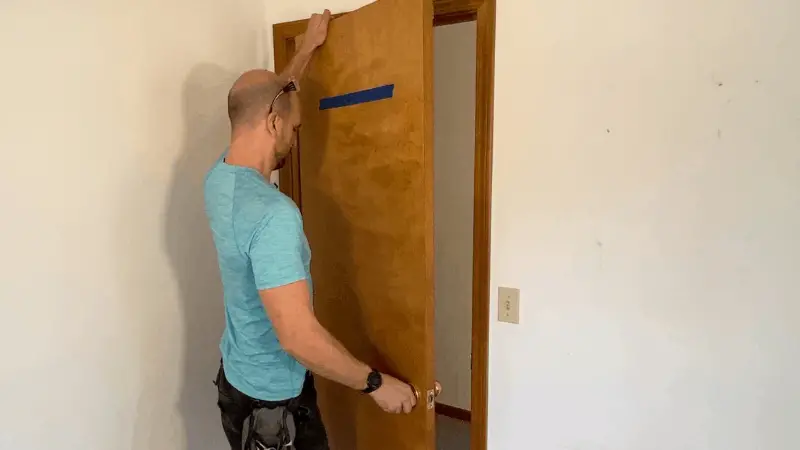
Step 1: Prepare the Door for Removal
Work with the door fully closed. This ensures that once detached at the hinges, the door will remain as steady as possible until you’re positioned and ready to back it out of the opening.
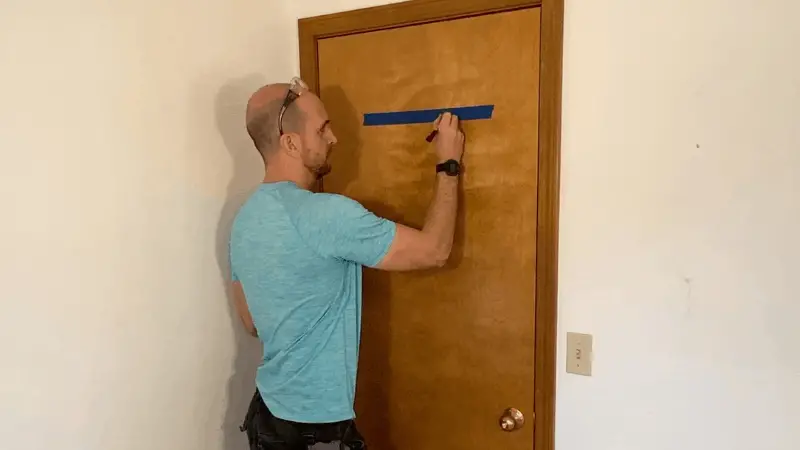
Pro Tip: If you’re going to be removing and working on multiple doors, take a moment to mark each door with the location to keep things straight when you go to reinstall them. A piece of blue painter’s tape makes a nice label that’s easy to remove later.
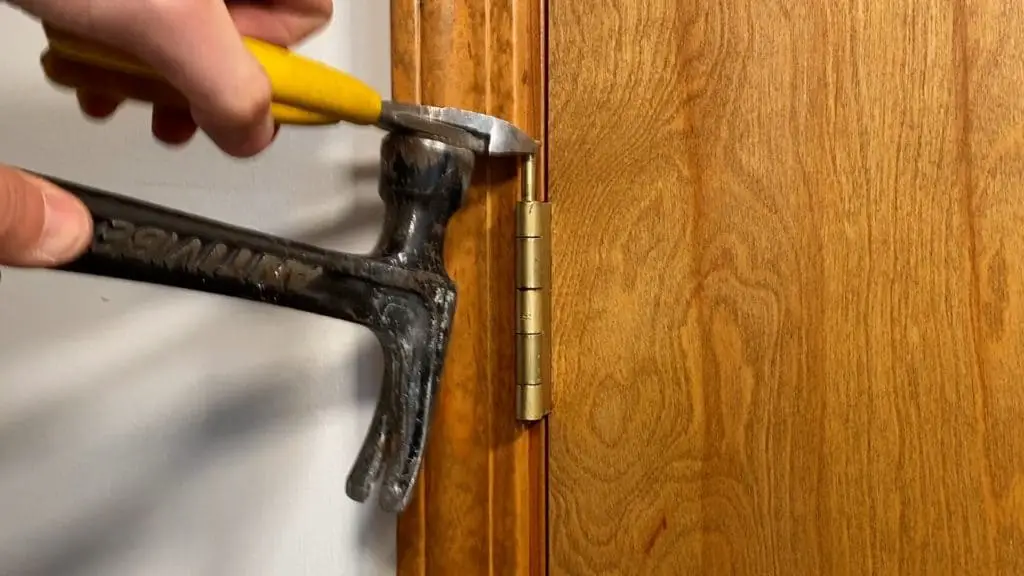
Step 2: Carefully Remove the Hinge Pins
Hinge pins are like oversized nails which hold the two intermeshed halves of the hinge together, and removing them is a simple shortcut to removing the door. Rather than struggle to pull the hinge pins out, we’re going to use side cutters of all things to make the job easier.
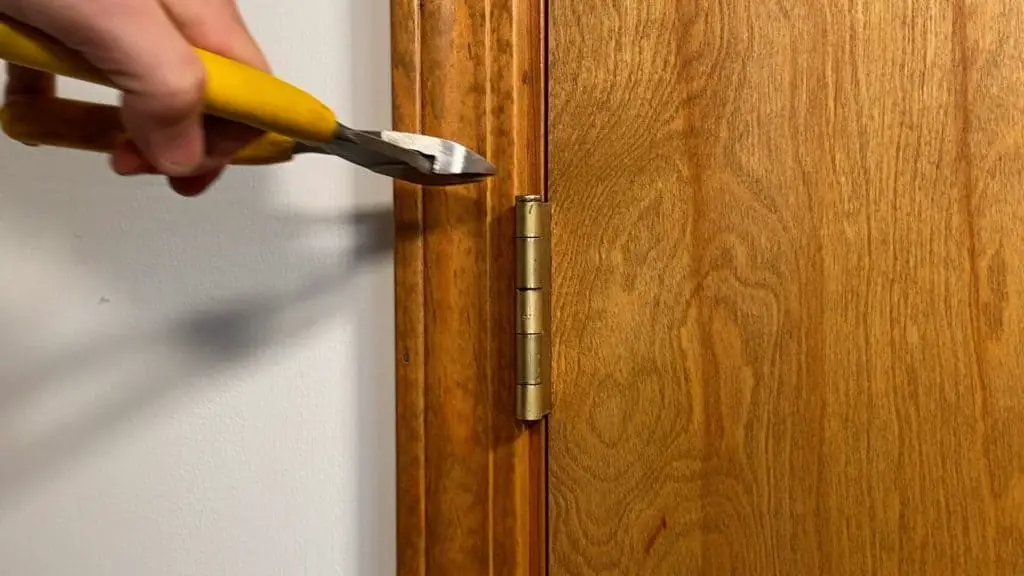
Starting with the bottom hinge, hold the side cutters with the blade side facing down, and lightly squeeze around the groove between the top of the hinge and the “head” of the hinge pin. While continuing to grip, start tapping upward on the underside of the side cutters with a hammer. This will begin to knock the hinge pin up and out until it can be fully removed. Repeat the process with the middle hinge, if there is one, and finally the top hinge.
Step 3: Back the Door Out of the Jamb
With the hinge pins removed, little other than the doorknob bolt/latch and you are holding the door in position. Carefully back the door out of the opening, gripping it on both sides. It can be helpful to open the door a little bit in order to expose enough of the top/edge for you to grip. Once you have a secure grip on the door, you can lift it back towards you and out.
Pro Tip: Drop the pins back in each hinge located on the door jamb for easy access when you go to reinstall the door
Step 4: Replacing the Door and Other Tips
Replacing the Door
When you’re ready to replace the door, it’s as simple as following the same steps in reverse. First, position the door back into the jamb fully closed, making sure the hinges are in proper vertical alignment. Next, slide the hinge pins back in place one at a time, starting at the top and working toward the bottom, tapping them in with the hammer if necessary to ensure the pins are fully seated in the hinge.
Removing the screws instead?
Even though removing the hinge pins is arguably the easiest and most convenient way to remove most doors, there can be times where it may be more desirable to fully remove the screws and hinges. Even in these cases though, it’s much easier to remove the pins first, then the screws and hinges once the weight of the door is off of them.
Though rarer, some security hinges do have pins that are welded in place and cannot be removed. In these instances, your only option is to fully remove the screws and hinges. If a door must be removed this way, it’s even more important to begin by shoring up the gap between the floor and the bottom of the door, since the door will be open and free to move around as the screws are being removed.
Similarly to removing hinge pins, start by removing the screws from the bottom hinge first and work your way toward the top. Which half of the hinges (door or jamb) the screws are removed from first is mainly a matter of preference, however, it’s best to remove all screws from all hinges on one side at a time.


