
 My Account
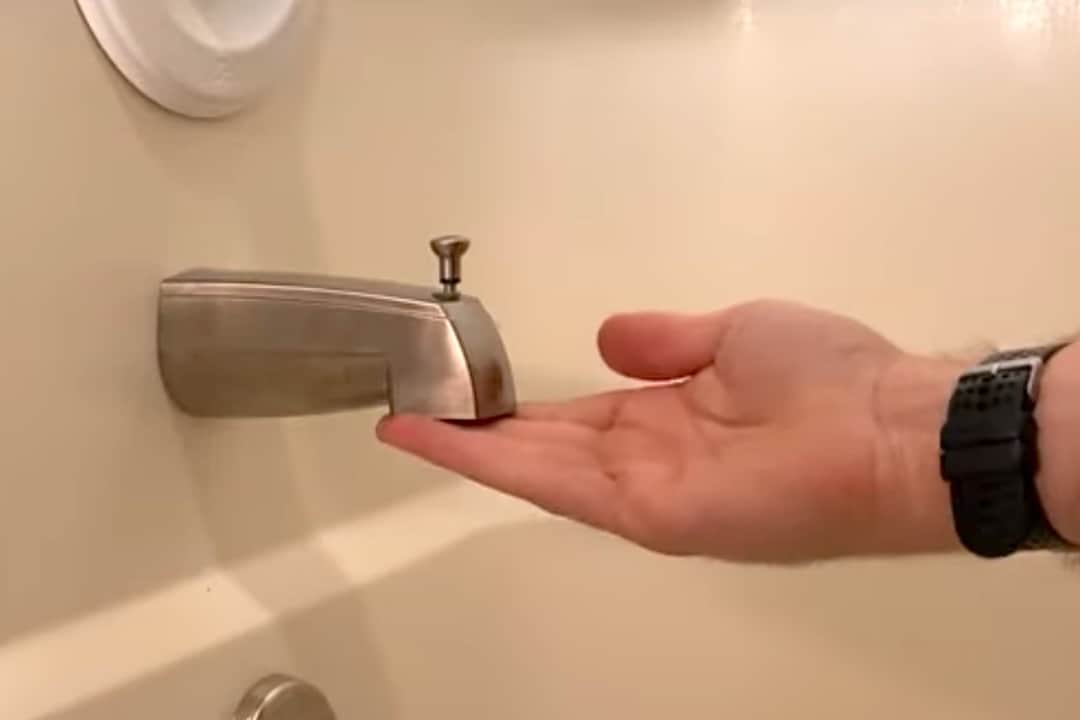
Today I’m swapping out a Delta tub spout and wanted to share how easy it is to replace this type of bathroom fixture.
Replacing a Delta Tub Spout: Step-by-Step Guide
In this quick tutorial, I’ll talk briefly about the two most common methods of installing a bathroom tub spout. Then I’ll walk you through the simple steps to replace a Delta tub spout.
Even if you’re totally new to do-it-yourself home projects, this is one you can approach with total confidence.
Rather watch than read? Check out this 5-minute video.
DISCLAIMER: This video and description contain affiliate links, which means that if you click on one of the product links, I’ll receive a small commission.
How to Replace a Delta Tub Spout: Supplies and Tools
Supplies
Tools
- possibly an Allen wrench (hex key)
Removing the Old Threaded Tub Spout
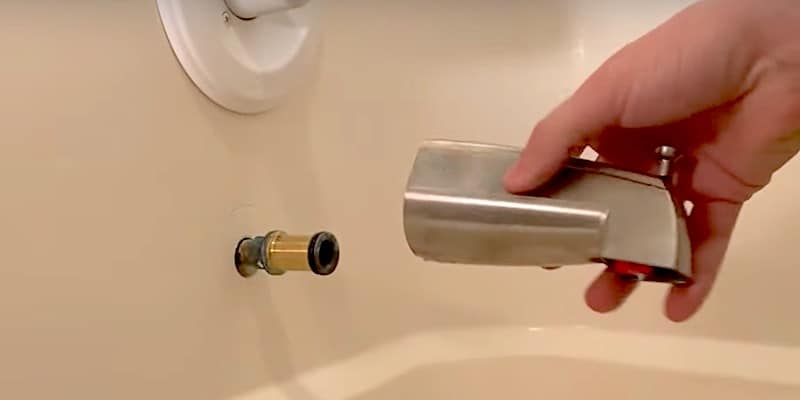
Let’s have a look at the spout I’m replacing. These bathroom fixtures are from the 90’s when this white finish was popular.
The tub spout I’m replacing is a Delta.
To remove it, I’m just going to turn it counterclockwise.
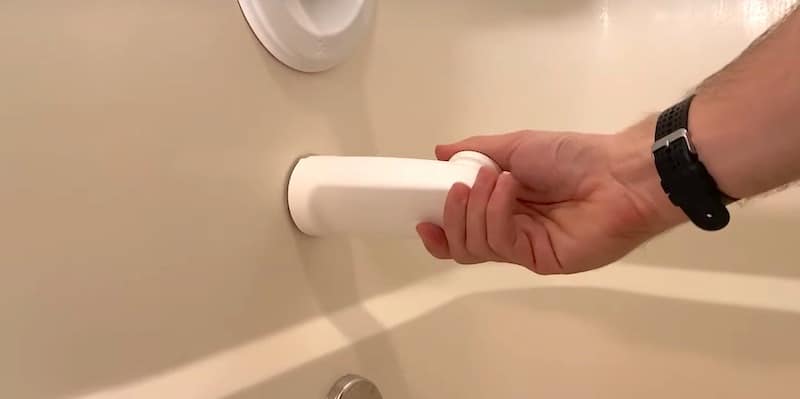
For being 20 years old, it’s pretty easy to take off.
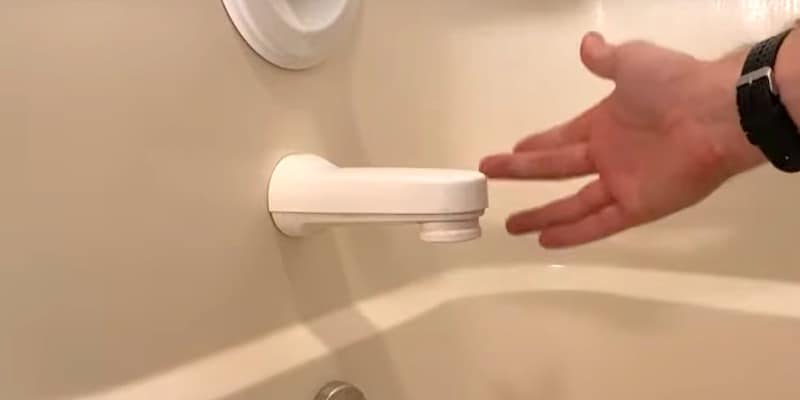
You might have plumber’s putty or caulking where the spout connects with the wall or tub surround. You’ll want to remove that with a utility knife or razor blade before trying to detach the spout.
If your spout isn’t so willing to come off even after you’ve removed any caulking, a trick is to put an old towel or cloth around the spout and then use some channel locks to softly grip it and turn it counterclockwise. The channel locks will give you the force needed to break loose calcium deposits or whatever might be keeping it stuck.
Different Types of Tub Spouts
Let’s talk about the main types of tub spouts, which are basically defined by how they’re installed and whether they have a diverter.
Threaded or Slip-On Connection
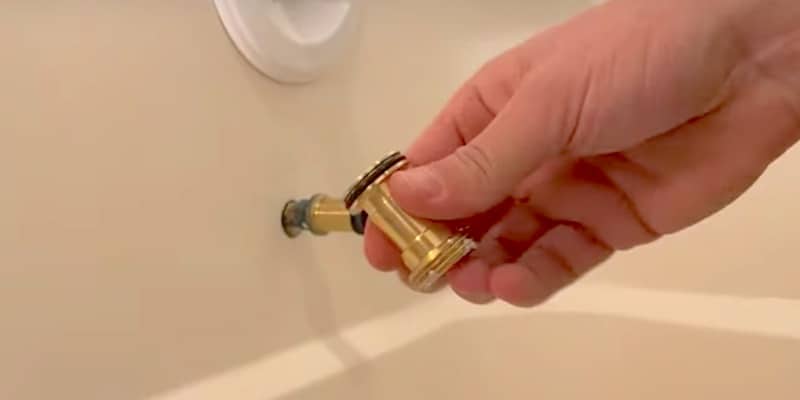
This Delta spout fits onto a brass Delta adapter with threads. The copper pipe coming out of the wall for this setup is usually around 4″ long and the brass adapter i.
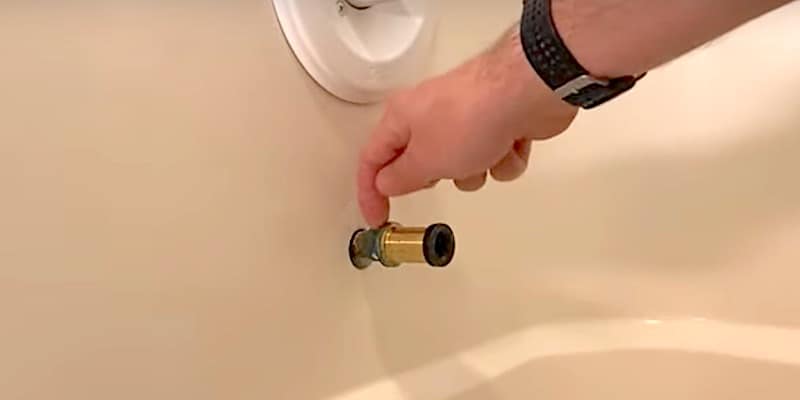
On the copper pipe is a nipple, then Teflon tape, then the adapter, which in my case is just twisted on. This type of adapter can also be soldered on.
The other kind of spout is a “slip-on” type that attaches to a ½-inch copper pipe with a setscrew instead of threading. If you see a tiny screw on the underside of the spout, you know you have a slip-on spout.
Here’s a closeup of the little slot where the setscrew would go, sometimes it’s larger.

Diverter or No Diverter
A diverter on your spout does exactly what the name implies — it diverts the flow of water from the tub spout to the showerhead. With older setups, a diverter on the tub spout is common. In newer bathrooms, the diverter is likely part of the on/off/temperature valve.
Before buying a new spout, you’ll want to note whether the old one has a diverter or not and get the same type.
The spout I’m replacing has a diverter, so my replacement fixture also has a diverter — a knob that you pull up on to send water to the shower sprayer. These can also be of the style that sits on the underside of the spigot that you pull down on to activate the diverter.
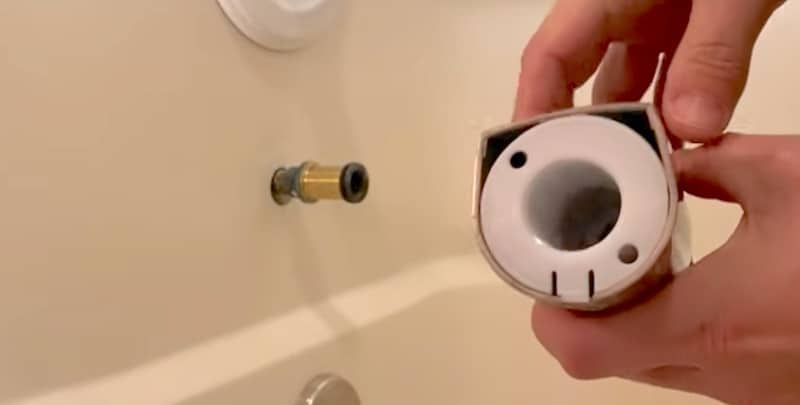
The Replacement Delta Tub Spout Components
I ordered a brushed nickel spout with diverter on Amazon. You can find the link to this exact product in the Supplies and Tools section.
The replacement tub spout usually comes with a replacement adapter and O-ring in addition to the spout itself.
NOTE: If you have a longer copper pipe coming out of the wall with a nipple on the end, you’d need to cut down the pipe before installing this kind of spout, and you’d have to put the appropriate nipple on it as well.
Installing the Replacement Delta Tub Spout
Before installing the new tub spout, I’m going to replace the O-ring on the adapter.
First, I’ll pry off the old one with a flathead screwdriver.
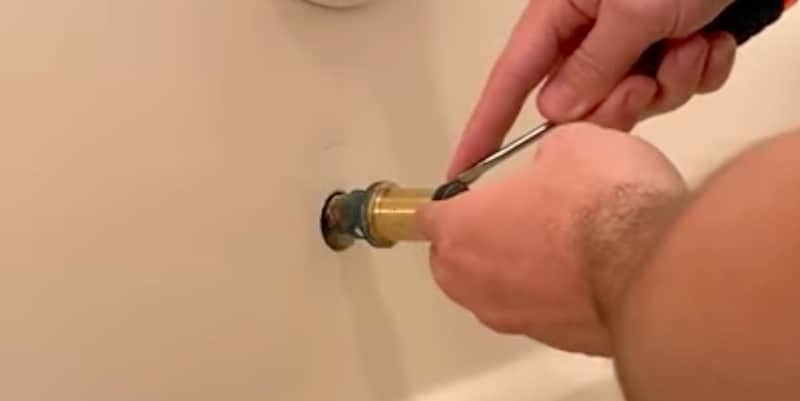
This O-ring doesn’t look too bad but I’m going to swap it out anyway. The O-ring is a component that can wear out, so it’s a good idea to put on a fresh one. A replacement spout kit should contain a new O-ring, as the Delta kit did.
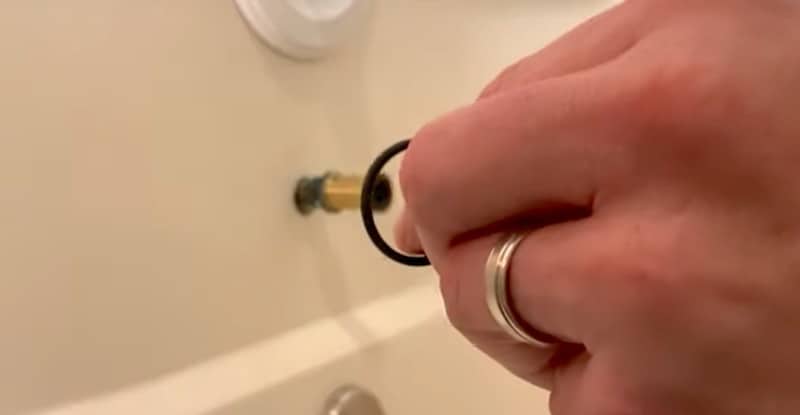
Be careful putting on the new O-ring; try not to roll it too much.
With any sort of plumbing installation, you’ll typically use Teflon tape. In this case, I’m not.
The O-ring I just replaced is going to create a seal against the inside surface of the spout, so installing it is as simple as screwing it on. After sliding it over the adapter, all I have to do is wind it in a clockwise direction.

What I also like about these components is that they’re pretty forgiving. There’s quite a bit of internal threading in the spout, which enables you to get the fixture good and close to the wall for a nice, finished look.
You’ll see and feel when you’re getting close to having the spout on all the way. Always gotta decide if you want one more turn or not!
This is looking pretty nicely snugged up to the wall.
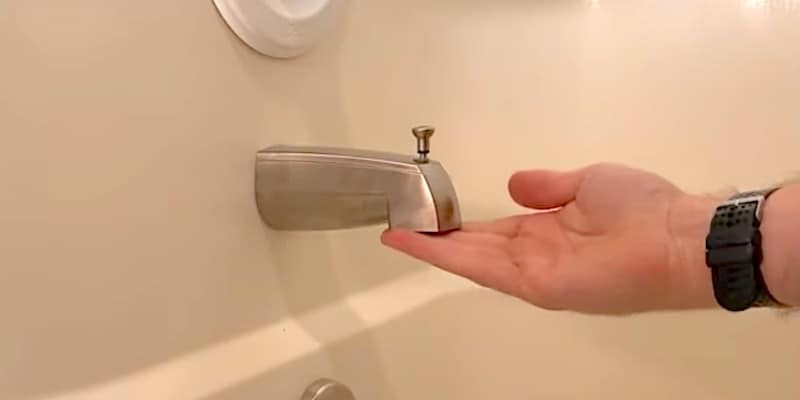
And that’s it!
How to Replace a Delta Tub Spout: Conclusion
As you can see, going from white to brushed nickel really updates the look of my tub fixtures a lot. And replacing this Delta tub spout was easy, much easier than most people think.
Best of luck with your project!
To Leave Comments and Questions
If something doesn’t make sense or if your situation is a little different, please leave a comment under the YouTube video. I check the comments on a daily basis and am happy to help out.
Don’t forget to subscribe to our channel as we have weekly videos coming out to help you with your everyday home repairs.
Other Faucet-Related Repairs
Got a leaky faucet? Check out our step-by-step guide on How to Fix a Bathtub Faucet From Leaking & Dripping.
Thanks for stopping by. We’ll catch you on the next one!


