
 My Account
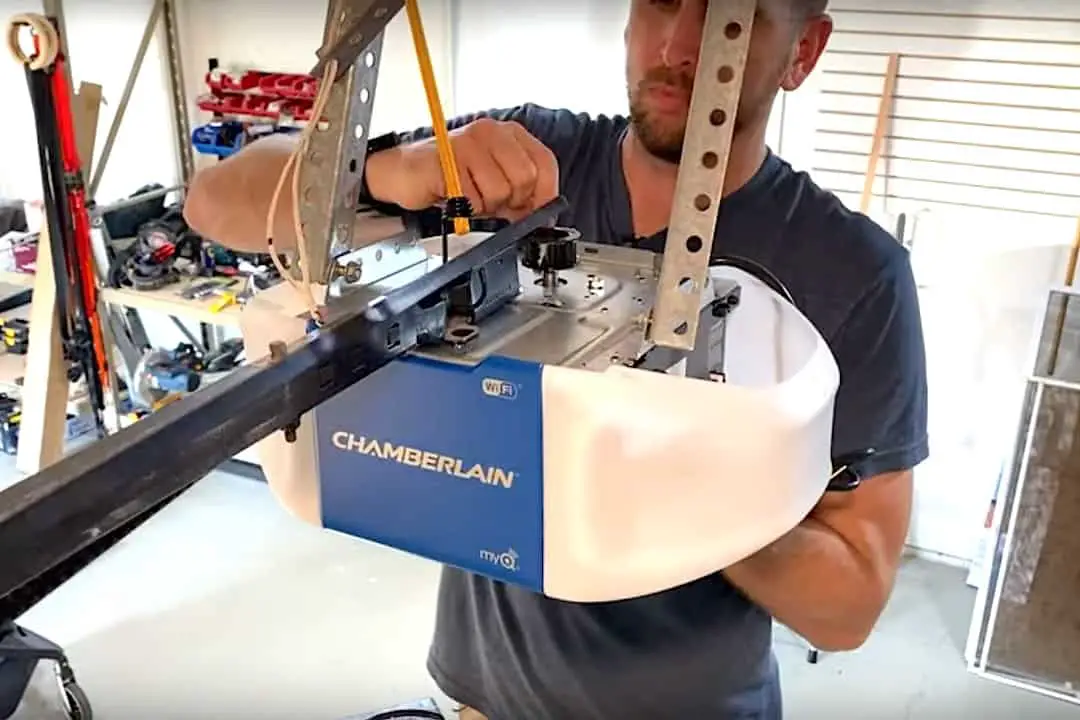
In this tutorial, I’ll show you how to replace a garage door opener in as little as 10 minutes. Might sound a bit hard to believe but it is doable when you reuse the existing rail and belt system plus the brackets that are already installed on the ceiling.
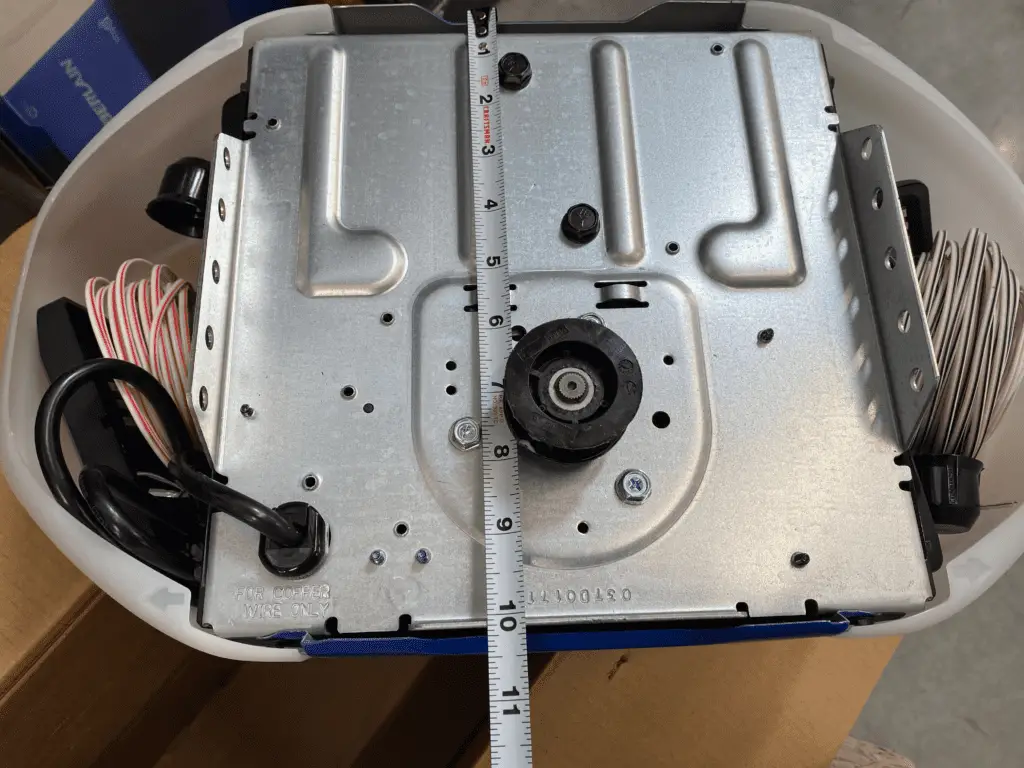
To be truthful, I wasn’t sure at the start if this idea would work or not, so I took some measurements of the garage door opener I have installed now, a 2011 Chamberlain HD660DM, to do a comparison. I measured the mounting brackets and also the bolt pattern of the rail where it attaches to the unit. Then I went down to Home Depot and (I’m not advising you do this) I opened the box of the new Chamberlain B750 I wanted to buy — very carefully, so that if I had to tape it back up I could — and compared measurements. Everything matched up, so I was pretty sure this would be an easy swap.
Replacing a Garage Door Opener: Step-By-Step Guide
When you’re thinking about replacing your garage door opener, keep in mind that your situation might lend itself to the kind of simple swap I’m showing in this tutorial. Even if your scenario is not identical to mine, you might still be in a position to do the same kind of switch-out. That’s because Chamberlain makes Liftmaster and Sears Craftsman, which means a lot of similarity in parts and measurements.
Liftmaster is Chamberlain’s commercial brand. You’ll know a garage door opener is higher-end because the rail is like a T-bar; much heavier-duty than the box rail that you see in a typical home setup.
When planning your project, taking a little time to make note of the features and measurements of the opener you’ve already got can save you a lot of time and hassle. For example, what type of drive does your garage door opener have? Is it a belt drive or a chain drive? Look at what’s available in a new garage door opener with these existing features in mind. Even if you’re starting with a totally different make or model than I’m showing here, you might find you’ll be able to do this same sort of swap and have your new garage door opener installed in no time.
Rather watch than read? Check out this 11-minute video.
DISCLAIMER: This video and description contain affiliate links, which means that if you click on one of the product links, I’ll receive a small commission.
How to Replace a Chamberlain Garage Door Opener: Supplies and Tools
Tools
- Screwdriver
- Wrenches
- Tape measure
Supplies
- New Garage Door Opener ( Chamberlain B550 1/2 HP version of what I used)
- Bungee cord (optional)
Disconnecting Power and the Drive Belt
First, let’s make things safe to work with by disconnecting power and the drive belt.
- With the garage door down, unplug the opener.
- Disengage the drive belt by pulling down on the red cord (located near the garage door).
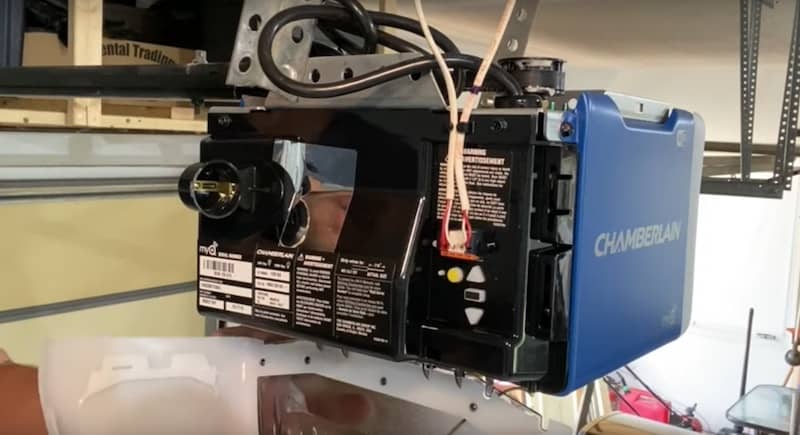
Understanding the Wiring on a Garage Door Opener
Let’s take a closer look at the wires on this garage door opener. This is probably what yours looks like.

On the left-hand side, the wires connect to the wall controller. On the right-hand side, they go to the safety sensors.
If these two sets of wires look similar to each other, I recommend marking them in some way before detaching them so you’ll remember which is which. I marked mine by giving the pair of sensor wires a little band with a sharpie.
To release the wires, press down on the little tabs at the bottom of each connector.
Disassembling the Belt System
Disassembling the belt system requires two simple steps:
1. Remove the cover of the belt drive (sitting over the sprocket where the belt or chain loops around on top of the opener).
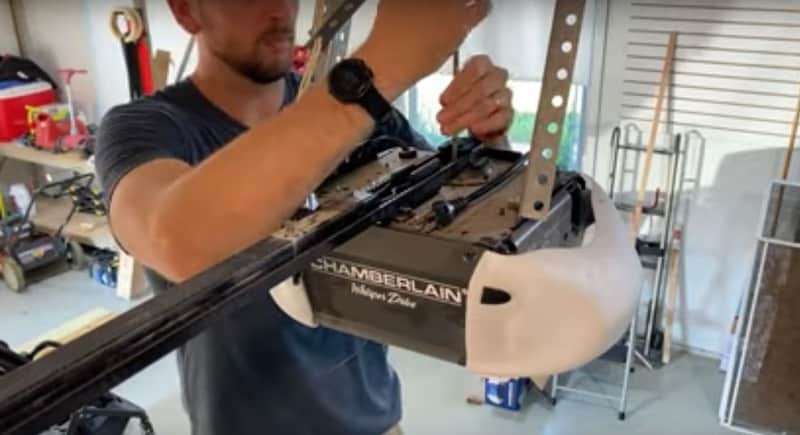
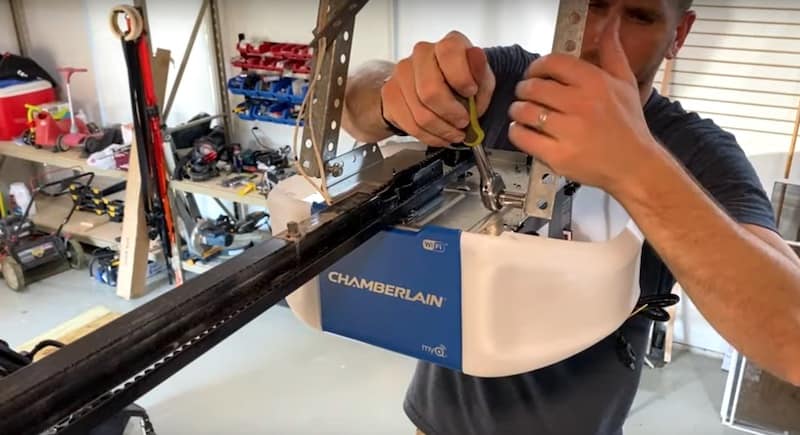
2. Unscrew the two mounting bolts that hold the rail on the housing.
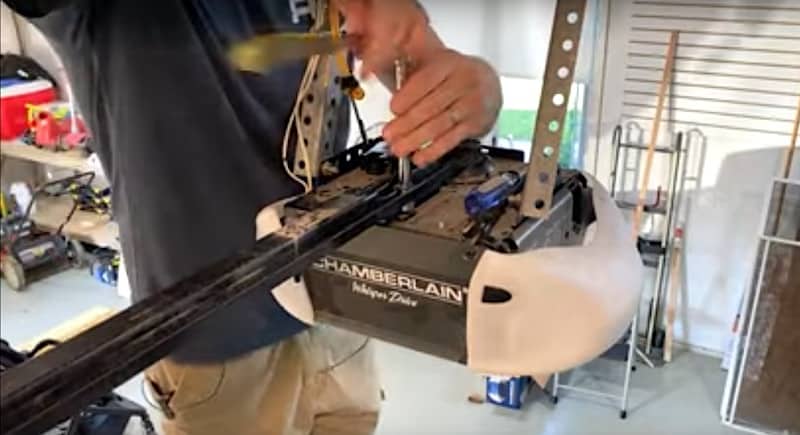
With the bolts removed, the rail is free.
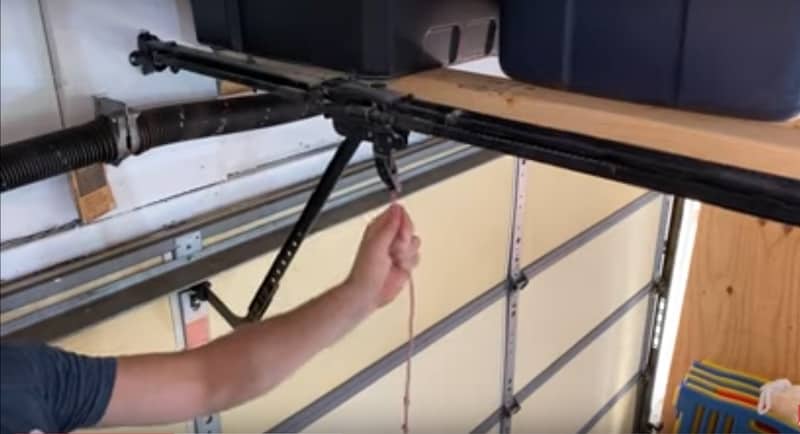
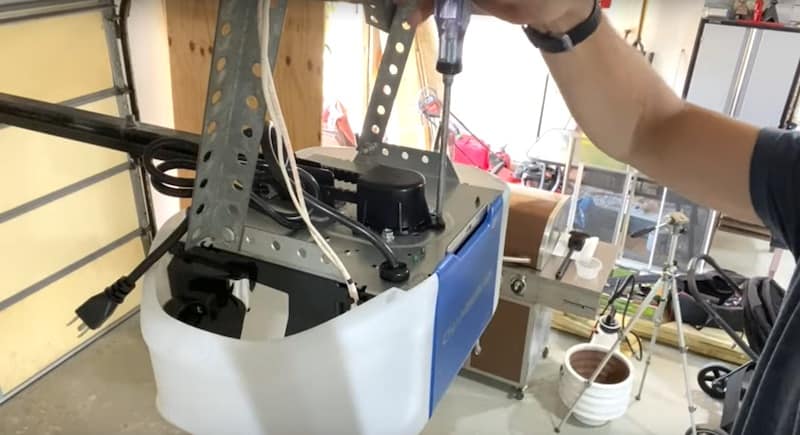
To keep the rail suspended while I’m removing the motor, I’ll use a bungee cord, which I’ve attached to the bracket on the ceiling. I’ll just hook the bungee cord onto the rail, which will hold it up and keep it within easy reach as I swap out the garage door opener.
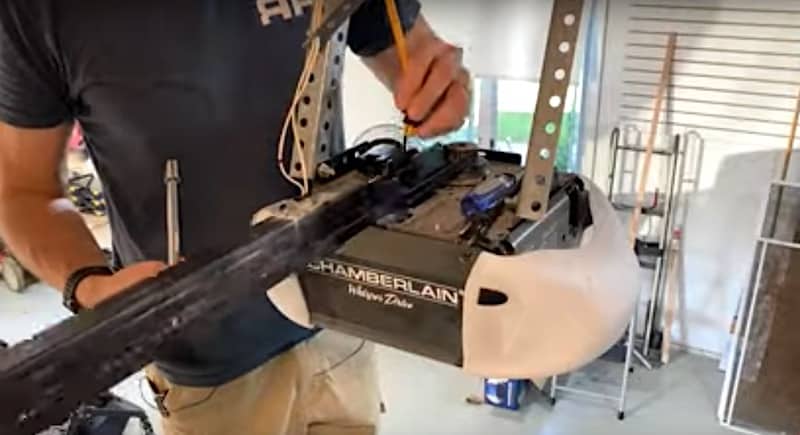
Note that using the bungee cord to suspend the rail is a little trick of mine. It’s handy because everything stays in place and you don’t have bolts and screws rolling around, but it’s certainly not a mandatory thing.
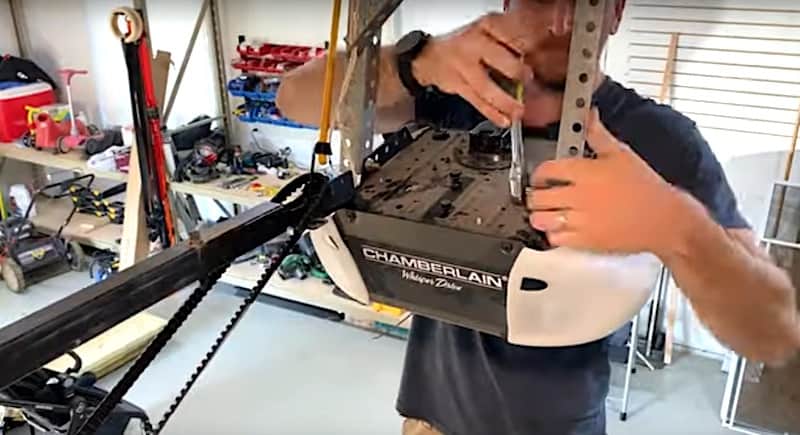
Removing the Old Garage Door Opener
Before you remove the old opener, take a look at the mounting bracket on top of the unit and make note of which hole is being used to connect it to the support brackets coming down from the ceiling.
To detach the old garage door opener from the support brackets, remove the nuts from the threaded studs on the inside of both mounting brackets.
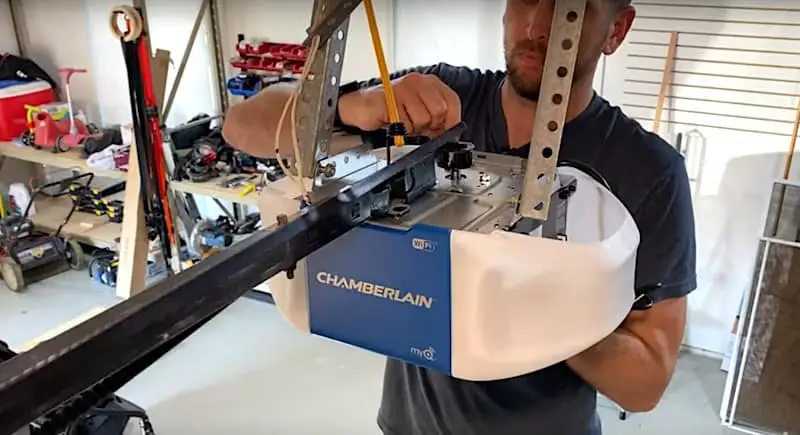
Mounting the New Garage Door Opener
Now we’re ready for the new opener!
Attach the New Opener
Attach the new opener by inserting the threaded studs of the support brackets through the appropriate hole in the mounting brackets on top of the unit. Slip the nuts onto the threaded studs and just hand-tighten for now.
Remount the Rail and Belt, Tighten All Connections
Before mounting the rail to the opener, pull the belt over the sprocket.
Attach the rail to the unit with the two bolts, then tighten them up with a wrench.

Once the rail is secure, you can undo the bungee cord (if you’ve used that trick.)
Now tighten up the two nuts on the threaded studs of the mounting brackets with a wrench.
Move Wires Over, If Needed
If the wires of the new opener connect on a different side from the old one, just take them to the other side, threading them through the holes in the support brackets as makes sense.
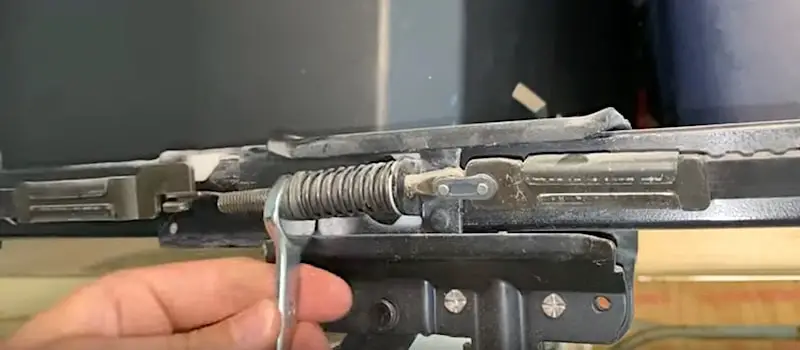
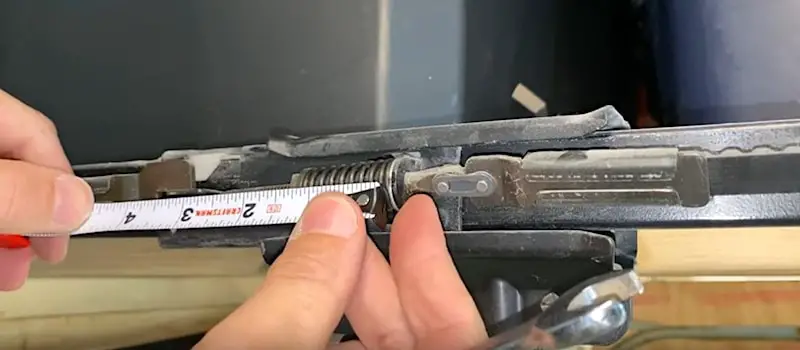
Adjust the Belt
To adjust the belt, all you need is a tape measure and a half-inch wrench to tighten the spring, which is located where the rail attaches to the trolley bracket above the red release cord.
By tightening the nut at the end of the spring, we’ll compress the spring so that its total length is one and one-quarter inches.
If you need a deeper dive into how to tension a garage door opener belt, check out this video.
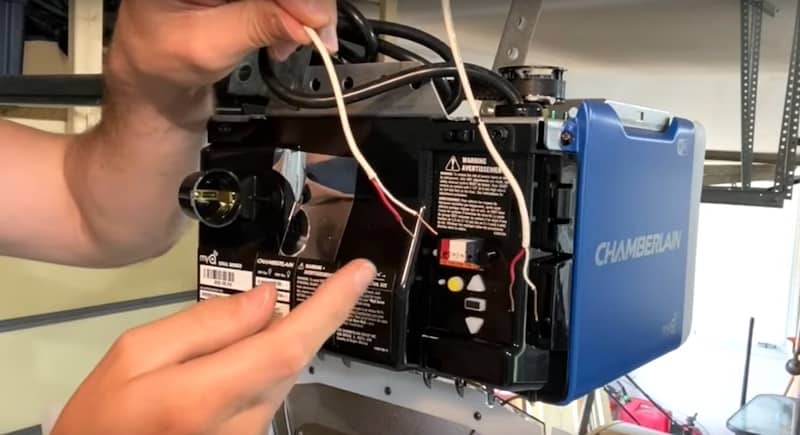
Connecting the Wires of the New Garage Door Opener
To start, let’s open the cover of the new garage door opener. Just pull down on the cover to release it.
We have four different click connector slots on this Chamberlain B750: red, white, white (a second one), and grey.
Connecting the Wires to the Wall Controller
First, we’ll attach the pair of wires that goes to the wall controller.
All we need to do is match red with red and white with white in these first two slots. These are push connectors, which literally means you push them in.
If you ever need to release the wires, simply press these little tabs at the bottom of the connectors.
Do a little pull test to make sure the wires are seated correctly in the connectors, then lock the cable into place in the little clip at the top of the housing.
Connecting the Wires to the Safety Sensors
Now for the sensor wires. Here we’ll insert the white wire of the pair of sensor wires into the second white connector. The grey connector will take either a red wire, as I have here, or a white wire with a black stripe.
Do another pull test to make sure the wires are securely inserted, then mount that cable in the little clip.
Last Steps Before Testing and Adjusting
- Screw in your light bulbs, one on each side.
- Flip the cover back up and click it into place, but do this carefully. The brackets that connect these covers tend to bind up and can crack the cover.
- Mount the cover over the sprocket of the belt drive.
We’re reaching the home stretch!
- Plug in the garage door opener. If you have light bulbs installed you’ll see those turn on.
- Re-engage the belt by pulling the red safety release cord towards the interior of the garage so that the lever returns to a horizontal position.
Now we can start to test and adjust the garage door opener.
Testing and Adjusting the New Garage Door Opener
The open and closed positions of the garage door will no longer be correct, so we’ll adjust those now.
Over at the wall switch, press it once to open the garage door. It will catch and engage the trolley.
Get back on your ladder and look on the opener for the buttons that set the door positions. You’ll find them underneath the wiring connectors. There are three buttons: an up-arrow button, a down-arrow button, and a square-ish button in the middle.
Setting the Garage Door Open Position
- Press and hold the middle button until you hear a beep. The up-arrow will begin to flash.
- Press and hold the up-arrow until the door reaches the desired open position.
- Press and release the middle button to accept the position.
- The lights of the opener will flash to confirm the new setting.
- The down-arrow button will begin flashing.
Setting the Garage Door Closed Position
- Press and hold the down-arrow until the garage door reaches the desired closed position. It should be touching the ground and compressing the bottom door seal.
- Press and release the middle button to accept the position.
- The lights of the opener will flash to confirm the new setting.
- The up-arrow button will begin flashing again. This is your prompt for the final confirmation of the settings you just imposed.
Final Confirmation of the Open and Closed Settings
- Press and release the flashing up-arrow. The garage door will travel to the open position you set.
- The down-arrow button will begin to flash.
- Press and release the down-arrow. The door will travel to the closed position you set.
Adjustments are complete and you have replaced your garage door opener in record time!
How to Replace a Chamberlain Garage Door Opener: Wrap Up
You’ve seen first-hand how you can get up and running with a replacement garage door opener in literally 10 minutes if you’re able to reuse the wiring, support brackets, and rail of your old opener like I was.
A nice feature of this Chamberlain B550 and B750 is that it puts out way less noise than my old Chamberlain Whisper Drive, which was about ten years old. I’m super happy with the end result.
Another huge plus is Chamberlain’s myQ system. This is basically a smart home app for the garage. It’s great because you can access and control everything from your phone, so you never have to wonder anymore if you left the garage door open when you’re out for dinner. Or if somebody’s stopping by while you’re away on vacation, you can let them in from the app. So lots of peace of mind and convenience with this system. I’m looking forward to it!
Got other garage projects to tackle?
Check out our YouTube Garage Door Opener Playlist for tons of how-to videos.


